
Easy Chili Growing Plan: Unleash your inner gardener and set your taste buds ablaze! Imagine plucking vibrant, fiery chilies straight from your own backyard, ready to spice up your favorite dishes. Sounds tempting, right? This isn’t just a dream; it’s an achievable reality with our simple, step-by-step guide to cultivating your own chili paradise.
For centuries, chilies have been more than just a culinary ingredient. Originating in South America, they’ve played a vital role in various cultures, used not only for flavor but also for medicinal purposes and even as a form of currency! Now, you can tap into that rich history and bring a touch of that fiery heritage to your own home.
Why should you embark on this easy chili growing plan? Well, store-bought chilies can be expensive and often lack the intense flavor and freshness of homegrown varieties. Plus, there’s immense satisfaction in nurturing a plant from seed to harvest. I’m going to show you how to bypass all the complicated gardening jargon and get straight to the good stuff – a thriving chili plant bursting with flavor. Whether you’re a seasoned gardener or a complete beginner, this DIY guide will equip you with the knowledge and confidence to grow your own delicious chilies. Get ready to add some zest to your life, one chili pepper at a time!
Grow Your Own Fiery Feast: An Easy Chili Growing Guide
Hey chili lovers! Ever dreamt of having a constant supply of fresh, spicy peppers right at your fingertips? Well, dream no more! Growing your own chili peppers is surprisingly easy, even if you don’t have a sprawling garden. I’m going to walk you through a simple, step-by-step guide that will have you harvesting a bumper crop of delicious chilies in no time.
Choosing Your Chili Variety
First things first, let’s talk about chili varieties. The world of chilies is vast and exciting, ranging from mild and fruity to scorching hot. Here’s a quick rundown to help you choose the perfect pepper for your palate:
* Mild Heat: If you’re new to the chili game, start with milder varieties like Anaheim, Poblano, or Jalapeño. These offer a subtle kick without overwhelming your taste buds.
* Medium Heat: For a bit more zing, try Serrano, Cayenne, or Thai chilies. These are great for adding a noticeable warmth to your dishes.
* Hot Stuff: If you’re a seasoned chili enthusiast, go for the big guns like Habanero, Scotch Bonnet, or even Ghost Peppers. Be warned, these pack a serious punch!
Consider your climate too! Some varieties thrive in warmer climates, while others are more tolerant of cooler temperatures. Check the seed packet or plant label for specific recommendations.
Getting Started: Seeds vs. Seedlings
You have two main options for starting your chili plants: from seeds or from seedlings (small, already-started plants).
* Starting from Seeds: This is the more economical option, and it gives you a wider variety of choices. However, it requires a bit more patience and effort. You’ll need to start your seeds indoors about 6-8 weeks before the last expected frost in your area.
* Buying Seedlings: This is the easier and faster option. You can find chili seedlings at most garden centers in the spring. Just make sure to choose healthy-looking plants with vibrant green leaves.
Starting Chili Seeds Indoors (If You Choose Seeds)
If you’re going the seed route, here’s how to get those little guys germinating:
1. Gather Your Supplies: You’ll need:
* Chili seeds
* Seed starting trays or small pots
* Seed starting mix (a light, well-draining soil)
* A spray bottle filled with water
* A heat mat (optional, but helpful)
* A grow light (optional, but recommended)
2. Sow the Seeds: Fill your seed starting trays or pots with seed starting mix. Moisten the soil with the spray bottle. Sow the chili seeds about ¼ inch deep, placing 2-3 seeds per cell or pot.
3. Provide Warmth and Moisture: Cover the trays or pots with a clear plastic lid or plastic wrap to create a humid environment. Place them on a heat mat (if using) and under a grow light (if using). The ideal temperature for germination is around 75-85°F (24-29°C).
4. Keep the Soil Moist: Check the soil daily and mist with water as needed to keep it consistently moist, but not soggy.
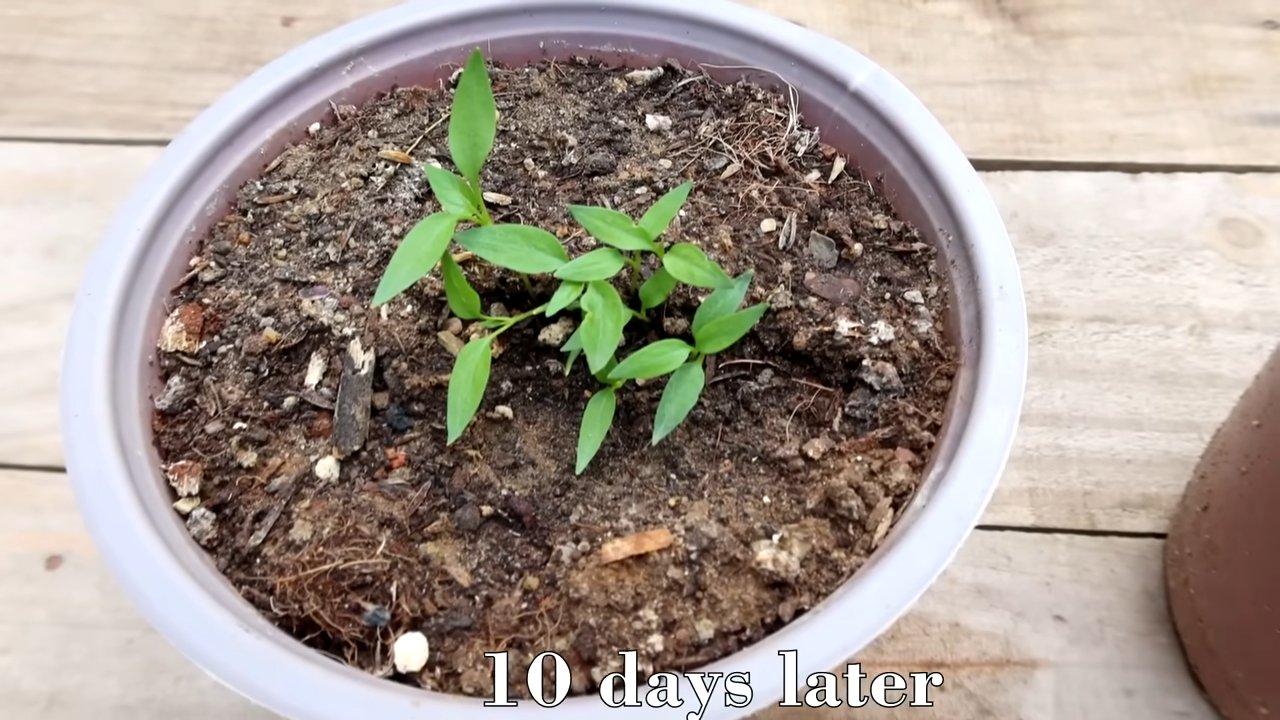
5. Wait for Germination: Chili seeds can take anywhere from 7 to 21 days to germinate, so be patient! Once the seedlings emerge, remove the plastic lid or wrap and move them closer to the grow light.
6. Thin the Seedlings: Once the seedlings have their first true leaves (the second set of leaves that appear after the initial seed leaves), thin them out by snipping off the weaker seedlings at the soil line, leaving only the strongest seedling in each cell or pot.
Transplanting Your Chili Plants
Whether you started from seeds or bought seedlings, you’ll need to transplant your chili plants into larger pots or directly into your garden.
1. Harden Off Your Seedlings: Before transplanting, you need to “harden off” your seedlings. This means gradually exposing them to outdoor conditions over a period of 7-10 days. Start by placing them in a sheltered spot outdoors for an hour or two each day, gradually increasing the amount of time they spend outside. This will help them acclimate to the sun, wind, and temperature changes.
2. Choose a Sunny Location: Chili plants need at least 6-8 hours of sunlight per day to thrive. Choose a location in your garden that gets plenty of sun.
3. Prepare the Soil: Chili plants prefer well-draining soil that is rich in organic matter. Amend your soil with compost or well-rotted manure before planting.
4. Transplant Carefully: Dig a hole that is slightly larger than the root ball of your chili plant. Gently remove the plant from its pot, being careful not to damage the roots. Place the plant in the hole and backfill with soil, gently firming it around the base of the plant.
5. Water Thoroughly: Water the newly transplanted chili plants thoroughly to help them settle in.
Caring for Your Chili Plants
Once your chili plants are in the ground, here’s how to keep them happy and healthy:
* Watering: Water your chili plants regularly, especially during hot, dry weather. Aim to keep the soil consistently moist, but not waterlogged. Water deeply at the base of the plant, avoiding getting the leaves wet.
* Fertilizing: Chili plants are heavy feeders and benefit from regular fertilization. Use a balanced fertilizer (e.g., 10-10-10) every 2-3 weeks, or a fertilizer specifically formulated for peppers and tomatoes.
* Mulching: Apply a layer of mulch around your chili plants to help retain moisture, suppress weeds, and regulate soil temperature. Organic mulches like straw, wood chips, or compost are ideal.
* Pruning: Pruning isn’t strictly necessary, but it can help improve air circulation and encourage bushier growth. You can pinch off the tips of the branches to promote branching.
* Pest and Disease Control: Keep an eye out for common chili plant pests like aphids, whiteflies, and spider mites. Treat infestations promptly with insecticidal soap or neem oil. Prevent fungal diseases by providing good air circulation and avoiding overhead watering.
Supporting Your Chili Plants
As your chili plants grow, they may need some support to prevent them from toppling over, especially when they are laden with fruit.
* Staking: Use stakes to support individual plants. Drive a stake into the ground near the plant and tie the stem to the stake with soft twine.
* Caging: Use tomato cages to provide all-around support for your chili plants. Place the cage over the plant when it is young and let it grow up through the cage.
Harvesting Your Chilies
The moment you’ve been waiting for! Harvesting your chilies is the most rewarding part of the process.
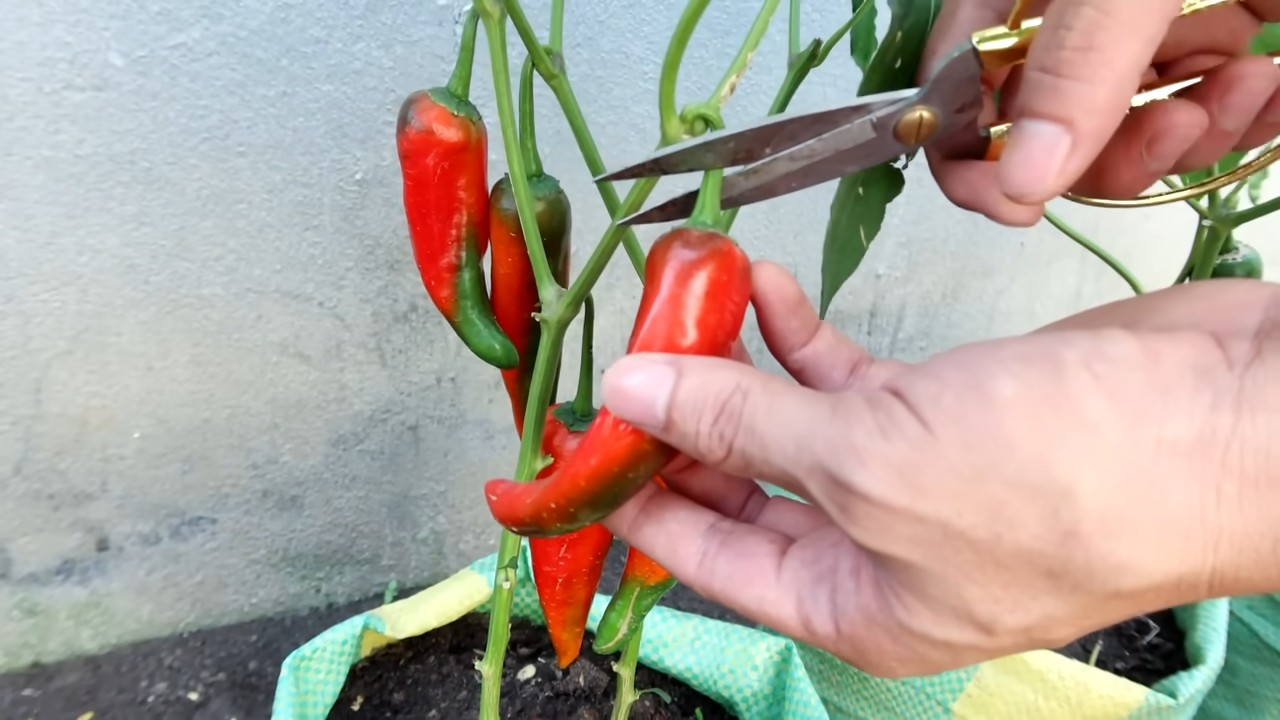
* When to Harvest: The timing of your harvest will depend on the variety of chili you are growing and your personal preference. Generally, chilies are ready to harvest when they have reached their mature color and size. They should also be firm to the touch.
* How to Harvest: Use sharp scissors or pruning shears to cut the chilies from the plant, leaving a small stem attached.
* Handling Hot Chilies: Be careful when handling hot chilies! Wear gloves to protect your skin from the oils that can cause burning. Avoid touching your eyes or face after handling chilies.
Preserving Your Chili Harvest
If you have a bumper crop of chilies, you’ll want to preserve them so you can enjoy them year-round. Here are a few options:
* Drying: String the chilies together and hang them in a warm, dry place until they are completely dry. You can also dry them in a dehydrator or in a low oven.
* Freezing: Freeze whole chilies in freezer bags. They can be used directly from the freezer in your cooking.
* Pickling: Pickle your chilies in vinegar and spices for a tangy and flavorful condiment.
* Making Chili Powder: Dry your chilies and then grind them into chili powder.
Troubleshooting Common Chili Growing Problems
Even with the best care, you might encounter some problems while growing your chili plants. Here are a few common issues and how to address them:
* Blossom End Rot: This is a common problem that causes the bottom of the chili to rot. It is usually caused by calcium deficiency. To prevent blossom end rot, make sure your soil is rich in calcium and water your plants regularly.
* Aphids: These tiny insects can suck the sap from your chili plants, causing them to weaken and become distorted. Treat aphids with insecticidal soap or neem oil.
* Whiteflies: These small, white insects can also suck the sap from your chili plants. Treat whiteflies with insecticidal soap or neem oil.
*
Conclusion
So, there you have it! This easy chili growing plan isn’t just a method; it’s a gateway to a world of vibrant flavors and homegrown satisfaction. We’ve walked through a simple, effective approach to cultivating your own chili peppers, regardless of your gardening experience. From selecting the right seeds to nurturing your plants and harvesting your fiery bounty, this guide provides a solid foundation for success.
But why is this DIY chili growing plan a must-try? Because it empowers you to take control of your food source, ensuring freshness, quality, and a level of flavor you simply can’t find in store-bought peppers. Imagine the satisfaction of adding your own homegrown chilies to your favorite dishes, knowing exactly where they came from and how they were grown. It’s a rewarding experience that connects you to nature and elevates your culinary creations.
Beyond the basic plan, the possibilities are endless. Experiment with different chili varieties to discover your preferred heat level and flavor profiles. Try growing your chilies in containers on a balcony or patio if you lack a traditional garden space. Consider companion planting with herbs like basil or oregano to enhance the flavor of your chilies and deter pests. You can even explore different methods of preserving your harvest, such as drying, pickling, or making your own chili powder or hot sauce.
Don’t be afraid to get creative and adapt this plan to suit your specific needs and preferences. The beauty of DIY gardening is the freedom to experiment and learn along the way.
We’re confident that this easy chili growing plan will provide you with a fulfilling and delicious experience. So, grab your seeds, prepare your soil, and get ready to embark on your chili-growing adventure! We encourage you to try this method and share your experiences with us. Let us know what chili varieties you’re growing, what challenges you encounter, and what successes you achieve. Your feedback will help us refine this guide and inspire other gardeners to join the chili-growing community. Share your photos and stories on social media using #EasyChiliGrowing and let’s celebrate the joy of homegrown chilies together!
Frequently Asked Questions (FAQ)
What are the best chili varieties to grow for beginners?
For beginners, milder varieties like Anaheim, Poblano, or Jalapeño are excellent choices. They are relatively easy to grow and offer a manageable level of heat. As you gain experience, you can explore hotter varieties like Serrano, Cayenne, or even Habanero, but start with the basics to build your confidence and understanding of chili plant care. Remember to research the Scoville Heat Units (SHU) of each variety to understand its heat level before planting.
How much sunlight do chili plants need?
Chili plants thrive in full sunlight, requiring at least 6-8 hours of direct sunlight per day. Insufficient sunlight can lead to leggy growth, reduced flowering, and smaller, less flavorful peppers. If you’re growing your chilies indoors, consider using grow lights to supplement natural sunlight, especially during the winter months. Rotate your plants regularly to ensure even exposure to light.
What type of soil is best for growing chilies?
Chili plants prefer well-draining soil that is rich in organic matter. A slightly acidic to neutral pH (around 6.0-7.0) is ideal. You can improve your soil by adding compost, aged manure, or other organic amendments. Avoid heavy clay soils, as they can retain too much moisture and lead to root rot. If you’re growing in containers, use a high-quality potting mix specifically formulated for vegetables.
How often should I water my chili plants?
Water your chili plants regularly, especially during hot and dry weather. The soil should be kept consistently moist but not waterlogged. Overwatering can lead to root rot, while underwatering can stress the plants and reduce their yield. Check the soil moisture by inserting your finger about an inch deep. If the soil feels dry, it’s time to water. Water deeply and thoroughly, allowing the water to reach the roots.
What are some common pests and diseases that affect chili plants?
Common pests that affect chili plants include aphids, spider mites, whiteflies, and chili thrips. Diseases include fungal infections like powdery mildew, blossom-end rot, and verticillium wilt. Regularly inspect your plants for signs of pests or diseases. Use organic pest control methods like insecticidal soap or neem oil to control pests. Ensure good air circulation and avoid overwatering to prevent fungal diseases. Blossom-end rot is often caused by calcium deficiency, so amend your soil with calcium-rich amendments like bone meal or eggshells.
How do I know when my chilies are ready to harvest?
The time it takes for chilies to mature depends on the variety. Generally, chilies are ready to harvest when they have reached their mature color (usually red, yellow, or orange) and are firm to the touch. You can also harvest green chilies, but they will be less flavorful and less spicy. Use pruning shears or scissors to cut the chilies from the plant, leaving a small stem attached.
Can I grow chilies indoors?
Yes, you can grow chilies indoors, especially if you live in a climate with cold winters. Choose a sunny location or use grow lights to provide adequate light. Use a well-draining potting mix and water regularly. Indoor chili plants may require hand-pollination to ensure fruit set. Gently shake the plant or use a small brush to transfer pollen from one flower to another.
How can I make my chilies hotter?
Several factors can influence the heat level of your chilies. Stressing the plants by withholding water or fertilizer can sometimes increase their heat. However, this can also reduce their yield. The best way to ensure hot chilies is to choose a hot variety and provide optimal growing conditions. The amount of capsaicin (the compound that makes chilies hot) is also influenced by genetics, so selecting high-quality seeds from a reputable source is important.
What can I do with my harvested chilies?
The possibilities are endless! You can use your harvested chilies fresh in your favorite dishes, or you can preserve them for later use. Drying, pickling, freezing, and making chili powder or hot sauce are all popular methods of preserving chilies. You can also share your harvest with friends and neighbors or donate them to a local food bank.
How do I save seeds from my chili plants?
Saving seeds from your chili plants is a great way to ensure a continuous supply of your favorite varieties. Allow the chilies to fully ripen on the plant before harvesting them for seeds. Cut open the chilies and remove the seeds. Spread the seeds out on a paper towel and allow them to dry completely for several days. Store the dried seeds in an airtight container in a cool, dark, and dry place. Label the container with the chili variety and the date.
Leave a Comment