
Bottle Grown Peppers: Imagine plucking vibrant, juicy peppers straight from your windowsill, even if you don’t have a sprawling garden! That’s the magic we’re unlocking today with a super simple, incredibly rewarding DIY project. Forget the sprawling garden beds and back-breaking labor; we’re bringing the farm to you, one recycled bottle at a time.
Growing peppers has a rich history, dating back thousands of years in South America. These fiery fruits weren’t just a culinary staple; they held cultural significance, used in rituals and traditional medicine. Now, you can connect with that history in a modern, sustainable way.
Why should you try this bottle grown peppers hack? Well, let’s face it, not everyone has the space, time, or resources for a traditional garden. This DIY method is perfect for apartment dwellers, busy bees, or anyone looking to add a touch of green to their lives. Plus, it’s an amazing way to recycle those plastic bottles that might otherwise end up in a landfill. I’m excited to show you how easy it is to create your own mini pepper paradise! Get ready to unleash your inner gardener and enjoy the satisfaction of harvesting your own delicious peppers, all from the comfort of your home.
Growing Peppers Upside Down in Bottles: A Fun DIY Project!
Hey there, fellow gardening enthusiasts! I’m so excited to share this super cool and surprisingly easy DIY project with you: growing peppers upside down in plastic bottles! It’s a fantastic way to save space, add a unique touch to your garden or balcony, and get a head start on your pepper harvest. Plus, it’s a great way to recycle those plastic bottles we all seem to accumulate. Let’s dive in!
What You’ll Need:
Before we get started, let’s gather our supplies. This is a pretty low-cost project, which is always a win in my book!
* Plastic Bottles: Think 2-liter soda bottles, large juice bottles, or even water cooler bottles. The bigger, the better, as it gives the pepper plant more room to grow. Make sure they’re clean!
* Pepper Seedlings: You can start your own from seeds (which I highly recommend for the full experience!) or buy established seedlings from your local nursery. Choose your favorite pepper varieties – bell peppers, jalapenos, chili peppers, the sky’s the limit!
* Potting Mix: A good quality potting mix is essential for healthy pepper growth. Avoid using garden soil, as it can compact and doesn’t drain well in containers.
* Landscape Fabric or Burlap: This will help keep the soil from falling out of the bottle’s opening.
* Scissors or Utility Knife: For cutting the plastic bottles. Be careful!
* Drill or Awl: To create drainage holes.
* Water: Of course!
* Optional:
* Gloves (to keep your hands clean)
* Measuring tape or ruler
* Permanent marker
* Fertilizer (for feeding your pepper plants)
* Hanging hardware (S-hooks, chain, rope)
Preparing the Bottles:
Okay, let’s get our hands dirty! This is where we transform those ordinary plastic bottles into pepper-growing powerhouses.
1. Clean the Bottles: Thoroughly wash the inside and outside of the bottles with soap and water. Rinse well to remove any residue. This is important to prevent any contamination that could harm your plants.
2. Cut the Bottles: This is where the scissors or utility knife comes in. You’ll want to cut off the bottom of the bottle. I usually cut it about 4-6 inches from the bottom, creating a wide opening. Be careful when using sharp tools!
3. Drill Drainage Holes: Now, we need to make sure the water can drain properly. Use your drill or awl to create several drainage holes in the bottle cap. I usually make about 4-6 holes, depending on the size of the cap.
4. Prepare the Landscape Fabric/Burlap: Cut a circle of landscape fabric or burlap that’s slightly larger than the bottle opening (the part where the cap is). This will act as a barrier to prevent the soil from falling out when the bottle is hanging upside down.
Planting the Pepper Seedlings:
This is the exciting part – bringing our pepper plants into their new upside-down homes!
1. Insert the Landscape Fabric/Burlap: Carefully push the landscape fabric or burlap circle into the bottle opening, ensuring it covers the entire opening. You might need to use your fingers or a small tool to tuck it in securely.
2. Add Potting Mix: Now, slowly add potting mix to the bottle, filling it about halfway. Gently tap the bottle to settle the soil.
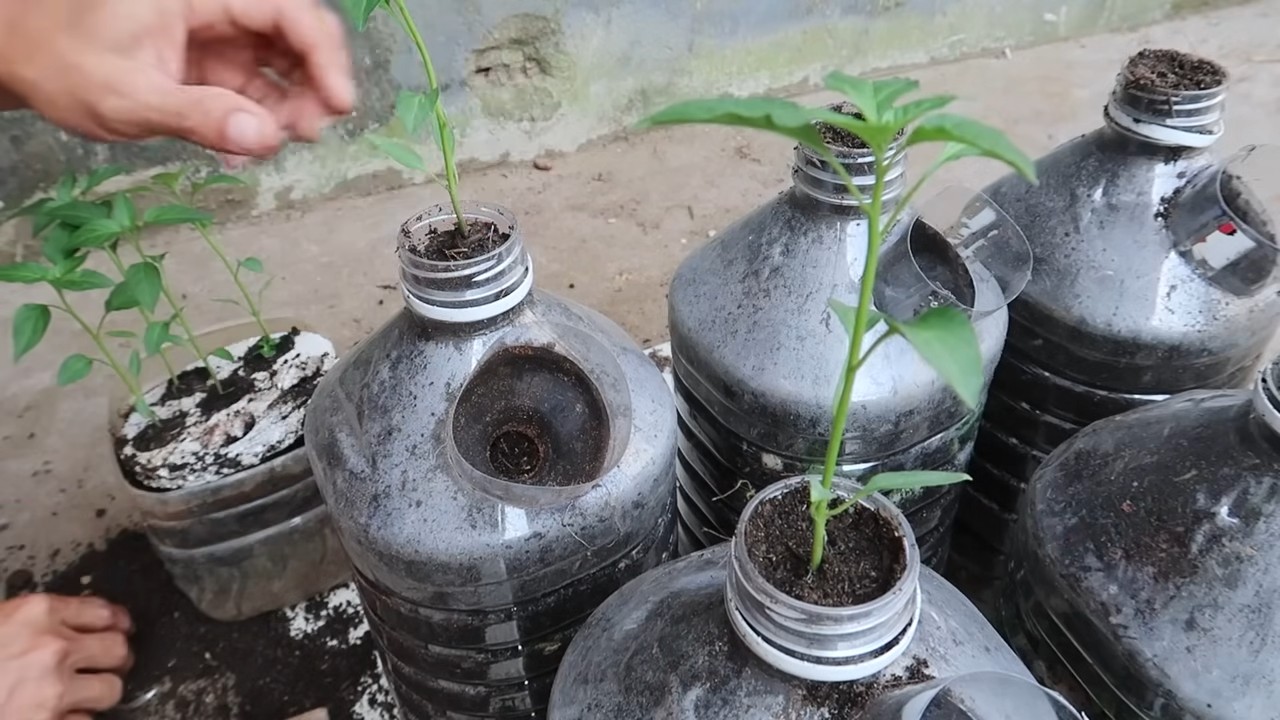
3. Plant the Seedling: Carefully remove the pepper seedling from its container. Gently loosen the roots with your fingers. Create a small hole in the potting mix in the bottle and carefully insert the seedling, making sure the roots are well covered.
4. Fill with More Potting Mix: Add more potting mix around the seedling, filling the bottle almost to the top. Leave about an inch or two of space at the top for watering.
5. Water Thoroughly: Water the pepper plant thoroughly until water drains out of the drainage holes in the bottle cap. This will help settle the soil and ensure the roots are well-hydrated.
Hanging the Bottles:
Now for the grand finale – hanging our upside-down pepper gardens!
1. Create Hanging Points: Depending on the type of bottle you’re using, you’ll need to create a way to hang it. For soda bottles, you can drill two small holes near the top of the bottle (on opposite sides) and thread rope or chain through them. For larger bottles, you might need to get a bit more creative with your hanging system.
2. Secure Hanging Hardware: Attach S-hooks, chain, or rope to the hanging points you created. Make sure the hardware is strong enough to support the weight of the bottle, soil, and plant.
3. Hang the Bottles: Choose a sunny location for your upside-down pepper garden. Peppers need at least 6-8 hours of sunlight per day to thrive. Hang the bottles securely from a sturdy structure, such as a porch railing, fence, or tree branch.
Caring for Your Upside-Down Pepper Plants:
Now that your pepper plants are hanging upside down, it’s important to provide them with the care they need to flourish.
1. Watering: Water your pepper plants regularly, especially during hot weather. Check the soil moisture by sticking your finger into the top inch of soil. If it feels dry, it’s time to water. Water slowly and thoroughly until water drains out of the drainage holes. Be careful not to overwater, as this can lead to root rot.
2. Fertilizing: Peppers are heavy feeders, so they need regular fertilization. Use a balanced fertilizer specifically formulated for vegetables. Follow the instructions on the fertilizer package. I usually fertilize my pepper plants every 2-3 weeks.
3. Sunlight: Make sure your pepper plants are getting enough sunlight. If they’re not getting at least 6-8 hours of sunlight per day, you might need to move them to a sunnier location.
4. Pest Control: Keep an eye out for pests, such as aphids, whiteflies, and spider mites. If you notice any pests, treat them with an appropriate insecticide or organic pest control method.
5. Pruning: Pruning your pepper plants can help encourage bushier growth and more fruit production. Remove any yellowing or dead leaves. You can also pinch off the tips of the branches to encourage branching.
6. Support: As your pepper plants grow and produce fruit, they might need some support. You can use twine or plant ties to support the branches and prevent them from breaking.
Troubleshooting:
Even with the best care, you might encounter some challenges along the way. Here are a few common problems and how to fix them:
* Yellowing Leaves: This could be a sign of overwatering, underwatering, nutrient deficiency, or pest infestation. Check the soil moisture, fertilize your plants, and inspect them for pests.
* Blossom Drop: This is when the pepper flowers fall off before they can produce fruit. This can be caused by temperature stress, lack of pollination, or nutrient deficiency. Make sure your plants are getting enough sunlight and water, and fertilize them regularly. You can also try hand-pollinating the flowers by gently shaking the plant or using a small paintbrush to transfer pollen from one flower to another.
* Slow Growth: This could be caused by lack of sunlight, poor soil, or nutrient deficiency. Make sure your plants are getting enough sunlight, use a good quality potting mix, and fertilize them regularly.
Harvesting Your Peppers:
The best part of growing peppers is, of course, harvesting them! The time it takes for your peppers to mature will depend on the variety you’re growing. Generally, bell peppers take about 60-90 days to mature, while chili peppers can take anywhere from 70-120 days.
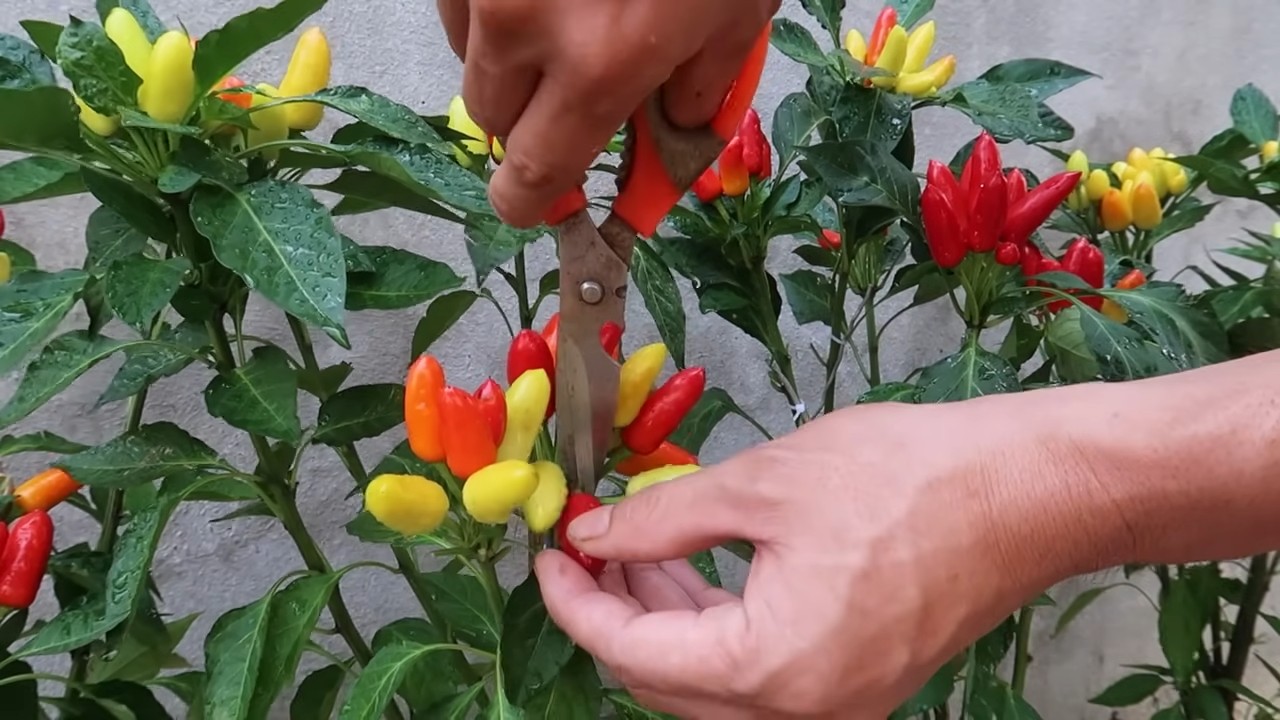
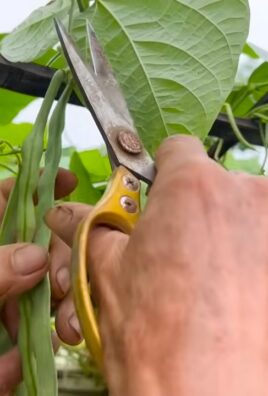
To harvest your peppers, simply cut them off the plant with a sharp knife or scissors. Be careful not to damage the plant. Harvest your peppers when they’re fully colored and firm to the touch.
And that’s it! You’ve successfully grown peppers upside down in plastic bottles. Enjoy your delicious, homegrown peppers! I hope you found this guide helpful and inspiring. Happy gardening!
Conclusion
So, there you have it! Growing peppers in bottles isn’t just a quirky gardening experiment; it’s a surprisingly effective and rewarding way to cultivate your own fresh produce, even with limited space. We’ve walked you through the simple steps, highlighting the benefits of this method, from its space-saving design to its ability to protect your precious pepper plants from pests and harsh weather.
This DIY trick is a must-try for several compelling reasons. First and foremost, it democratizes gardening. You don’t need acres of land or expensive equipment to enjoy the satisfaction of harvesting your own peppers. A few recycled bottles, some potting mix, and a sunny spot are all you need to embark on this horticultural adventure. Secondly, it’s an incredibly sustainable practice. By repurposing plastic bottles, you’re actively reducing waste and giving these materials a new lease on life. It’s a small but meaningful step towards a more environmentally conscious lifestyle. Thirdly, it’s a fantastic educational opportunity, especially for children. They can witness the entire life cycle of a plant firsthand, from seed to fruit, fostering a deeper appreciation for nature and where their food comes from.
But the beauty of bottle-grown peppers lies not only in its practicality but also in its versatility. Feel free to experiment with different varieties of peppers. From the fiery heat of habaneros to the sweet crunch of bell peppers, the possibilities are endless. You can also customize your growing medium by adding compost or other organic amendments to enrich the soil and provide your plants with the nutrients they need to thrive. Consider adding a slow-release fertilizer to the soil mix at planting time to provide a steady stream of nutrients throughout the growing season.
Don’t be afraid to get creative with your bottle designs! Paint them, decorate them, or even create a vertical garden by stacking them on top of each other. The only limit is your imagination.
And remember, success in gardening often comes from learning and adapting. Pay close attention to your plants, observe their growth patterns, and adjust your watering and feeding schedules accordingly. If you notice any signs of pests or diseases, take action promptly to prevent them from spreading.
We are confident that you’ll find growing peppers in bottles to be a fun, rewarding, and ultimately delicious experience. So, gather your supplies, get your hands dirty, and prepare to be amazed by the bounty you can harvest from these humble containers.
Now, we want to hear from you! Have you tried growing peppers in bottles before? What tips and tricks have you learned along the way? Share your experiences, photos, and questions in the comments below. Let’s create a community of bottle-growing enthusiasts and inspire others to give this DIY trick a try. We can’t wait to see what you create! Happy gardening!
Frequently Asked Questions (FAQ)
What type of bottles are best for growing peppers?
The ideal bottles for growing peppers are sturdy plastic bottles, such as those used for water, soda, or juice. Look for bottles that are at least 2 liters in size to provide ample space for the roots to grow. Clear or translucent bottles are preferable, as they allow you to monitor the moisture level of the soil. Make sure to thoroughly clean the bottles before using them to remove any residue or contaminants. Avoid using bottles that have contained harmful chemicals or pesticides.
How often should I water my bottle-grown pepper plants?
The frequency of watering will depend on several factors, including the size of the bottle, the type of potting mix, the weather conditions, and the size of the plant. As a general rule, water your pepper plants when the top inch of soil feels dry to the touch. Avoid overwatering, as this can lead to root rot. When watering, make sure to saturate the soil thoroughly, allowing excess water to drain out of the drainage holes. During hot and dry weather, you may need to water your plants more frequently.
What kind of potting mix should I use for bottle-grown peppers?
A well-draining potting mix is essential for growing healthy pepper plants in bottles. Look for a mix that is specifically formulated for container gardening. Avoid using garden soil, as it can be too heavy and compact, leading to poor drainage and root problems. You can also create your own potting mix by combining equal parts of peat moss, perlite, and vermiculite. Adding compost to the mix will provide your plants with additional nutrients.
How much sunlight do bottle-grown pepper plants need?
Pepper plants need at least 6-8 hours of direct sunlight per day to thrive. Choose a sunny location for your bottle-grown peppers, such as a south-facing window or a patio that receives plenty of sunlight. If you don’t have access to enough natural sunlight, you can supplement with artificial grow lights.
How do I fertilize my bottle-grown pepper plants?
Pepper plants are heavy feeders and require regular fertilization to produce abundant yields. Start fertilizing your plants a few weeks after transplanting them into the bottles. Use a balanced fertilizer that is specifically formulated for vegetables. Follow the instructions on the fertilizer label for application rates and frequency. You can also use organic fertilizers, such as compost tea or fish emulsion. Avoid over-fertilizing, as this can burn the roots and damage the plants.
How do I protect my bottle-grown pepper plants from pests and diseases?
Bottle-grown peppers are generally less susceptible to pests and diseases than plants grown in the ground. However, it’s still important to monitor your plants regularly for any signs of problems. Common pests that can affect pepper plants include aphids, spider mites, and whiteflies. You can control these pests by spraying your plants with insecticidal soap or neem oil. Common diseases that can affect pepper plants include powdery mildew and blossom end rot. You can prevent these diseases by providing good air circulation, avoiding overwatering, and ensuring that your plants receive adequate calcium.
Can I grow different varieties of peppers in bottles?
Yes, you can grow different varieties of peppers in bottles. However, it’s important to choose varieties that are well-suited to container gardening. Smaller, more compact varieties, such as bell peppers, jalapenos, and chili peppers, tend to perform better in bottles than larger varieties. When growing multiple varieties of peppers, make sure to label each bottle clearly to avoid confusion.
How do I harvest my bottle-grown peppers?
The time it takes for peppers to mature will depend on the variety and the growing conditions. As a general rule, peppers are ready to harvest when they have reached their mature size and color. Use a sharp knife or scissors to cut the peppers from the plant, leaving a small stem attached. Handle the peppers carefully to avoid bruising them.
What can I do with my bottle-grown peppers?
The possibilities are endless! You can eat them fresh, add them to salads, stir-fries, and sauces, or preserve them by pickling, canning, or drying. Bottle-grown peppers are a delicious and versatile addition to any meal.
Is growing peppers in bottles a good way to recycle?
Absolutely! Growing peppers in bottles is a fantastic way to recycle plastic bottles and reduce waste. By repurposing these materials, you’re giving them a new lease on life and contributing to a more sustainable lifestyle. It’s a win-win situation for you and the environment. Plus, you get to enjoy fresh, homegrown peppers!
Leave a Comment