
Oil Polish Kitchen Hack: Are you tired of dull, lifeless kitchen cabinets and countertops? Do you dream of a sparkling, showroom-worthy kitchen without breaking the bank on expensive commercial cleaners? Well, you’re in luck! I’m about to share a simple, yet incredibly effective, DIY secret that will transform your kitchen using ingredients you probably already have in your pantry.
The practice of using natural oils to polish and protect wood surfaces dates back centuries. From ancient Egyptians using beeswax and oils on their furniture to early American settlers relying on homemade concoctions, the desire to preserve and beautify wood has always been strong. This tradition of resourcefulness and sustainability is something I deeply admire, and it’s what inspired me to create this oil polish kitchen hack.
In today’s world, we’re constantly bombarded with chemical-laden cleaning products that can be harmful to our health and the environment. Plus, they can be surprisingly expensive! That’s why this DIY oil polish is such a game-changer. It’s a natural, affordable, and effective way to restore the shine to your kitchen surfaces, leaving them looking refreshed and revitalized. I’ve found that this simple trick not only saves me money but also gives me peace of mind knowing I’m using safe and eco-friendly ingredients in my home. So, let’s dive in and discover how you can achieve a gleaming kitchen with this easy-to-follow guide!
DIY Oil Polish for a Sparkling Kitchen: A Natural Shine Boost!
Hey there, fellow DIY enthusiasts! I’m super excited to share one of my favorite kitchen hacks with you: making your own oil polish. Forget those expensive, chemical-laden cleaners – this homemade polish is not only incredibly effective at cleaning and shining your wooden cabinets, countertops (if you have wood or butcher block!), and even stainless steel appliances, but it’s also completely natural and safe for your family and pets. Plus, it’s a fantastic way to use up those leftover oils you might have sitting in your pantry. Let’s get started!
What You’ll Need: Gathering Your Supplies
Before we dive in, let’s make sure you have everything you need. This is a pretty simple recipe, so you probably already have most of these items on hand.
* **Base Oil:** This is the star of the show! I personally love using olive oil for its conditioning properties and subtle scent, but you can also use other oils like:
* Coconut oil (melted, of course!)
* Avocado oil
* Jojoba oil
* Mineral oil (though this isn’t a natural option, it’s very effective)
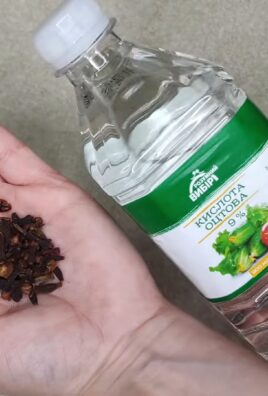
* **Vinegar:** White vinegar is my go-to for its cleaning power, but apple cider vinegar works too! The acidity helps cut through grease and grime.
* **Lemon Juice (Optional):** This adds extra cleaning power and a lovely fresh scent.
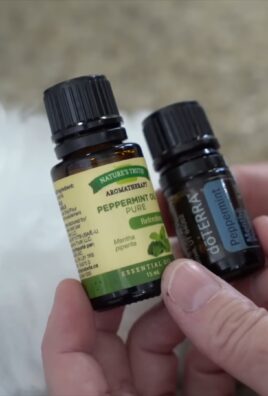
* **Essential Oils (Optional):** For an extra boost of fragrance and potential antibacterial properties, consider adding a few drops of your favorite essential oils. I love lemon, orange, or tea tree oil.
* **Spray Bottle:** A clean, empty spray bottle is essential for easy application.
* **Soft Cloths:** Microfiber cloths are my absolute favorite for polishing, as they won’t scratch surfaces and leave a beautiful shine.
* **Measuring Spoons/Cups:** For accurate measurements.
* **Funnel (Optional):** Makes pouring into the spray bottle much easier.
The Recipe: Mixing Your Oil Polish
Okay, now for the fun part – creating our magic potion! I’m going to give you my basic recipe, but feel free to adjust the ratios to suit your preferences and the specific needs of your kitchen surfaces.
Basic Recipe:
* 1/2 cup base oil (olive oil, coconut oil, etc.)
* 1/4 cup white vinegar
* 1/4 cup lemon juice (optional)
* 10-15 drops essential oil (optional)
Step-by-Step Instructions:
1. Combine Ingredients: In a measuring cup or small bowl, combine the base oil, vinegar, and lemon juice (if using).
2. Add Essential Oils (Optional): If you’re using essential oils, add them now. Remember, a little goes a long way! Start with 10 drops and add more if you want a stronger scent.
3. Mix Well: Stir the ingredients thoroughly until they are well combined. The mixture might look a little cloudy, but that’s perfectly normal.
4. Pour into Spray Bottle: Using a funnel (if you have one), carefully pour the mixture into your clean spray bottle.
5. Shake Well Before Each Use: Since oil and vinegar tend to separate, it’s important to shake the bottle well before each use to ensure the ingredients are properly mixed.
Putting it to Work: Polishing Your Kitchen Surfaces
Now that you have your homemade oil polish ready to go, let’s get polishing! Here’s how I use it on different surfaces in my kitchen:
Wooden Cabinets
1. Dust First: Before applying the polish, use a dry cloth or duster to remove any loose dust or debris from your cabinets. This will prevent scratching.
2. Spray Lightly: Lightly spray the oil polish onto a small section of your cabinet. You don’t need to saturate the wood – a light mist is enough.
3. Wipe and Buff: Using a clean, soft cloth, wipe the polish into the wood in a circular motion. Then, use a dry section of the cloth to buff the surface until it shines.
4. Repeat: Repeat steps 2 and 3 on the remaining sections of your cabinets, working in small areas at a time.
5. Address Stubborn Spots: For stubborn spots or grease buildup, you can let the polish sit for a few minutes before wiping it away.
6. Admire Your Work: Step back and admire your beautifully polished cabinets!
Wooden or Butcher Block Countertops
Important Note: Always test the polish on a small, inconspicuous area of your countertop first to ensure it doesn’t damage the finish.
1. Clean the Surface: Before polishing, make sure your countertop is clean and dry. Wipe away any spills or crumbs.
2. Apply Sparingly: Apply a small amount of the oil polish to a clean cloth. You don’t want to spray directly onto the countertop, as this can lead to uneven application.
3. Rub it In: Rub the polish into the wood in a circular motion, working with the grain.
4. Buff to a Shine: Use a clean, dry cloth to buff the surface until it shines.
5. Allow to Absorb: Let the oil absorb into the wood for a few hours, or even overnight. This will help condition and protect the wood.
6. Wipe Away Excess: After the oil has had time to absorb, wipe away any excess with a clean cloth.
7. Regular Maintenance: For ongoing maintenance, I recommend polishing your wooden countertops every few weeks, or as needed.
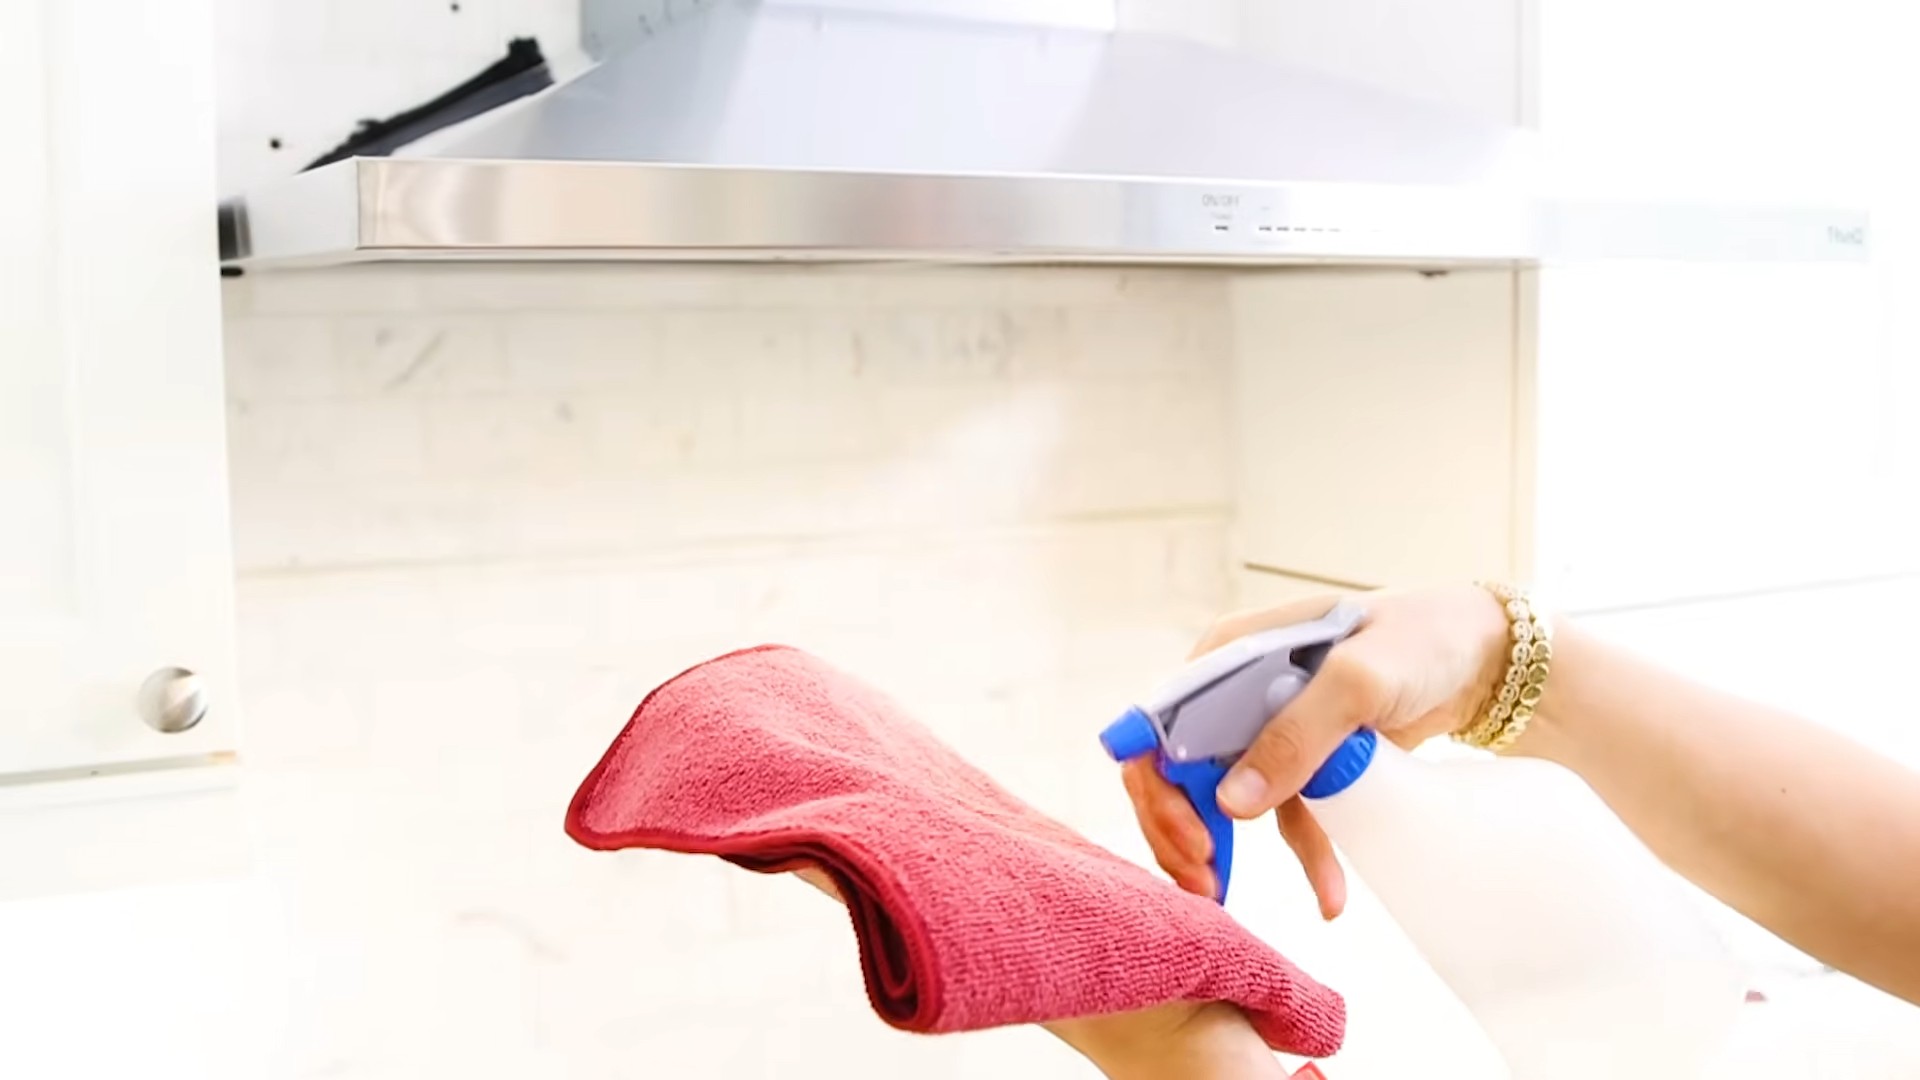
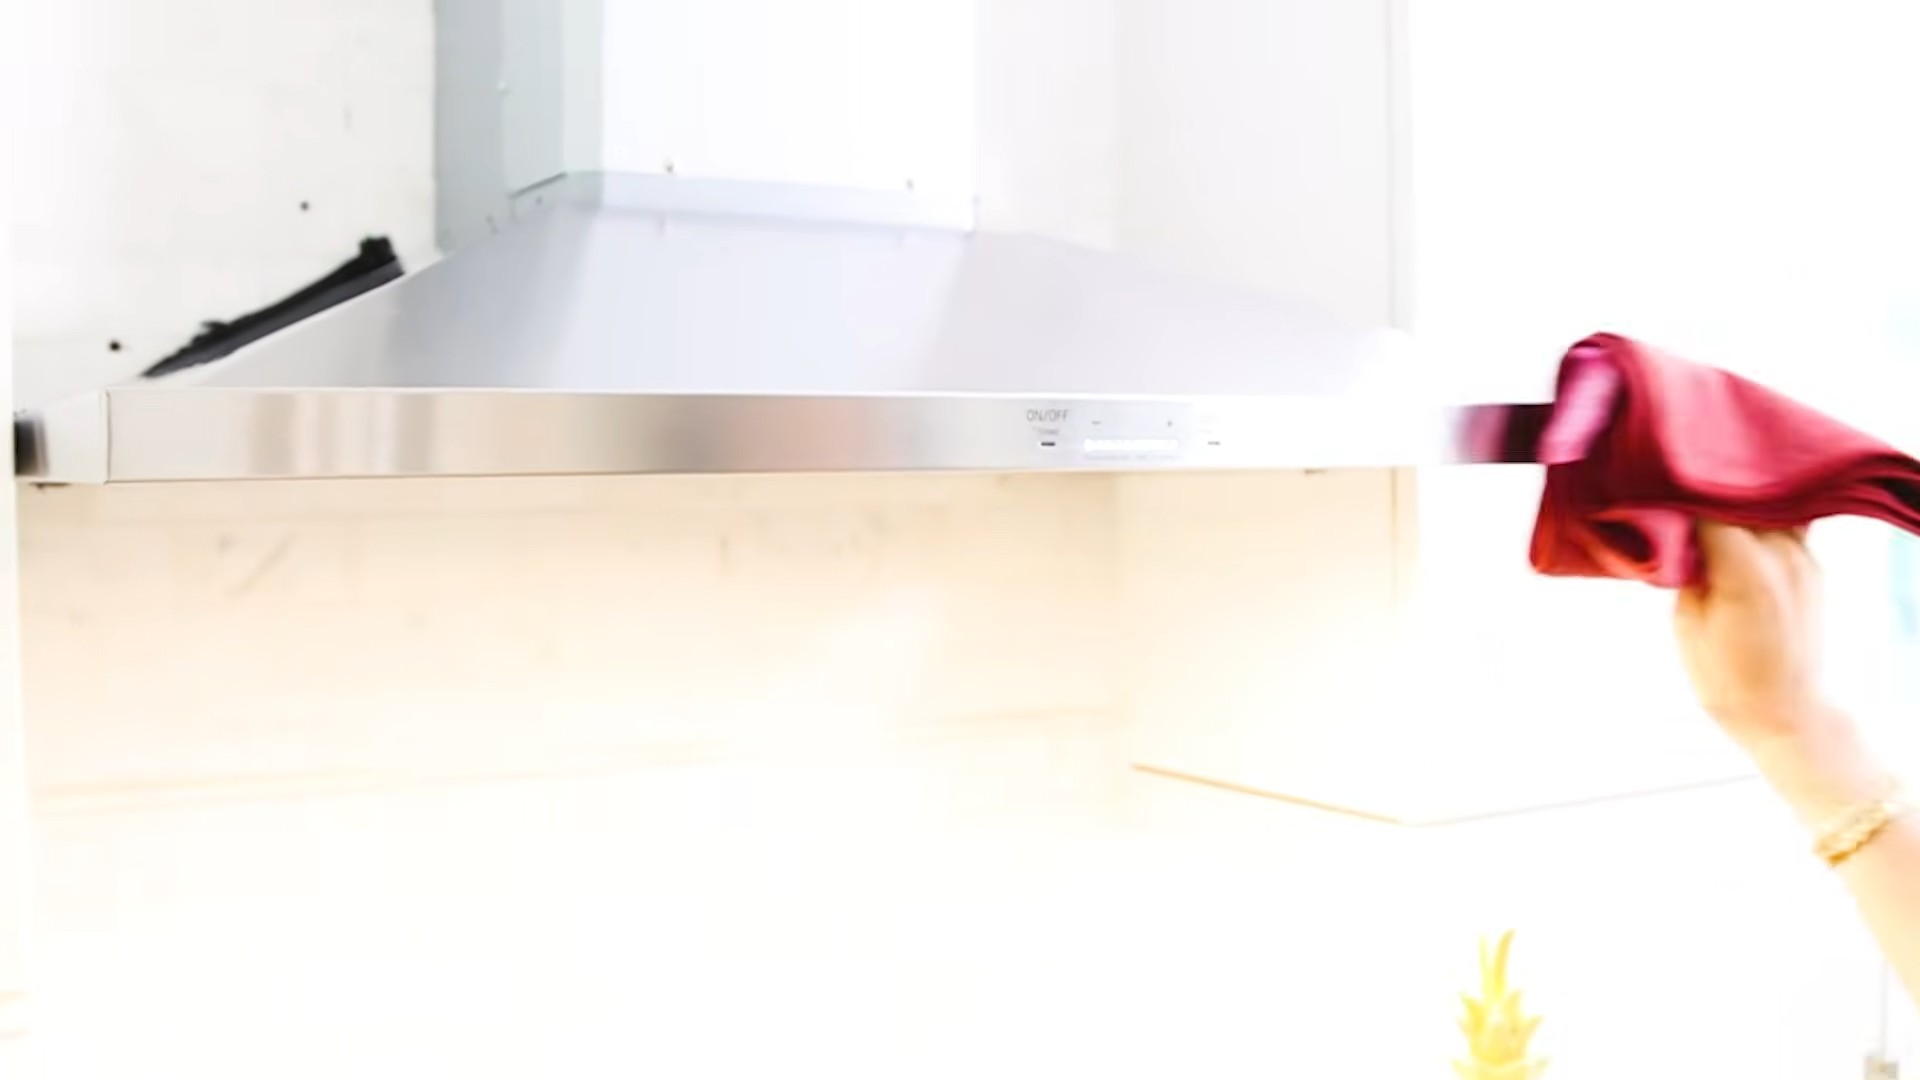
Stainless Steel Appliances
This oil polish works wonders on stainless steel, helping to remove fingerprints and smudges and leave a streak-free shine.
1. Clean First: Start by cleaning your stainless steel appliances with a damp cloth to remove any loose dirt or grime.
2. Spray Lightly: Lightly spray the oil polish onto a clean, soft cloth. Again, avoid spraying directly onto the appliance.
3. Wipe with the Grain: Wipe the appliance in the direction of the grain of the stainless steel. This will help prevent streaks.
Hey there, fellow DIY enthusiasts! I’m super excited to share one of my favorite kitchen hacks with you: making your own oil polish. Forget those expensive, chemical-laden cleaners – this homemade polish is not only incredibly effective at cleaning and shining your wooden cabinets, countertops (if you have wood or butcher block!), and even stainless steel appliances, but it’s also completely natural and safe for your family and pets. Plus, it’s a fantastic way to use up those leftover oils you might have sitting in your pantry. Let’s get started!
What You’ll Need: Gathering Your Supplies
Before we dive in, let’s make sure you have everything you need. This is a pretty simple recipe, so you probably already have most of these items on hand.
* **Base Oil:** This is the star of the show! I personally love using olive oil for its conditioning properties and subtle scent, but you can also use other oils like:
* Coconut oil (melted, of course!)
* Avocado oil
* Jojoba oil
* Mineral oil (though this isn’t a natural option, it’s very effective)
* **Vinegar:** White vinegar is my go-to for its cleaning power, but apple cider vinegar works too! The acidity helps cut through grease and grime.
* **Lemon Juice (Optional):** This adds extra cleaning power and a lovely fresh scent.
* **Essential Oils (Optional):** For an extra boost of fragrance and potential antibacterial properties, consider adding a few drops of your favorite essential oils. I love lemon, orange, or tea tree oil.
* **Spray Bottle:** A clean, empty spray bottle is essential for easy application.
* **Soft Cloths:** Microfiber cloths are my absolute favorite for polishing, as they won’t scratch surfaces and leave a beautiful shine.
* **Measuring Spoons/Cups:** For accurate measurements.
* **Funnel (Optional):** Makes pouring into the spray bottle much easier.
The Recipe: Mixing Your Oil Polish
Okay, now for the fun part – creating our magic potion! I’m going to give you my basic recipe, but feel free to adjust the ratios to suit your preferences and the specific needs of your kitchen surfaces.
Basic Recipe:
* 1/2 cup base oil (olive oil, coconut oil, etc.)
* 1/4 cup white vinegar
* 1/4 cup lemon juice (optional)
* 10-15 drops essential oil (optional)
Step-by-Step Instructions:
1. Combine Ingredients: In a measuring cup or small bowl, combine the base oil, vinegar, and lemon juice (if using).
2. Add Essential Oils (Optional): If you’re using essential oils, add them now. Remember, a little goes a long way! Start with 10 drops and add more if you want a stronger scent.
3. Mix Well: Stir the ingredients thoroughly until they are well combined. The mixture might look a little cloudy, but that’s perfectly normal.
4. Pour into Spray Bottle: Using a funnel (if you have one), carefully pour the mixture into your clean spray bottle.
5. Shake Well Before Each Use: Since oil and vinegar tend to separate, it’s important to shake the bottle well before each use to ensure the ingredients are properly mixed.
Putting it to Work: Polishing Your Kitchen Surfaces
Now that you have your homemade oil polish ready to go, let’s get polishing! Here’s how I use it on different surfaces in my kitchen:
Wooden Cabinets
1. Dust First: Before applying the polish, use a dry cloth or duster to remove any loose dust or debris from your cabinets. This will prevent scratching.
2. Spray Lightly: Lightly spray the oil polish onto a small section of your cabinet. You don’t need to saturate the wood – a light mist is enough.
3. Wipe and Buff: Using a clean, soft cloth, wipe the polish into the wood in a circular motion. Then, use a dry section of the cloth to buff the surface until it shines.
4. Repeat: Repeat steps 2 and 3 on the remaining sections of your cabinets, working in small areas at a time.
5. Address Stubborn Spots: For stubborn spots or grease buildup, you can let the polish sit for a few minutes before wiping it away.
6. Admire Your Work: Step back and admire your beautifully polished cabinets!
Wooden or Butcher Block Countertops
Important Note: Always test the polish on a small, inconspicuous area of your countertop first to ensure it doesn’t damage the finish.
1. Clean the Surface: Before polishing, make sure your countertop is clean and dry. Wipe away any spills or crumbs.
2. Apply Sparingly: Apply a small amount of the oil polish to a clean cloth. You don’t want to spray directly onto the countertop, as this can lead to uneven application.
3. Rub it In: Rub the polish into the wood in a circular motion, working with the grain.
4. Buff to a Shine: Use a clean, dry cloth to buff the surface until it shines.
5. Allow to Absorb: Let the oil absorb into the wood for a few hours, or even overnight. This will help condition and protect the wood.
6. Wipe Away Excess: After the oil has had time to absorb, wipe away any excess with a clean cloth.
7. Regular Maintenance: For ongoing maintenance, I recommend polishing your wooden countertops every few weeks, or as needed.
Stainless Steel Appliances
This oil polish works wonders on stainless steel, helping to remove fingerprints and smudges and leave a streak-free shine.
1. Clean First: Start by cleaning your stainless steel appliances with a damp cloth to remove any loose dirt or grime.
2. Spray Lightly: Lightly spray the oil polish onto a clean, soft cloth. Again, avoid spraying directly onto the appliance.
3. Wipe with the Grain: Wipe the appliance in the direction of the grain of the stainless steel. This will help prevent streaks.
4. Buff to a Shine: Use a clean, dry section of the cloth to buff the surface until it shines.
5. Enjoy the Sparkle: Stand back and admire your gleaming stainless steel appliances!
Tips and Tricks for Best Results
Here are a few extra tips and tricks I’ve learned over time to help you get the best results with your homemade oil polish:
* Test First: As I mentioned earlier, always test the polish on a small, inconspicuous area before applying it to the entire surface. This is especially important for delicate or antique furniture.
* Don’t Overdo It: A little polish goes a long way! Using too much can leave a greasy residue.
* Use Clean Cloths: Always use clean, soft cloths to avoid scratching surfaces. Microfiber cloths are ideal.
* Shake Well: Remember to shake the spray bottle well before each use to ensure the ingredients are properly mixed.
* Store Properly: Store your oil polish in a cool, dark place. It should last for several months.
* Adjust the Recipe: Feel free to experiment with the recipe to find what works best for you. If you find the polish is too oily, add more vinegar. If it’s not cleaning well enough, add more lemon juice or essential oils.
* Be Patient: Polishing takes time and effort, but the results are well worth it!
* Safety First: While this polish is made with natural ingredients, it’s still a good idea to wear gloves when polishing, especially if you have sensitive skin.
Troubleshooting: Addressing Common Issues
Sometimes, things don’t go exactly as planned. Here are a few common issues you might encounter and how to fix them:
* Greasy Residue: If you’re left with a greasy residue after polishing, you’re likely using too much oil. Try using less polish next time, and be sure to buff the surface thoroughly with a clean, dry cloth. You can also try wiping the surface with a damp cloth to remove the excess oil.
* Streaks: Streaks can be caused by using a dirty cloth or by not wiping in the direction of the grain (especially on stainless steel). Make sure you’re using a clean cloth and wiping in the correct direction.
* Dull Finish: If your surfaces aren’t shining as much as you’d like, try adding a few drops of essential oil to the polish. Essential oils can help to enhance the shine.
* Cloudy Appearance: A cloudy appearance can be caused by the vinegar separating from the oil. Make sure you’re shaking the bottle well before each use.
Why I Love This Hack: The Benefits of Homemade Oil Polish
I’m a huge fan of
Conclusion
So, there you have it! Transforming your dull, lackluster kitchen surfaces into gleaming showcases doesn’t require expensive commercial products or harsh chemicals. This simple, effective oil polish kitchen hack is a game-changer for anyone looking to revitalize their kitchen without breaking the bank or compromising on eco-friendliness.
Why is this a must-try? Because it’s incredibly easy, cost-effective, and yields stunning results. You’re likely to already have the necessary ingredients in your pantry – a little bit of oil and some vinegar or lemon juice. The application process is straightforward, requiring minimal effort for maximum impact. Beyond the immediate shine, this DIY polish also helps protect your surfaces from future wear and tear, acting as a natural sealant against moisture and minor scratches.
But the beauty of this hack lies in its versatility. Feel free to experiment with different types of oils to find your perfect match. Olive oil is a classic choice, known for its conditioning properties, but coconut oil can add a subtle, pleasant aroma. For a deeper clean and extra degreasing power, consider adding a few drops of your favorite essential oil, such as lemon or orange. These citrus oils not only enhance the cleaning action but also leave your kitchen smelling fresh and inviting.
Another variation to consider is the type of cloth you use. A microfiber cloth is ideal for achieving a streak-free finish, but a soft cotton cloth will also work well. Just be sure to use a clean cloth to avoid transferring dirt or grime back onto the surface. For stubborn stains or buildup, you can pre-treat the area with a paste of baking soda and water before applying the oil polish.
We understand that trying something new can sometimes feel daunting, but we wholeheartedly encourage you to give this oil polish kitchen hack a try. The transformation you’ll witness will be well worth the minimal effort. Imagine the satisfaction of seeing your countertops, cabinets, and appliances gleaming with a natural, healthy shine, all thanks to a simple DIY solution.
Don’t just take our word for it – experience the magic for yourself! We’re confident that you’ll be amazed by the results. And once you’ve tried it, we’d love to hear about your experience. Share your before-and-after photos, your favorite oil combinations, and any tips or tricks you discovered along the way. Let’s create a community of DIY enthusiasts who are passionate about keeping their kitchens sparkling clean and naturally beautiful. Share your experiences in the comments below or tag us on social media using #OilPolishKitchenHack. We can’t wait to see your shining results!
Frequently Asked Questions (FAQ)
What types of surfaces can I use this oil polish on?
This oil polish kitchen hack is generally safe and effective for a wide range of kitchen surfaces, including:
* Wood Cabinets: This is where the oil polish truly shines, restoring moisture and luster to wooden surfaces.
* Granite and Marble Countertops: The oil helps to seal and protect these natural stone surfaces, enhancing their natural beauty. However, always test in an inconspicuous area first, as some stones can be more porous than others.
* Stainless Steel Appliances: Say goodbye to fingerprints and smudges! The oil polish leaves a streak-free shine on stainless steel.
* Laminate Countertops: This polish can help to restore the shine to laminate surfaces, making them look newer and more vibrant.
* Ceramic Tile Backsplashes: The oil polish can help to remove grime and water spots from ceramic tile, leaving it sparkling clean.
However, it’s best to avoid using this polish on porous surfaces like unsealed grout or unfinished wood, as the oil can be absorbed and leave a greasy residue. Always test a small, inconspicuous area first to ensure compatibility.
How often should I use this oil polish?
The frequency of application depends on the usage and condition of your kitchen surfaces. For high-traffic areas like countertops and frequently used appliances, you may want to apply the polish every week or two. For less frequently used surfaces like cabinets, a monthly application may suffice. Observe your surfaces and adjust the frequency accordingly. If you notice that the shine is starting to fade or that dirt and grime are accumulating, it’s time for another application.
What type of oil is best for this DIY polish?
While olive oil is a popular and effective choice, you can experiment with different types of oils to find your preference. Here are a few options to consider:
* Olive Oil: A classic choice, known for its conditioning properties and ability to restore moisture to wood.
* Coconut Oil: Adds a subtle, pleasant aroma and can help to protect surfaces from moisture. Be sure to use refined coconut oil to avoid a strong coconut scent.
* Mineral Oil: A good option for stainless steel appliances, as it leaves a streak-free shine.
* Walnut Oil: A drying oil that can provide a durable finish, but be mindful of potential allergies.
Always test a small, inconspicuous area first to ensure that the oil doesn’t discolor or damage the surface.
Can I add essential oils to this polish?
Yes, adding essential oils can enhance the cleaning power and fragrance of your oil polish kitchen hack. Citrus oils like lemon, orange, and grapefruit are excellent choices for degreasing and leaving a fresh, clean scent. Lavender and tea tree oil have antibacterial properties and can help to disinfect surfaces. Add a few drops of your favorite essential oil to the oil and vinegar mixture before applying it to your surfaces.
Will this polish leave a greasy residue?
If applied correctly, this polish should not leave a greasy residue. The key is to use a small amount of oil and to buff the surface thoroughly with a clean cloth. If you do notice a greasy residue, simply wipe the surface again with a clean, dry cloth.
Is this polish safe for food preparation surfaces?
Yes, this polish is generally safe for food preparation surfaces, as long as you use food-grade oils like olive oil or coconut oil. However, it’s always a good idea to wipe down the surface with a clean, damp cloth before preparing food, just to be on the safe side.
Can I use this polish on painted surfaces?
It’s generally not recommended to use this polish on painted surfaces, as the oil can potentially damage the paint. If you’re unsure, test a small, inconspicuous area first.
What if I don’t have vinegar or lemon juice?
Vinegar and lemon juice act as mild acids that help to cut through grease and grime. If you don’t have either on hand, you can try using a small amount of dish soap diluted in water. However, be sure to rinse the surface thoroughly with clean water after applying the soap.
How do I store the leftover polish?
Store any leftover polish in an airtight container in a cool, dark place. The polish should last for several weeks.
My kitchen surfaces are heavily soiled. Will this polish still work?
For heavily soiled surfaces, it’s best to pre-clean them before applying the oil polish. You can use a solution of warm water and dish soap to remove any dirt and grime. Rinse the surface thoroughly with clean water and allow it to dry completely before applying the polish. For stubborn stains, you can try using a paste of baking soda and water.
Leave a Comment