
Growing Strawberries in Bags: Imagine plucking juicy, sun-ripened strawberries right from your patio, balcony, or even a sunny corner indoors! Forget sprawling gardens and back-breaking weeding; this year, we’re taking strawberry cultivation to new heights – literally! For centuries, humans have cultivated strawberries, from the wild berries enjoyed by ancient Romans to the carefully bred varieties we savor today. But did you know that innovative techniques like growing them in bags are revolutionizing how even apartment dwellers can enjoy this delicious fruit?
This DIY guide is your passport to a bountiful strawberry harvest, regardless of your space constraints. We’ll walk you through every step, from choosing the right bag and soil to nurturing your plants for maximum yield. Why is this trick a game-changer? Because it’s incredibly space-efficient, minimizes pests and diseases, and allows for better drainage, leading to healthier, happier strawberry plants. Plus, it’s a fun and rewarding project that brings a touch of nature right to your doorstep. So, grab your gardening gloves, and let’s dive into the wonderful world of growing strawberries in bags! I promise, you’ll be amazed at how easy and fruitful this method can be.

Growing Strawberries in Bags: A Bountiful Harvest in a Small Space!
Hey there, fellow gardening enthusiasts! Are you dreaming of juicy, red strawberries but short on garden space? Well, I’ve got the perfect solution for you: growing strawberries in bags! It’s a fantastic way to maximize your yield, minimize weeds, and enjoy fresh berries right outside your door. Trust me, once you try this, you’ll be hooked!
Why Grow Strawberries in Bags?
Before we dive into the how-to, let’s quickly cover why this method is so awesome:
* Space-Saving: Perfect for balconies, patios, or small yards.
* Easy to Manage: Less bending and weeding compared to traditional garden beds.
* Improved Drainage: Bags provide excellent drainage, preventing root rot.
* Pest Control: Easier to monitor and protect your plants from slugs and other pests.
* Portability: You can move your strawberry plants to the best sun exposure as needed.
* Early Harvest: Bags warm up faster in the spring, leading to an earlier harvest.
What You’ll Need
Okay, let’s gather our supplies. Here’s what you’ll need to get started:
* Strawberry Plants: Choose everbearing or June-bearing varieties depending on your preference. Everbearing produce throughout the season, while June-bearing produce a large crop in early summer. I personally love everbearing for a continuous supply!
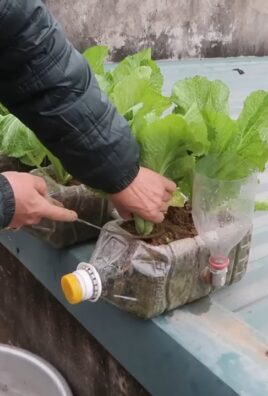
* Large Grow Bags: I recommend bags that are at least 10-12 inches in diameter and 12-18 inches deep. Fabric grow bags are ideal because they allow for good drainage and aeration.
* Potting Mix: Use a high-quality potting mix that’s well-draining and rich in organic matter. Avoid using garden soil, as it can compact and hinder drainage.
* Slow-Release Fertilizer: A balanced slow-release fertilizer will provide your strawberry plants with the nutrients they need throughout the growing season. Look for one specifically formulated for berries.
* Watering Can or Hose: For regular watering.
* Scissors or Utility Knife: For making drainage holes and planting pockets.
* Gloves: To protect your hands.
* Optional: Straw or pine needles for mulching.
Step-by-Step Guide to Planting Strawberries in Bags
Alright, let’s get our hands dirty! Here’s a detailed step-by-step guide to planting your strawberries in bags:
1. Prepare the Grow Bags
* Choose Your Location: Select a sunny spot that receives at least 6-8 hours of direct sunlight per day. Strawberries thrive in full sun.
* Drainage Holes: If your grow bags don’t already have them, create drainage holes at the bottom. This is crucial to prevent waterlogging. I usually make about 4-5 holes, evenly spaced.
* Position the Bags: Place the grow bags in their final location before filling them with soil. Once they’re full, they can be quite heavy to move.
2. Fill the Grow Bags with Potting Mix
* Add Potting Mix: Gradually fill the grow bags with potting mix, leaving about 2-3 inches of space at the top.
* Mix in Fertilizer: Incorporate the slow-release fertilizer into the potting mix according to the package instructions. This will provide a steady supply of nutrients to your strawberry plants.
* Water the Soil: Gently water the potting mix until it’s evenly moist but not soggy. This will help settle the soil and prepare it for planting.
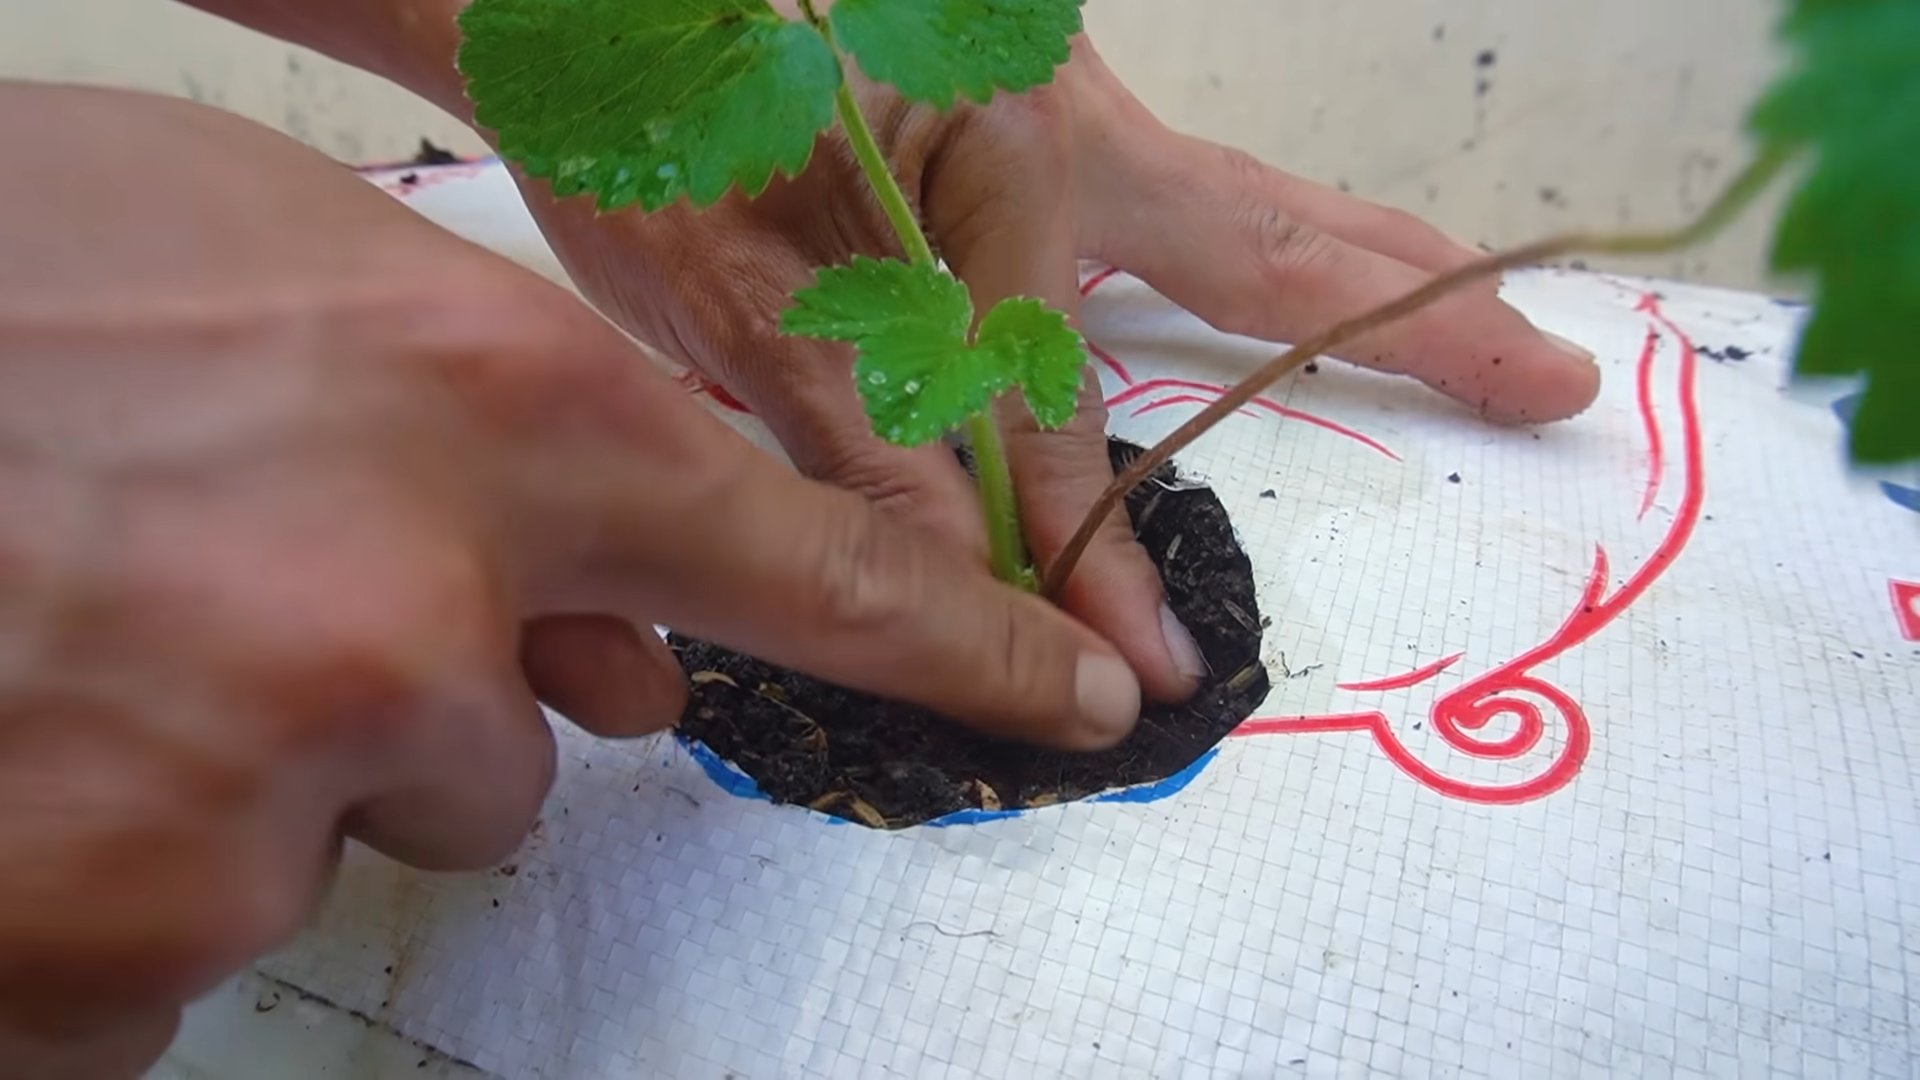
3. Planting the Strawberry Plants
* Create Planting Pockets: Now comes the fun part! Depending on the size of your grow bag, you can plant multiple strawberry plants in each bag. I usually aim for about 3-4 plants per bag.
* For Vertical Planting (Optional): If you want to maximize space, you can create planting pockets along the sides of the bag. To do this, make small slits in the bag with your scissors or utility knife, spacing them about 6-8 inches apart. These slits should be large enough to accommodate the strawberry plant’s root ball.
* Remove Plants from Containers: Gently remove the strawberry plants from their nursery containers. Loosen the roots slightly with your fingers to encourage them to spread out.
* Plant the Strawberries:
* In the Top of the Bag: Dig a small hole in the potting mix, large enough to accommodate the root ball. Place the strawberry plant in the hole, ensuring that the crown (the point where the stems meet the roots) is level with the soil surface.
* In the Planting Pockets (If Applicable): Carefully insert the root ball of the strawberry plant into the slit you created. Gently push the roots into the potting mix inside the bag.
* Backfill with Soil: Fill in the hole around the strawberry plant with potting mix, gently firming the soil around the base of the plant.
* Water Thoroughly: Water the newly planted strawberries thoroughly to help them settle in.
4. Mulching (Optional but Recommended)
* Apply Mulch: Spread a layer of straw or pine needles around the base of the strawberry plants. Mulch helps to retain moisture, suppress weeds, and keep the berries clean. I find that it also helps to regulate soil temperature.
Caring for Your Strawberry Plants
Now that your strawberries are planted, it’s time to provide them with the care they need to thrive.
1. Watering
* Regular Watering: Strawberries need consistent moisture, especially during fruiting. Water deeply whenever the top inch of soil feels dry to the touch. Avoid overwatering, as this can lead to root rot.
* Watering Technique: Water at the base of the plants to avoid wetting the foliage, which can encourage fungal diseases.
2. Fertilizing
* Regular Feeding: Continue to fertilize your strawberry plants throughout the growing season with a balanced liquid fertilizer. Follow the package instructions for application rates. I usually fertilize every 2-3 weeks.
* Foliar Feeding (Optional): You can also supplement with foliar feeding by spraying the leaves with a diluted liquid fertilizer. This can help to boost growth and fruit production.
3. Pruning and Maintenance
* Remove Runners: Strawberry plants produce runners, which are long stems that grow horizontally and develop new plantlets. If you want to maximize fruit production, it’s best to remove these runners. Simply snip them off with scissors.
* Remove Dead Leaves: Regularly remove any dead or yellowing leaves to prevent the spread of disease.
* Protect from Pests: Keep an eye out for common strawberry pests such as slugs, snails, and aphids. Handpick them off the plants or use organic pest control methods.
* Protect from Birds: Birds love strawberries just as much as we do! To protect your berries, you can cover the plants with netting.
4. Overwintering
* Prepare for Winter: In colder climates, strawberry plants need protection during the winter months.
* Mulch Heavily: Apply a thick layer of mulch around the base of the plants to insulate the roots.
* Move Indoors (Optional): If you have space, you can move the grow bags indoors to a cool, bright location. Water sparingly during the winter months.
Harvesting Your Strawberries
* Harvest When Ripe: Strawberries are ready to harvest when they are fully red and slightly soft to the touch.
* Gently Pick: Gently twist or snip the strawberries from the plant, leaving a small piece of the stem attached.
* Enjoy Fresh: Enjoy your freshly harvested strawberries right away, or store them in the refrigerator for a few days.
Troubleshooting
Even with the best care, you might encounter some challenges along the way. Here are a few common problems and how to address them:
* Yellowing Leaves: This could be a sign of nutrient deficiency. Try fertilizing with a balanced fertilizer.
* Small Berries: This could be due to insufficient watering or fertilization. Make sure your plants are getting enough water and nutrients.
* Lack of Fruit: This could be due to insufficient sunlight or pollination. Ensure your plants are getting at least 6-8 hours of direct sunlight per day. You can also hand-pollinate the flowers by gently brushing them with a small paintbrush.
* Root Rot: This is caused by overwatering. Make sure your grow bags have good drainage and avoid watering too frequently.
Enjoy Your Homegrown Strawberries!
Growing strawberries in bags is a rewarding and enjoyable experience. With a little care and attention, you can enjoy a bountiful harvest of delicious, homegrown strawberries right outside your door. Happy gardening! I hope you found this guide helpful, and I can’t wait to hear about your strawberry-growing success!
Conclusion
So, there you have it! Growing strawberries in bags isn’t just a gardening trend; it’s a game-changer for anyone looking to enjoy fresh, juicy berries without the constraints of a traditional garden. We’ve explored the simplicity, space-saving benefits, and overall efficiency of this method, and hopefully, you’re now convinced that it’s a must-try.
But why is this DIY trick so compelling? It boils down to accessibility and control. Whether you have a sprawling backyard or a tiny balcony, bag gardening brings the joy of homegrown strawberries within reach. You have complete control over the soil quality, watering schedule, and sun exposure, allowing you to create the perfect environment for your plants to thrive. Plus, the elevated position of the bags helps deter pests and diseases, leading to a healthier and more abundant harvest.
Don’t be afraid to experiment with variations! Try using different types of bags, such as burlap sacks for a rustic look or repurposed grow bags for an eco-friendly approach. Consider adding companion plants like basil or marigolds to your strawberry bags to further deter pests and enhance growth. You can also adjust the soil mix to suit your specific climate and strawberry variety. For example, if you live in a particularly hot and dry area, adding more moisture-retentive materials like coco coir or vermiculite to your soil mix can be beneficial.
Remember, the key to successful growing strawberries in bags is consistent care and attention. Regularly check the moisture levels of the soil, fertilize as needed, and prune away any dead or diseased leaves. With a little effort, you’ll be rewarded with a bountiful supply of delicious, homegrown strawberries that you can enjoy fresh, in jams, or in your favorite desserts.
We wholeheartedly encourage you to give this DIY trick a try. It’s a fun, rewarding, and surprisingly easy way to grow your own strawberries, regardless of your gardening experience. And most importantly, don’t forget to share your experience with us! We’d love to hear about your successes, challenges, and any tips or tricks you discover along the way. Share your photos and stories on social media using #StrawberryBagGardening or leave a comment below. Let’s build a community of bag-gardening enthusiasts and inspire others to embrace this innovative and delicious way to grow their own food. Happy gardening!
Frequently Asked Questions (FAQ)
1. What type of bag is best for growing strawberries?
The best type of bag for growing strawberries depends on your preferences and resources. Fabric grow bags are a popular choice because they allow for good drainage and aeration, preventing root rot. Burlap sacks offer a rustic aesthetic and are biodegradable. Plastic bags can also be used, but be sure to poke drainage holes to prevent waterlogging. Consider the size of the bag as well; a bag that is at least 12 inches in diameter and 12 inches deep is generally recommended for each strawberry plant. Dark-colored bags tend to absorb more heat, which can be beneficial in cooler climates but may overheat the soil in hotter regions.
2. What kind of soil should I use for growing strawberries in bags?
Strawberries thrive in well-draining, slightly acidic soil with a pH between 5.5 and 6.5. A good soil mix for growing strawberries in bags would be a combination of potting mix, compost, and perlite or vermiculite. The potting mix provides a base for the plants to grow in, the compost adds nutrients and improves soil structure, and the perlite or vermiculite enhances drainage and aeration. Avoid using garden soil, as it can be too heavy and may contain pests or diseases. You can also purchase a pre-mixed strawberry potting mix from your local garden center.
3. How often should I water my strawberry plants in bags?
The frequency of watering depends on several factors, including the climate, the type of bag you’re using, and the stage of growth of your plants. Generally, you should water your strawberry plants whenever the top inch of soil feels dry to the touch. During hot, dry weather, you may need to water daily, while in cooler, wetter weather, you may only need to water every few days. Be careful not to overwater, as this can lead to root rot. Ensure that the bag has adequate drainage to prevent water from pooling at the bottom. A good way to check if your plants need water is to lift the bag; if it feels light, it’s likely time to water.
4. How much sunlight do strawberries need when grown in bags?
Strawberries need at least 6-8 hours of direct sunlight per day to produce a good crop of berries. Choose a location for your strawberry bags that receives plenty of sunlight throughout the day. If you live in a particularly hot climate, you may want to provide some afternoon shade to prevent the plants from overheating. If you don’t have a sunny spot, you can supplement with grow lights. Rotate the bags periodically to ensure that all sides of the plants receive adequate sunlight.
5. What kind of fertilizer should I use for strawberries in bags?
Strawberries are heavy feeders and benefit from regular fertilization. Use a balanced fertilizer with an NPK ratio of 10-10-10 or 12-12-12. You can also use a fertilizer specifically formulated for strawberries. Apply the fertilizer according to the package directions, typically every 2-4 weeks during the growing season. Avoid over-fertilizing, as this can burn the roots of the plants. You can also supplement with organic fertilizers like compost tea or fish emulsion.
6. How do I protect my strawberry plants from pests and diseases in bags?
Growing strawberries in bags can help reduce the risk of pests and diseases, but it’s still important to take precautions. Regularly inspect your plants for signs of pests or diseases. Common strawberry pests include aphids, spider mites, and slugs. You can control these pests with insecticidal soap, neem oil, or by hand-picking them off the plants. Common strawberry diseases include powdery mildew and gray mold. Prevent these diseases by providing good air circulation, avoiding overwatering, and removing any infected leaves. You can also use a fungicide if necessary. Consider using companion plants like marigolds or basil to deter pests naturally.
7. Can I grow strawberries in bags indoors?
Yes, you can grow strawberries in bags indoors, but you’ll need to provide them with adequate light and ventilation. Place the bags near a sunny window or use grow lights to provide at least 6-8 hours of light per day. Ensure that the room has good air circulation to prevent fungal diseases. You may also need to hand-pollinate the flowers to ensure fruit production. Indoor growing can be a great option for those who live in climates with harsh winters or limited outdoor space.
8. How long does it take for strawberries to produce fruit when grown in bags?
The time it takes for strawberries to produce fruit depends on the variety of strawberry you’re growing and the growing conditions. Generally, June-bearing strawberries produce fruit in the spring, while everbearing strawberries produce fruit throughout the growing season. You can expect to harvest your first strawberries about 4-6 weeks after the plants begin to flower. Be patient and consistent with your care, and you’ll be rewarded with a bountiful harvest of delicious strawberries.
9. Can I reuse the soil in my strawberry bags?
It’s generally not recommended to reuse the soil in your strawberry bags, as it may contain pests, diseases, or depleted nutrients. However, if you choose to reuse the soil, you should sterilize it first by baking it in the oven at 180 degrees Fahrenheit for 30 minutes. You should also amend the soil with fresh compost and fertilizer to replenish the nutrients. A better option is to discard the old soil and start with fresh soil each year.
10. What do I do with my strawberry plants in bags during the winter?
The best way to overwinter your strawberry plants in bags depends on your climate. In mild climates, you can simply leave the bags outdoors and protect them from frost with a layer of mulch. In colder climates, you can move the bags to a sheltered location, such as a garage or shed, or bury them in the ground. Water the plants occasionally during the winter to prevent them from drying out. In the spring, move the bags back to their sunny location and resume regular watering and fertilizing.

Leave a Comment