
Grow Giant Peanuts and astound your friends and family with peanuts so large, they’ll think you’ve stumbled upon a secret agricultural society! Have you ever dreamt of harvesting peanuts that are not only delicious but also impressively sized? Well, you’re in the right place. This isn’t just about growing peanuts; it’s about cultivating colossal, conversation-starting legumes right in your own backyard.
The humble peanut, despite its name, isn’t actually a nut but a legume, and its journey from South America to global snack stardom is a fascinating one. For centuries, peanuts have been a staple food source, providing essential nutrients and a satisfying crunch. But let’s be honest, who wouldn’t want to take that satisfying crunch to the next level?
In this DIY guide, I’m going to share some tried-and-true tricks and hacks that will help you grow giant peanuts. Forget those tiny, underwhelming peanuts you find at the grocery store. I’ll walk you through everything from selecting the right peanut variety and preparing your soil to providing the optimal growing conditions and fending off pesky pests. Imagine the look on your neighbor’s face when you show off your peanut harvest! More than just a fun project, growing your own giant peanuts ensures you know exactly what’s going into your food – no harmful chemicals or mystery ingredients. So, grab your gardening gloves, and let’s get started on this exciting journey to peanut perfection!
Growing Giant Peanuts: My Foolproof Guide to Peanut Perfection!
Okay, peanut lovers, gather ’round! I’m about to share my secrets to growing peanuts that are so big, they’ll make you the envy of every squirrel in the neighborhood. Forget those tiny, shriveled peanuts you find at the store. We’re talking about plump, juicy, and incredibly flavorful giants! This isn’t just gardening; it’s a peanut-growing adventure!
Choosing the Right Peanut Variety
First things first, not all peanuts are created equal. If you want giants, you need to start with the right genetics. Here’s what I’ve learned:
* Virginia Peanuts: These are your best bet for size. They produce the largest peanuts, often with two kernels per shell. Look for varieties specifically labeled as “Virginia Jumbo” or “Virginia Extra Large.”
* Avoid Spanish and Runner Peanuts: While delicious, these varieties are smaller and more suited for peanut butter or candy. They won’t give you the giant results we’re after.
* Seed Source Matters: Don’t just grab any old peanuts from the grocery store. Those are often roasted and won’t germinate. You need raw, untreated peanuts specifically sold for planting. Reputable seed companies are your best source.
Preparing Your Peanut Paradise
Peanuts are surprisingly picky about their soil. They need loose, well-drained soil to thrive. Think sandy loam – that’s the peanut’s happy place.
* Soil Testing is Key: Before you do anything, get your soil tested. Peanuts prefer a slightly acidic pH (around 6.0 to 6.5). Your local agricultural extension office can help you with this.
* Amend, Amend, Amend!: If your soil is heavy clay or compacted, you’ll need to amend it. Add plenty of organic matter like compost, well-rotted manure, or peat moss. This will improve drainage and aeration.
* Loosen the Soil: Till or dig the soil to a depth of at least 12 inches. This will give the peanut pegs (the stems that grow down into the soil to form the peanuts) plenty of room to penetrate.
* Raised Beds (Optional but Recommended): I’ve found that raised beds are fantastic for growing giant peanuts. They provide excellent drainage and allow you to control the soil composition.
Planting Your Peanut Seeds
Timing is crucial! Peanuts need warm soil to germinate. Wait until the soil temperature is consistently above 65°F (18°C) before planting. This is usually a couple of weeks after the last frost.
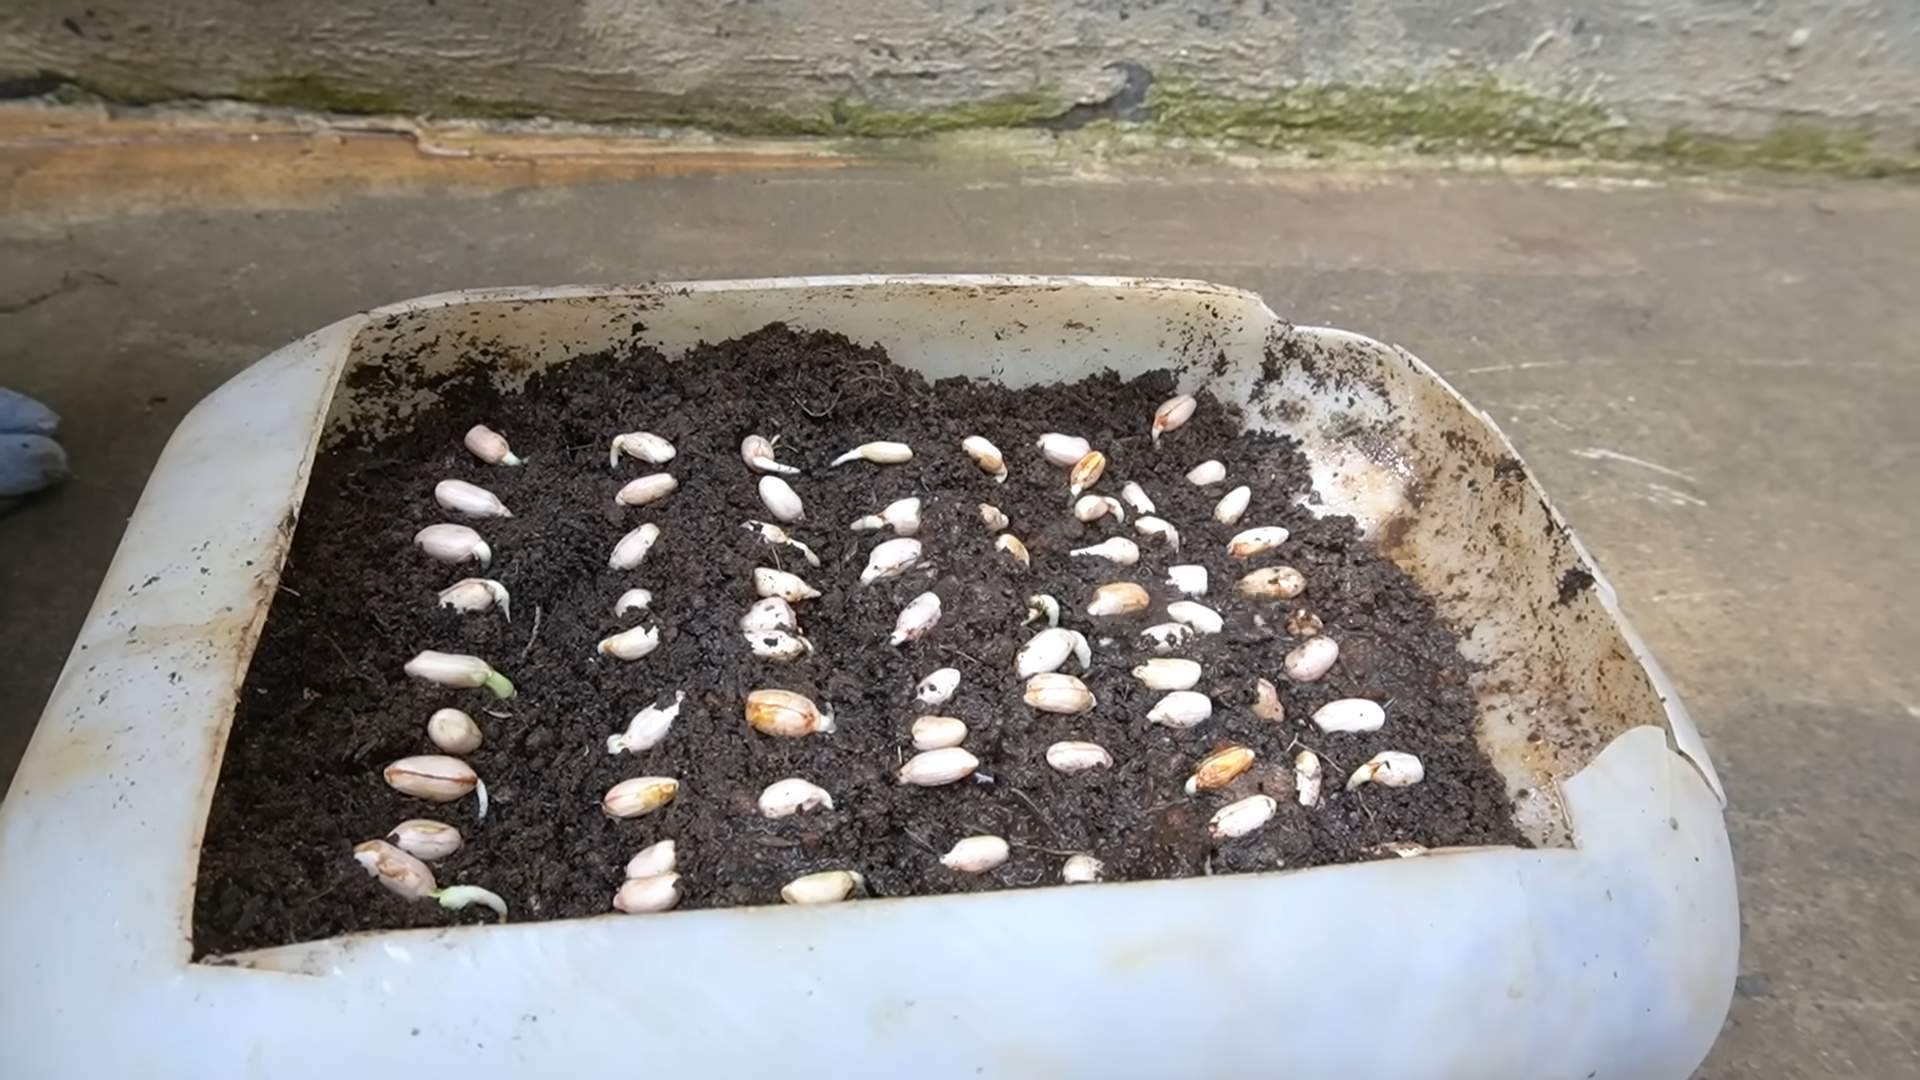
1. Soak the Seeds (Optional): Some gardeners swear by soaking peanut seeds in water for a few hours before planting to speed up germination. I’ve tried it both ways and haven’t noticed a huge difference, but it can’t hurt.
2. Planting Depth: Plant the peanuts about 2 inches deep and 6-8 inches apart. Space rows about 2-3 feet apart to give the plants plenty of room to spread.
3. Orientation: Plant the peanuts with the pointed end facing down. This is where the root will emerge.
4. Water Gently: After planting, water the soil gently to settle it around the seeds. Avoid overwatering, which can cause the seeds to rot.
5. Mark Your Rows: Use row markers or labels to keep track of where you planted your peanuts.
Nurturing Your Peanut Plants
Peanuts are relatively low-maintenance, but they do need some TLC to produce those giant nuts.
* Watering: Water regularly, especially during dry spells. Peanuts need consistent moisture to develop properly. However, avoid overwatering, which can lead to fungal diseases. Aim for about 1 inch of water per week.
* Weeding: Keep the area around your peanut plants free of weeds. Weeds compete for nutrients and water, which can stunt the growth of your peanuts. Hand-pulling is the best method, as herbicides can damage the plants.
* Fertilizing: Peanuts are legumes, which means they can fix nitrogen from the air. However, they still benefit from a balanced fertilizer. Use a fertilizer with a low nitrogen content (e.g., 5-10-10) to encourage pod development. Apply the fertilizer according to the package directions.
* Hilling: As the peanut plants grow, they will produce “pegs” that grow down into the soil. These pegs are where the peanuts will form. To encourage peanut development, hill the soil around the base of the plants, covering the pegs. This will provide them with a dark, moist environment to grow in.
* Calcium Boost: Peanuts need calcium to develop properly. If your soil is deficient in calcium, you can add gypsum (calcium sulfate) to the soil. Apply gypsum according to the package directions.
* Pest Control: Peanuts are susceptible to a few pests, such as aphids, spider mites, and leafhoppers. Monitor your plants regularly for signs of infestation. If you find pests, you can treat them with insecticidal soap or neem oil.
Harvesting Your Giant Peanuts
This is the most exciting part! Knowing when to harvest is key to getting those perfect, giant peanuts.
1. Timing is Everything: Peanuts are typically ready to harvest about 120-150 days after planting. The leaves will start to turn yellow and the plants will begin to die back.
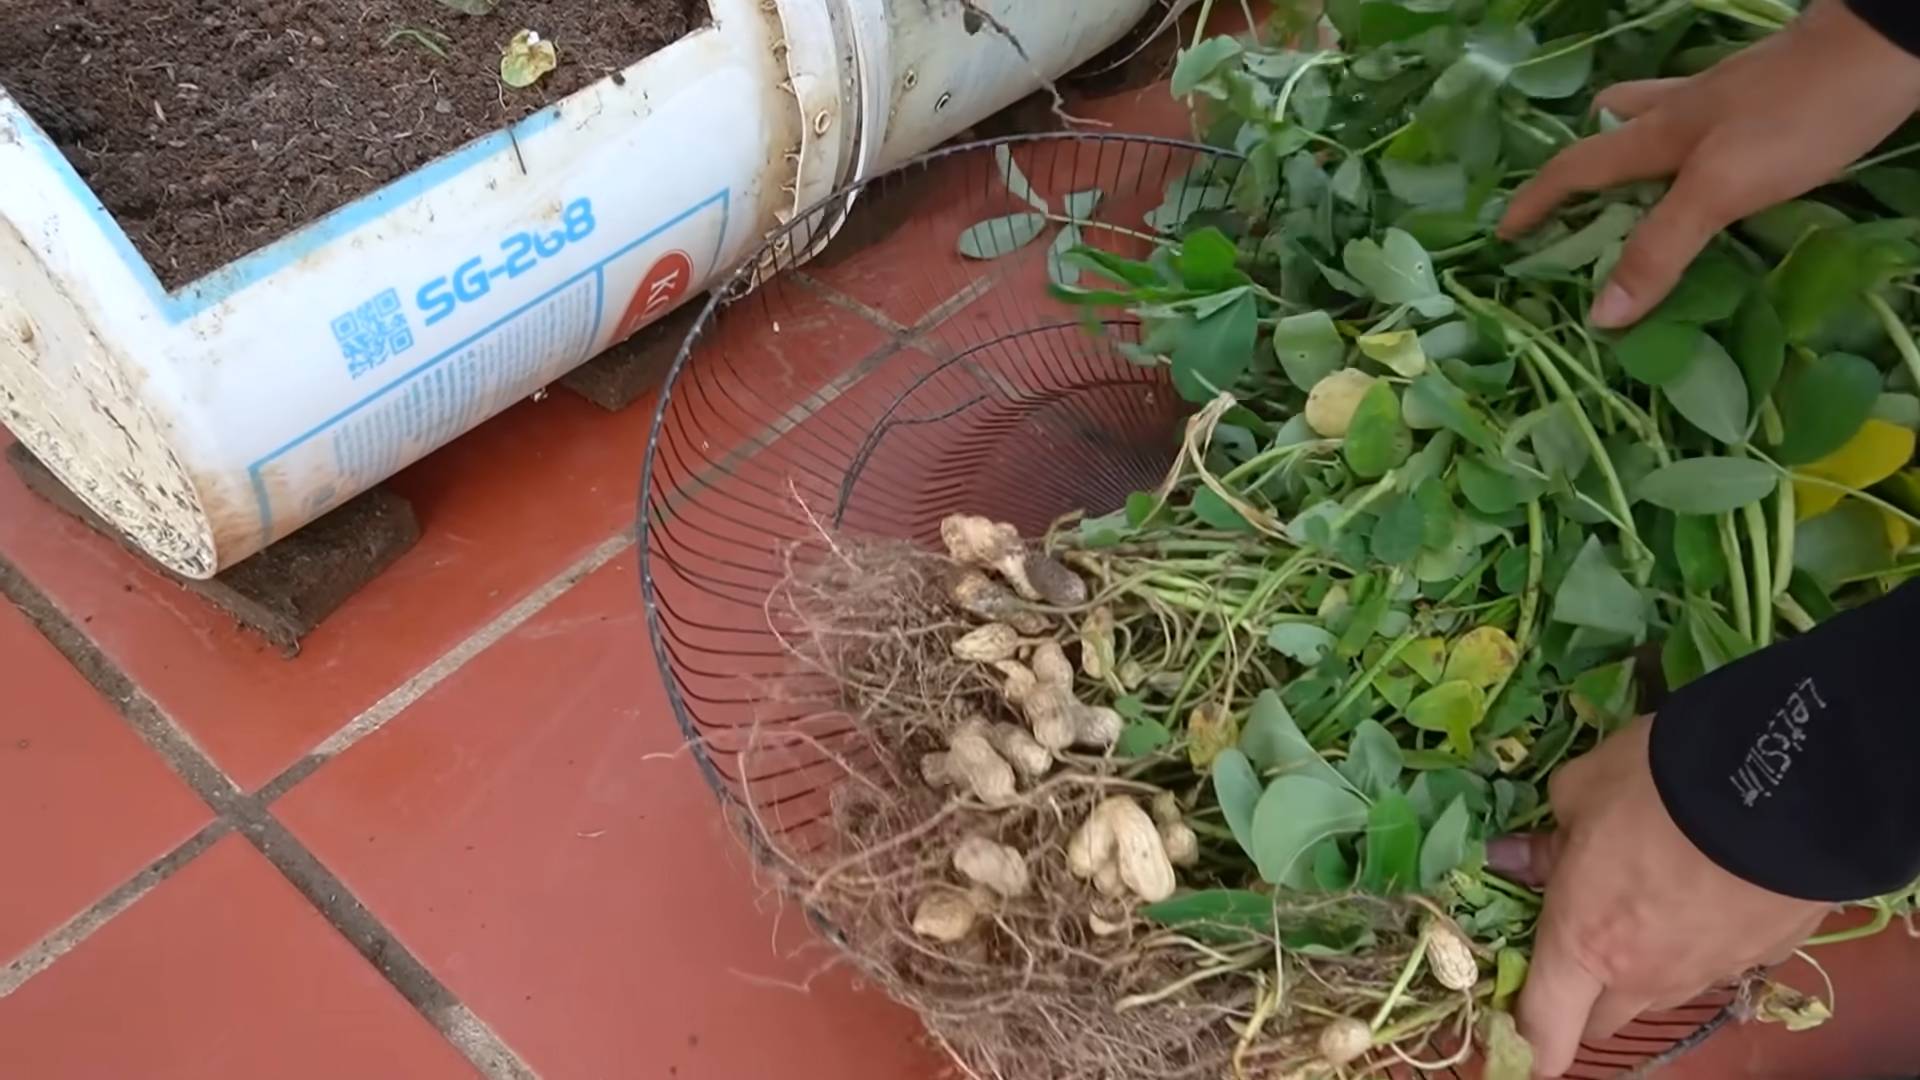
2. The Pull Test: The best way to determine if your peanuts are ready to harvest is to pull up a plant and check the peanuts. The shells should be fully formed and the kernels should be plump and well-developed. The inside of the shell should have a dark veining pattern.
3. Digging Them Up: Use a garden fork or shovel to carefully dig up the peanut plants. Be gentle, as you don’t want to damage the peanuts.
4. Shake Off the Soil: Shake off as much soil as possible from the plants.
5. Curing Your Peanuts: This is a crucial step for developing the flavor and preventing mold.
* Method 1: Hanging: Hang the entire plant upside down in a well-ventilated area for 2-4 weeks. Make sure the peanuts are not touching each other to allow for proper air circulation.
* Method 2: Drying Racks: Spread the peanuts out on drying racks in a single layer. Turn them regularly to ensure even drying. This method also takes about 2-4 weeks.
6. Testing for Dryness: To test if the peanuts are dry enough, crack open a few shells. The kernels should be crisp and the skins should easily rub off.
7. Shelling and Storing: Once the peanuts are fully cured, you can shell them. Store the shelled peanuts in an airtight container in a cool, dry place. They will keep for several months.
Troubleshooting Peanut Problems
Even with the best care, you might encounter some problems along the way. Here’s how to deal with them:
* Poor Germination: If your peanut seeds don’t germinate, it could be due to cold soil, overwatering, or poor-quality seeds. Make sure the soil is warm enough and avoid overwatering. Use fresh, untreated peanut seeds from a reputable source.
* Yellowing Leaves: Yellowing leaves can be a sign of nutrient deficiency, overwatering, or disease. Check your soil pH and nutrient levels. Adjust your watering schedule as needed. Treat any diseases with appropriate fungicides.
* Small Peanuts: Small peanuts can be caused by poor soil, lack of water, or pests. Amend your soil with organic matter and ensure consistent watering. Control pests with insecticidal soap or neem oil.
* Mold: Mold can be a problem during curing if the peanuts are not properly ventilated. Ensure good air circulation during curing and discard any peanuts that show signs of mold.
Extra Tips for Giant Peanut Success
* Sunlight is Your Friend: Peanuts need at least 6-8 hours of sunlight per day. Choose a sunny location for your peanut patch.
* Crop Rotation: Don’t plant peanuts in the same spot year after year. Rotate your crops to prevent soilborne diseases.
* Companion Planting: Plant peanuts with beneficial companion plants like marigolds, which repel nematodes, or basil, which repels aphids.
* Patience is a Virtue: Growing giant peanuts takes time and effort. Don’t get discouraged if you don’t see results immediately. Just keep following these tips and you’ll be rewarded with a bountiful harvest of delicious, giant peanuts!
And there you have it! My complete guide to growing giant peanuts. It might seem like a lot, but trust me, it’s worth it. There’s nothing quite like the satisfaction of harvesting your own homegrown, giant peanuts. Happy growing!
Conclusion
So, there you have it! Growing giant peanuts isn’t just a fun gardening project; it’s a rewarding experience that yields impressive results. Imagine the look on your friends’ and family’s faces when you present them with peanuts that dwarf anything they’ve ever seen. This DIY trick, focusing on soil preparation, proper watering, and strategic fertilization, is the key to unlocking the potential of your peanut plants and achieving truly remarkable growth.
Why is this a must-try? Because it’s more than just growing peanuts; it’s about understanding the science behind plant growth and applying that knowledge to achieve extraordinary outcomes. It’s about connecting with nature, nurturing life, and reaping the benefits of your hard work in the form of a bountiful and impressive harvest. Plus, who wouldn’t want to be known as the person who grows the biggest peanuts in the neighborhood?
But don’t stop there! Experiment with different varieties of peanuts known for their larger size, such as the Virginia Jumbo or the Runner type. Try amending your soil with different combinations of organic matter to see what works best in your specific climate and soil conditions. Consider using raised beds or containers to further control the growing environment and optimize drainage. You could even try companion planting with herbs like basil or marigolds, which are known to deter pests and attract beneficial insects.
The possibilities are endless, and the journey is just as exciting as the destination. We encourage you to embrace this DIY trick, get your hands dirty, and witness the magic of growing giant peanuts for yourself. Don’t be afraid to experiment, adapt, and learn from your experiences.
And most importantly, share your results! We’d love to hear about your successes, your challenges, and any variations you’ve tried. Post pictures of your giant peanuts on social media using #GiantPeanutsDIY and tag us so we can celebrate your achievements. Let’s create a community of peanut-growing enthusiasts and inspire others to embark on this exciting journey. So, go ahead, give it a try, and prepare to be amazed by the incredible potential of these humble legumes. You might just surprise yourself with what you can achieve!
Frequently Asked Questions (FAQ)
What exactly makes this DIY trick different from just regular peanut growing?
This DIY trick focuses on maximizing peanut size through specific techniques. While basic peanut growing involves planting and watering, this method emphasizes optimizing soil composition with amendments like compost and aged manure, providing consistent and deep watering to encourage root development, and using a balanced fertilizer schedule tailored to the peanut plant’s growth stages. It’s about creating the ideal environment for peanuts to reach their full potential, resulting in significantly larger peanuts than you’d typically get with standard methods.
What kind of soil is best for growing giant peanuts?
Peanuts thrive in well-drained, sandy loam soil. This type of soil allows for good aeration and drainage, which is crucial for preventing root rot and promoting healthy growth. The sandy texture also makes it easier for the peanut pegs (the structures that develop into peanuts) to penetrate the soil. Before planting, amend your soil with plenty of organic matter, such as compost or well-rotted manure, to improve its fertility and drainage. Avoid heavy clay soils, as they can become waterlogged and hinder peanut development. A slightly acidic to neutral pH (around 6.0 to 7.0) is ideal.
How often should I water my peanut plants to grow giant peanuts?
Consistent and deep watering is essential, especially during the flowering and pegging stages. Water deeply whenever the top inch of soil feels dry to the touch. Aim for about 1 inch of water per week, either through rainfall or irrigation. Avoid overwatering, as this can lead to root rot. During hot, dry periods, you may need to water more frequently. Mulching around the plants can help retain moisture and reduce the need for frequent watering.
What kind of fertilizer should I use, and when should I apply it?
Use a balanced fertilizer with a slightly higher phosphorus content (e.g., 10-20-10) to promote root development and flowering. Apply a starter fertilizer at planting time, following the package instructions. Then, side-dress the plants with fertilizer again when they begin to flower and again when the pegs start to develop. Avoid over-fertilizing, as this can lead to excessive foliage growth at the expense of peanut production. Organic options like bone meal and rock phosphate can also be used to provide phosphorus.
How long does it take to grow giant peanuts?
Peanuts typically take about 120 to 150 days to mature, depending on the variety and growing conditions. Start seeds indoors 6-8 weeks before the last expected frost or direct sow after the danger of frost has passed. Be patient and monitor the plants closely for signs of maturity, such as yellowing leaves and hardened peanut shells.
Are there any specific pests or diseases I should watch out for?
Common peanut pests include aphids, spider mites, and leafhoppers. Regularly inspect your plants for signs of infestation and take appropriate action, such as using insecticidal soap or neem oil. Diseases like leaf spot and root rot can also affect peanut plants. Ensure good air circulation around the plants and avoid overwatering to prevent these diseases. Crop rotation and using disease-resistant varieties can also help.
Can I grow giant peanuts in containers?
Yes, you can grow giant peanuts in containers, but you’ll need to choose a large container (at least 18 inches in diameter and depth) to accommodate the plant’s root system. Use a well-draining potting mix and ensure the container has drainage holes. Container-grown peanuts may require more frequent watering and fertilization than those grown in the ground.
What are some variations I can try to further enhance peanut size?
Consider using mycorrhizal fungi inoculants at planting time to enhance root development and nutrient uptake. Experiment with different types of organic mulches, such as straw or wood chips, to see which works best for retaining moisture and suppressing weeds. You can also try foliar feeding with a seaweed extract solution to provide additional nutrients directly to the leaves. Some growers also report success with Epsom salt applications to provide magnesium, which is essential for chlorophyll production.
How do I know when my peanuts are ready to harvest?
The best way to determine if your peanuts are ready to harvest is to dig up a few plants and check the peanut shells. The shells should be fully formed, with a distinct veining pattern, and the kernels inside should be plump and fill the shell. The leaves of the plant will also start to yellow and dry out.
What’s the best way to cure and store my giant peanuts?
After harvesting, gently shake off any excess soil and allow the peanuts to dry in a well-ventilated area for several weeks. You can spread them out on a screen or hang them in bunches. Once the shells are completely dry, store the peanuts in a cool, dry place in airtight containers. Properly cured and stored peanuts can last for several months.
Leave a Comment