
Growing Cabbage From Seed might seem daunting, but trust me, it’s a rewarding experience that connects you to generations of gardeners! For centuries, cabbage has been a staple in diets worldwide, from the humble peasant’s stew to the elaborate feasts of royalty. Its cultivation dates back to ancient times, with evidence suggesting its presence in Europe as early as the Bronze Age. Think about it – you’re participating in a tradition that spans millennia!
But why bother growing cabbage from seed yourself when you can just buy it at the store? Well, for starters, you gain access to a wider variety of cabbage types, some of which you’ll never find commercially. Plus, there’s nothing quite like the taste of a cabbage you’ve nurtured from a tiny seed to a leafy head. I’ve found that homegrown cabbage is sweeter and more tender than anything I can buy. And let’s be honest, in today’s world, knowing where your food comes from and having control over what goes into it is more important than ever. This DIY guide will give you the knowledge and confidence to start your own cabbage patch, ensuring a fresh, healthy, and delicious harvest. Get ready to roll up your sleeves and discover the joy of growing your own cabbage!
Growing Cabbage From Seed: A Beginner’s Guide
Okay, so you want to grow your own cabbage from seed? Awesome! It’s surprisingly rewarding, and nothing beats the taste of homegrown veggies. I’m going to walk you through everything you need to know, from choosing the right seeds to transplanting your little cabbage babies. Let’s get started!
Choosing Your Cabbage Variety
First things first, let’s talk cabbage types. There are tons of varieties out there, each with its own unique flavor, size, and growing season. Here’s a quick rundown to help you decide:
* **Early Cabbage:** These mature quickly (around 60-70 days) and are great for a spring or early summer harvest. Examples include ‘Golden Acre’ and ‘Early Jersey Wakefield’.
* **Mid-Season Cabbage:** These take a bit longer (70-90 days) and are perfect for a fall harvest. ‘Copenhagen Market’ is a popular choice.
* **Late Cabbage:** These need the longest growing season (over 90 days) and are ideal for winter storage. Think ‘Danish Ballhead’ or ‘January King’.
* **Savoy Cabbage:** These have crinkled leaves and a milder flavor. ‘Savoy Ace’ is a good option.
* **Red Cabbage:** Adds a pop of color to your garden and has a slightly peppery taste. ‘Red Acre’ is a classic.
Consider your local climate and the time of year you want to harvest when making your choice. I usually go for a mix of early and mid-season varieties to have a continuous supply.
Starting Your Cabbage Seeds Indoors
Starting your cabbage seeds indoors gives them a head start, especially if you live in a colder climate with a shorter growing season. Here’s how I do it:
1. **Gather Your Supplies:** You’ll need:
* Cabbage seeds (obviously!)
* Seed starting trays or small pots
* Seed starting mix (this is important – regular potting soil can be too heavy)
* A spray bottle filled with water
* A heat mat (optional, but helpful)
* A grow light (also optional, but recommended)
2. **Prepare Your Seed Starting Trays:** Fill each cell or pot with seed starting mix. Gently tap the tray to settle the soil.
3. **Sow Your Seeds:** Make a small indentation (about ¼ inch deep) in the center of each cell. Drop 2-3 seeds into each indentation. This increases your chances of at least one seed germinating.
4. **Cover the Seeds:** Gently cover the seeds with a thin layer of seed starting mix.
5. **Water Thoroughly:** Use your spray bottle to moisten the soil. You want it to be damp, but not soggy.
6. **Provide Warmth and Light:** Place your seed starting trays on a heat mat (if using) and under a grow light (if using). If you don’t have a heat mat, a warm spot in your house will do. If you don’t have a grow light, place the trays near a sunny window, but be sure to rotate them regularly to prevent the seedlings from leaning towards the light.
7. **Maintain Moisture:** Keep the soil consistently moist, but not waterlogged. Check the soil daily and mist with your spray bottle as needed.
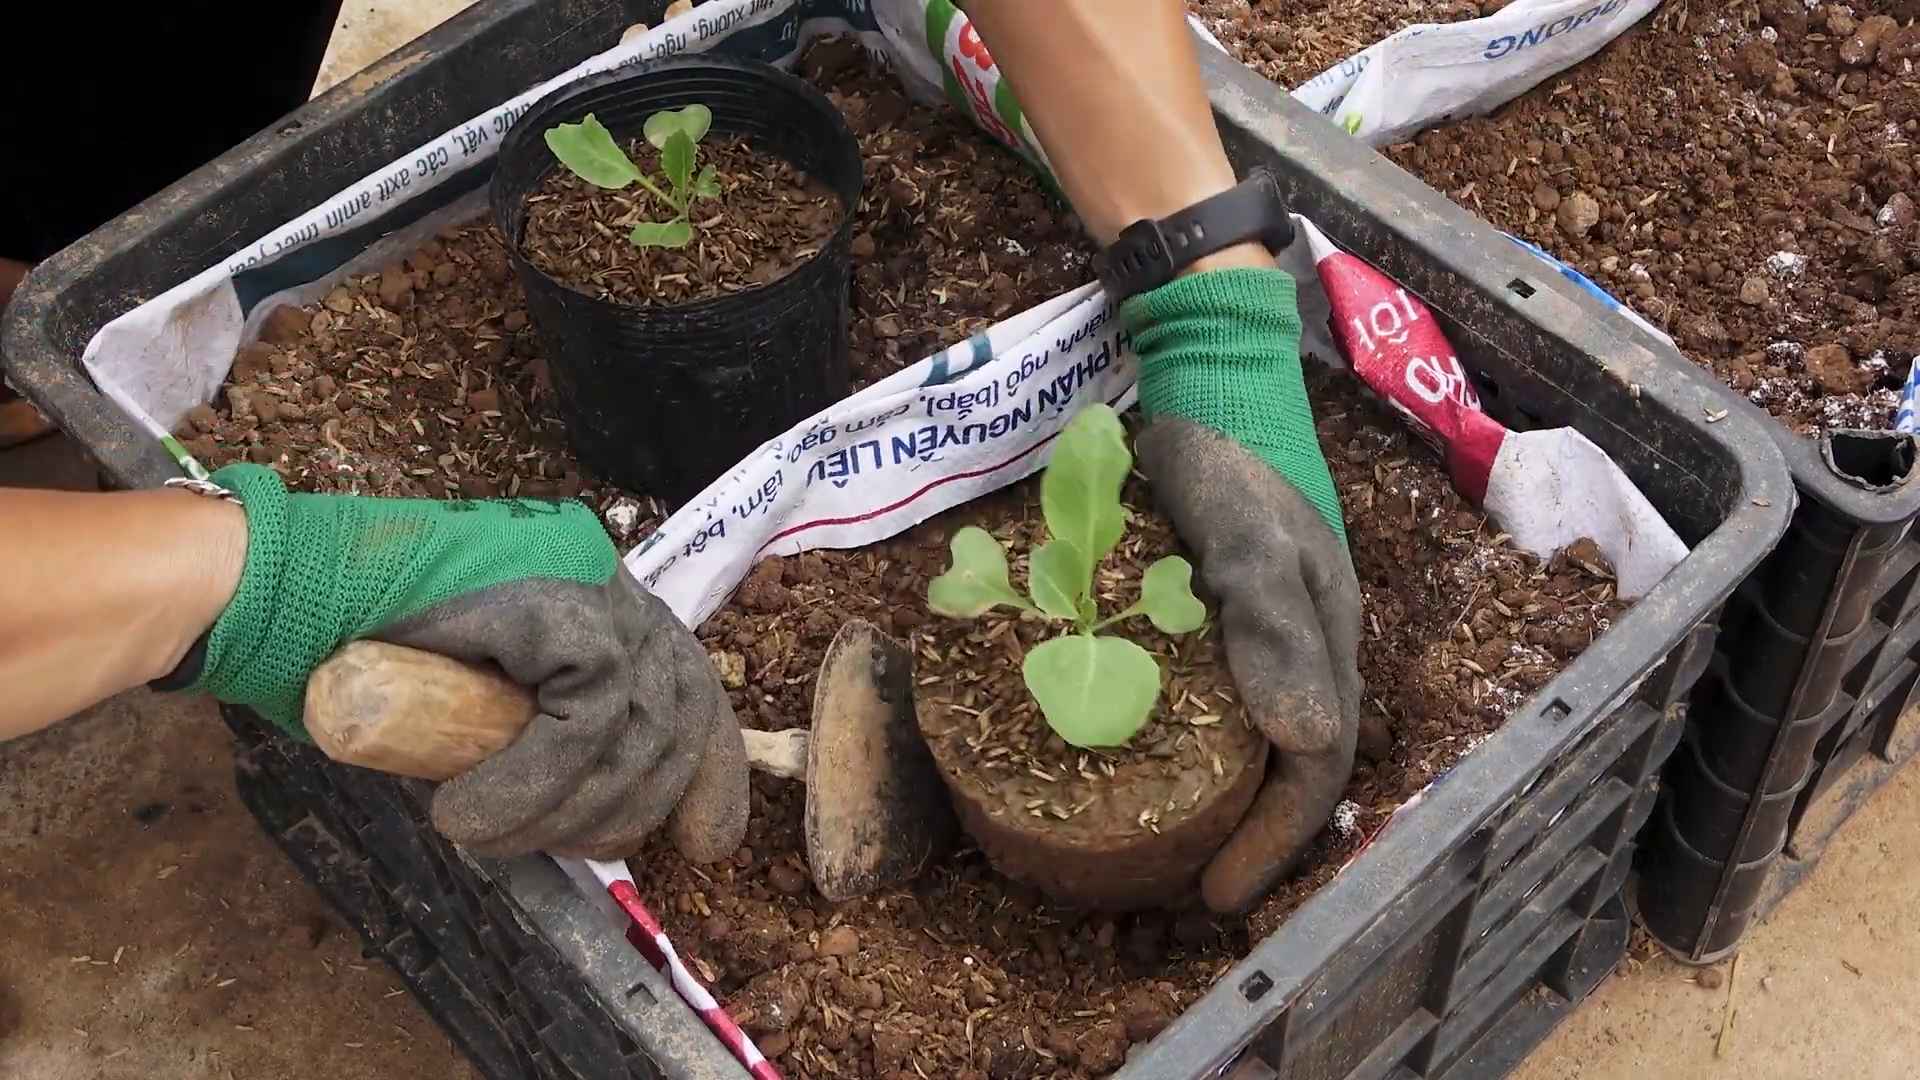
8. **Thin the Seedlings:** Once the seedlings have emerged and have their first true leaves (the second set of leaves), thin them out by snipping off the weaker seedlings at the soil line with scissors. Leave only the strongest seedling in each cell. This gives the remaining seedling plenty of room to grow.
Hardening Off Your Cabbage Seedlings
Before you transplant your cabbage seedlings outdoors, you need to “harden them off.” This process gradually acclimates them to the outdoor environment, preventing shock.
1. **Start a Week Before Transplanting:** About a week before you plan to transplant your seedlings, begin taking them outside for a few hours each day.
2. **Gradual Exposure:** Start with just an hour or two in a sheltered spot, away from direct sunlight and strong winds.
3. **Increase Exposure Daily:** Gradually increase the amount of time they spend outdoors each day, and slowly expose them to more sunlight.
4. **Monitor the Seedlings:** Watch for signs of stress, such as wilting or sunburn. If you see any of these signs, bring the seedlings back inside and reduce their exposure the next day.
Transplanting Your Cabbage Seedlings Outdoors
Now for the exciting part – planting your cabbage babies in the garden!
1. **Choose the Right Location:** Cabbage needs at least 6 hours of sunlight per day. Choose a location with well-drained soil.
2. **Prepare the Soil:** Amend the soil with compost or other organic matter to improve drainage and fertility. Cabbage are heavy feeders!
3. **Space the Seedlings:** Space the seedlings 12-18 inches apart in rows that are 2-3 feet apart. This gives them plenty of room to grow.
4. **Dig the Holes:** Dig holes that are slightly larger than the root balls of the seedlings.
5. **Gently Remove the Seedlings:** Carefully remove the seedlings from their trays or pots. Try to disturb the roots as little as possible.
6. **Plant the Seedlings:** Place the seedlings in the holes and gently backfill with soil. Make sure the top of the root ball is level with the surrounding soil.
7. **Water Thoroughly:** Water the seedlings thoroughly after planting.
8. **Mulch Around the Plants:** Apply a layer of mulch around the plants to help retain moisture, suppress weeds, and regulate soil temperature. Straw, wood chips, or shredded leaves work well.
Caring for Your Cabbage Plants
Once your cabbage plants are in the ground, it’s important to provide them with proper care to ensure a healthy and bountiful harvest.
* **Watering:** Cabbage needs consistent moisture, especially during hot, dry weather. Water deeply whenever the top inch of soil feels dry.
* **Fertilizing:** Cabbage are heavy feeders and benefit from regular fertilization. Use a balanced fertilizer according to the package directions. I like to side-dress my cabbage plants with compost tea every few weeks.
* **Weeding:** Keep the area around your cabbage plants free of weeds. Weeds compete with the cabbage for nutrients and water.
* **Pest Control:** Cabbage can be susceptible to several pests, including cabbage worms, aphids, and flea beetles. Inspect your plants regularly and take action if you see any signs of infestation. Here are a few things I do:
* **Cabbage Worms:** These are the larvae of cabbage white butterflies. They can quickly decimate your cabbage plants. Handpick them off the plants or use Bacillus thuringiensis (Bt), a natural insecticide.
* **Aphids:** These tiny insects suck the sap from plants. Spray them off with a strong stream of water or use insecticidal soap.
* **Flea Beetles:** These tiny beetles chew small holes in the leaves. Cover your plants with row covers to prevent them from reaching the plants.
* **Disease Prevention:** Cabbage can also be susceptible to several diseases, such as black rot and clubroot. Choose disease-resistant varieties and practice good sanitation to prevent these diseases.
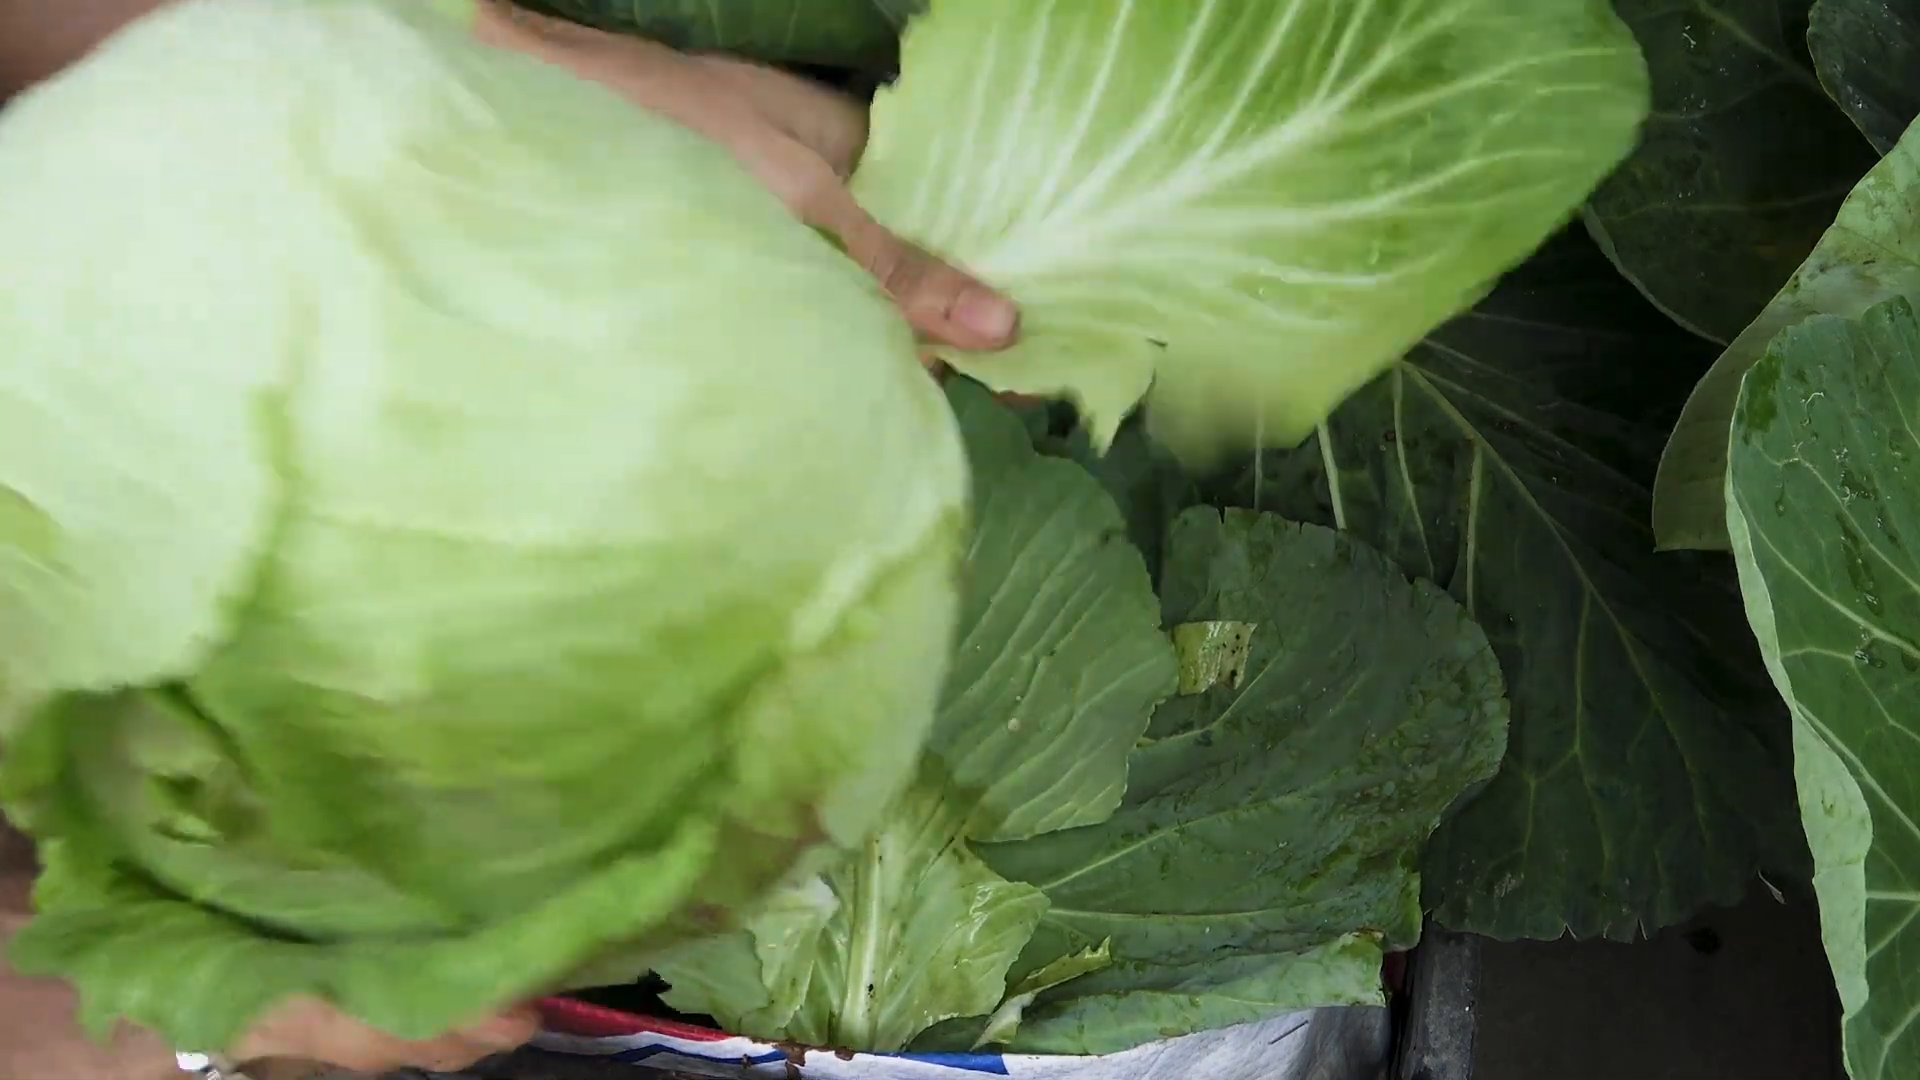
Harvesting Your Cabbage
The moment you’ve been waiting for! Harvesting your cabbage is the culmination of all your hard work.
1. **Check for Maturity:** Cabbage is ready to harvest when the head is firm and solid. The size of the head will vary depending on the variety.
2. **Cut the Head:** Use a sharp knife to cut the head from the stem, leaving a few outer leaves attached.
3. **Store Your Cabbage:** Cabbage can be stored in the refrigerator for several weeks. For longer storage, you can store it in a cool, humid root cellar.
Troubleshooting Common Cabbage Problems
Even with the best care, you might encounter some problems along the way. Here are a few common issues and how to address them:
* **Cabbage Heads Splitting:** This can happen when the cabbage head grows too quickly due to excessive watering or fertilization. To prevent this, water consistently but not excessively, and avoid over-fertilizing.
* **Small Cabbage Heads:** This can be caused by insufficient sunlight, poor soil, or overcrowding. Make sure your cabbage plants are getting at least 6 hours of sunlight per day, amend the soil with compost, and space the plants properly.
* **Pest Infestations:** As mentioned earlier, cabbage can be susceptible to several pests. Inspect your plants regularly and take action if you see any signs of infestation.
Growing cabbage from seed is a rewarding experience. With a little patience and care, you can enjoy fresh, homegrown cabbage all season long. Happy gardening!
Conclusion
So, there you have it! Growing cabbage from seed isn’t just a gardening project; it’s a rewarding journey from tiny speck to crisp, leafy head. We’ve walked through the steps, from selecting the right seeds and preparing your soil to nurturing those delicate seedlings and transplanting them into their final home. You might be thinking, “Is it really worth the effort?” And the answer, unequivocally, is YES!
Why? Because the flavor of homegrown cabbage, bursting with freshness and untainted by long-distance travel, is simply incomparable to anything you can buy in a store. Plus, you have complete control over the growing process, ensuring your cabbage is free from unwanted pesticides and herbicides. You’re not just growing cabbage; you’re cultivating a healthier, more sustainable food source for yourself and your family.
But the benefits extend beyond just taste and health. Gardening is therapeutic. It’s a chance to connect with nature, to get your hands dirty, and to witness the miracle of life unfolding before your eyes. And when you finally harvest that beautiful head of cabbage, you’ll feel a sense of accomplishment that’s hard to match.
Ready to take your cabbage growing to the next level? Consider these variations:
* **Experiment with different varieties:** From the classic green cabbage to the vibrant red and Savoy varieties, there’s a whole world of cabbage to explore. Each variety offers a unique flavor and texture, so don’t be afraid to try something new.
* **Succession planting:** Plant seeds every few weeks to ensure a continuous harvest throughout the growing season. This is especially useful if you have a large family or enjoy making sauerkraut or coleslaw regularly.
* **Companion planting:** Plant cabbage alongside beneficial herbs and flowers like dill, rosemary, and marigolds to deter pests and attract pollinators. This is a natural and effective way to protect your crop.
* Consider container gardening: If you have limited space, growing cabbage in containers is a viable option. Choose a large container with good drainage and use a high-quality potting mix.
Growing cabbage from seed is a skill that will reward you for years to come. It’s a chance to connect with nature, to enjoy fresh, healthy food, and to experience the satisfaction of growing your own. Don’t be intimidated by the process. Take it one step at a time, and remember that even experienced gardeners face challenges along the way. The key is to learn from your mistakes and to keep experimenting until you find what works best for you.
We’re confident that you’ll be amazed by the results. So, grab your seeds, get your hands dirty, and start growing your own delicious cabbage today! And most importantly, we want to hear about your experience. Share your tips, your triumphs, and your challenges in the comments below. Let’s build a community of cabbage growers and learn from each other. Happy gardening!
Frequently Asked Questions (FAQ)
How long does it take to grow cabbage from seed?
The time it takes to grow cabbage from seed to harvest varies depending on the variety and growing conditions. Generally, it takes about 60 to 100 days from transplanting seedlings to harvesting mature heads. Starting seeds indoors can give you a head start, especially in regions with short growing seasons. Keep a close eye on your cabbage plants and harvest them when the heads are firm and tightly packed.
What are the most common problems when growing cabbage, and how can I prevent them?
Cabbage is susceptible to several pests and diseases, including cabbage worms, aphids, clubroot, and black rot. Here’s how to prevent them:
* **Cabbage worms:** These green caterpillars can quickly decimate your cabbage plants. Inspect your plants regularly and handpick any worms you find. You can also use Bacillus thuringiensis (Bt), a natural insecticide that is effective against cabbage worms. Covering your plants with row covers can also prevent moths from laying eggs on your cabbage.
* **Aphids:** These tiny insects suck the sap from cabbage leaves, weakening the plants. Spray aphids with a strong stream of water or use insecticidal soap. Introducing beneficial insects like ladybugs can also help control aphid populations.
* **Clubroot:** This soilborne disease causes swollen, distorted roots and stunted growth. To prevent clubroot, ensure your soil is well-drained and has a pH of 6.5 to 7.0. Rotate your crops regularly and avoid planting cabbage in the same spot year after year. You can also amend your soil with lime to raise the pH.
* **Black rot:** This bacterial disease causes yellowing and browning of cabbage leaves. To prevent black rot, use disease-free seeds and avoid overhead watering. Ensure good air circulation around your plants and remove any infected leaves immediately.
What kind of soil is best for growing cabbage?
Cabbage thrives in well-drained, fertile soil that is rich in organic matter. The ideal soil pH is between 6.5 and 7.0. Before planting, amend your soil with compost or well-rotted manure to improve its fertility and drainage. If your soil is heavy clay, consider adding sand or perlite to improve drainage. A soil test can help you determine the pH and nutrient levels of your soil and make any necessary amendments.
How much sunlight does cabbage need?
Cabbage needs at least 6 hours of direct sunlight per day to grow properly. Choose a sunny location for your cabbage plants and ensure they are not shaded by trees or buildings. If you live in a hot climate, providing some afternoon shade can help prevent the leaves from scorching.
How often should I water cabbage plants?
Cabbage plants need consistent moisture to thrive. Water your plants deeply whenever the top inch of soil feels dry to the touch. Avoid overwatering, as this can lead to root rot. Mulching around your plants can help retain moisture and suppress weeds. During hot, dry weather, you may need to water your cabbage plants more frequently.
When is the best time to harvest cabbage?
Harvest cabbage when the heads are firm and tightly packed. The size of the head will vary depending on the variety. To harvest, use a sharp knife to cut the head from the stem, leaving a few outer leaves attached. You can store cabbage in the refrigerator for several weeks.
Can I grow cabbage in containers?
Yes, you can grow cabbage in containers, but you’ll need to choose a large container with good drainage. A 5-gallon container is a good size for a single cabbage plant. Use a high-quality potting mix and water your plants regularly. Container-grown cabbage may need to be fertilized more frequently than cabbage grown in the ground.
What are some good companion plants for cabbage?
Companion planting can help deter pests, attract pollinators, and improve the overall health of your cabbage plants. Some good companion plants for cabbage include:
* **Dill:** Deters cabbage moths and attracts beneficial insects.
* **Rosemary:** Deters cabbage moths and other pests.
* **Marigolds:** Deters nematodes and other soil pests.
* **Nasturtiums:** Attracts aphids away from cabbage plants.
* **Garlic:** Deters cabbage moths and other pests.
* **Onions:** Deters cabbage moths and other pests.
Can I save seeds from my cabbage plants?
Saving seeds from cabbage is possible, but it’s a bit more involved than saving seeds from some other vegetables. Cabbage is a biennial plant, meaning it takes two years to produce seeds. In the first year, the plant will produce a head of cabbage. In the second year, it will flower and produce seeds. To save seeds, you’ll need to overwinter your cabbage plants and allow them to flower in the spring. Be aware that cabbage can cross-pollinate with other members of the Brassica family, so if you’re growing multiple varieties, you may need to isolate them to prevent cross-pollination.

Leave a Comment