
Growing Potatoes in Containers: Imagine harvesting a bounty of fresh, homegrown potatoes right from your patio or balcony! No sprawling garden needed. I’m here to tell you that it’s easier than you think, and incredibly rewarding. For centuries, potatoes have been a staple food source, playing a vital role in cultures worldwide, from the Andes Mountains where they originated to the tables of families everywhere. But you don’t need acres of farmland to enjoy the taste of freshly dug spuds.
In today’s world, where space is often a premium, and access to fresh, healthy produce can be challenging, growing potatoes in containers offers a fantastic solution. This DIY guide will walk you through simple, effective techniques to cultivate your own potato crop, even if you’re a complete beginner. Forget the back-breaking labor of traditional gardening; container gardening is accessible, manageable, and fun!
Why should you try this DIY trick? Because nothing beats the flavor of homegrown potatoes, and knowing exactly where your food comes from is incredibly satisfying. Plus, it’s a fantastic way to get your hands dirty, connect with nature, and impress your friends and family with your green thumb. Let’s get started and turn your small space into a potato paradise!
Growing Potatoes in Containers: A Bountiful Harvest on Your Patio!
Hey there, fellow gardening enthusiasts! I’m so excited to share one of my favorite DIY gardening projects with you: growing potatoes in containers. It’s surprisingly easy, incredibly rewarding, and perfect for those of us with limited garden space. Forget acres of farmland; you can have a potato harvest right on your balcony or patio! Let’s dive in and get our hands dirty!
What You’ll Need: The Potato Powerhouse Starter Kit
Before we get started, let’s gather our supplies. This is what I’ve found works best for me:
* A Large Container: Think big! We’re talking at least 10-15 gallons. A half-barrel planter, a large plastic tub, or even a sturdy trash can (with drainage holes, of course!) will do the trick. The bigger, the better, as it gives the potatoes room to grow.
* Seed Potatoes: These aren’t your regular grocery store potatoes. Seed potatoes are specifically grown for planting and are certified disease-free. You can find them at your local garden center or online. Choose a variety you love to eat! I personally love Yukon Gold for their creamy texture and fingerling potatoes for their unique shape.
* Well-Draining Potting Mix: This is crucial! Regular garden soil is too dense and won’t allow the potatoes to breathe. Opt for a high-quality potting mix that’s light and airy. You can also amend it with compost for extra nutrients.
* Compost or Aged Manure: This is potato fertilizer! Potatoes are heavy feeders, so adding compost or aged manure to the potting mix will give them the boost they need.
* Watering Can or Hose: Essential for keeping your potato plants hydrated.
* Optional:
* Grow Bags: These are fabric containers that allow for excellent drainage and aeration.
* Potato Fertilizer: A balanced fertilizer specifically formulated for potatoes can further enhance your harvest.
* Mulch: Straw or wood chips can help retain moisture and suppress weeds.
Step-by-Step: From Seed Potato to Spud-tacular Harvest
Okay, now for the fun part! Let’s get those potatoes growing!
1. Prepare Your Seed Potatoes: A week or two before planting, take your seed potatoes and place them in a cool, bright location. This encourages them to sprout, which will give them a head start when planted. If your seed potatoes are large (bigger than an egg), you can cut them into smaller pieces, ensuring each piece has at least one or two “eyes” (those little bumps where sprouts emerge). Let the cut pieces dry for a day or two to callous over, which helps prevent rot. I usually cut mine into pieces about the size of a golf ball.
2. Prepare Your Container: Make sure your container has adequate drainage holes. If not, drill some! Then, add a layer of potting mix to the bottom of the container, about 4-6 inches deep. Mix in some compost or aged manure for added nutrients.
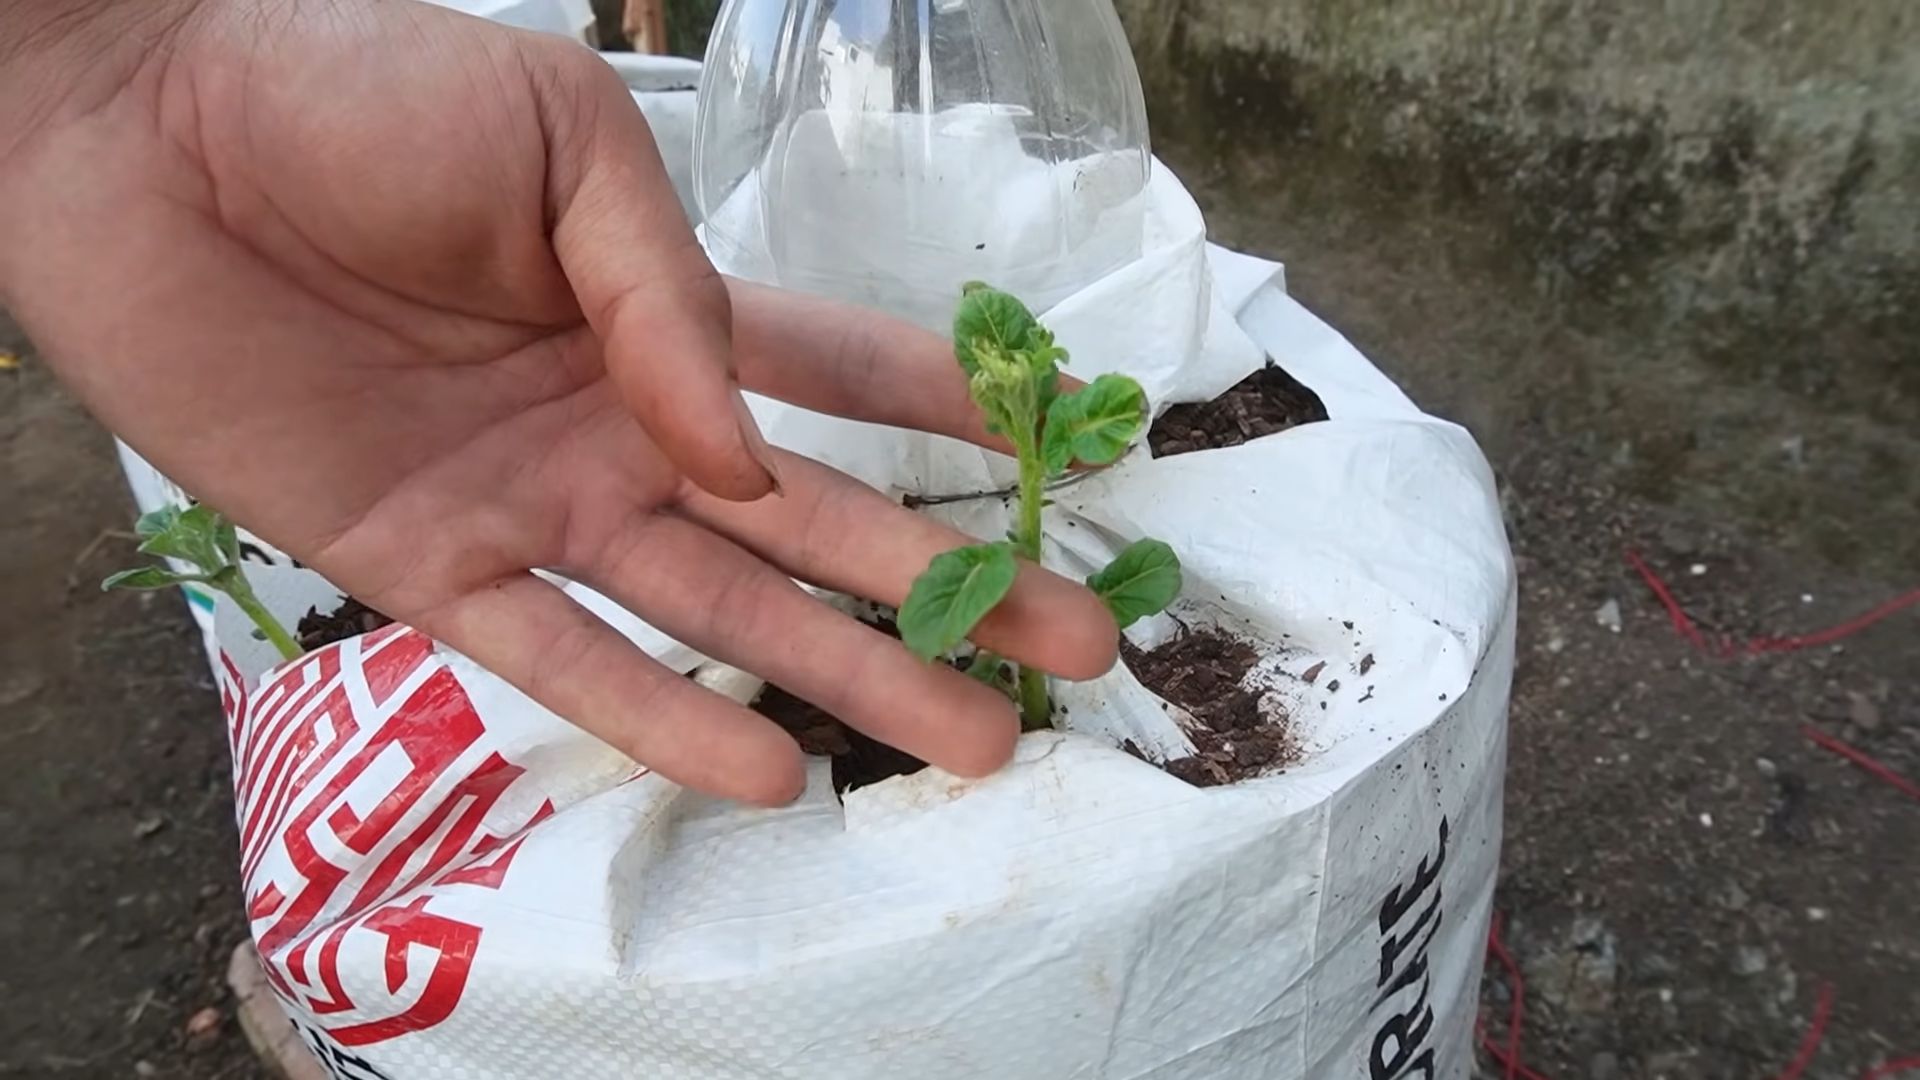
3. Plant Your Seed Potatoes: Place your sprouted seed potato pieces (or whole small seed potatoes) on top of the potting mix, with the sprouts facing upwards. Space them evenly, about 8-10 inches apart. If you’re using a very large container, you can plant multiple seed potatoes.
4. Cover with Soil: Cover the seed potatoes with another 4-6 inches of potting mix. Gently water the soil until it’s moist but not soggy.
5. “Hilling” – The Secret to More Potatoes: This is where the magic happens! As your potato plants grow, they’ll develop stems. When the stems reach about 6-8 inches tall, it’s time to “hill” them. This means adding more potting mix around the base of the stems, burying the lower portion of the plant. This encourages the plant to produce more potatoes along the buried stem.
* Repeat the Hilling Process: Continue hilling every few weeks as the plants grow, until you’ve filled the container almost to the top. Leave a few inches of space at the top for watering. I usually aim to hill about every two weeks, or whenever the stems have grown another 6-8 inches.
6. Watering: Potatoes need consistent moisture, especially during flowering and tuber development. Water deeply whenever the top inch of soil feels dry to the touch. Avoid overwatering, as this can lead to rot. I usually water every other day, but it depends on the weather.
7. Fertilizing: As I mentioned before, potatoes are heavy feeders. In addition to the compost or aged manure you added at planting, you can also fertilize them every few weeks with a balanced potato fertilizer. Follow the instructions on the fertilizer package.
8. Sunlight: Potatoes need at least 6-8 hours of sunlight per day. Place your container in a sunny location where it will receive plenty of light.
9. Pest Control: Keep an eye out for pests like aphids, potato beetles, and flea beetles. If you spot any, you can try hand-picking them off the plants or using an organic insecticide. I prefer to use neem oil, which is a natural insecticide that’s safe for beneficial insects.
Harvest Time: Digging Up Your Treasure!
Now for the moment we’ve all been waiting for: harvest time!
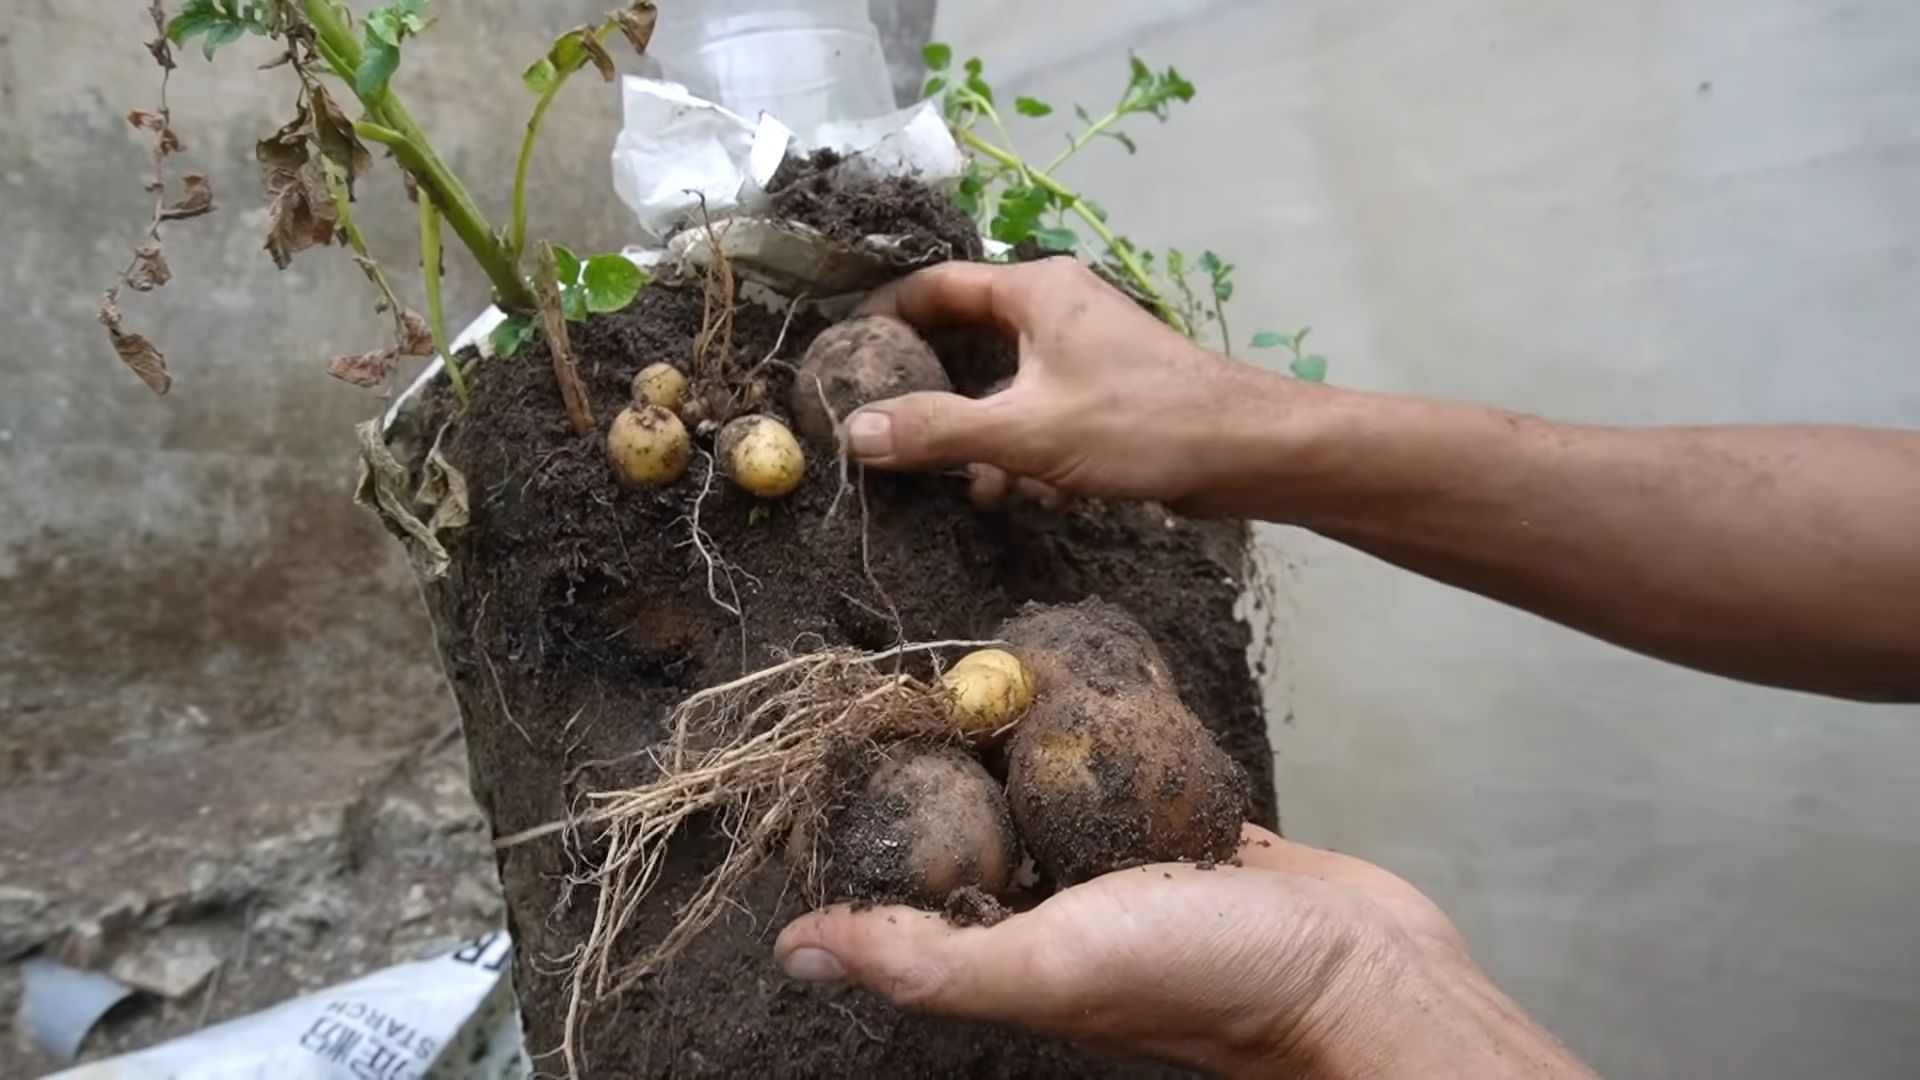
1. When to Harvest: You can start harvesting “new potatoes” (small, tender potatoes) about 7-8 weeks after planting. To harvest new potatoes, carefully dig around the base of the plant and remove a few potatoes, leaving the rest to continue growing. For mature potatoes, wait until the foliage starts to die back and turn yellow or brown. This usually happens about 10-12 weeks after planting.
2. How to Harvest: The easiest way to harvest potatoes from a container is to simply dump the container out onto a tarp or large sheet of plastic. Then, carefully sift through the soil and collect your potatoes! Be gentle, as the skins of new potatoes are delicate.
3. Curing and Storing: If you’re harvesting mature potatoes for long-term storage, you’ll need to cure them first. This involves drying them in a cool, dark, well-ventilated place for about a week. Curing helps to toughen the skins and prevent rot. After curing, store your potatoes in a cool, dark, dry place, such as a root cellar or basement. They should last for several months.
Troubleshooting: Common Potato Problems and Solutions
Even with the best care, you might encounter a few problems along the way. Here are some common issues and how to address them:
* Potato Scab: This is a common fungal disease that causes rough, scabby patches on the potato skins. It’s usually caused by alkaline soil. To prevent potato scab, make sure your soil is slightly acidic (pH 6.0-6.5). You can also add sulfur to the soil to lower the pH.
* Early Blight: This is another fungal disease that causes brown spots on the leaves. It’s more common in humid weather. To prevent early blight, provide good air circulation around your plants and avoid overhead watering. You can also spray your plants with a copper fungicide.
* Potato Beetles: These pesky beetles can quickly defoliate your potato plants. Hand-picking them off the plants is the most effective way to control them. You can also use an insecticide, but be sure to choose one that’s safe for beneficial insects.
* Lack of Potatoes: If your potato plants are growing well but not producing many potatoes, it could be due to a lack of nutrients. Make sure you’re fertilizing your plants regularly with a balanced potato fertilizer. It could also be due to insufficient sunlight. Make sure your plants are getting at least 6-8 hours of sunlight per day.
Variety is the Spice of Life (and Potatoes!): Choosing the Right Potato for You
There are so many different varieties of potatoes to choose from! Here are a few of my favorites:
* Yukon Gold: These are my go-to potatoes for everything from mashed potatoes to roasted potatoes. They have a creamy texture and a slightly sweet flavor.
* Red Pontiac: These potatoes have a red skin and a white flesh. They’re great for boiling, roasting, or making potato salad.
* Fingerling Potatoes: These long, slender potatoes have a unique shape and a nutty flavor. They’re delicious roasted or steamed.
* Russet Potatoes: These are the classic baking potatoes. They have a thick skin and a fluffy flesh.
* Purple Potatoes: These potatoes have a vibrant purple flesh and a slightly earthy flavor. They’re a fun and colorful addition to any meal.
Final Thoughts: Happy Potato Growing!
Growing potatoes in containers is a fun and rewarding experience. With a little bit of care and attention, you can enjoy a bountiful harvest of homegrown potatoes right on your patio or balcony. So, grab your supplies,
Conclusion
So, there you have it! Growing potatoes in containers is not just a gardening trend; it’s a game-changer for anyone with limited space, a desire for fresh, homegrown produce, or simply a yearning to connect with nature. We’ve walked through the process, from selecting the right container and seed potatoes to nurturing your plants and harvesting your bounty. But why is this DIY trick a must-try?
Firstly, the convenience is unparalleled. Imagine stepping onto your balcony or patio and harvesting fresh, flavorful potatoes whenever you need them. No more trips to the grocery store for subpar spuds! Secondly, container gardening gives you complete control over the growing environment. You can choose the perfect soil mix, protect your plants from pests and diseases more easily, and even move them to optimize sunlight exposure. This level of control translates to healthier plants and a more abundant harvest.
Beyond the practical benefits, growing potatoes in containers is incredibly rewarding. There’s something deeply satisfying about nurturing a plant from a small seed potato to a thriving, potato-producing powerhouse. It’s a tangible connection to the earth, a reminder of the simple joys of life, and a fantastic way to reduce your carbon footprint by growing your own food.
But the fun doesn’t stop there! Feel free to experiment with different potato varieties. Try growing colorful potatoes like ‘Purple Majesty’ or ‘All Blue’ for a visually stunning and nutritious addition to your meals. You can also explore different container sizes and materials to find what works best for your space and climate. Consider adding companion plants like marigolds or basil to deter pests and attract beneficial insects.
And speaking of variations, don’t be afraid to get creative with your growing medium. While a standard potting mix works well, you can also incorporate compost, aged manure, or even coconut coir for added nutrients and improved drainage. Some gardeners even use a “lasagna gardening” technique, layering different organic materials in the container to create a rich and fertile growing environment.
Ultimately, the key to success with growing potatoes in containers is to experiment, observe, and learn from your experiences. Pay attention to your plants’ needs, adjust your watering and fertilizing schedule as necessary, and don’t be discouraged by the occasional setback. Gardening is a journey, not a destination, and every mistake is an opportunity to learn and grow.
We wholeheartedly encourage you to give this DIY trick a try. Whether you’re a seasoned gardener or a complete beginner, growing potatoes in containers is a fun, rewarding, and accessible way to enjoy fresh, homegrown produce. And once you’ve harvested your first crop, we’d love to hear about your experience! Share your tips, tricks, and photos in the comments below. Let’s build a community of container potato growers and inspire others to embrace the joys of homegrown food. So, grab your containers, seed potatoes, and potting mix, and get ready to embark on a potato-growing adventure! You’ll be amazed at what you can achieve with a little bit of effort and a whole lot of love. Remember, the best potatoes are the ones you grow yourself!
Frequently Asked Questions (FAQ)
What is the best size container for growing potatoes?
The ideal container size for growing potatoes depends on the variety you choose. Generally, a container that is at least 10 gallons in size is recommended. This provides enough space for the potato plants to develop a healthy root system and produce a decent yield. For smaller, bush-type potato varieties, you might get away with a slightly smaller container, around 7 gallons. However, for larger, more prolific varieties, a 15-20 gallon container is preferable. The key is to ensure that the container is deep enough (at least 12 inches) to allow for the “hilling” process, where you gradually add more soil around the stems as the plants grow. This encourages the development of more potatoes along the buried stems. Remember, bigger is generally better when it comes to container size for potatoes.
What type of soil should I use for growing potatoes in containers?
Potatoes thrive in well-draining, slightly acidic soil. A good potting mix is essential for container gardening, as it provides the necessary nutrients and aeration for healthy root growth. Avoid using garden soil directly in containers, as it can become compacted and poorly drained. A mix of equal parts potting soil, compost, and perlite or vermiculite is ideal. The compost provides essential nutrients, while the perlite or vermiculite improves drainage and aeration. You can also add a slow-release fertilizer to the soil mix to provide a steady supply of nutrients throughout the growing season. Ensure the pH of the soil is between 6.0 and 6.5 for optimal potato growth.
How often should I water my potato plants in containers?
Watering frequency depends on several factors, including the weather, the size of the container, and the type of soil you’re using. Generally, you should water your potato plants whenever the top inch of soil feels dry to the touch. During hot, dry weather, you may need to water them daily. Avoid overwatering, as this can lead to root rot. Ensure that the container has drainage holes to allow excess water to escape. A good way to check if your plants need watering is to stick your finger into the soil. If it feels dry, it’s time to water. Water deeply, until water drains out of the bottom of the container.
How much sunlight do potato plants need?
Potato plants need at least six hours of direct sunlight per day to thrive. Choose a location for your containers that receives plenty of sunlight throughout the day. If you live in a particularly hot climate, you may need to provide some afternoon shade to prevent the plants from overheating. Insufficient sunlight can result in weak, leggy plants and a reduced yield. Observe your plants closely and adjust their location as needed to ensure they are receiving adequate sunlight.
When is the best time to plant potatoes in containers?
The best time to plant potatoes in containers is in early spring, after the last frost. You can start seed potatoes indoors a few weeks before the last frost to give them a head start. To do this, place the seed potatoes in a cool, dark place until they begin to sprout. Once the sprouts are about an inch long, you can plant them in containers. In warmer climates, you can plant potatoes in containers in the fall for a winter harvest. Check your local gardening calendar for specific planting dates in your area.
How do I “hill” potatoes in containers?
Hilling is an essential part of growing potatoes in containers. As the potato plants grow, gradually add more soil around the stems, burying the lower leaves. This encourages the development of more potatoes along the buried stems. Start by filling the container about one-third full with soil. Plant the seed potatoes and water them well. As the plants grow, add more soil around the stems, leaving only the top few leaves exposed. Repeat this process every few weeks until the container is almost full. Hilling provides more space for the potatoes to develop and increases the overall yield.
What are some common pests and diseases that affect potato plants in containers?
Potato plants are susceptible to several pests and diseases, including aphids, potato beetles, and blight. Aphids can be controlled with insecticidal soap or neem oil. Potato beetles can be hand-picked off the plants or controlled with Bacillus thuringiensis (Bt). Blight is a fungal disease that can be prevented by ensuring good air circulation and avoiding overhead watering. If blight does occur, remove the affected leaves and spray the plants with a fungicide. Regularly inspect your plants for signs of pests and diseases and take action promptly to prevent them from spreading.
How do I know when my potatoes are ready to harvest?
Potatoes are typically ready to harvest about 70-90 days after planting, depending on the variety. You can harvest “new potatoes” earlier, when the plants are still flowering. These potatoes will be small and tender. For larger, more mature potatoes, wait until the plants have flowered and the foliage begins to die back. At this point, stop watering the plants and allow the soil to dry out slightly. To harvest, simply tip the container over and carefully remove the potatoes from the soil.
Can I reuse the soil from my potato containers?
Yes, you can reuse the soil from your potato containers, but it’s important to amend it with fresh compost and fertilizer before planting again. Potatoes are heavy feeders and deplete the soil of nutrients. Adding compost and fertilizer will replenish the nutrients and improve the soil structure. You should also check the soil for any signs of pests or diseases and treat it accordingly. Alternatively, you can use the old soil in other parts of your garden or compost it.
What are some good companion plants for potatoes in containers?
Companion planting can help to deter pests, attract beneficial insects, and improve the overall health of your potato plants. Some good companion plants for potatoes include marigolds, basil, thyme, and nasturtiums. Marigolds deter nematodes and other soil pests. Basil repels aphids and other insects. Thyme attracts beneficial insects that prey on potato pests. Nasturtiums attract aphids away from the potato plants. Avoid planting potatoes near tomatoes, as they are both susceptible to the same diseases.
Leave a Comment