
Growing Brussels Sprouts Kitchen: Ever dreamt of snipping fresh, vibrant Brussels sprouts right from your own kitchen? I know I have! Forget those sad, wilted sprouts from the grocery store – imagine the satisfaction of serving up a plate of homegrown goodness. This isn’t just about food; it’s about connecting with nature, even in the smallest of spaces.
While Brussels sprouts might seem like a modern vegetable, their history stretches back centuries. They’re believed to have originated in (you guessed it!) Brussels, Belgium, gaining popularity in the 16th century. For generations, they’ve been a staple in European cuisine, and now, with a little know-how, you can bring that tradition into your own home.
So, why should you bother with growing Brussels sprouts kitchen style? Well, for starters, it’s incredibly rewarding! But more practically, it allows you to control the quality of your food, ensuring it’s free from unwanted pesticides and packed with nutrients. Plus, let’s be honest, it’s a fantastic conversation starter! In this article, I’m going to share some simple, DIY tricks and hacks that will have you harvesting delicious Brussels sprouts from your kitchen in no time. Get ready to unleash your inner urban farmer!
Growing Brussels Sprouts Indoors: A DIY Kitchen Garden Guide
Okay, so you want to grow Brussels sprouts indoors? Awesome! It’s totally doable, and honestly, there’s something super satisfying about harvesting your own little cabbages right from your kitchen. It’s not the easiest project, but with a little patience and the right setup, you can absolutely make it happen. I’m going to walk you through everything you need to know, from choosing the right variety to dealing with those pesky aphids. Let’s get started!
Choosing the Right Brussels Sprouts Variety
Not all Brussels sprouts are created equal, especially when it comes to indoor growing. You’ll want to pick a variety that’s relatively compact and matures quickly. Here are a few that I’ve had success with:
* ‘Jade Cross E’: This is a classic choice, known for its good flavor and relatively small size. It’s a reliable producer and matures in about 90 days.
* ‘Long Island Improved’: Another popular variety, ‘Long Island Improved’ is a bit more tolerant of less-than-perfect conditions, which is great for indoor growing. Expect a harvest in around 100 days.
* ‘Redarling’: If you’re feeling adventurous, try ‘Redarling’. It produces beautiful red-purple sprouts and has a slightly sweeter flavor. It takes a bit longer to mature, around 110 days, so be patient!
Gathering Your Supplies
Before you even think about planting, you need to get your supplies in order. Trust me, having everything ready beforehand will make the whole process much smoother. Here’s what you’ll need:
* Brussels Sprouts Seeds: Obviously! Choose a variety suited for indoor growing, as mentioned above.
* Seed Starting Trays or Small Pots: These are perfect for getting your seeds started. I prefer trays with individual cells, as they make transplanting easier.
* Seed Starting Mix: This is a light, sterile soil mix that’s ideal for delicate seedlings. Don’t use regular garden soil; it’s too heavy and can harbor diseases.
* Larger Pots (at least 12 inches in diameter): Once your seedlings are big enough, you’ll need to transplant them into larger pots. Make sure they have drainage holes!
* Potting Mix: This is different from seed starting mix. You’ll want a well-draining potting mix that’s rich in organic matter.
* Grow Lights: Brussels sprouts need a lot of light, so unless you have a super sunny window, you’ll need grow lights. LED grow lights are energy-efficient and work great.
* Fertilizer: A balanced liquid fertilizer will help your Brussels sprouts thrive. Look for one with an NPK ratio of around 10-10-10.
* Watering Can or Spray Bottle: For gentle watering.
* pH Meter (optional): This can help you monitor the pH of your soil, which should be between 6.0 and 7.5 for Brussels sprouts.
* Pest Control (optional): Be prepared to deal with pests like aphids. Insecticidal soap or neem oil can be helpful.
Starting Your Seeds
Okay, now for the fun part! Let’s get those seeds started.
1. Prepare Your Seed Starting Trays: Fill your seed starting trays or small pots with seed starting mix. Gently tamp it down to remove any air pockets.
2. Sow the Seeds: Plant 2-3 seeds in each cell or pot, about ¼ inch deep.
3. Water Gently: Water the soil gently with a spray bottle or watering can. You want the soil to be moist, but not soggy.
4. Provide Warmth: Brussels sprouts seeds germinate best in warm temperatures (around 70-75°F). You can use a heat mat to speed up germination.
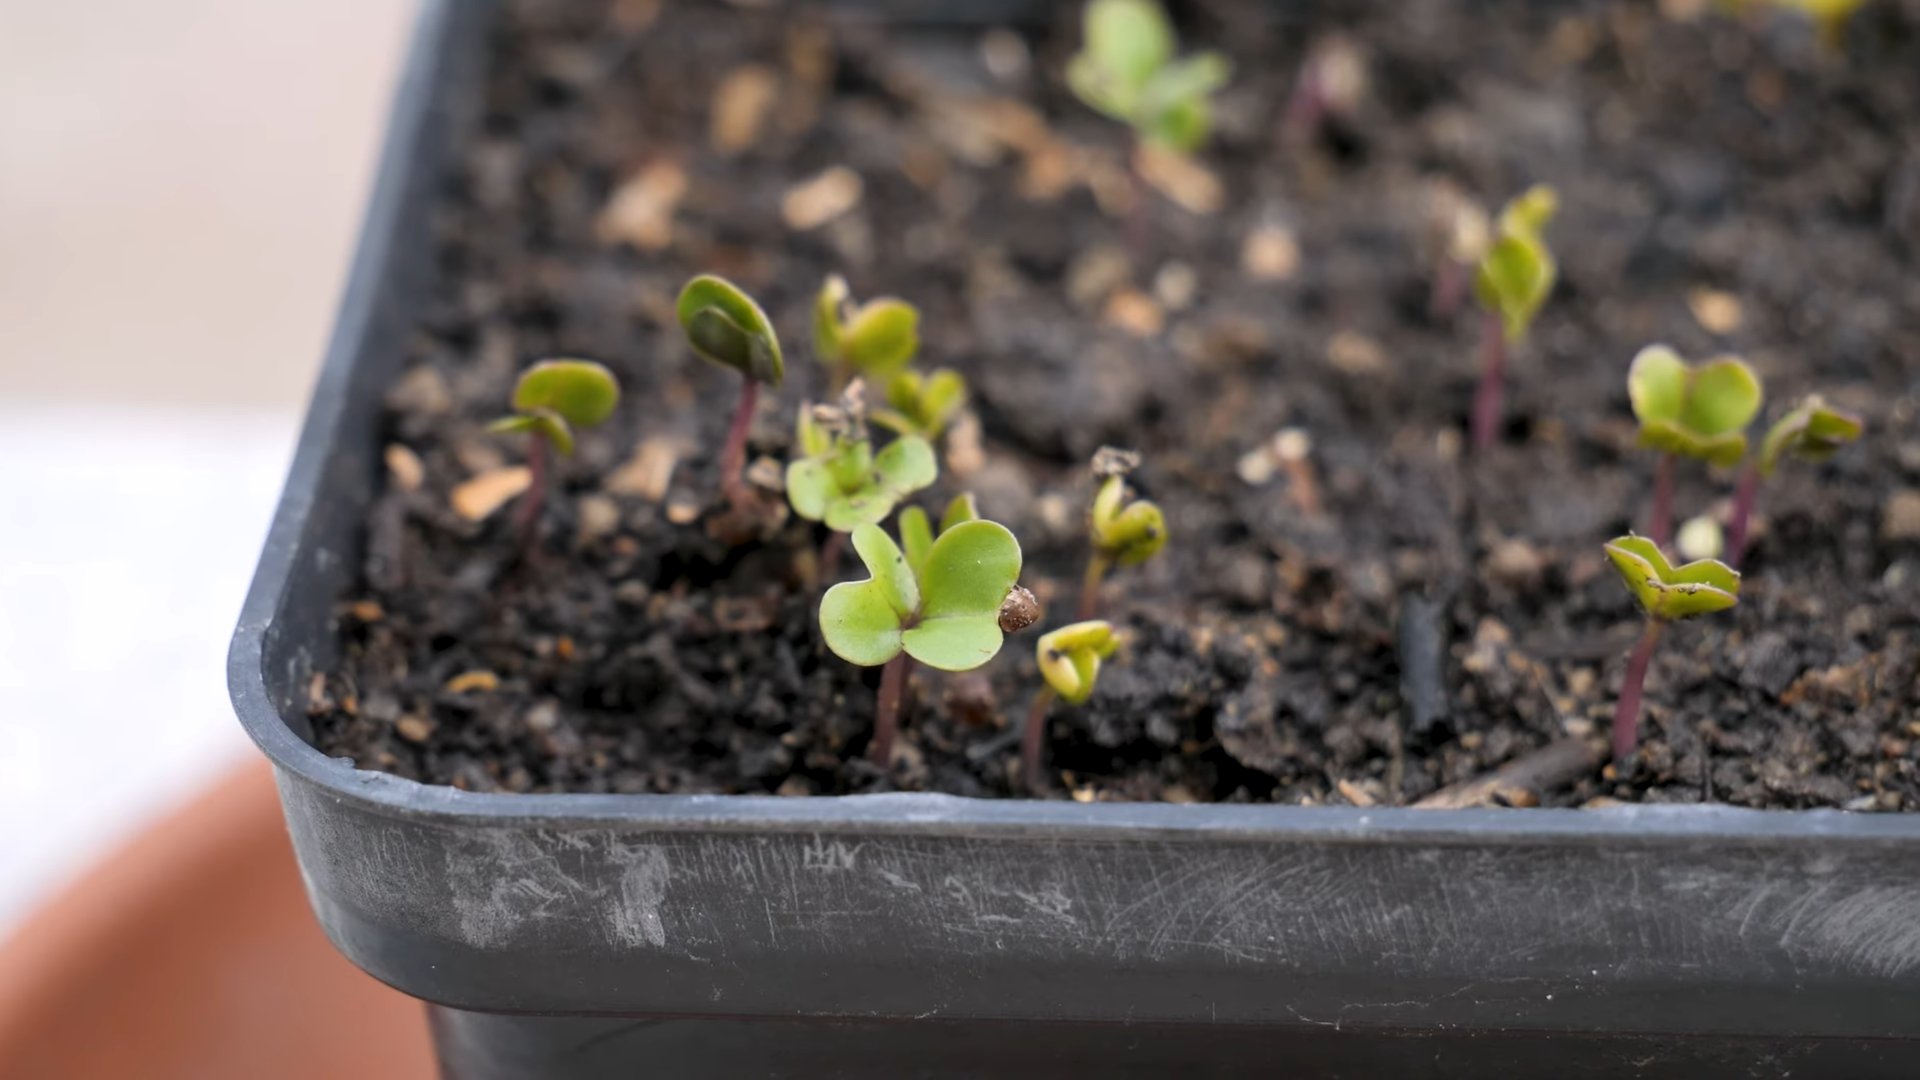
5. Provide Light: Once the seedlings emerge (usually in 5-10 days), place them under grow lights. Keep the lights on for 14-16 hours per day.
6. Thin the Seedlings: Once the seedlings have a few true leaves, thin them to one plant per cell or pot. Choose the strongest, healthiest-looking seedling.
Transplanting Your Seedlings
Once your seedlings are a few inches tall and have a good root system, it’s time to transplant them into larger pots.
1. Prepare Your Larger Pots: Fill your larger pots with potting mix. Again, make sure the pots have drainage holes.
2. Gently Remove the Seedlings: Carefully remove the seedlings from their seed starting trays or pots. Try to disturb the roots as little as possible.
3. Plant the Seedlings: Plant one seedling in each larger pot. Make sure the top of the root ball is level with the soil surface.
4. Water Thoroughly: Water the seedlings thoroughly after transplanting.
5. Provide Support (Optional): As your Brussels sprouts grow, they may need some support. You can use stakes or tomato cages to keep them upright.
Caring for Your Brussels Sprouts
Now that your Brussels sprouts are in their permanent homes, it’s time to focus on providing them with the care they need to thrive.
1. Watering: Water your Brussels sprouts regularly, keeping the soil consistently moist but not waterlogged. Check the soil moisture by sticking your finger into the soil. If the top inch feels dry, it’s time to water.
2. Fertilizing: Fertilize your Brussels sprouts every 2-3 weeks with a balanced liquid fertilizer. Follow the instructions on the fertilizer label.
3. Light: Brussels sprouts need a lot of light, so make sure they’re getting at least 6 hours of direct light per day. If you’re using grow lights, keep them on for 14-16 hours per day.
4. Temperature: Brussels sprouts prefer cool temperatures (around 60-70°F). Avoid exposing them to extreme heat or cold.
5. Humidity: Brussels sprouts prefer moderate humidity. If the air in your home is very dry, you can increase the humidity by using a humidifier or placing a tray of water near the plants.
6. Air Circulation: Good air circulation is important for preventing fungal diseases. Make sure your plants have plenty of space around them, and consider using a small fan to improve air circulation.
Dealing with Pests and Diseases
Unfortunately, Brussels sprouts are susceptible to a few pests and diseases. Here’s what to watch out for and how to deal with them:
* Aphids: These tiny insects can suck the sap from your plants, causing them to weaken and become distorted. You can control aphids by spraying them with insecticidal soap or neem oil.
* Cabbage Worms: These green caterpillars can devour the leaves of your Brussels sprouts. You can control cabbage worms by handpicking them off the plants or by using Bacillus thuringiensis (Bt), a natural insecticide.
* Clubroot: This fungal disease causes the roots of your plants to become swollen and distorted. It’s difficult to control, so prevention is key. Make sure to use sterile potting mix and avoid overwatering.
* Downy Mildew: This fungal disease causes yellow spots on the leaves of your plants. You can control downy mildew by improving air circulation and avoiding overhead watering.
Harvesting Your Brussels Sprouts
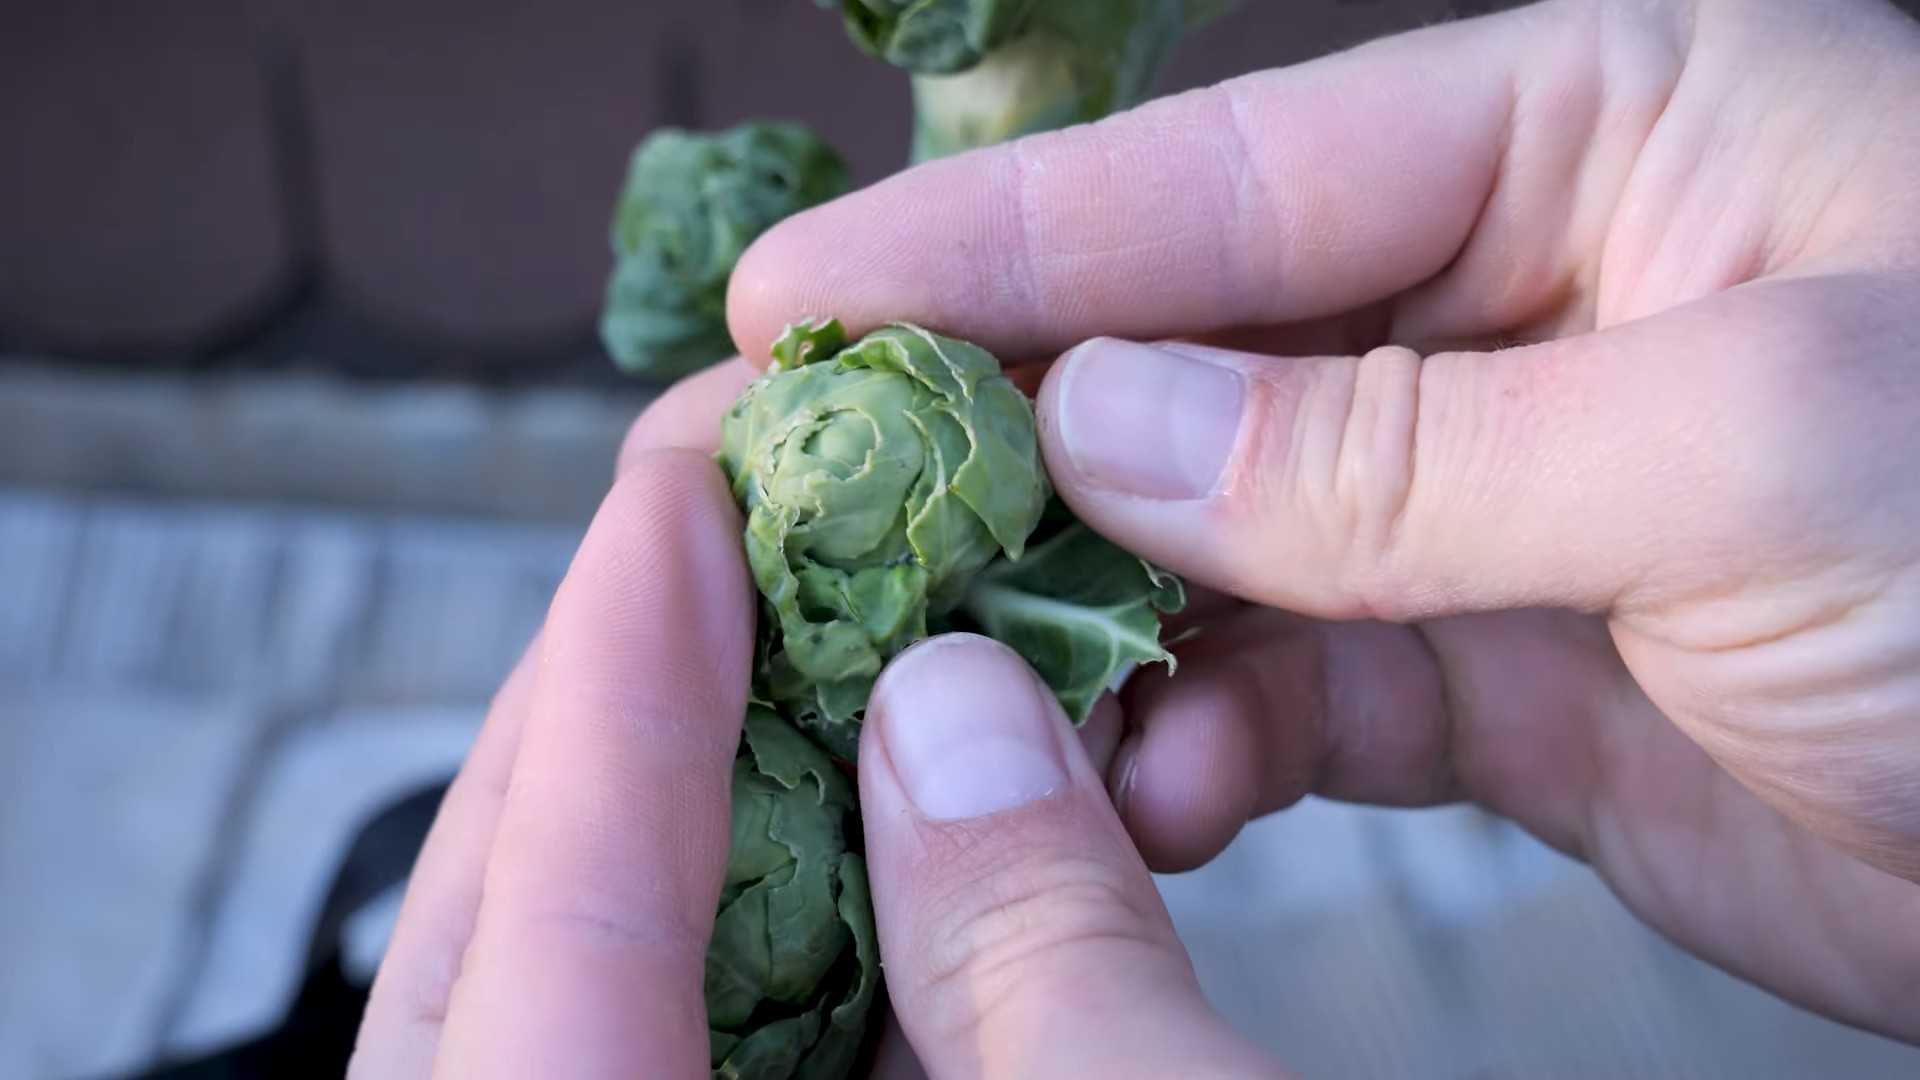
After about 90-110 days, your Brussels sprouts should be ready to harvest. The sprouts should be firm and about 1-2 inches in diameter.
1. Harvest from the Bottom Up: Start harvesting the sprouts from the bottom of the plant, as they mature first.
2. Twist and Snap: Gently twist and snap the sprouts off the stem.
3. Remove Yellowing Leaves: As you harvest the sprouts, remove any yellowing leaves from the plant.
4. Store Your Harvest: Store your harvested Brussels sprouts in the refrigerator for up to a week.
Troubleshooting
Even with the best care, you might run into a few problems along the way. Here are some common issues and how to fix them:
* Sprouts are Small and Loose: This could be due to a lack of nutrients or sunlight. Make sure you’re fertilizing your plants regularly and providing them with plenty of light.
* Plants are Leggy and Weak: This is usually a sign of insufficient light. Move your plants to a sunnier location or provide them with more grow light.
* Leaves are Turning Yellow: This could be due to overwatering, underwatering, or a nutrient deficiency. Check the soil moisture and adjust your watering accordingly. Fertilize your plants if necessary.
* No Sprouts are Forming: This could be due to a lack of pollination. While Brussels sprouts are self-pollinating, you can help them along by gently shaking the plants or using a small brush to transfer pollen
Conclusion
So, there you have it! Growing Brussels sprouts in your kitchen, while perhaps seeming a bit unconventional at first, is a surprisingly rewarding and accessible project. We’ve walked through the entire process, from selecting the right sprouts and preparing them for germination to nurturing those tiny seedlings and eventually transplanting them into larger containers. The beauty of this method lies in its simplicity and control. You’re not at the mercy of unpredictable weather patterns or garden pests. You create the ideal environment for your Brussels sprouts to thrive, right in the comfort of your own home.
But why is this DIY trick a must-try? Beyond the sheer novelty of growing your own vegetables indoors, it offers a unique connection to your food. You witness the entire life cycle of the plant, from seed to sprout to miniature cabbage-like buds. This hands-on experience fosters a deeper appreciation for the effort and resources that go into producing the food we often take for granted. Plus, let’s be honest, there’s a certain satisfaction in harvesting your own fresh, organic Brussels sprouts, knowing exactly where they came from and how they were grown.
And the possibilities don’t stop there! Feel free to experiment with different varieties of Brussels sprouts. Some are known for their sweeter flavor, while others boast a more robust, nutty taste. You can also adjust the lighting and temperature to see how it affects the growth rate and overall yield. Consider using different types of potting mix to find the optimal blend for your indoor garden.
Variations to consider:
* Hydroponics: For a more advanced approach, explore hydroponic systems for growing your Brussels sprouts. This method involves growing plants without soil, using nutrient-rich water solutions.
* Vertical Gardening: If you’re short on space, consider a vertical gardening setup. This allows you to grow multiple plants in a small area, maximizing your yield.
* Succession Planting: Plant new seeds every few weeks to ensure a continuous harvest of fresh Brussels sprouts throughout the growing season.
Ultimately, the success of your indoor Brussels sprouts garden depends on your dedication and attention to detail. But with a little patience and care, you’ll be rewarded with a bountiful harvest of delicious, homegrown vegetables.
We wholeheartedly encourage you to give this DIY trick a try. It’s a fun, educational, and ultimately rewarding experience. And once you’ve harvested your first batch of homegrown Brussels sprouts, we’d love to hear about your experience! Share your photos, tips, and challenges in the comments below. Let’s build a community of indoor gardeners and inspire others to embrace the joy of growing their own food. Don’t forget to share this article with your friends and family who might be interested in learning how to grow Brussels sprouts in their kitchen! Happy growing!
Frequently Asked Questions (FAQ)
What are the best varieties of Brussels sprouts to grow indoors?
While most varieties can be grown indoors, some tend to be more successful than others. Look for compact varieties that are well-suited for container gardening. ‘Long Island Improved’ and ‘Jade Cross’ are popular choices known for their relatively small size and good yields. ‘Rubine’ is a purple variety that adds a splash of color to your indoor garden. Research the specific needs of each variety to ensure you provide the optimal growing conditions.
How much light do Brussels sprouts need when grown indoors?
Brussels sprouts require a significant amount of light, ideally 6-8 hours of direct sunlight per day. If you don’t have a sunny windowsill, you’ll need to supplement with artificial grow lights. LED grow lights are a great option as they are energy-efficient and provide the full spectrum of light that plants need to thrive. Position the lights close to the plants, but not so close that they burn the leaves. Adjust the height of the lights as the plants grow to ensure they receive adequate illumination.
What type of soil is best for growing Brussels sprouts in containers?
A well-draining potting mix is essential for growing Brussels sprouts in containers. Avoid using garden soil, as it can become compacted and prevent proper drainage. A good potting mix should be lightweight, airy, and rich in organic matter. You can also amend your potting mix with perlite or vermiculite to improve drainage and aeration. Consider adding compost to provide essential nutrients to your plants.
How often should I water my indoor Brussels sprouts?
Water your Brussels sprouts regularly, keeping the soil consistently moist but not waterlogged. Check the soil moisture level daily by sticking your finger into the soil. If the top inch of soil feels dry, it’s time to water. Water deeply, allowing the excess water to drain out of the bottom of the container. Avoid overwatering, as this can lead to root rot. Adjust your watering schedule based on the temperature and humidity of your environment.
How do I fertilize my indoor Brussels sprouts?
Brussels sprouts are heavy feeders and require regular fertilization. Start fertilizing your plants a few weeks after they sprout, using a balanced liquid fertilizer diluted to half strength. Fertilize every two weeks, following the instructions on the fertilizer label. You can also use a slow-release fertilizer at the time of planting. As the plants mature and begin to form sprouts, switch to a fertilizer that is higher in potassium, which promotes sprout development.
How long does it take to grow Brussels sprouts indoors?
Brussels sprouts typically take 80-100 days to mature, from seed to harvest. The exact time will depend on the variety, growing conditions, and your climate. Be patient and monitor your plants closely. The sprouts are ready to harvest when they are firm, green, and about 1-2 inches in diameter.
What are some common pests and diseases that affect indoor Brussels sprouts?
While growing indoors reduces the risk of pests and diseases, your plants can still be susceptible to certain problems. Aphids, spider mites, and whiteflies are common pests that can infest indoor plants. Inspect your plants regularly for signs of infestation and take action immediately if you spot any pests. You can use insecticidal soap or neem oil to control pests. Fungal diseases, such as powdery mildew, can also affect Brussels sprouts. Ensure good air circulation around your plants and avoid overwatering to prevent fungal problems.
How do I harvest Brussels sprouts from my indoor plants?
Harvest the sprouts from the bottom of the plant first, as they mature earlier than the sprouts at the top. Gently twist or cut the sprouts off the stem, leaving the leaves intact. You can harvest the sprouts gradually, as they mature, or harvest the entire plant at once. After harvesting, remove the lower leaves to encourage the remaining sprouts to develop.
Can I grow Brussels sprouts indoors year-round?
Yes, you can grow Brussels sprouts indoors year-round, provided you have adequate lighting and temperature control. You may need to adjust your growing schedule to account for the shorter days of winter. Consider using grow lights to supplement natural light and maintain a consistent temperature.
What if my Brussels sprouts are not forming properly?
Several factors can contribute to poorly formed Brussels sprouts. Insufficient light, inadequate fertilization, and improper watering are common culprits. Ensure your plants are receiving enough light, fertilize them regularly, and water them consistently. Also, make sure the temperature is within the optimal range for Brussels sprouts (60-75°F). If the sprouts are too crowded, thin them out to allow for better air circulation and light penetration.
Leave a Comment