
Grow Swiss Chard at Home? Absolutely! And I’m here to tell you it’s easier than you might think. Forget those wilted, overpriced bunches at the grocery store. Imagine stepping into your own backyard and harvesting vibrant, nutritious Swiss chard whenever you need it. Sounds dreamy, right?
For centuries, Swiss chard has been a staple in Mediterranean cuisine, prized not only for its earthy flavor but also for its impressive nutritional profile. From ancient Roman gardens to modern-day kitchen gardens, this leafy green has proven its resilience and versatility. But you don’t need to be a seasoned gardener to enjoy the benefits of fresh, homegrown Swiss chard.
In today’s world, where healthy eating and sustainable living are more important than ever, learning to grow Swiss Chard at Home is a game-changer. Not only will you have access to a constant supply of fresh greens, packed with vitamins and minerals, but you’ll also reduce your carbon footprint and save money. Plus, there’s something incredibly satisfying about nurturing a plant from seed to table. This DIY guide will provide you with simple, effective tricks and hacks to cultivate a thriving Swiss chard patch, even if you have limited space or gardening experience. Let’s get our hands dirty and unlock the secrets to a bountiful harvest!
Growing Swiss Chard at Home: A Beginner’s Guide
Hey there, fellow gardening enthusiasts! I’m so excited to share my experience with growing Swiss chard at home. It’s surprisingly easy, incredibly rewarding, and adds a vibrant splash of color to your garden (and your plate!). Swiss chard is packed with nutrients, tastes delicious, and is incredibly versatile in the kitchen. Plus, it’s a cut-and-come-again crop, meaning you can harvest leaves continuously throughout the growing season. Let’s dive in!
Choosing Your Swiss Chard Variety
Before we get our hands dirty, let’s talk about choosing the right variety of Swiss chard. There are several options, each with its own unique characteristics:
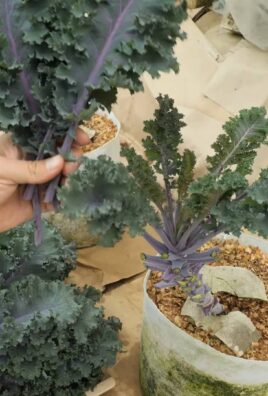
* Bright Lights: This is my personal favorite! It boasts a stunning array of stem colors – red, yellow, orange, pink, and white. It’s not just beautiful; it’s also incredibly flavorful.
* Fordhook Giant: If you’re looking for large, dark green leaves and thick, white stalks, Fordhook Giant is an excellent choice. It’s known for its robust growth and heat tolerance.
* Lucullus: This variety offers crinkled, light green leaves and thick, pale green stalks. It has a mild, slightly sweet flavor.
* Ruby Red: As the name suggests, Ruby Red features vibrant red stalks and dark green leaves. It’s a visually striking variety that adds a pop of color to any dish.
Consider your climate, personal preferences, and available space when selecting your Swiss chard variety. I recommend starting with Bright Lights – it’s a real showstopper!
Starting from Seed vs. Transplants
You have two options for starting your Swiss chard: from seed or from transplants. Both have their advantages and disadvantages:
* Starting from Seed: This is the more economical option, and it allows you to choose from a wider variety of cultivars. However, it requires a bit more patience and attention.
* Using Transplants: Transplants are a great option if you’re short on time or want a head start on the growing season. They’re readily available at most garden centers.
I personally prefer starting from seed because I enjoy the entire process, from sowing the seeds to watching them sprout and grow. Plus, it’s a great way to save money!
Sowing Seeds Indoors (Optional)
If you live in a region with a short growing season, you might want to start your Swiss chard seeds indoors 4-6 weeks before the last expected frost. Here’s how:
1. Gather Your Supplies: You’ll need seed starting trays or small pots, seed starting mix, Swiss chard seeds, a spray bottle, and a warm, sunny location or grow lights.
2. Fill the Trays/Pots: Fill your seed starting trays or pots with seed starting mix, leaving about half an inch of space at the top.
3. Sow the Seeds: Sow 2-3 seeds per cell or pot, about half an inch deep.
4. Water Gently: Use a spray bottle to gently moisten the soil. Avoid overwatering, as this can lead to damping off.
5. Provide Warmth and Light: Place the trays or pots in a warm, sunny location or under grow lights. Maintain a temperature of around 70-75°F (21-24°C).
6. Keep the Soil Moist: Check the soil moisture regularly and water as needed to keep it consistently moist but not soggy.
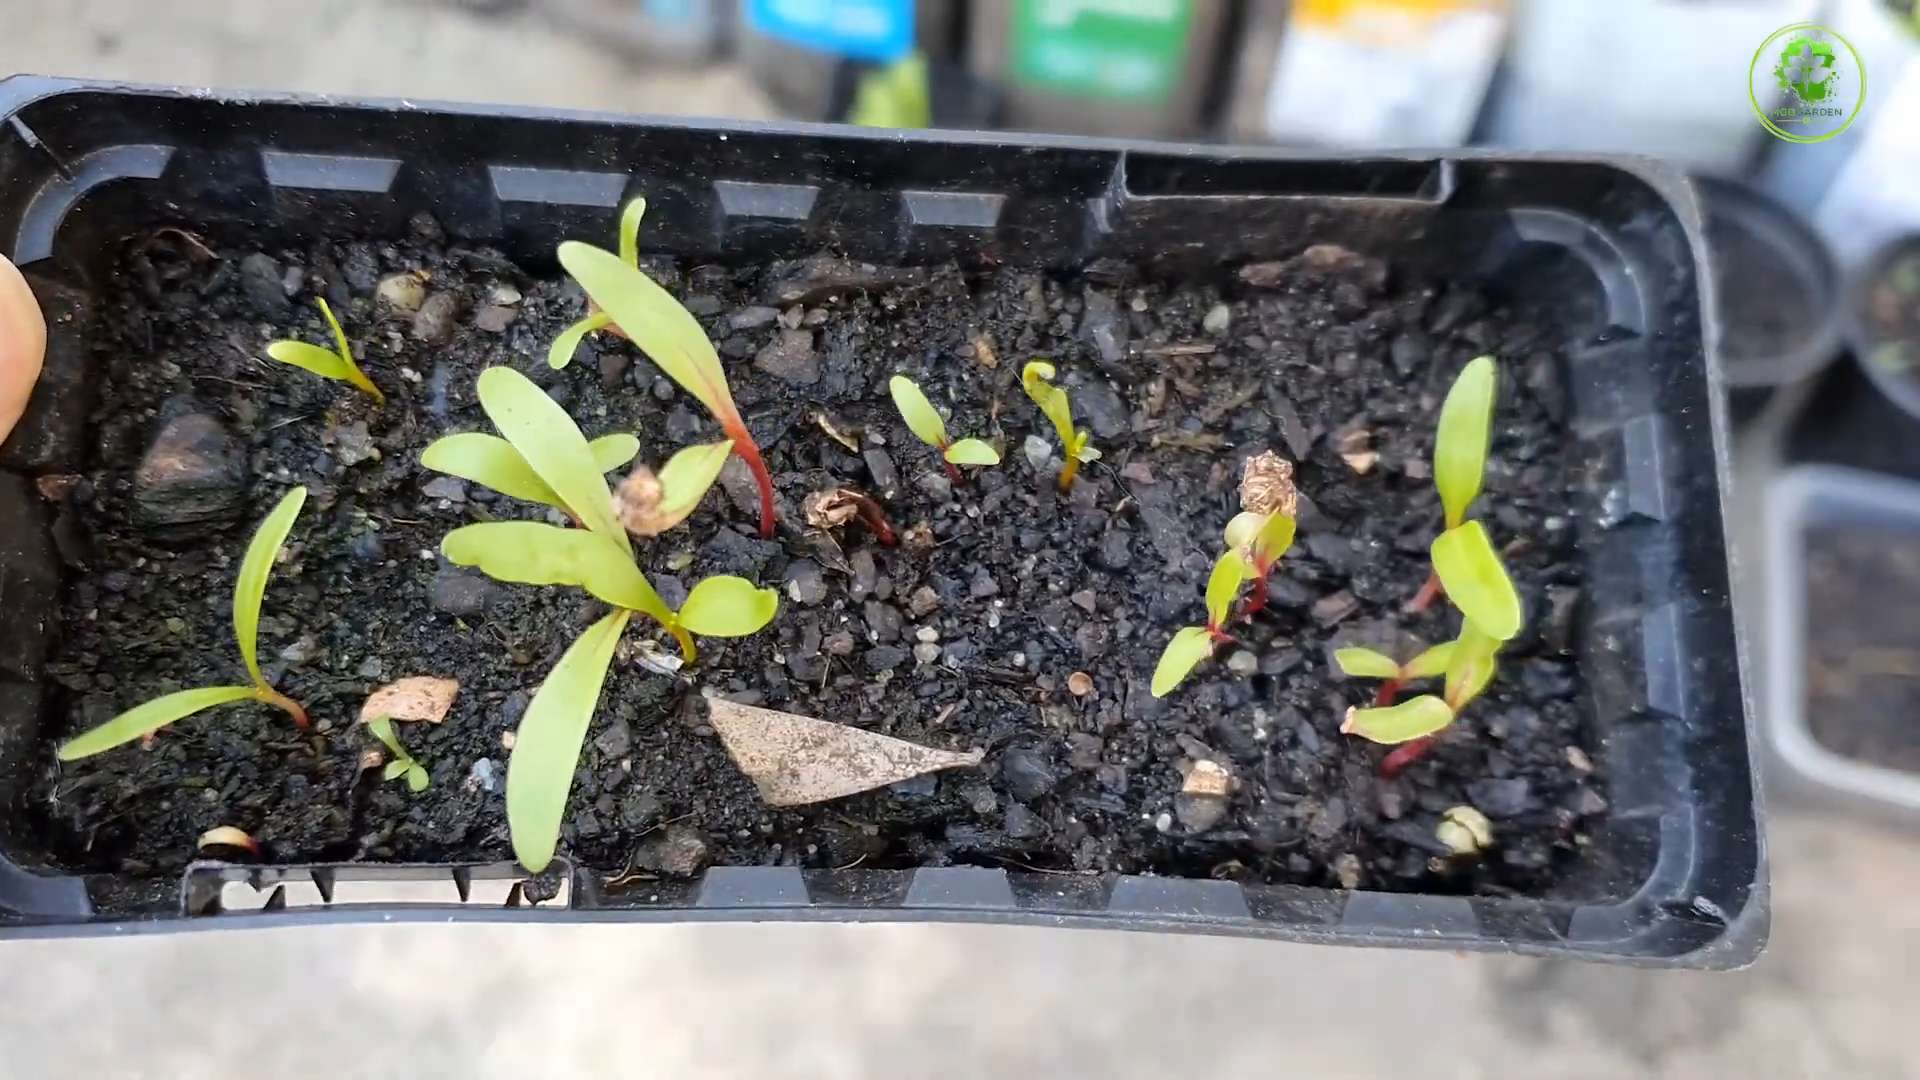
7. Thin Seedlings: Once the seedlings emerge (usually within 5-10 days), thin them to one seedling per cell or pot. Choose the strongest, healthiest seedling and snip off the others at the soil line.
Direct Sowing Seeds Outdoors
If you live in a region with a longer growing season, you can direct sow your Swiss chard seeds outdoors. Here’s how:
1. Prepare the Soil: Choose a location that receives at least 6 hours of sunlight per day. Swiss chard prefers well-drained soil that is rich in organic matter. Amend the soil with compost or well-rotted manure before planting.
2. Sow the Seeds: Sow the seeds about half an inch deep and 1-2 inches apart in rows that are 18-24 inches apart.
3. Water Gently: Water the soil gently after sowing to ensure good seed-to-soil contact.
4. Keep the Soil Moist: Keep the soil consistently moist until the seeds germinate.
5. Thin Seedlings: Once the seedlings emerge, thin them to 6-12 inches apart. This will give them enough space to grow and develop.
Transplanting Seedlings (If Starting Indoors)
Once your seedlings have developed a few sets of true leaves and the danger of frost has passed, it’s time to transplant them outdoors.
1. Harden Off Seedlings: Before transplanting, you’ll need to harden off your seedlings. This process gradually acclimates them to outdoor conditions. Start by placing the seedlings outdoors in a sheltered location for a few hours each day, gradually increasing the amount of time they spend outdoors over the course of a week.
2. Prepare the Planting Site: Choose a location that receives at least 6 hours of sunlight per day. Amend the soil with compost or well-rotted manure before planting.
3. Transplant Seedlings: Dig holes that are slightly larger than the root balls of the seedlings. Gently remove the seedlings from their containers and place them in the holes. Backfill with soil and water thoroughly. Space the seedlings 6-12 inches apart.
Caring for Your Swiss Chard
Once your Swiss chard is planted, it’s relatively easy to care for. Here are a few tips:
* Watering: Water regularly, especially during dry periods. Swiss chard prefers consistently moist soil.
* Fertilizing: Fertilize every few weeks with a balanced fertilizer or compost tea.
* Weeding: Keep the area around your Swiss chard free of weeds. Weeds can compete with your plants for nutrients and water.
* Pest Control: Swiss chard is relatively pest-resistant, but it can be susceptible to aphids, slugs, and snails. Handpick pests as needed or use organic pest control methods.
* Bolting: Bolting is when the plant starts to produce flowers and seeds prematurely. This can happen when the weather gets too hot. To prevent bolting, provide shade during the hottest part of the day and water regularly.
Harvesting Your Swiss Chard
One of the best things about growing Swiss chard is that you can harvest it continuously throughout the growing season.
1. When to Harvest: You can start harvesting Swiss chard when the leaves are about 6 inches long.
2. How to Harvest: Use a sharp knife or scissors to cut the outer leaves near the base of the plant. Leave the inner leaves to continue growing.
3. Cut-and-Come-Again: Swiss chard is a cut-and-come-again crop, meaning you can harvest leaves repeatedly throughout the growing season. Just be sure to leave enough leaves on the plant to allow it to continue growing.
Using Your Harvest
Swiss chard is incredibly versatile in the kitchen. You can use it in salads, soups, stews, stir-fries, and more. Here are a few of my favorite ways to use Swiss chard:
* Sautéed Swiss Chard: Sauté Swiss chard with garlic, olive oil, and a pinch of red pepper flakes for a simple and delicious side dish.
* Swiss Chard and Ricotta Tart: Use Swiss chard in a savory tart with ricotta cheese and herbs.
* Swiss Chard Soup: Add Swiss chard to your favorite soup recipe for a boost of nutrients and flavor.
* Swiss Chard Smoothies: Blend Swiss chard into your smoothies for a healthy and refreshing drink.
Troubleshooting Common Problems
Even with the best care, you might encounter a few problems when growing Swiss chard. Here are some common issues and how to address them:
* Aphids: These tiny pests can suck the sap from your plants, causing them to weaken and become distorted. Spray aphids with a strong stream of water or use insecticidal soap.
* Slugs and Snails: These pests can chew holes in the leaves of your Swiss chard. Handpick them as needed or use slug and snail bait.
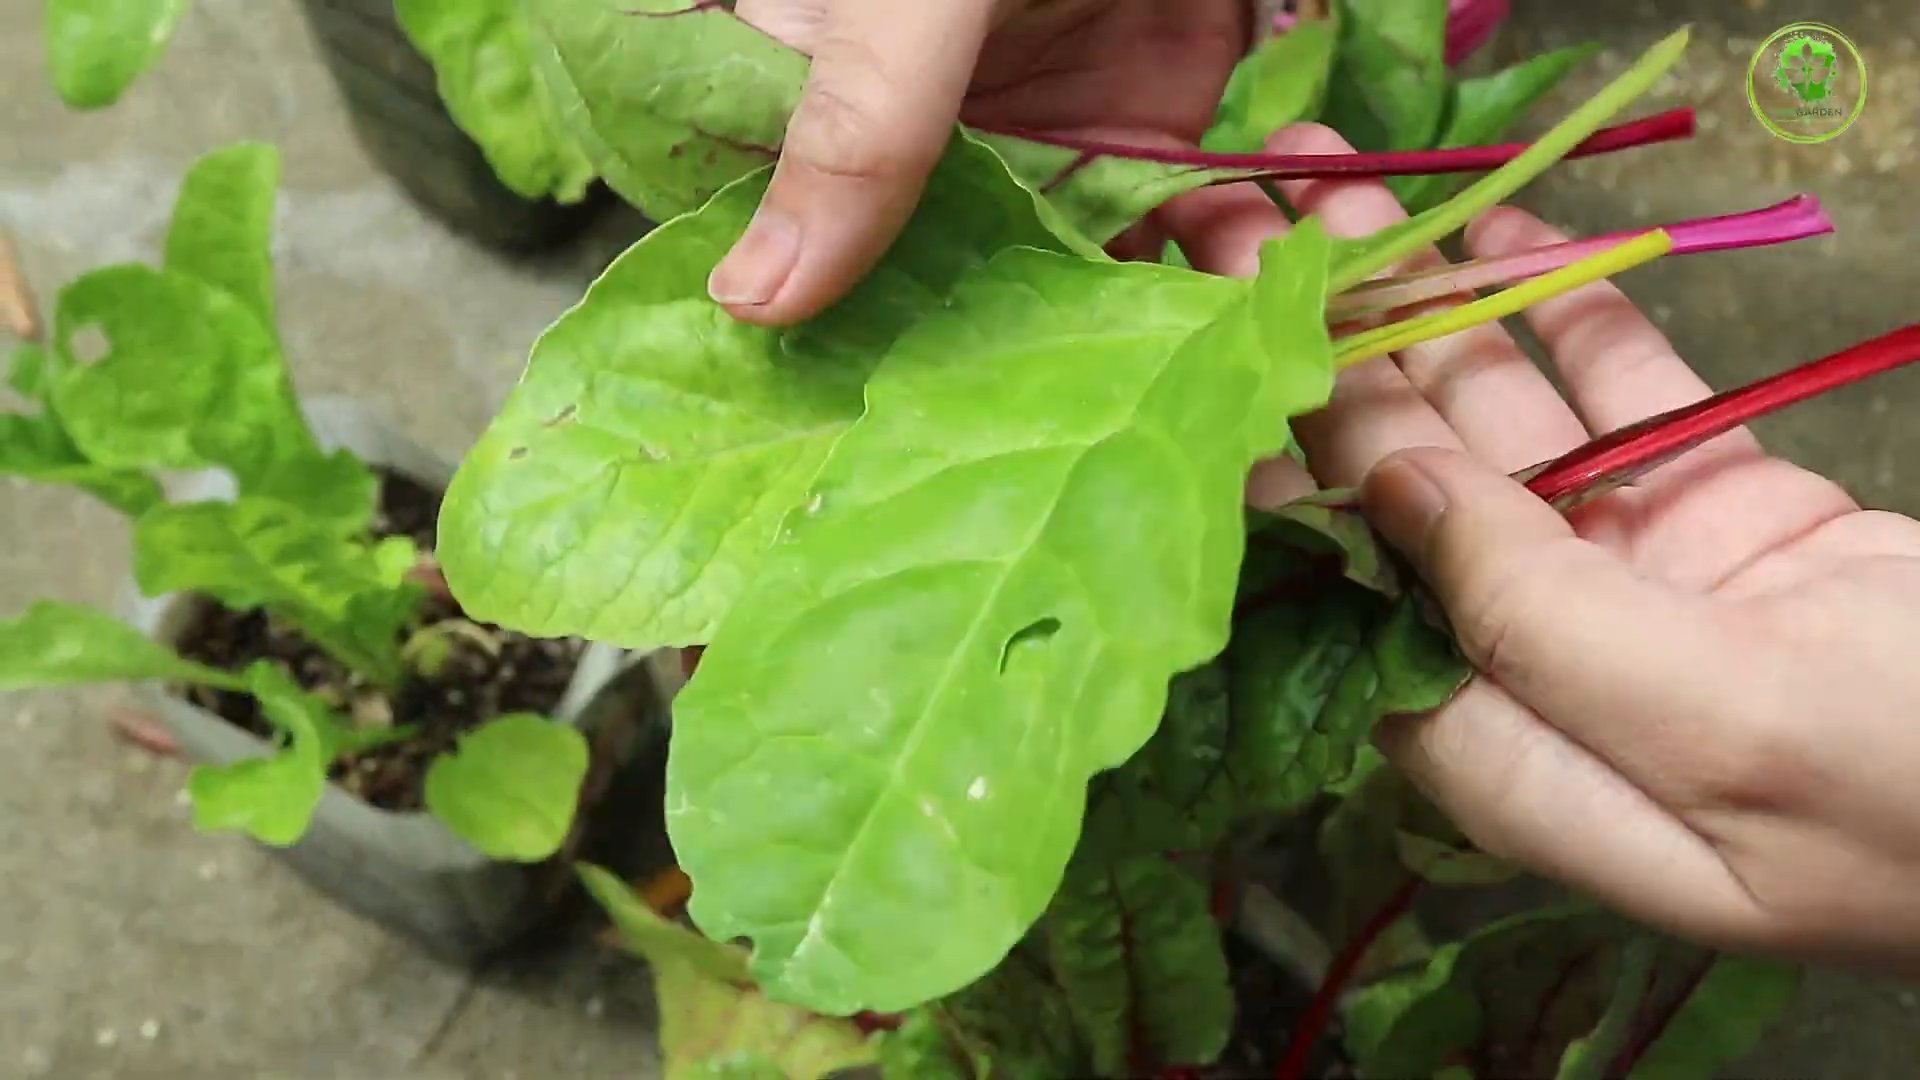
* Leaf Miners: These pests tunnel through the leaves of your Swiss chard, leaving unsightly trails. Remove and destroy affected leaves.
* Bolting: As mentioned earlier, bolting can occur when the weather gets too hot. Provide shade during the hottest part of the day and water regularly to prevent bolting.
Extending the Harvest
If you live in a region with cold winters, you can extend the harvest of your Swiss chard by protecting it
Conclusion
So, there you have it! Growing Swiss chard at home is not only surprisingly simple, but it’s also incredibly rewarding. Imagine stepping out into your garden and harvesting fresh, vibrant leaves for your next salad, stir-fry, or side dish. Forget those wilted, overpriced bunches at the grocery store – with a little effort, you can have a constant supply of this nutritious and delicious leafy green right at your fingertips.
This DIY approach to growing Swiss chard offers a multitude of benefits. You’re in complete control of the growing process, ensuring that your chard is free from harmful pesticides and herbicides. Plus, you’ll save money in the long run, especially if you regularly consume Swiss chard. But perhaps the most compelling reason to try this is the sheer satisfaction of nurturing something from seed to table. There’s a unique joy in harvesting food you’ve grown yourself, and Swiss chard is a fantastic entry point for beginner gardeners.
Don’t be afraid to experiment with different varieties of Swiss chard! From the classic ‘Lucullus’ with its crinkled green leaves to the vibrant ‘Bright Lights’ with its rainbow of colorful stems, there’s a chard variety to suit every taste and garden aesthetic. You can also try growing Swiss chard in containers if you have limited space, making it accessible even for apartment dwellers. Consider companion planting with herbs like basil or rosemary to deter pests and enhance the flavor of your chard.
Growing Swiss chard at home is a game-changer. It’s a sustainable, healthy, and cost-effective way to enjoy this versatile vegetable. We highly encourage you to give it a try. Start small, learn as you go, and don’t be discouraged by initial setbacks. Gardening is a journey, and every mistake is a learning opportunity.
We’re confident that you’ll be amazed by how easy and enjoyable it is to grow your own Swiss chard. Once you’ve tasted the difference between homegrown and store-bought, you’ll never go back! So, grab some seeds, prepare your soil, and get ready to embark on a rewarding gardening adventure.
And most importantly, we want to hear about your experience! Share your tips, tricks, and photos in the comments below. Let us know what varieties you’re growing, what challenges you’ve faced, and what successes you’ve celebrated. Together, we can create a community of Swiss chard enthusiasts and inspire others to embrace the joys of homegrown goodness. Happy gardening!
Frequently Asked Questions (FAQ)
What is the best time of year to plant Swiss chard?
Swiss chard is a cool-season crop, meaning it thrives in cooler temperatures. The best time to plant Swiss chard depends on your climate. In areas with mild winters, you can plant it in the fall for a winter or early spring harvest. In colder climates, plant Swiss chard in the spring, after the last frost. You can also start seeds indoors 4-6 weeks before the last frost and transplant them outdoors once the weather warms up. For a continuous harvest, consider succession planting, sowing new seeds every few weeks.
How much sunlight does Swiss chard need?
Swiss chard prefers full sun, which means at least 6 hours of direct sunlight per day. However, it can tolerate partial shade, especially in hotter climates. If you live in a region with intense summer heat, providing some afternoon shade can help prevent the leaves from wilting or scorching. When growing Swiss chard indoors, use grow lights to supplement natural sunlight and ensure adequate light exposure.
What kind of soil is best for growing Swiss chard?
Swiss chard prefers well-drained soil that is rich in organic matter. Amend your soil with compost or aged manure before planting to improve its fertility and drainage. The ideal soil pH for Swiss chard is between 6.0 and 7.5. You can test your soil pH using a soil testing kit and adjust it accordingly with lime (to raise the pH) or sulfur (to lower the pH). Avoid heavy clay soils, as they can become waterlogged and hinder root growth.
How often should I water Swiss chard?
Swiss chard needs consistent moisture to thrive. Water deeply and regularly, especially during dry periods. Aim to keep the soil consistently moist but not waterlogged. Check the soil moisture by sticking your finger about an inch deep into the soil. If it feels dry, it’s time to water. Mulching around your Swiss chard plants can help retain moisture and suppress weeds.
What are some common pests and diseases that affect Swiss chard?
Swiss chard is generally resistant to pests and diseases, but it can be susceptible to certain problems. Common pests include aphids, flea beetles, and leaf miners. You can control aphids with insecticidal soap or by introducing beneficial insects like ladybugs. Flea beetles can be deterred with row covers or by spraying with neem oil. Leaf miners can be controlled by removing and destroying infested leaves. Diseases that can affect Swiss chard include fungal leaf spots and downy mildew. Prevent these diseases by providing good air circulation, avoiding overhead watering, and using disease-resistant varieties.
How do I harvest Swiss chard?
You can begin harvesting Swiss chard leaves when they are about 6 inches long. Harvest the outer leaves first, leaving the inner leaves to continue growing. This cut-and-come-again method allows you to harvest Swiss chard continuously throughout the growing season. Use a sharp knife or scissors to cut the leaves near the base of the plant. Avoid damaging the central bud, as this will prevent new leaves from growing.
Can I eat the stems of Swiss chard?
Yes, the stems of Swiss chard are edible and delicious! They have a slightly different texture and flavor than the leaves, but they are equally nutritious. You can cook the stems separately from the leaves, as they take longer to cook. Try sautéing them with garlic and olive oil, or adding them to soups and stews. The colorful stems of varieties like ‘Bright Lights’ add a beautiful touch to any dish.
How do I store Swiss chard after harvesting?
To store Swiss chard, wash the leaves thoroughly and pat them dry. Wrap them loosely in a damp paper towel and store them in a plastic bag in the refrigerator. Swiss chard will typically last for about a week in the refrigerator. You can also freeze Swiss chard for longer storage. To freeze it, blanch the leaves in boiling water for 2 minutes, then plunge them into ice water to stop the cooking process. Drain the leaves well and pack them into freezer bags or containers.
Can I grow Swiss chard in containers?
Yes, Swiss chard grows well in containers, making it a great option for gardeners with limited space. Choose a container that is at least 12 inches deep and wide to allow the roots to grow properly. Use a well-draining potting mix and provide adequate sunlight and water. Container-grown Swiss chard may need to be fertilized more frequently than plants grown in the ground.
Is Swiss chard nutritious?
Yes, Swiss chard is a nutritional powerhouse! It is an excellent source of vitamins A, C, and K, as well as minerals like magnesium, potassium, and iron. It is also a good source of fiber and antioxidants. Swiss chard is low in calories and fat, making it a healthy addition to any diet.
Leave a Comment