
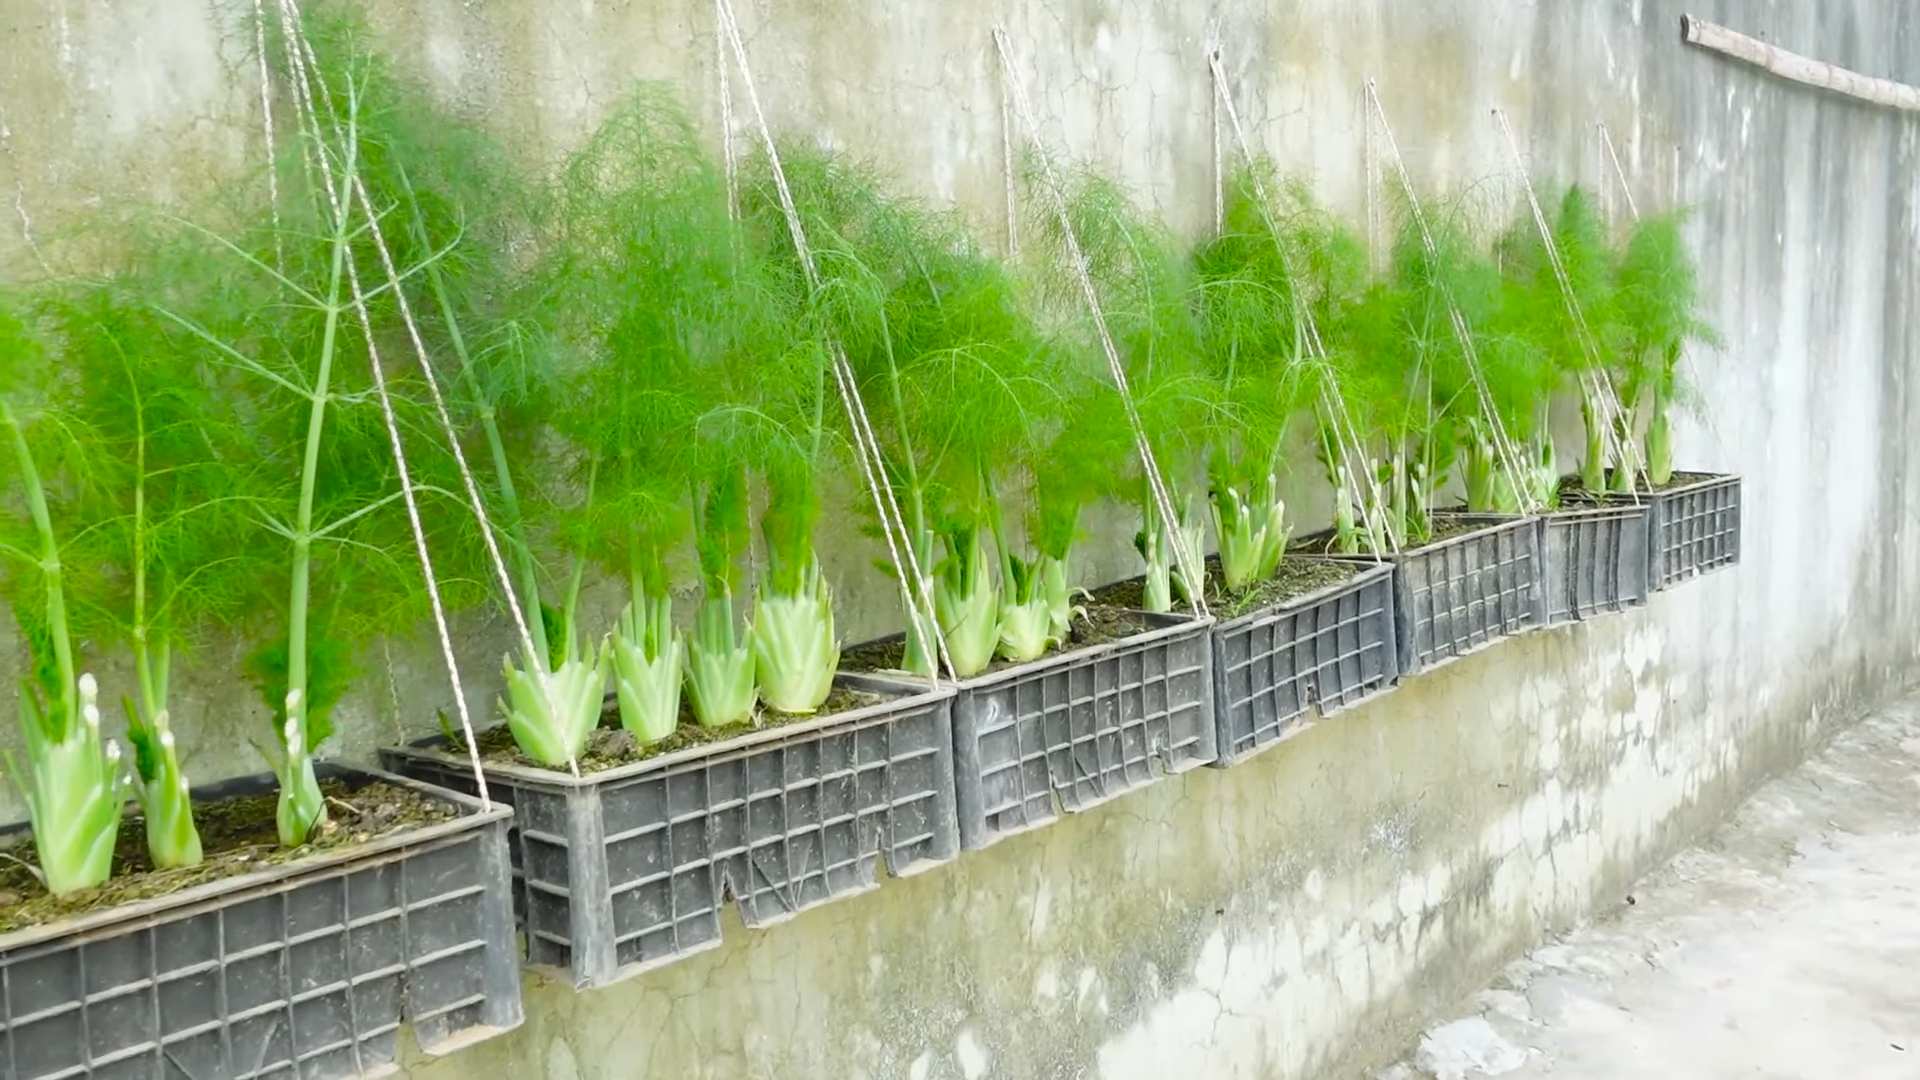
Grow Dill Indoors? Absolutely! Imagine having fresh, fragrant dill readily available, even when the snow is falling outside. No more sad, wilted bunches from the grocery store – just vibrant, flavorful dill at your fingertips. For centuries, dill has been cherished not only for its culinary uses but also for its medicinal properties. Ancient Egyptians used it to soothe digestive issues, and Roman gladiators believed it brought them good luck!
But let’s be honest, sometimes life gets in the way, and maintaining an outdoor garden just isn’t feasible. That’s where the magic of indoor gardening comes in. This DIY guide is your passport to successfully grow dill indoors, regardless of your experience level. I’m going to share some simple yet effective tricks and hacks that will transform your windowsill into a thriving herb garden.
Why do you need this? Because fresh dill elevates everything from creamy dips and tangy pickles to grilled fish and roasted vegetables. Plus, nurturing a little bit of green indoors is incredibly therapeutic. So, let’s ditch the store-bought stuff and embark on this rewarding journey together! Get ready to enjoy the delightful aroma and taste of homegrown dill, all year round.
Growing Swiss Chard at Home: A Beginner’s Guide
Hey there, fellow gardening enthusiasts! I’m so excited to share my experience growing Swiss chard at home. It’s a fantastic vegetable – packed with nutrients, easy to grow, and adds a vibrant splash of color to your garden. Plus, it’s incredibly versatile in the kitchen. I’ve found it’s much easier than I initially thought, and I’m confident you can do it too! Let’s dive in!
Choosing Your Swiss Chard Variety
Before we get our hands dirty, let’s talk about varieties. Swiss chard comes in a rainbow of colors, and each one is just as delicious as the next. Here are a few of my favorites:
* **Bright Lights:** This is probably the most popular variety, and for good reason! It boasts stems in shades of red, yellow, orange, pink, and white. It’s a real showstopper in the garden.
* **Ruby Red:** As the name suggests, this variety has vibrant red stems and deep green leaves. It’s a classic choice and adds a beautiful pop of color.
* **Fordhook Giant:** If you’re looking for a more traditional green chard, Fordhook Giant is an excellent option. It has large, dark green leaves and thick, white stems. It’s known for its productivity and heat tolerance.
* **Lucullus:** This is another great green variety with slightly savoyed (crinkled) leaves. It’s known for its mild flavor and tender texture.
I usually opt for Bright Lights because I love the variety of colors, but feel free to choose whichever variety appeals to you most!
Getting Started: Seeds vs. Seedlings
You have two main options for starting your Swiss chard: seeds or seedlings. Both have their pros and cons.
* **Seeds:** Starting from seed is generally more economical, and you have a wider selection of varieties to choose from. However, it requires a bit more patience and attention.
* **Seedlings:** Buying seedlings from a nursery is a quicker and easier option, especially if you’re short on time or new to gardening. However, you’ll likely have fewer variety choices, and it can be more expensive.
I usually start my Swiss chard from seed because I enjoy the process and like having more control over the varieties I grow. But if you’re a beginner, seedlings are a perfectly fine option!
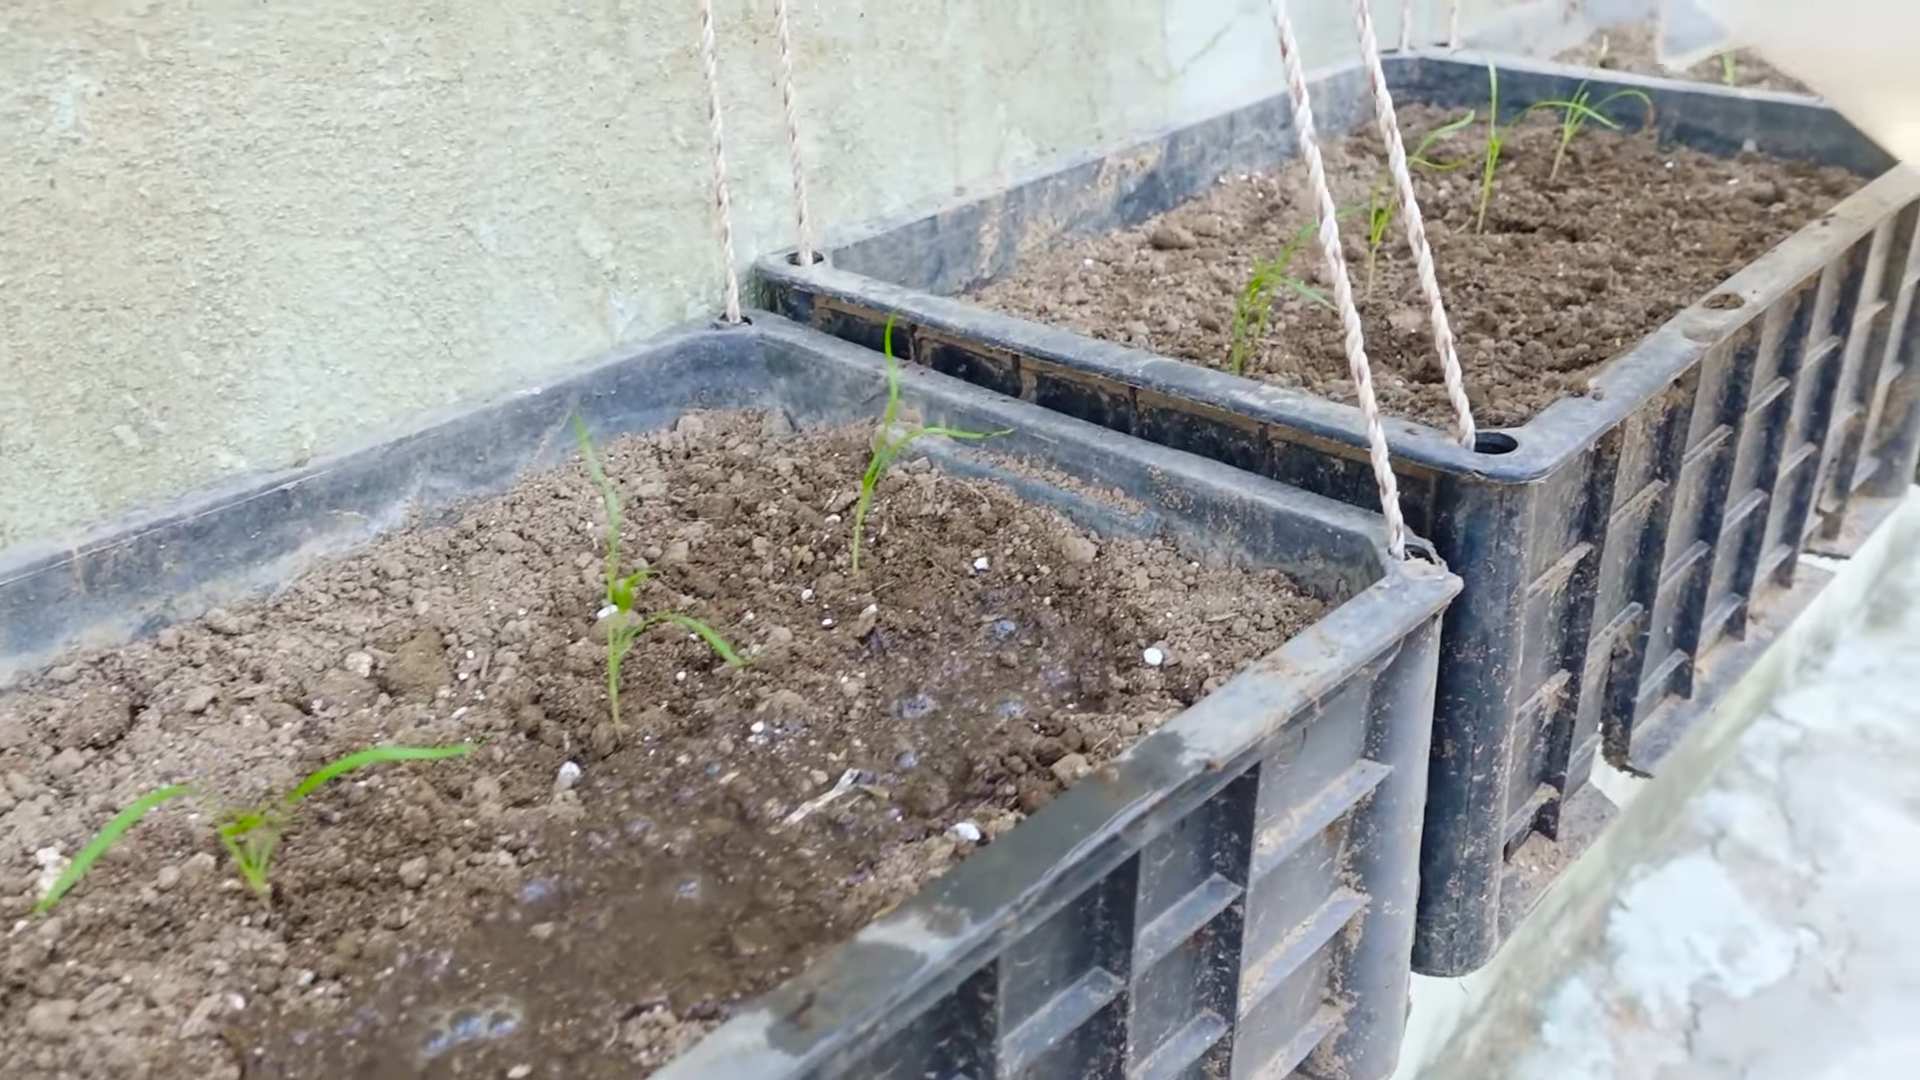
Sowing Seeds Indoors (Optional)
If you live in a colder climate with a shorter growing season, you might want to start your Swiss chard seeds indoors 4-6 weeks before the last expected frost. Here’s how I do it:
1. **Prepare your seed starting mix:** I use a lightweight seed starting mix that’s specifically designed for seedlings. You can find this at most garden centers. Moisten the mix thoroughly before filling your seed starting trays or pots.
2. **Sow the seeds:** Plant the seeds about ½ inch deep in the soil. I usually sow 2-3 seeds per cell or pot to increase my chances of germination.
3. **Water gently:** Water the seeds gently using a spray bottle or watering can with a fine rose. Avoid overwatering, as this can lead to damping off (a fungal disease that can kill seedlings).
4. **Provide warmth and light:** Place the seed starting trays or pots in a warm location, such as on top of a refrigerator or near a heat vent. Once the seeds germinate, move them to a sunny windowsill or under grow lights. I use grow lights to ensure my seedlings get enough light, especially during the winter months.
5. **Thin the seedlings:** Once the seedlings have their first true leaves (the second set of leaves that appear after the cotyledons), thin them to one seedling per cell or pot. Choose the strongest and healthiest-looking seedling to keep.
6. **Harden off the seedlings:** Before transplanting the seedlings outdoors, you’ll need to harden them off. This means gradually exposing them to outdoor conditions over a period of 7-10 days. Start by placing them in a sheltered location for a few hours each day, gradually increasing the amount of time they spend outdoors. This will help them acclimate to the sun, wind, and temperature changes.
Planting Swiss Chard Outdoors
Whether you started your Swiss chard from seed indoors or bought seedlings from a nursery, here’s how to plant them outdoors:
1. **Choose a sunny location:** Swiss chard prefers a location that receives at least 6 hours of sunlight per day. However, it can tolerate some partial shade, especially in hotter climates.
2. **Prepare the soil:** Swiss chard thrives in well-drained soil that’s rich in organic matter. Before planting, amend the soil with compost or well-rotted manure. This will improve drainage, fertility, and water retention. I usually add a generous amount of compost to my garden beds before planting anything.
3. **Space the plants:** Space the plants about 12-18 inches apart. This will give them enough room to grow and prevent overcrowding.
4. **Dig holes:** Dig holes that are slightly larger than the root balls of the seedlings.
5. **Plant the seedlings:** Gently remove the seedlings from their containers and place them in the holes. Make sure the top of the root ball is level with the surrounding soil.
6. **Fill in the holes:** Fill in the holes with soil and gently firm the soil around the plants.
7. **Water thoroughly:** Water the plants thoroughly after planting. This will help settle the soil and encourage root growth.
8. **Mulch:** Apply a layer of mulch around the plants. Mulch helps to retain moisture, suppress weeds, and regulate soil temperature. I like to use straw or shredded leaves as mulch.
Caring for Your Swiss Chard
Once your Swiss chard is planted, here’s how to keep it healthy and productive:
1. **Water regularly:** Swiss chard needs consistent moisture to thrive. Water deeply whenever the top inch of soil feels dry to the touch. Avoid overwatering, as this can lead to root rot.
2. **Fertilize:** Swiss chard is a heavy feeder, so it benefits from regular fertilization. I like to use a balanced organic fertilizer every 4-6 weeks. You can also side-dress the plants with compost or well-rotted manure.
3. **Weed regularly:** Keep the area around your Swiss chard free of weeds. Weeds compete with the plants for water, nutrients, and sunlight.
4. **Pest control:** Swiss chard is generally pest-resistant, but it can be susceptible to aphids, flea beetles, and slugs. I usually inspect my plants regularly for pests and take action if necessary. For aphids, I use a strong spray of water or insecticidal soap. For flea beetles, I use row covers or diatomaceous earth. For slugs, I use beer traps or handpick them off the plants.
5. **Bolting:** In hot weather, Swiss chard may bolt (go to seed). This can make the leaves bitter. To prevent bolting, provide shade during the hottest part of the day and water regularly. If your Swiss chard does bolt, you can still harvest the leaves, but they may not taste as good.
Harvesting Your Swiss Chard
One of the best things about Swiss chard is that you can harvest it continuously throughout the growing season.
1. **When to harvest:** You can start harvesting Swiss chard when the leaves are about 6-8 inches long.
2. **How to harvest:** To harvest, simply cut the outer leaves off at the base of the plant, leaving the inner leaves to continue growing. This is known as the “cut-and-come-again” method.
3. **Storage:** Swiss chard can be stored in the refrigerator for up to a week. To store it, wrap the leaves in a damp paper towel and place them in a plastic bag.
Using Your Homegrown Swiss Chard
Now for the fun part – using your homegrown Swiss chard in the kitchen! Swiss chard is incredibly versatile and can be used in a variety of dishes. Here are a few of my favorite ways to use it:
* **Sautéed:** Sautéed Swiss chard is a simple and delicious side dish. Simply sauté the leaves with garlic, olive oil, and a pinch of salt and pepper.
* **In soups and stews:** Swiss chard adds a nutritious and flavorful boost to soups and stews.
* **In salads:** Young, tender Swiss chard leaves can be used in salads.
* **In omelets and frittatas:** Swiss chard adds a healthy and colorful touch to omelets and frittatas.
* **In smoothies:** Swiss chard can be added to smoothies for a boost of vitamins and minerals.
* **Stems:** Don’t forget the stems! They can be cooked just like asparagus. I like to sauté them with garlic and olive oil.
I hope this guide has inspired you to grow your own Swiss chard at home. It’s a rewarding and delicious experience that I highly recommend. Happy gardening!
Conclusion
So, there you have it! Growing dill indoors is not only achievable, but it’s also a rewarding experience that brings the fresh, vibrant taste of summer right into your kitchen, all year round. Forget those sad, wilted bunches from the grocery store – imagine snipping fresh, fragrant dill whenever you need it, adding a burst of flavor to your favorite dishes.
This DIY trick is a must-try for several compelling reasons. First and foremost, it provides a constant supply of fresh dill, eliminating the need for frequent trips to the store and ensuring you always have this essential herb on hand. Secondly, it’s incredibly cost-effective. A single packet of dill seeds is far cheaper than repeatedly purchasing fresh dill, making it a budget-friendly option for herb lovers. Thirdly, growing your own dill allows you to control the growing environment, ensuring that your herbs are free from harmful pesticides and chemicals. You know exactly what’s going into your food, providing peace of mind and a healthier option for you and your family.
But the benefits don’t stop there. Growing dill indoors is also a fantastic way to add a touch of greenery to your home, brightening up your space and creating a more inviting atmosphere. It’s a simple yet effective way to connect with nature, even when you’re stuck indoors. Plus, the act of nurturing a plant from seed to harvest can be incredibly therapeutic and rewarding.
Looking for variations? Consider experimenting with different varieties of dill. ‘Bouquet’ dill is a popular choice for its abundant foliage, while ‘Fernleaf’ dill is known for its compact size, making it ideal for smaller spaces. You can also try growing dill alongside other herbs like parsley, chives, and basil, creating a mini indoor herb garden that caters to all your culinary needs. Another fun variation is to use different types of containers. While a standard pot works perfectly well, you could also try using a repurposed mason jar or even a hanging basket for a more decorative touch. Just remember to ensure that your chosen container has adequate drainage.
Don’t be intimidated if you’ve never grown herbs indoors before. Growing dill indoors is surprisingly easy, even for beginners. With just a few simple supplies and a little bit of patience, you can enjoy a bountiful harvest of fresh dill in no time.
We wholeheartedly encourage you to give this DIY trick a try. It’s a simple, affordable, and rewarding way to enhance your culinary creations and bring a touch of nature into your home. Once you’ve experienced the joy of harvesting your own fresh dill, you’ll never go back to store-bought again.
And most importantly, we want to hear about your experience! Share your photos, tips, and tricks in the comments below. Let us know what worked for you, what challenges you faced, and any creative variations you tried. Your feedback will not only help other readers but also inspire us to continue sharing valuable gardening tips and tricks. So, grab your seeds, get your hands dirty, and start growing dill indoors today! Let’s cultivate a community of indoor herb enthusiasts and share the joy of fresh, homegrown flavor.
Frequently Asked Questions (FAQ)
What kind of soil is best for growing dill indoors?
Dill thrives in well-draining soil that is rich in organic matter. A good potting mix specifically formulated for herbs is ideal. You can also create your own mix by combining equal parts of potting soil, perlite, and compost. The perlite helps with drainage, while the compost provides essential nutrients. Avoid using garden soil, as it can be too heavy and may contain pests or diseases.
How much sunlight does indoor dill need?
Dill requires at least 6 hours of direct sunlight per day to thrive. If you don’t have a sunny windowsill, you can supplement with a grow light. Place the grow light about 6-12 inches above the plants and keep it on for 12-16 hours per day. Insufficient sunlight can lead to leggy growth and reduced flavor. Rotate the pot regularly to ensure that all sides of the plant receive adequate light.
How often should I water my indoor dill?
Water dill regularly, keeping the soil consistently moist but not waterlogged. Check the soil moisture by sticking your finger about an inch into the soil. If it feels dry, it’s time to water. Avoid overwatering, as this can lead to root rot. Ensure that your pot has adequate drainage to prevent water from pooling at the bottom. During the winter months, when growth slows down, you may need to water less frequently.
When can I start harvesting my indoor dill?
You can start harvesting dill leaves once the plants are about 6-8 inches tall. Simply snip off the leaves as needed, using scissors or pruning shears. Avoid removing more than one-third of the plant at a time, as this can stunt its growth. Regular harvesting encourages the plant to produce more leaves. You can also harvest the dill seeds once the flower heads have dried and turned brown.
How do I prevent pests and diseases from affecting my indoor dill?
To prevent pests and diseases, start with clean potting mix and ensure that your plants have good air circulation. Regularly inspect your plants for signs of pests, such as aphids or spider mites. If you spot any pests, you can try washing them off with a strong stream of water or using an insecticidal soap. Avoid overcrowding your plants, as this can create a humid environment that is conducive to fungal diseases. If you notice any signs of disease, such as yellowing leaves or powdery mildew, remove the affected leaves immediately.
Can I grow dill from seed indoors?
Yes, growing dill from seed indoors is a great way to start. Sow the seeds directly into your chosen container, about ¼ inch deep. Keep the soil moist and warm until the seeds germinate, which usually takes about 7-14 days. Once the seedlings emerge, thin them out to ensure that each plant has enough space to grow. You can also start dill seeds in seed trays and transplant them into larger pots once they have developed a few sets of true leaves.
How long will my indoor dill plant last?
Dill is an annual herb, meaning that it completes its life cycle in one growing season. However, with proper care, you can extend the life of your indoor dill plant. Regular harvesting, adequate sunlight, and proper watering will help to keep your plant healthy and productive for several months. Once the plant starts to flower, it will begin to decline. You can prolong its life by pinching off the flower buds, but eventually, it will need to be replaced.
What are some common problems when growing dill indoors and how can I fix them?
One common problem is leggy growth, which is usually caused by insufficient sunlight. To fix this, move your plant to a sunnier location or supplement with a grow light. Another common problem is yellowing leaves, which can be caused by overwatering or nutrient deficiencies. Ensure that you are watering your plant properly and consider fertilizing it with a balanced liquid fertilizer. Pests and diseases can also be a problem, so be sure to inspect your plants regularly and take action if you spot any signs of trouble.
Can I transplant my indoor dill plant outdoors?
Yes, you can transplant your indoor dill plant outdoors, but it’s important to do it gradually to avoid shocking the plant. Start by acclimating the plant to outdoor conditions by placing it outside for a few hours each day, gradually increasing the amount of time it spends outdoors. Choose a sunny location with well-draining soil. Dig a hole that is slightly larger than the root ball and gently transplant the plant into the hole. Water thoroughly and protect the plant from strong winds and direct sunlight for the first few days.
Is it possible to grow dill indoors year-round?
Absolutely! With the right conditions, you can enjoy fresh dill year-round by growing it indoors. Providing adequate sunlight, proper watering, and regular fertilization will help to keep your plants healthy and productive, even during the winter months. You may need to adjust your watering schedule and provide supplemental lighting during the shorter days of winter. By following these tips, you can enjoy the fresh, vibrant flavor of dill all year long.


Leave a Comment