
Grow Peppers at Home, even if you think you don’t have a green thumb! Imagine plucking vibrant, juicy peppers straight from your own backyard, ready to spice up your next meal. Forget those bland, store-bought peppers – we’re talking about flavor explosions and the satisfaction of nurturing your own food.
For centuries, peppers have been cultivated across the globe, adding zest and vitality to cuisines from South America to Asia. Their journey from ancient civilizations to our modern gardens is a testament to their enduring appeal. But let’s be honest, sometimes getting those peppers to thrive can feel like a real challenge. That’s where these simple, yet effective, DIY tricks come in.
I’ve been there, staring at pepper plants that just wouldn’t produce, wondering what I was doing wrong. That’s why I’ve compiled these easy-to-follow hacks that will help you grow peppers at home like a pro, even if you’re a complete beginner. We’ll cover everything from soil preparation and watering techniques to pest control and maximizing your yield. So, ditch the frustration and get ready to enjoy a bountiful harvest of delicious, homegrown peppers!
Growing Peppers at Home: A Beginner’s Guide
Hey there, fellow gardening enthusiasts! I’m so excited to share my tried-and-true method for growing peppers right in your own backyard (or even on your balcony!). Peppers are such a rewarding crop – they’re vibrant, delicious, and surprisingly easy to cultivate once you get the hang of it. This guide will walk you through every step, from choosing the right seeds to harvesting your bountiful pepper crop. Let’s get started!
Choosing Your Pepper Varieties
Before we dive into the nitty-gritty, let’s talk about pepper varieties. The world of peppers is vast and exciting, ranging from sweet bell peppers to fiery habaneros. Consider your taste preferences and growing conditions when making your selection.
* Sweet Peppers: These are your bell peppers (red, yellow, orange, green), banana peppers, and pimentos. They’re mild and perfect for salads, stuffing, and snacking.
* Mildly Spicy Peppers: Think jalapeños, poblanos, and Anaheim peppers. They offer a gentle kick and are great for adding flavor to dishes.
* Hot Peppers: This category includes serranos, cayenne peppers, and Thai chilies. They pack a punch and are ideal for those who love some serious heat.
* Extremely Hot Peppers: Handle with care! This group features habaneros, scotch bonnets, ghost peppers, and Carolina reapers. They’re not for the faint of heart.
Also, think about the size of your growing space. Some pepper plants can get quite large, so choose varieties that fit your available area. Bushier varieties are great for containers.
Starting Your Pepper Seeds Indoors
Peppers need a long growing season, so starting them indoors is crucial, especially if you live in a cooler climate. I usually start my seeds about 8-10 weeks before the last expected frost.
Materials You’ll Need:
* Pepper seeds (of course!)
* Seed starting trays or small pots
* Seed starting mix (a light, well-draining mix is essential)
* Spray bottle
* Heat mat (optional, but highly recommended)
* Grow lights (also optional, but they make a huge difference)
* Waterproof tray to hold the seed trays
Step-by-Step Instructions:
1. Prepare Your Seed Starting Trays: Fill your seed starting trays or pots with seed starting mix. Gently tap the trays to settle the mix.
2. Sow the Seeds: Make a small indentation (about ¼ inch deep) in the center of each cell or pot. Place 2-3 seeds in each indentation. This increases your chances of at least one seed germinating.
3. Cover the Seeds: Gently cover the seeds with seed starting mix.
4. Water Thoroughly: Use a spray bottle to thoroughly moisten the soil. Avoid overwatering, as this can lead to damping-off (a fungal disease that kills seedlings).
5. Provide Warmth: Place the seed starting trays on a heat mat. Peppers need warm soil (around 80-85°F) to germinate.
6. Provide Light: If you’re using grow lights, position them a few inches above the seed starting trays. If you’re relying on natural light, place the trays in a sunny window. However, grow lights provide more consistent and reliable light.
7. Maintain Moisture: Keep the soil consistently moist, but not soggy. Check the soil daily and mist with a spray bottle as needed.
8. Wait Patiently: Germination typically takes 7-14 days, but it can take longer depending on the pepper variety and growing conditions.
9. Thin the Seedlings: Once the seedlings have emerged and have a couple of sets of true leaves (the leaves that look like miniature pepper leaves), thin them to one seedling per cell or pot. Choose the strongest, healthiest-looking seedling and snip off the others at the soil line. Don’t pull them out, as this can disturb the roots of the remaining seedling.
Transplanting Your Pepper Seedlings
Once the danger of frost has passed and the soil has warmed up, it’s time to transplant your pepper seedlings outdoors.
Materials You’ll Need:
* Your pepper seedlings
* Gardening gloves
* Trowel or shovel
* Compost or well-rotted manure
* Watering can or hose
* Mulch (optional)
* Stakes or cages (for support, especially for taller varieties)
Step-by-Step Instructions:
1. Harden Off the Seedlings: Before transplanting, you need to “harden off” the seedlings. This process gradually acclimates them to outdoor conditions. Start by placing the seedlings outdoors in a sheltered location (like a porch or patio) for a few hours each day. Gradually increase the amount of time they spend outdoors over the course of a week or two. This will help them adjust to the sun, wind, and temperature changes.
2. Prepare the Planting Site: Choose a sunny location with well-drained soil. Peppers need at least 6-8 hours of sunlight per day. Amend the soil with compost or well-rotted manure to improve its fertility and drainage.
3. Dig the Planting Holes: Dig holes that are slightly larger than the root balls of your seedlings. Space the holes according to the mature size of the pepper variety you’re growing. Generally, allow 18-24 inches between plants.
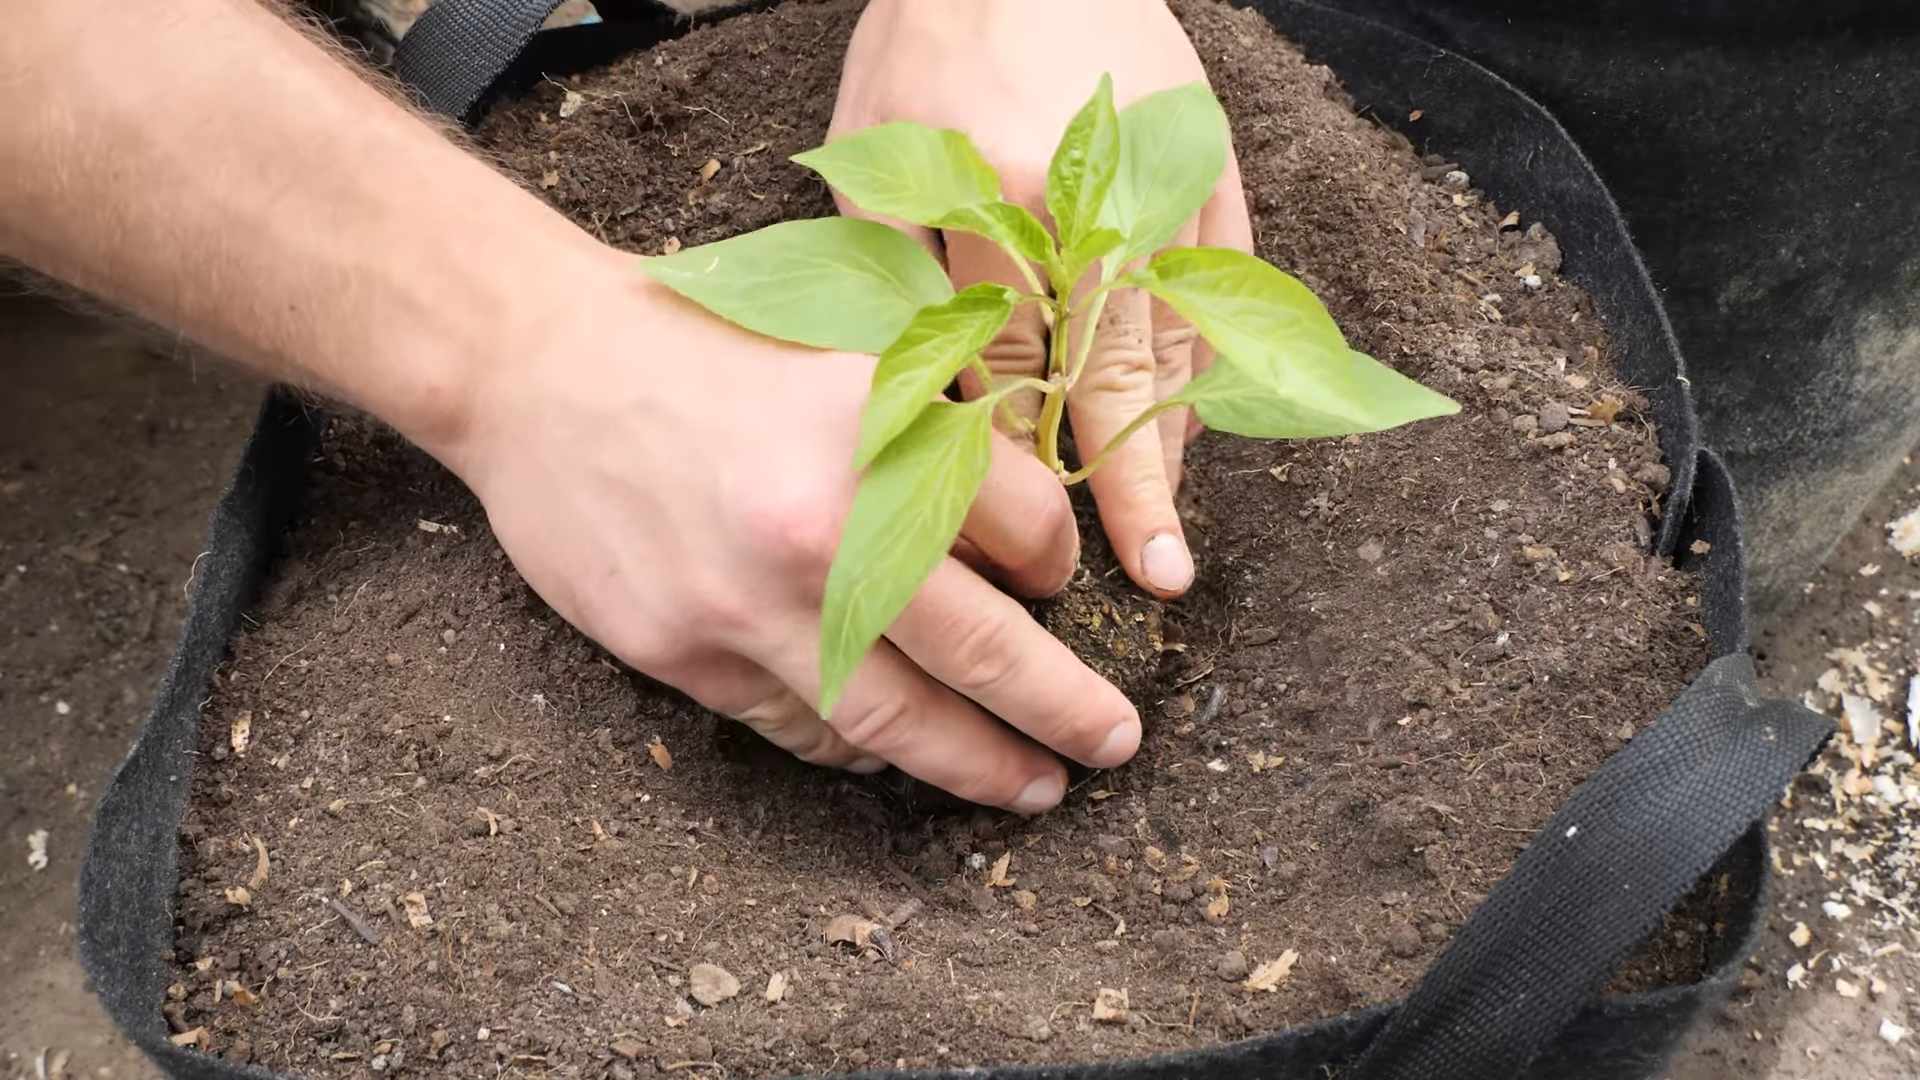
4. Transplant the Seedlings: Gently remove the seedlings from their trays or pots. Be careful not to damage the roots. Place each seedling in a planting hole and backfill with soil.
5. Water Thoroughly: Water the seedlings thoroughly after transplanting. This will help settle the soil around the roots.
6. Add Support: If you’re growing taller pepper varieties, provide support with stakes or cages. This will prevent the plants from falling over when they’re loaded with peppers.
7. Mulch (Optional): Apply a layer of mulch around the base of the plants. Mulch helps retain moisture, suppress weeds, and regulate soil temperature.
Caring for Your Pepper Plants
Once your pepper plants are in the ground, it’s important to provide them with proper care to ensure a bountiful harvest.
* Watering: Water your pepper plants regularly, especially during hot, dry weather. Aim to keep the soil consistently moist, but not soggy. Water deeply and less frequently, rather than shallowly and more often.
* Fertilizing: Peppers are heavy feeders, so they need regular fertilization. Use a balanced fertilizer (like 10-10-10) or a fertilizer specifically formulated for vegetables. Follow the instructions on the fertilizer label. I like to side-dress my pepper plants with compost every few weeks as well.
* Pruning: Pruning isn’t essential, but it can help improve air circulation and encourage fruit production. Remove any suckers (small shoots that grow from the base of the plant) and any yellowing or diseased leaves.
* Pest and Disease Control: Keep an eye out for pests and diseases. Common pepper pests include aphids, flea beetles, and spider mites. Common diseases include blossom end rot, fungal leaf spot, and viral disea
Hey there, fellow gardening enthusiasts! I’m so excited to share my tried-and-true method for growing peppers right in your own backyard (or even on your balcony!). Peppers are such a rewarding crop – they’re vibrant, delicious, and surprisingly easy to cultivate once you get the hang of it. This guide will walk you through every step, from choosing the right seeds to harvesting your bountiful pepper crop. Let’s get started!
Choosing Your Pepper Varieties
Before we dive into the nitty-gritty, let’s talk about pepper varieties. The world of peppers is vast and exciting, ranging from sweet bell peppers to fiery habaneros. Consider your taste preferences and growing conditions when making your selection.
* Sweet Peppers: These are your bell peppers (red, yellow, orange, green), banana peppers, and pimentos. They’re mild and perfect for salads, stuffing, and snacking.
* Mildly Spicy Peppers: Think jalapeños, poblanos, and Anaheim peppers. They offer a gentle kick and are great for adding flavor to dishes.
* Hot Peppers: This category includes serranos, cayenne peppers, and Thai chilies. They pack a punch and are ideal for those who love some serious heat.
* Extremely Hot Peppers: Handle with care! This group features habaneros, scotch bonnets, ghost peppers, and Carolina reapers. They’re not for the faint of heart.
Also, think about the size of your growing space. Some pepper plants can get quite large, so choose varieties that fit your available area. Bushier varieties are great for containers.
Starting Your Pepper Seeds Indoors
Peppers need a long growing season, so starting them indoors is crucial, especially if you live in a cooler climate. I usually start my seeds about 8-10 weeks before the last expected frost.
Materials You’ll Need:
* Pepper seeds (of course!)
* Seed starting trays or small pots
* Seed starting mix (a light, well-draining mix is essential)
* Spray bottle
* Heat mat (optional, but highly recommended)
* Grow lights (also optional, but they make a huge difference)
* Waterproof tray to hold the seed trays
Step-by-Step Instructions:
1. Prepare Your Seed Starting Trays: Fill your seed starting trays or pots with seed starting mix. Gently tap the trays to settle the mix.
2. Sow the Seeds: Make a small indentation (about ¼ inch deep) in the center of each cell or pot. Place 2-3 seeds in each indentation. This increases your chances of at least one seed germinating.
3. Cover the Seeds: Gently cover the seeds with seed starting mix.
4. Water Thoroughly: Use a spray bottle to thoroughly moisten the soil. Avoid overwatering, as this can lead to damping-off (a fungal disease that kills seedlings).
5. Provide Warmth: Place the seed starting trays on a heat mat. Peppers need warm soil (around 80-85°F) to germinate.
6. Provide Light: If you’re using grow lights, position them a few inches above the seed starting trays. If you’re relying on natural light, place the trays in a sunny window. However, grow lights provide more consistent and reliable light.
7. Maintain Moisture: Keep the soil consistently moist, but not soggy. Check the soil daily and mist with a spray bottle as needed.
8. Wait Patiently: Germination typically takes 7-14 days, but it can take longer depending on the pepper variety and growing conditions.
9. Thin the Seedlings: Once the seedlings have emerged and have a couple of sets of true leaves (the leaves that look like miniature pepper leaves), thin them to one seedling per cell or pot. Choose the strongest, healthiest-looking seedling and snip off the others at the soil line. Don’t pull them out, as this can disturb the roots of the remaining seedling.
Transplanting Your Pepper Seedlings
Once the danger of frost has passed and the soil has warmed up, it’s time to transplant your pepper seedlings outdoors.
Materials You’ll Need:
* Your pepper seedlings
* Gardening gloves
* Trowel or shovel
* Compost or well-rotted manure
* Watering can or hose
* Mulch (optional)
* Stakes or cages (for support, especially for taller varieties)
Step-by-Step Instructions:
1. Harden Off the Seedlings: Before transplanting, you need to “harden off” the seedlings. This process gradually acclimates them to outdoor conditions. Start by placing the seedlings outdoors in a sheltered location (like a porch or patio) for a few hours each day. Gradually increase the amount of time they spend outdoors over the course of a week or two. This will help them adjust to the sun, wind, and temperature changes.
2. Prepare the Planting Site: Choose a sunny location with well-drained soil. Peppers need at least 6-8 hours of sunlight per day. Amend the soil with compost or well-rotted manure to improve its fertility and drainage.
3. Dig the Planting Holes: Dig holes that are slightly larger than the root balls of your seedlings. Space the holes according to the mature size of the pepper variety you’re growing. Generally, allow 18-24 inches between plants.
4. Transplant the Seedlings: Gently remove the seedlings from their trays or pots. Be careful not to damage the roots. Place each seedling in a planting hole and backfill with soil.
5. Water Thoroughly: Water the seedlings thoroughly after transplanting. This will help settle the soil around the roots.
6. Add Support: If you’re growing taller pepper varieties, provide support with stakes or cages. This will prevent the plants from falling over when they’re loaded with peppers.
7. Mulch (Optional): Apply a layer of mulch around the base of the plants. Mulch helps retain moisture, suppress weeds, and regulate soil temperature.
Caring for Your Pepper Plants
Once your pepper plants are in the ground, it’s important to provide them with proper care to ensure a bountiful harvest.
* Watering: Water your pepper plants regularly, especially during hot, dry weather. Aim to keep the soil consistently moist, but not soggy. Water deeply and less frequently, rather than shallowly and more often.
* Fertilizing: Peppers are heavy feeders, so they need regular fertilization. Use a balanced fertilizer (like 10-10-10) or a fertilizer specifically formulated for vegetables. Follow the instructions on the fertilizer label. I like to side-dress my pepper plants with compost every few weeks as well.
* Pruning: Pruning isn’t essential, but it can help improve air circulation and encourage fruit production. Remove any suckers (small shoots that grow from the base of the plant) and any yellowing or diseased leaves.
* Pest and Disease Control: Keep an eye out for pests and diseases. Common pepper pests include aphids, flea beetles, and spider mites. Common diseases include blossom end rot, fungal leaf spot, and viral diseases. Treat any problems promptly with appropriate organic or chemical controls. I prefer using insecticidal soap or neem oil for pest control. For blossom end rot, make sure your plants are getting consistent watering and consider adding calcium to the soil.
* Sunlight: Ensure your pepper plants are getting at least 6-8 hours of sunlight per day. If they’re not getting enough sun, they may produce fewer peppers.
Harvesting Your Peppers
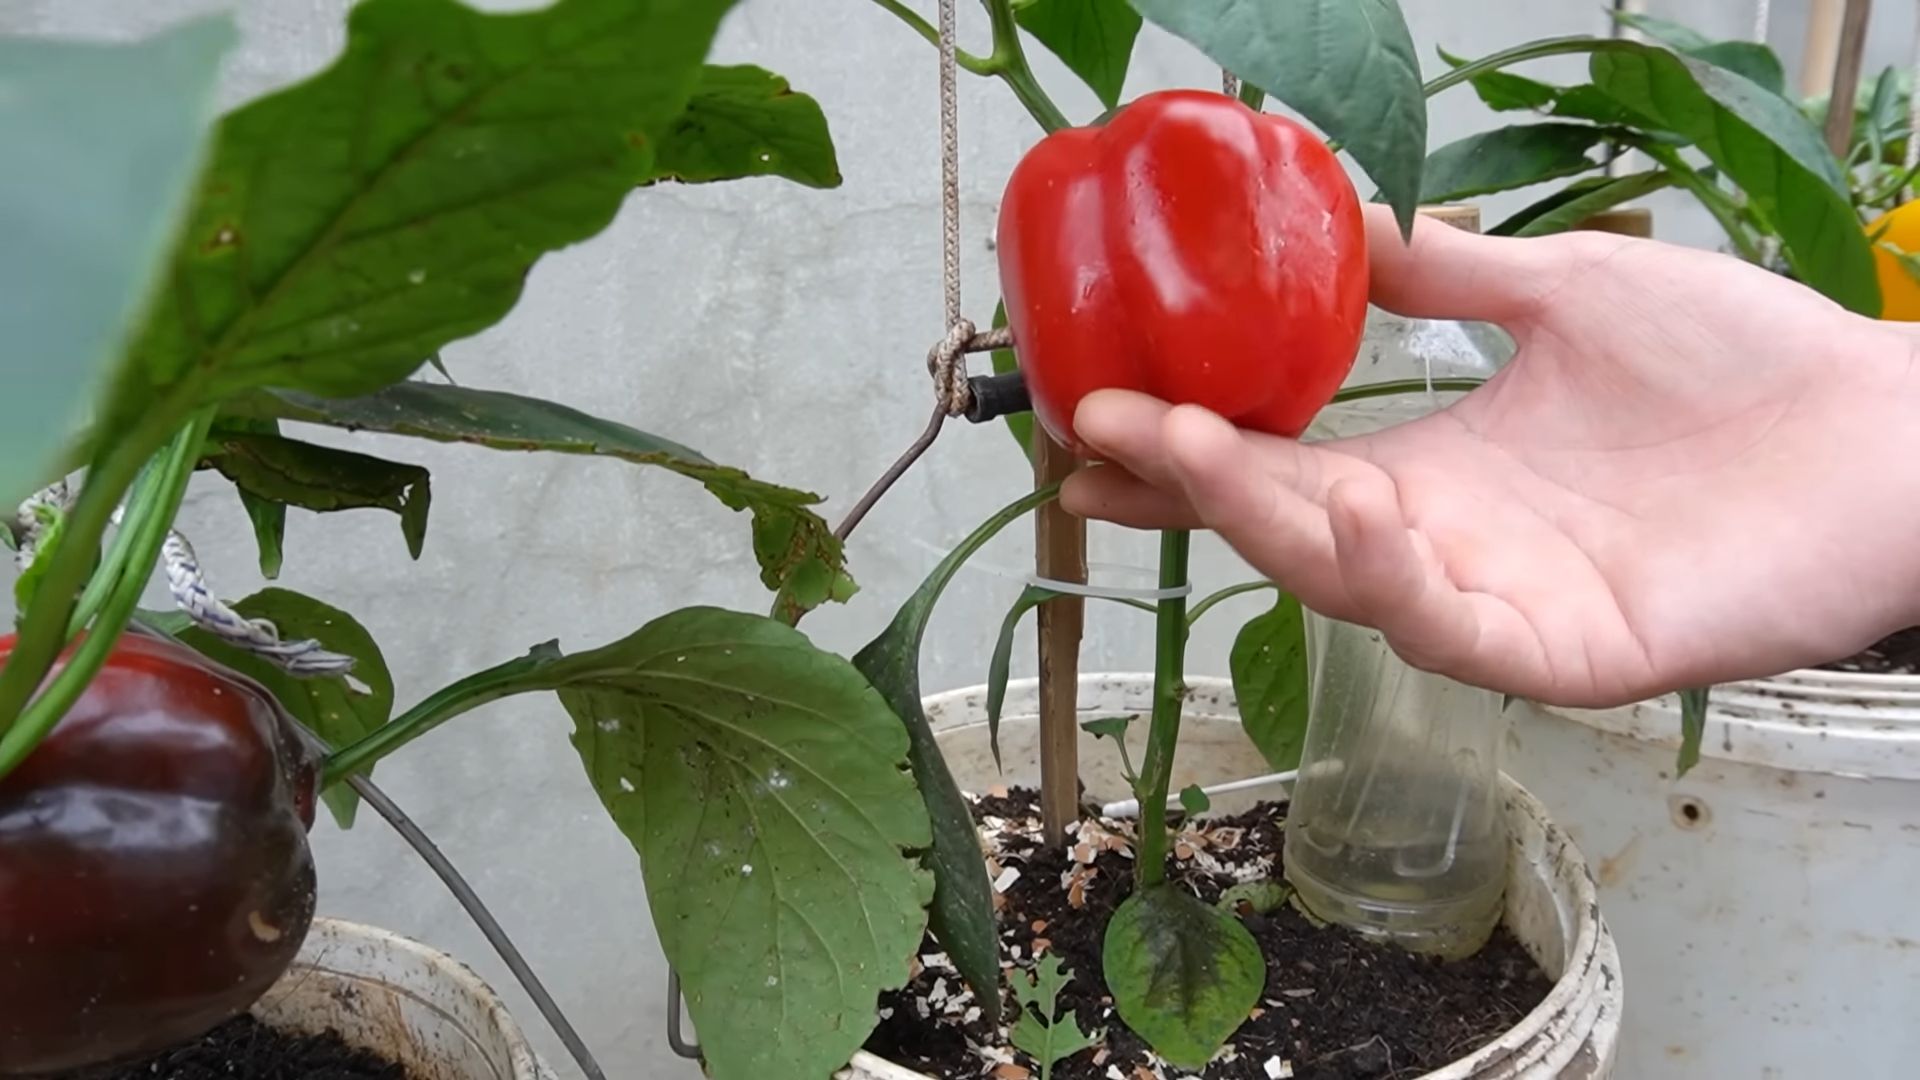
The moment you’ve been waiting for! Harvesting your peppers is the most rewarding part of the process.
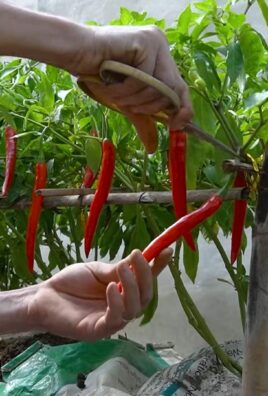
* When to Harvest: The timing of your harvest depends on the pepper variety and your personal preferences. Sweet peppers are typically harvested when they’re fully colored and firm. Hot peppers can be harvested when they’re green or when they’ve turned their mature color (usually red, orange, or yellow).
* How to Harvest: Use pruning shears or a sharp knife to cut the peppers from the plant. Be careful not to damage the plant.
* Storage: Fresh peppers can be stored in the refrigerator for up to a week. You can also freeze, dry, or pickle peppers for longer-term storage.
Troubleshooting Common Pepper Problems
Even with the best care, you may encounter some problems while growing peppers. Here are a few common issues and how to address them:
* Blossom End Rot: This is a common problem that causes the bottom of the pepper to rot. It’s usually caused by a calcium deficiency or inconsistent watering. Make sure your plants are getting consistent watering and consider adding calcium to the soil.
* Aphids: These tiny insects can suck the sap from pepper plants, causing them to weaken and produce fewer peppers. Treat aphids with insecticidal soap or neem oil
Conclusion
So, there you have it! Growing peppers at home, especially with these simple DIY tricks, isn’t just a gardening project; it’s an investment in flavor, freshness, and a deeper connection to your food. We’ve walked you through the essentials, from seed starting to harvesting, highlighting the benefits of creating your own pepper paradise right in your backyard or even on your balcony.
Why is this a must-try? Because store-bought peppers, while convenient, often lack the vibrant taste and satisfying crunch of homegrown varieties. Plus, you have complete control over the growing process, ensuring your peppers are free from unwanted chemicals and pesticides. Imagine the satisfaction of plucking a perfectly ripe bell pepper, jalapeño, or habanero straight from the plant and using it in your favorite dish. That’s the magic of growing peppers at home.
But the real beauty of this DIY adventure lies in its adaptability. Feel free to experiment with different pepper varieties. Want to add some serious heat to your life? Try growing ghost peppers or Scotch bonnets. Prefer something milder? Bell peppers, banana peppers, or poblano peppers are excellent choices. You can even mix and match different varieties in the same garden, creating a colorful and flavorful tapestry.
Consider these variations to personalize your pepper-growing experience:
* Vertical Gardening: If you’re short on space, explore vertical gardening techniques. Peppers thrive in containers, making them perfect for balconies, patios, or small yards. Use trellises or hanging baskets to maximize your growing area.
* Companion Planting: Enhance your pepper plants’ growth by incorporating companion plants. Basil, marigolds, and carrots are known to deter pests and improve soil health.
* Hydroponics: For a more advanced approach, try growing peppers hydroponically. This method involves growing plants without soil, using nutrient-rich water solutions. It can be a fun and rewarding way to experiment with indoor gardening.
* Pepper Powders and Flakes: Once you have a bountiful harvest, consider drying your peppers to create your own homemade pepper powders and flakes. This is a great way to preserve your harvest and add a fiery kick to your meals year-round.
* Fermented Hot Sauce: Take your pepper growing to the next level by fermenting your peppers into a delicious and complex hot sauce. This is a great way to use up a large harvest and create a unique condiment.
Growing peppers at home is more than just a hobby; it’s a journey of discovery, flavor, and self-sufficiency. It’s about connecting with nature, learning new skills, and enjoying the fruits (or vegetables!) of your labor.
So, what are you waiting for? Grab some seeds, prepare your soil, and embark on your pepper-growing adventure today! We’re confident that you’ll be amazed by the results. And don’t forget to share your experiences with us! We’d love to hear about your favorite pepper varieties, your DIY gardening tips, and the delicious dishes you create with your homegrown peppers. Share your photos and stories on social media using #HomegrownPeppers and inspire others to join the pepper-growing revolution. Let’s cultivate a community of passionate pepper enthusiasts!
FAQ
Q: What is the best time to start growing peppers from seed?
A: The ideal time to start growing peppers from seed is typically 6-8 weeks before the last expected frost in your area. This allows the seedlings to develop a strong root system before being transplanted outdoors. Check your local weather forecasts and gardening resources to determine the average last frost date for your region. Starting seeds indoors provides a controlled environment and gives your pepper plants a head start on the growing season.
Q: What kind of soil is best for growing peppers?
A: Peppers thrive in well-draining soil that is rich in organic matter. A slightly acidic to neutral pH (around 6.0 to 7.0) is ideal. Amend your soil with compost, aged manure, or other organic materials to improve drainage, fertility, and water retention. Avoid heavy clay soils, as they can become waterlogged and hinder root growth. If you’re growing peppers in containers, use a high-quality potting mix specifically formulated for vegetables.
Q: How often should I water my pepper plants?
A: Pepper plants need consistent moisture, but avoid overwatering. Water deeply when the top inch of soil feels dry to the touch. The frequency of watering will depend on factors such as weather conditions, soil type, and plant size. During hot, dry periods, you may need to water more frequently. Mulching around your pepper plants can help retain moisture and reduce the need for frequent watering.
Q: What are some common pests and diseases that affect pepper plants?
A: Common pests that can affect pepper plants include aphids, spider mites, whiteflies, and pepper weevils. Diseases such as blossom-end rot, fungal leaf spot, and verticillium wilt can also be problematic. Regularly inspect your plants for signs of pests or diseases. Use organic pest control methods such as insecticidal soap, neem oil, or introducing beneficial insects. Ensure good air circulation around your plants to prevent fungal diseases. Blossom-end rot is often caused by calcium deficiency, so amend your soil with calcium-rich amendments if needed.
Q: How do I know when my peppers are ripe and ready to harvest?
A: The ripeness of peppers depends on the variety. Bell peppers are typically harvested when they are fully colored (green, red, yellow, orange, or purple) and firm to the touch. Hot peppers are often harvested when they reach their mature color and size. Some varieties may change color as they ripen, while others may remain green even when fully ripe. Use your best judgment and taste test a small piece of the pepper to determine if it’s ready to harvest.
Q: Can I grow peppers indoors?
A: Yes, you can grow peppers indoors, but they require adequate light. Place your pepper plants near a sunny window that receives at least 6-8 hours of direct sunlight per day. If you don’t have enough natural light, supplement with grow lights. Use a well-draining potting mix and water regularly. Indoor pepper plants may require hand-pollination to ensure fruit set.
Q: How do I prevent blossom-end rot in my peppers?
A: Blossom-end rot is a common problem in peppers caused by calcium deficiency. To prevent it, ensure your soil has adequate calcium levels. Amend your soil with lime or bone meal before planting. Water consistently to maintain even soil moisture. Avoid over-fertilizing with nitrogen, as it can interfere with calcium uptake. You can also use a calcium foliar spray to provide a quick boost of calcium to your plants.
Q: What are some good companion plants for peppers?
A: Companion planting can benefit pepper plants by deterring pests, attracting beneficial insects, and improving soil health. Some good companion plants for peppers include basil, marigolds, carrots, onions, garlic, and rosemary. Avoid planting peppers near fennel or brassicas (such as cabbage and broccoli), as they can inhibit pepper growth.
Q: How do I save seeds from my pepper plants?
A: To save seeds from your pepper plants, allow the peppers to fully ripen on the plant. Once they are fully ripe, cut them open and remove the seeds. Spread the seeds out on a paper towel and let them dry completely for several days. Store the dried seeds in an airtight container in a cool, dark, and dry place. Label the container with the pepper variety and the date of collection.
Leave a Comment