
Concrete yard corn growing might sound like an impossible dream, right? I get it! When I first envisioned a lush cornfield bursting with golden ears, my tiny, concrete-dominated backyard felt like the ultimate obstacle. But guess what? You absolutely can cultivate your own delicious corn, even without acres of sprawling farmland. This isn’t just about defying expectations; it’s about embracing resourcefulness and bringing a touch of rural charm to even the most urban spaces.
For centuries, corn has been a staple crop, deeply woven into the fabric of countless cultures. From the ancient civilizations of Mesoamerica, where corn held immense spiritual and nutritional significance, to its modern-day role as a global food source, this versatile grain has nourished and sustained communities worldwide. Now, you can participate in this rich history, even if your “farm” is a small patch of concrete.
Why bother with concrete yard corn growing? Well, imagine stepping outside to harvest fresh, sweet corn for your dinner table. Think of the satisfaction of knowing exactly where your food comes from and the joy of sharing your homegrown bounty with friends and family. Plus, let’s be honest, store-bought corn just doesn’t compare to the flavor of freshly picked, sun-ripened kernels. This DIY guide will provide you with simple, effective tricks and hacks to transform your concrete jungle into a surprisingly productive corn patch. Get ready to roll up your sleeves and discover the secrets to successful urban gardening!
DIY: Maisanbau im Betonhof – So geht’s!
Hey Leute, habt ihr auch einen tristen Betonhof und träumt von etwas Grün? Ich zeige euch, wie ihr selbst Mais anbauen könnt, auch wenn ihr keinen Garten habt! Es ist einfacher als ihr denkt und bringt ein Stück Natur direkt vor eure Haustür. Lasst uns loslegen!
Was ihr braucht:
* Maissamen: Am besten Zuckermais, der ist süß und lecker! Achtet auf eine Sorte, die für den Anbau in Töpfen geeignet ist.
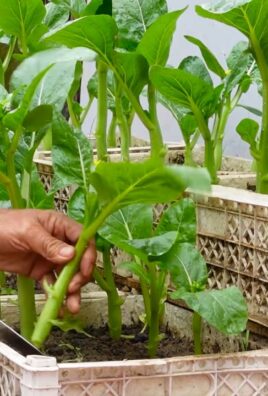
* Große Pflanzgefäße: Mindestens 30 Liter Volumen pro Pflanze, besser noch größer. Mais braucht Platz für seine Wurzeln!
* Hochwertige Pflanzerde: Eine Mischung aus Gartenerde, Kompost und Sand ist ideal.
* Drainagematerial: Blähton, Kies oder Tonscherben für den Boden der Töpfe.
* Dünger: Langzeitdünger oder Flüssigdünger für Mais.
* Gießkanne oder Schlauch: Zum Bewässern.
* Pflanzschaufel: Zum Umtopfen und Einpflanzen.
* Stützstäbe (optional): Für windige Standorte.
* Geduld und Liebe: Das Wichtigste überhaupt!
Vorbereitung ist alles: Die Pflanzgefäße
Bevor wir mit dem Pflanzen beginnen, müssen wir die Pflanzgefäße vorbereiten. Das ist ein wichtiger Schritt, damit der Mais später gut wachsen kann.
1. Reinigung: Reinigt die Pflanzgefäße gründlich mit Wasser und eventuell etwas Spülmittel. So entfernt ihr alte Erd- und Düngerreste.
2. Drainage: Füllt eine Schicht Drainagematerial (Blähton, Kies oder Tonscherben) auf den Boden der Töpfe. Das sorgt dafür, dass überschüssiges Wasser abfließen kann und die Wurzeln nicht faulen. Eine Schicht von etwa 5-10 cm ist ideal.
3. Erde einfüllen: Füllt die Pflanzgefäße mit der vorbereiteten Pflanzerde. Lasst etwa 5 cm Platz bis zum Rand, damit ihr später noch gießen könnt, ohne dass die Erde überschwappt.
Aussaat: Der Grundstein für eine reiche Ernte
Jetzt kommt der spannende Teil: die Aussaat! Hier zeige ich euch, wie ihr die Maissamen richtig in die Erde bringt.
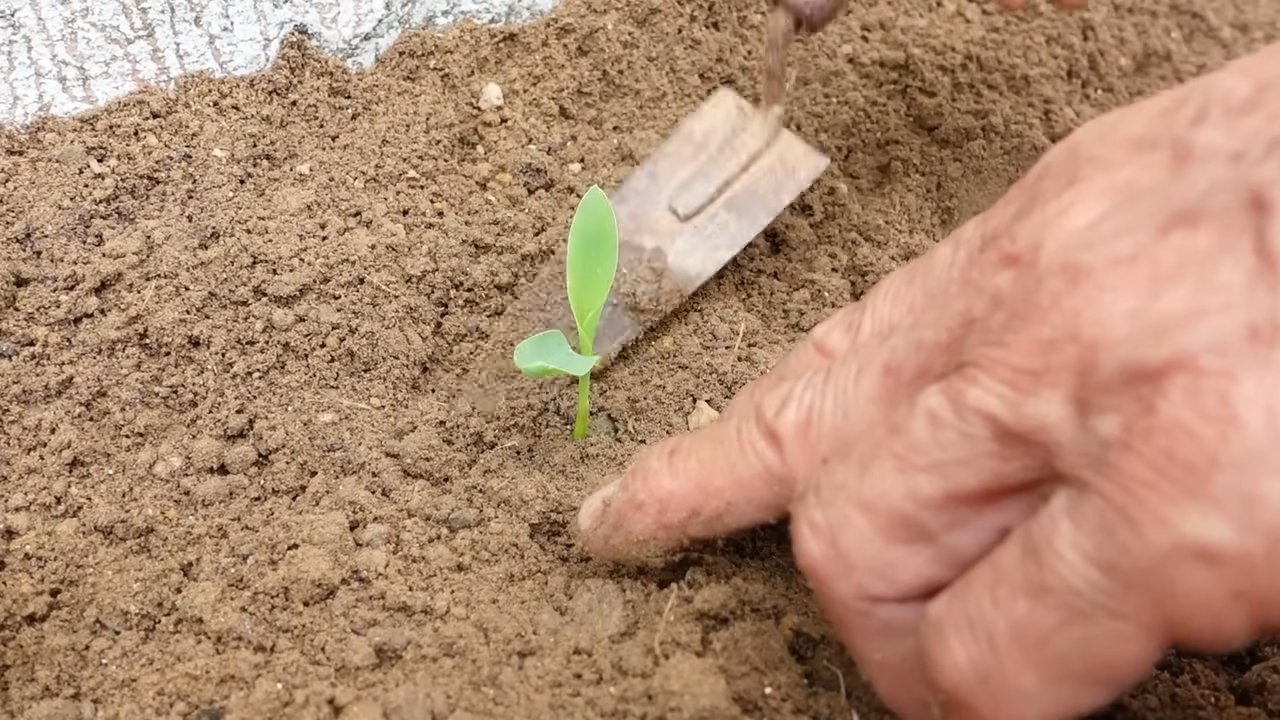
1. Samen vorbereiten: Weicht die Maissamen vor der Aussaat für etwa 12-24 Stunden in lauwarmem Wasser ein. Das beschleunigt die Keimung.
2. Aussaat: Drückt mit dem Finger oder einem kleinen Stock kleine Löcher in die Erde, etwa 2-3 cm tief. Legt in jedes Loch 2-3 Maissamen. Das erhöht die Wahrscheinlichkeit, dass mindestens ein Samen keimt.
3. Abdecken: Bedeckt die Samen mit Erde und drückt sie leicht an.
4. Gießen: Gießt die Erde vorsichtig an, sodass sie gut durchfeuchtet ist. Achtet darauf, dass die Samen nicht weggeschwemmt werden.
5. Standort: Stellt die Pflanzgefäße an einen sonnigen und warmen Ort. Mais liebt die Sonne!
Pflege: Damit der Mais prächtig gedeiht
Die Pflege ist entscheidend, damit euer Mais gut wächst und eine reiche Ernte bringt. Hier sind meine Tipps:
1. Gießen: Gießt den Mais regelmäßig, besonders an heißen Tagen. Die Erde sollte immer leicht feucht sein, aber nicht nass. Vermeidet Staunässe!
2. Düngen: Düngt den Mais regelmäßig mit einem Langzeitdünger oder Flüssigdünger. Achtet auf die Dosierungsanleitung auf der Verpackung. Mais ist ein Starkzehrer und braucht viele Nährstoffe.
3. Unkraut entfernen: Entfernt regelmäßig Unkraut aus den Pflanzgefäßen. Unkraut konkurriert mit dem Mais um Nährstoffe und Wasser.
4. Stützen: Wenn der Mais größer wird, kann es sinnvoll sein, ihn mit Stützstäben zu stabilisieren, besonders an windigen Standorten.
5. Bestäubung: Mais ist auf Windbestäubung angewiesen. Wenn ihr nur wenige Pflanzen habt, könnt ihr die Bestäubung unterstützen, indem ihr die männlichen Blütenstände (die Fahnen oben an der Pflanze) vorsichtig schüttelt, wenn die weiblichen Blütenstände (die Seidenfäden an den Kolben) sichtbar sind.
Schädlinge und Krankheiten: Was tun, wenn’s Probleme gibt?
Auch beim Maisanbau im Topf können Schädlinge und Krankheiten auftreten. Hier sind einige häufige Probleme und wie ihr sie bekämpfen könnt:
* Blattläuse: Blattläuse saugen Pflanzensaft und können den Mais schwächen. Ihr könnt sie mit einem Wasserstrahl abspritzen oder mit einem biologischen Insektizid bekämpfen.
* Maisbeulenbrand: Maisbeulenbrand ist eine Pilzkrankheit, die zu Wucherungen an den Kolben führt. Befallene Pflanzen sollten entfernt und entsorgt werden.
* Maiszünsler: Der Maiszünsler ist ein Schmetterling, dessen Raupen sich in die Maiskolben bohren und sie beschädigen. Ihr könnt ihn mit biologischen Mitteln bekämpfen.
Wichtig: Achtet auf die Gesundheit eurer Pflanzen und handelt schnell, wenn ihr Schädlinge oder Krankheiten entdeckt.
Ernte: Der Lohn der Mühe
Nach etwa 80-100 Tagen ist es endlich soweit: Die Maiskolben sind reif und können geerntet werden!
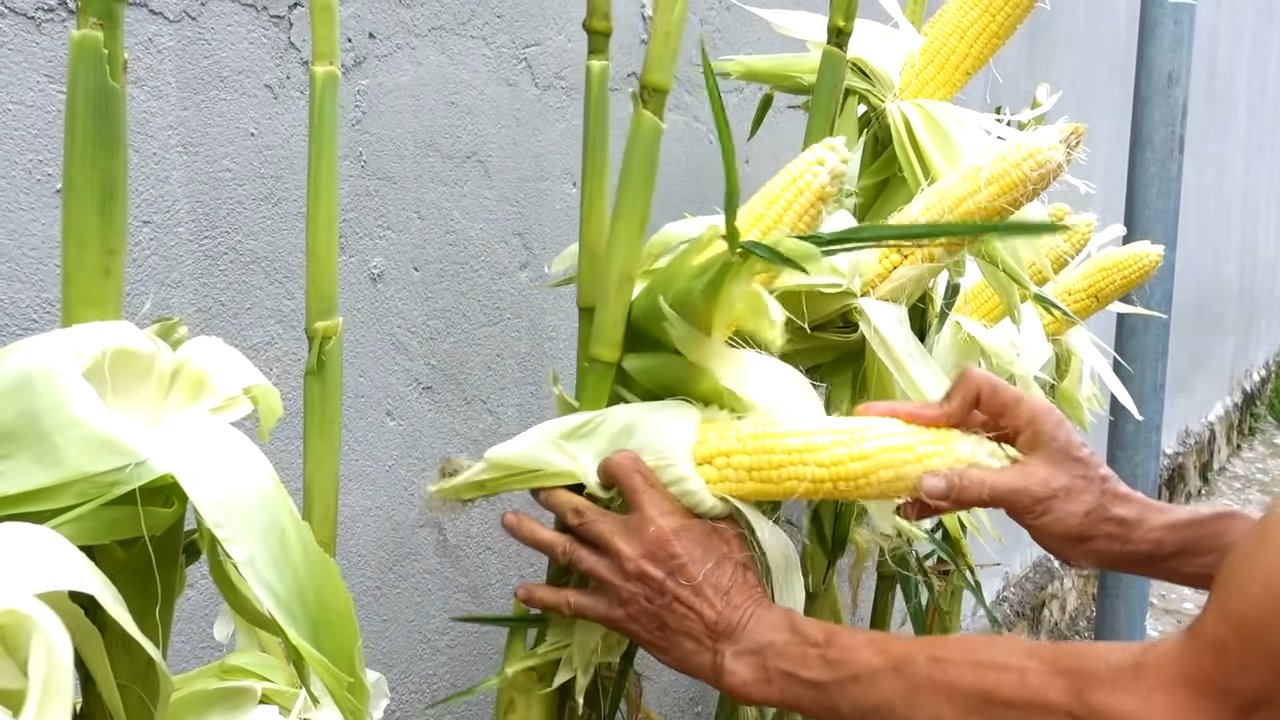
1. Reife erkennen: Die Maiskolben sind reif, wenn die Seidenfäden braun und trocken sind und die Kolben sich prall anfühlen.
2. Ernten: Brecht die Maiskolben vorsichtig von der Pflanze ab.
3. Genießen: Entfernt die Hüllblätter und die Seidenfäden und genießt den frischen Zuckermais! Ihr könnt ihn kochen, grillen oder roh essen.
Zusätzliche Tipps für den erfolgreichen Maisanbau im Betonhof:
* Sortenwahl: Wählt eine Maissorte, die für den Anbau in Töpfen geeignet ist. Es gibt spezielle Sorten, die kompakter wachsen und weniger Platz benötigen.
* Standort: Achtet auf einen sonnigen und warmen Standort. Mais braucht mindestens 6 Stunden Sonne pro Tag.
* Windschutz: Schützt die Pflanzen vor starkem Wind, indem ihr sie an einer Wand oder einem Zaun aufstellt.
* Nachbarn: Pflanzt mehrere Maispflanzen nebeneinander, um die Bestäubung zu verbessern.
* Kreativität: Nutzt den Maisanbau im Betonhof, um euren Außenbereich zu verschönern. Ihr könnt die Pflanzgefäße mit anderen Pflanzen kombinieren oder sie dekorativ anordnen.
Ich hoffe, diese Anleitung hilft euch dabei, euren eigenen Mais im Betonhof anzubauen. Es ist ein tolles Gefühl, die eigenen Früchte zu ernten und zu genießen. Viel Erfolg und viel Spaß beim Gärtnern!
Conclusion
So, there you have it! Growing corn in a concrete yard might seem like an impossible feat, but with this simple DIY trick, you can enjoy the taste of homegrown corn even without a traditional garden. This method isn’t just about circumventing the limitations of your space; it’s about embracing resourcefulness and connecting with the natural world, even in the most urban environments.
Why is this DIY approach a must-try? Because it empowers you to cultivate fresh, delicious corn regardless of your living situation. Imagine stepping outside your door and harvesting your own sweet corn for dinner – a truly rewarding experience. Beyond the satisfaction of growing your own food, this method is also incredibly cost-effective. Think about it: no need to purchase expensive corn from the grocery store when you can have a steady supply right at your fingertips. Plus, you know exactly what went into growing your corn, ensuring it’s free from harmful pesticides and chemicals.
But the benefits don’t stop there. This DIY corn-growing trick is also a fantastic educational opportunity, especially if you have children. It’s a hands-on way to teach them about plant life cycles, the importance of sustainable practices, and the joy of growing their own food. It fosters a sense of responsibility and connection to nature, which are invaluable lessons in today’s world.
Now, let’s talk about variations and suggestions to personalize your corn-growing experience. While we’ve focused on growing corn in containers, you can adapt this method to suit your specific needs and preferences. For instance, you could experiment with different varieties of corn, such as sweet corn, popcorn, or even ornamental corn. Each variety offers a unique flavor and texture, allowing you to tailor your harvest to your culinary desires.
Another variation involves the type of container you use. While large pots are ideal, you can also repurpose other containers, such as old buckets, barrels, or even large plastic tubs. Just make sure the container has adequate drainage holes to prevent waterlogging. You can also explore different soil mixes to find the one that works best for your climate and corn variety. Adding compost or other organic matter to the soil will further enhance its fertility and promote healthy growth.
Consider companion planting to maximize your yields and deter pests. Marigolds, for example, are known to repel nematodes and other harmful insects. Beans can help fix nitrogen in the soil, benefiting the corn plants. Experiment with different combinations to find what works best for your concrete yard environment.
Finally, don’t be afraid to get creative with your setup. You can build a simple trellis to support the corn stalks as they grow, or you can create a mini-greenhouse to extend the growing season. The possibilities are endless!
We wholeheartedly encourage you to try this DIY corn-growing trick and experience the joy of harvesting your own homegrown corn. It’s a simple, rewarding, and sustainable way to connect with nature, even in the most unlikely of places. Once you’ve given it a try, we’d love to hear about your experience! Share your photos, tips, and challenges in the comments section below. Let’s create a community of urban gardeners who are passionate about growing their own food and sharing their knowledge with others. Remember, growing corn in a concrete yard is not just a possibility; it’s a reality waiting to be embraced. So, grab your seeds, soil, and containers, and let’s get growing! Let’s see how you can make the most of this **concrete yard corn growing** method.
Frequently Asked Questions (FAQ)
1. What type of corn is best for growing in containers in a concrete yard?
The best type of corn for container gardening is typically shorter, more compact varieties. Sweet corn varieties like ‘Golden Bantam’ or ‘Early Sunglow’ are excellent choices because they mature quickly and don’t require as much space as taller varieties. Popcorn varieties can also be grown, but be mindful of their potential height. Consider dwarf or miniature corn varieties specifically bred for container gardening if space is a major concern. Always check the seed packet for information on plant height and spacing requirements.
2. How much sunlight does corn need when grown in a concrete yard?
Corn requires at least 6-8 hours of direct sunlight per day to thrive. A concrete yard can actually be advantageous in this regard, as the concrete can reflect sunlight and increase the overall light intensity around the plants. However, be mindful of potential overheating, especially during the hottest part of the day. If your concrete yard gets excessively hot, consider providing some shade during the afternoon hours to prevent the corn plants from getting stressed. Monitor the leaves for signs of sunburn, such as browning or wilting.
3. What size container is needed for growing corn in a concrete yard?
Corn plants need a substantial amount of space for their roots to develop properly. A minimum container size of 12-15 inches in diameter and depth is recommended for each plant. Larger containers, such as half-barrels or large plastic tubs, are even better, as they provide more room for root growth and help retain moisture. Ensure the container has adequate drainage holes to prevent waterlogging, which can lead to root rot.
4. What type of soil is best for growing corn in containers?
Corn needs a well-draining, fertile soil that is rich in organic matter. A good potting mix specifically formulated for vegetables is a great starting point. You can also amend the potting mix with compost, aged manure, or other organic materials to improve its fertility and water-holding capacity. Avoid using garden soil directly in containers, as it can become compacted and poorly drained. A slightly acidic to neutral pH (around 6.0-7.0) is ideal for corn growth.
5. How often should I water corn grown in containers in a concrete yard?
Corn plants are heavy drinkers, especially during hot weather. Water deeply and regularly, ensuring the soil stays consistently moist but not waterlogged. Check the soil moisture level daily, and water when the top inch feels dry to the touch. Concrete yards can get very hot, which can cause the soil to dry out quickly. Consider using a soaker hose or drip irrigation system to provide a slow, steady supply of water directly to the roots. Mulching around the base of the plants can also help retain moisture and suppress weeds.
6. What fertilizer should I use for corn grown in containers?
Corn is a heavy feeder and requires regular fertilization to produce a good harvest. Use a balanced fertilizer with a ratio of 10-10-10 or 14-14-14, or a fertilizer specifically formulated for vegetables. Apply the fertilizer according to the package instructions, typically every 2-3 weeks during the growing season. You can also supplement with organic fertilizers, such as compost tea or fish emulsion. Avoid over-fertilizing, as this can lead to excessive vegetative growth and reduced ear production.
7. How do I pollinate corn grown in containers?
Corn is wind-pollinated, meaning the pollen from the tassels (male flowers) needs to reach the silks (female flowers) on the ears. In a container setting, natural wind pollination may not be sufficient. You can assist pollination by gently shaking the corn stalks to release pollen or by using a small paintbrush to transfer pollen from the tassels to the silks. Repeat this process every day for several days to ensure adequate pollination. You’ll know pollination is successful when the silks turn brown and dry.
8. How do I protect corn from pests and diseases in a concrete yard?
While concrete yards can offer some protection from certain pests, corn plants are still susceptible to various insects and diseases. Common pests include corn earworms, aphids, and spider mites. Regularly inspect your plants for signs of infestation and take appropriate action, such as hand-picking pests, spraying with insecticidal soap, or using neem oil. Diseases like corn smut and leaf blight can also affect corn plants. Ensure good air circulation around the plants and avoid overhead watering to minimize the risk of fungal diseases. Remove any infected leaves or plants promptly to prevent the spread of disease.
9. When is corn ready to harvest?
Corn is typically ready to harvest about 60-90 days after planting, depending on the variety. The silks will turn brown and dry, and the ears will feel plump and full. To test for ripeness, gently peel back a portion of the husk and puncture a kernel with your fingernail. If the liquid that comes out is milky, the corn is ready to harvest. If the liquid is clear, the corn is not yet ripe. If the liquid is doughy, the corn is overripe. Harvest the corn by twisting the ear downward and snapping it off the stalk.
10. Can I grow other vegetables alongside corn in containers in a concrete yard?
Yes, companion planting can be beneficial for corn grown in containers. Good companion plants for corn include beans, squash, and cucumbers. Beans help fix nitrogen in the soil, benefiting the corn plants. Squash and cucumbers provide ground cover, which helps retain moisture and suppress weeds. Avoid planting tomatoes or brassicas (cabbage, broccoli, cauliflower) near corn, as they can compete for nutrients and attract pests.
Leave a Comment