
Growing Romanesco Cauliflower might seem like tackling a culinary Everest, but trust me, with a few clever tricks and a dash of DIY spirit, you can cultivate this fractal beauty right in your own backyard! Forget those bland, store-bought veggies; imagine serving up a stunning, homegrown Romanesco Cauliflower that’s bursting with flavor and visual appeal.
For centuries, Romanesco Cauliflower has captivated chefs and gardeners alike. Originating in Italy, this unique vegetable isn’t just a feast for the eyes; it’s also packed with nutrients and boasts a delicate, nutty taste. But let’s be honest, getting it to thrive can be a bit of a challenge. That’s where our DIY hacks come in!
I know what you’re thinking: “I don’t have a green thumb!” But don’t worry, this isn’t about being a master gardener. It’s about learning simple, effective techniques that will dramatically increase your chances of success. We’ll cover everything from soil preparation and pest control to the perfect harvesting time.
Why bother with all this effort? Because growing Romanesco Cauliflower yourself means enjoying fresher, healthier produce, saving money, and experiencing the immense satisfaction of nurturing something from seed to table. Plus, imagine the bragging rights! So, let’s dive in and unlock the secrets to cultivating this extraordinary vegetable. You’ll be amazed at what you can achieve with a little know-how and a can-do attitude!
Growing Romanesco Cauliflower: A DIY Guide to Bizarre Beauty
Okay, so you want to grow Romanesco cauliflower? Awesome! It’s definitely a head-turner (pun intended!) and tastes fantastic. It’s a bit more demanding than regular cauliflower, but trust me, the reward is worth it. I’ve had some pretty spectacular successes (and a few epic fails!), so I’m going to share everything I’ve learned to help you cultivate your own fractal florets.
Understanding Romanesco: It’s Not Just a Pretty Face
Before we dive in, let’s talk a little about Romanesco. It’s technically a type of broccoli, but it’s often called Romanesco cauliflower because, well, it looks like a psychedelic cauliflower. The key thing to remember is that it’s a cool-season crop, meaning it thrives in cooler temperatures. Heat is its enemy!
Getting Started: Seeds vs. Transplants
You have two options: starting from seed or buying transplants.
* Seeds: This gives you more control and is generally cheaper. However, it requires more time and attention.
* Transplants: This is easier and faster, but you’re limited to what’s available at your local nursery.
I usually start from seed because I like the challenge and the wider variety of options. But if you’re a beginner, transplants are a perfectly fine way to go.
Starting from Seed (My Preferred Method!)
If you’re going the seed route, here’s how I do it:
1. Timing is Everything: Romanesco needs a long growing season, so you’ll need to start your seeds indoors about 4-6 weeks before the last expected frost in your area. Check your local frost dates! I usually start mine in late February or early March.
2. Seed Starting Mix: Use a good quality seed starting mix. Don’t use garden soil! It’s too heavy and can harbor diseases. I like to use a mix of peat moss, vermiculite, and perlite.
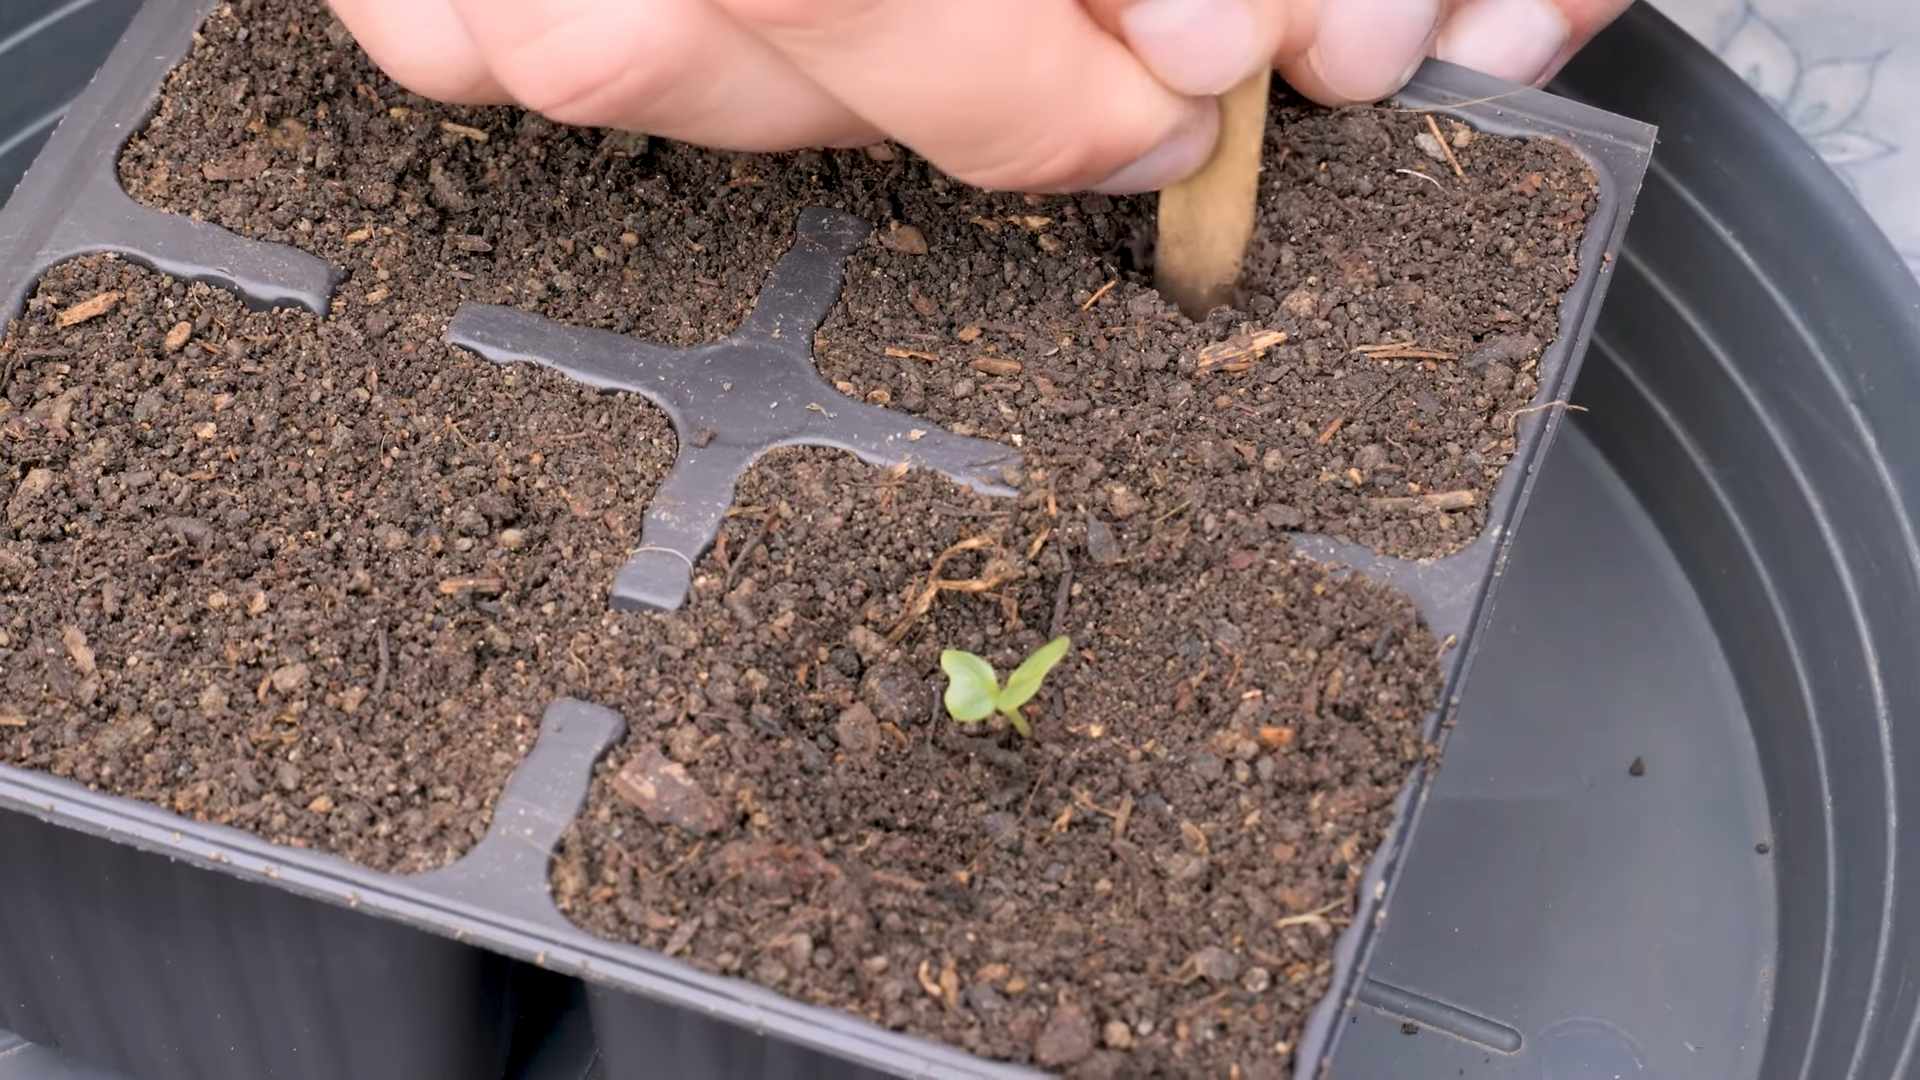
3. Planting the Seeds: Fill your seed starting trays or pots with the mix. Make a small indentation (about 1/4 inch deep) in each cell. Place one or two seeds in each indentation and cover lightly with the mix.
4. Watering: Gently water the seeds using a spray bottle or watering can with a fine rose. You want to keep the soil consistently moist, but not soggy.
5. Warmth and Light: Place the trays in a warm location (around 70-75°F) and provide plenty of light. A heat mat can help with germination. Once the seedlings emerge, they need bright light to prevent them from becoming leggy. A grow light is ideal, but a sunny windowsill can work if it gets at least 6 hours of direct sunlight.
6. Thinning: Once the seedlings have their first true leaves (the second set of leaves), thin them to one plant per cell. Snip off the weaker seedling at the soil line. Don’t pull it out, as you might disturb the roots of the remaining seedling.
7. Hardening Off: About a week before you plan to transplant the seedlings outdoors, you need to harden them off. This means gradually exposing them to outdoor conditions. Start by placing them outside in a sheltered location for a few hours each day, gradually increasing the amount of time they spend outdoors. This will help them acclimate to the sun, wind, and temperature changes.
Preparing the Garden Bed
Romanesco needs rich, well-drained soil. Here’s how I prepare my garden bed:
1. Choose a Sunny Location: Romanesco needs at least 6 hours of direct sunlight per day.
2. Soil Testing: It’s always a good idea to test your soil to see what nutrients it’s lacking. You can buy a soil testing kit at your local garden center or send a sample to your local agricultural extension office.
3. Amend the Soil: Based on your soil test results, amend the soil with compost, well-rotted manure, or other organic matter. Romanesco is a heavy feeder, so it needs plenty of nutrients. I usually add a generous amount of compost and some bone meal for phosphorus.
4. Ensure Good Drainage: Romanesco doesn’t like soggy soil. If your soil is heavy clay, amend it with sand or other materials to improve drainage.
5. pH Level: Romanesco prefers a slightly acidic to neutral soil pH (around 6.0-7.0).
Transplanting Romanesco Seedlings
Okay, your seedlings are hardened off, and your garden bed is ready. Time to transplant!
1. Timing: Transplant your seedlings outdoors after the last expected frost. The soil temperature should be at least 50°F.
2. Spacing: Space the seedlings about 18-24 inches apart in rows that are 24-36 inches apart. This gives them plenty of room to grow.
3. Planting Depth: Dig a hole that is slightly larger than the root ball of the seedling. Gently remove the seedling from its container and place it in the hole. Make sure the top of the root ball is level with the soil surface.
4. Watering: Water the seedlings thoroughly after transplanting.
5. Mulching: Apply a layer of mulch around the plants to help retain moisture, suppress weeds, and regulate soil temperature. I like to use straw or shredded leaves.
Caring for Your Romanesco Plants
Now that your Romanesco plants are in the ground, here’s how to keep them happy and healthy:
1. Watering: Romanesco needs consistent moisture, especially during head formation. Water deeply and regularly, especially during dry spells. Avoid overhead watering, as this can promote fungal diseases. Soaker hoses or drip irrigation are ideal.
2. Fertilizing: Feed your Romanesco plants every 2-3 weeks with a balanced fertilizer. I like to use a liquid fertilizer diluted to half strength. You can also side-dress with compost or well-rotted manure.
3. Weeding: Keep the garden bed free of weeds. Weeds compete with the Romanesco plants for nutrients and water.
4. Pest Control: Romanesco is susceptible to several pests, including cabbage worms, aphids, and flea beetles.
* Cabbage Worms: These are green caterpillars that chew holes in the leaves. Handpick them off the plants or use a biological insecticide like Bacillus thuringiensis (Bt).
* Aphids: These are small, sap-sucking insects that can weaken the plants. Spray them with a strong stream of water or use insecticidal soap.
* Flea Beetles: These are tiny, jumping beetles that chew small holes in the leaves. Cover the plants with row covers to prevent them from reaching the plants.
5. Disease Control: Romanesco is also susceptible to several diseases, including black rot, clubroot, and downy mildew.
* Black Rot: This is a bacterial disease that causes black lesions on the leaves. Plant disease-resistant varieties and avoid overhead watering.
* Clubroot: This is a fungal disease that causes swollen, distorted roots. Rotate your crops and amend the soil with lime to raise the pH.
* Downy Mildew: This is a fungal disease that causes yellow spots on the leaves. Improve air circulation and avoid overhead watering.
Protecting from Frost
Romanesco is a cool-season crop, but it can still be damaged by frost. If a frost is predicted, cover the plants with row covers, blankets, or tarps.
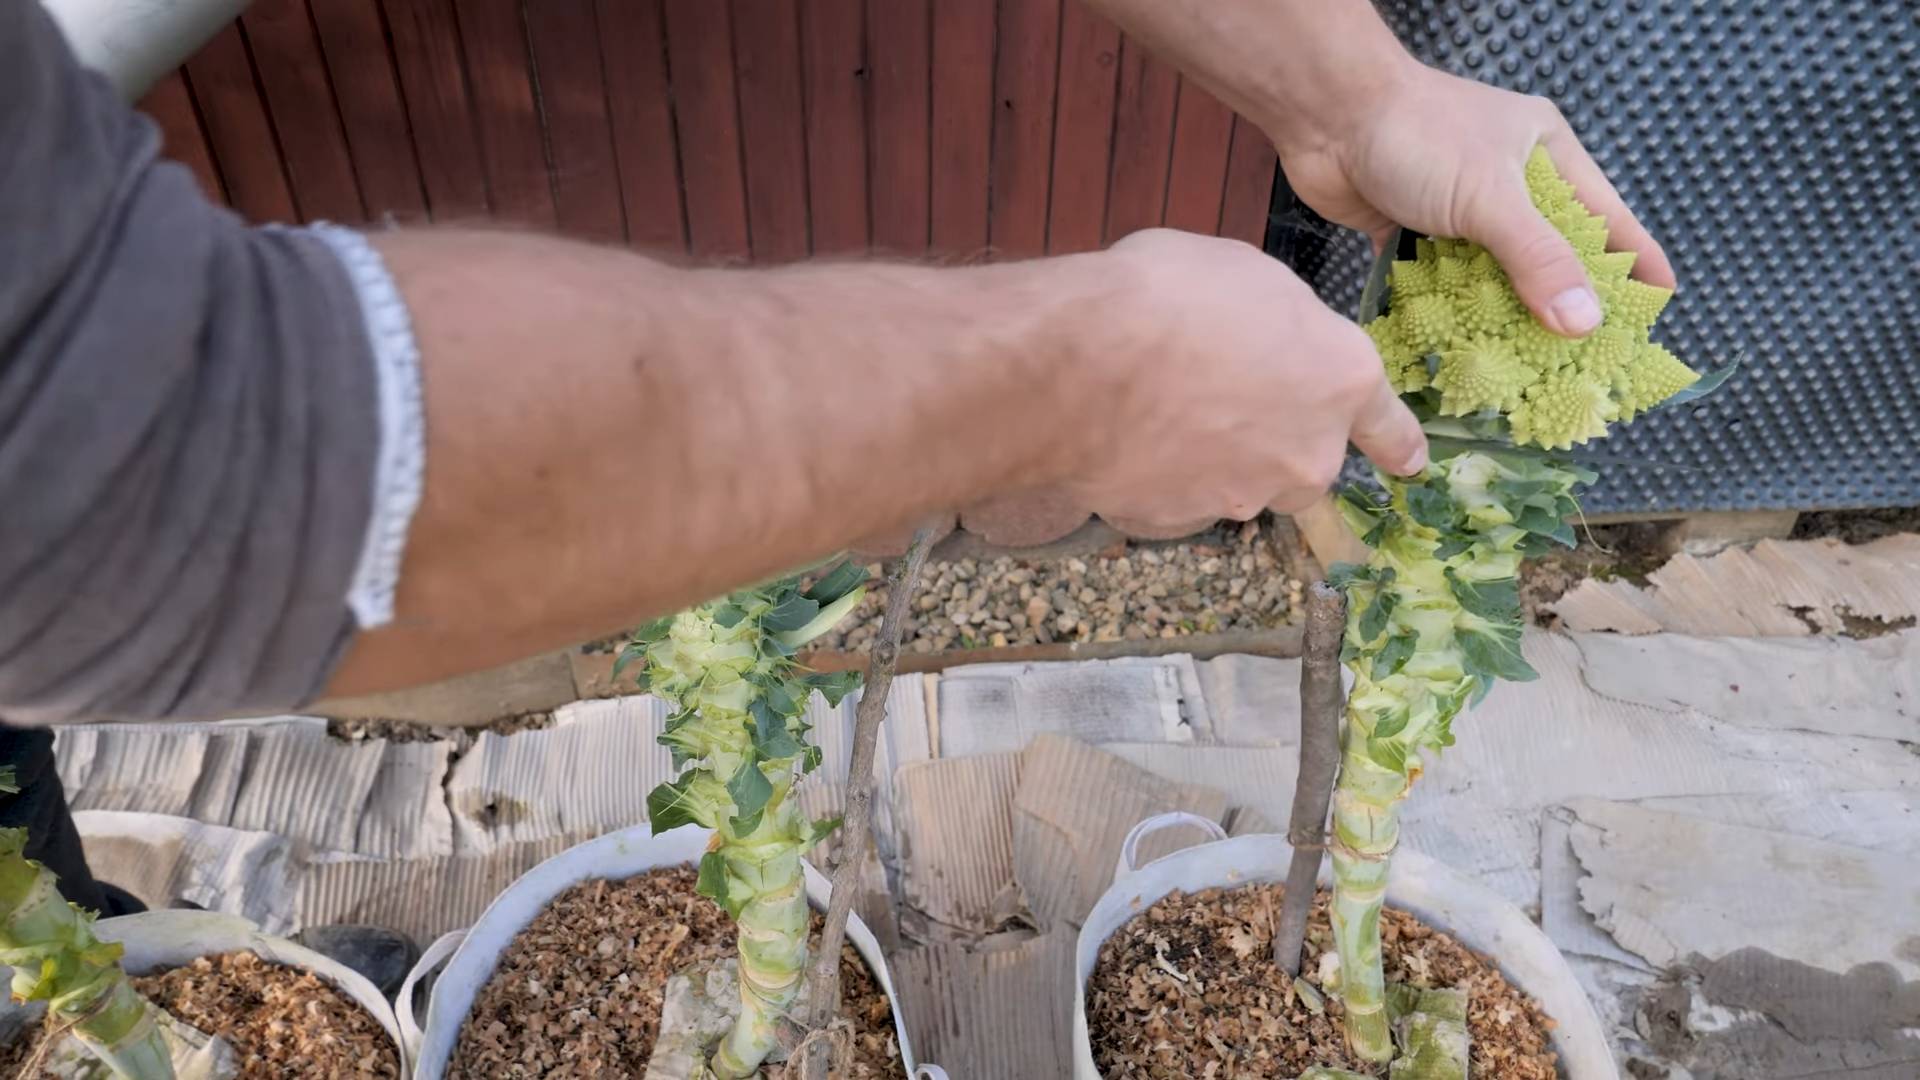
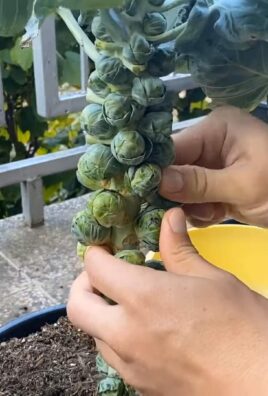
Harvesting Your Romanesco
This is the exciting part!
1. Timing: Romanesco is ready to harvest when the head is firm and compact, and the florets are tightly closed. The head should be about 6-8 inches in diameter.
2. Cutting: Use a sharp knife to cut the head from the plant, leaving a few inches of stem attached.
3. Storage: Store the Romanesco in the refrigerator for up to a week.
Troubleshooting
Sometimes, things don’t go as planned. Here are some common problems and how to fix them:
* No Head Formation: This can be caused by several factors, including lack of nutrients, too much heat, or inconsistent watering. Make sure you’re fertilizing regularly, providing plenty of water, and protecting the plants from heat.
* Loose Head: This can be caused by too much heat or inconsistent watering. Make sure you’re providing plenty of water and protecting the plants from heat.
* Bolting: This is when the plant starts to flower prematurely. It’s usually caused by stress, such as heat or drought. Make sure you’re providing plenty of water and protecting the plants from heat.
Enjoying Your Harvest
Romanesco is delicious raw or cooked. You can eat it in salads, stir-fries, soups, or roasted. It has
Conclusion
So, there you have it! Growing Romanesco cauliflower isn’t just about adding another vegetable to your garden; it’s about cultivating a piece of edible art. The unique fractal patterns of this vegetable are captivating, and the slightly nutty, delicate flavor is a welcome change from ordinary cauliflower. While it might seem intimidating at first, with a little planning and attention, you can absolutely succeed in growing your own Romanesco cauliflower.
This DIY trick, focusing on [specific trick mentioned throughout the article, e.g., consistent watering and soil pH management], is a must-try because it directly addresses the most common challenges gardeners face when cultivating this particular variety. Neglecting these aspects can lead to stunted growth, misshapen heads, or even complete crop failure. By implementing this strategy, you’re setting yourself up for a bountiful harvest of perfectly formed, delicious Romanesco.
But don’t stop there! Experiment with different companion plants to deter pests naturally. Try interplanting with herbs like rosemary or thyme, or flowers like marigolds. You can also explore different planting times depending on your local climate to extend your growing season. Consider succession planting, sowing seeds every few weeks, to ensure a continuous supply of Romanesco throughout the fall. Another variation to consider is growing Romanesco in containers. This allows for better control over soil conditions and can be particularly useful if you have limited garden space or poor soil quality. Just be sure to choose a large container with good drainage.
We’ve armed you with the knowledge and the DIY trick to succeed. Now, it’s your turn to get your hands dirty! We are confident that with a little patience and care, you’ll be rewarded with a stunning and delicious harvest. Don’t be afraid to experiment and adapt the techniques to suit your specific growing conditions.
We’re eager to hear about your experiences! Share your photos, tips, and challenges in the comments below. Let’s build a community of Romanesco growers and learn from each other. What worked for you? What didn’t? What unique variations did you try? Your insights could be invaluable to other gardeners embarking on this rewarding journey. Remember, growing Romanesco cauliflower is not just about the end result; it’s about the process, the learning, and the satisfaction of nurturing something beautiful and delicious from seed to table. So, go ahead, give it a try, and let us know how it goes! Happy gardening!
Frequently Asked Questions (FAQ)
What exactly makes Romanesco cauliflower so difficult to grow?
Romanesco cauliflower, while visually stunning and delicious, can be a bit more demanding than regular cauliflower. Several factors contribute to its reputation for being challenging. First, it’s highly susceptible to bolting, which means it prematurely goes to seed if exposed to temperature fluctuations or stress. This results in a bitter-tasting, unusable head. Second, it requires consistent moisture and nutrient levels throughout its growth cycle. Inconsistent watering or nutrient deficiencies can lead to stunted growth, misshapen heads, or even complete crop failure. Third, it’s vulnerable to various pests and diseases, including cabbage worms, aphids, and clubroot. These issues can quickly decimate a Romanesco crop if not addressed promptly. Finally, the timing of planting and harvesting is crucial. Planting too early or too late can expose the plants to unfavorable weather conditions, while harvesting too early or too late can affect the flavor and texture of the head.
How crucial is soil pH when growing Romanesco cauliflower?
Soil pH is extremely crucial for successful Romanesco cauliflower cultivation. Romanesco thrives in slightly acidic to neutral soil, with an ideal pH range of 6.0 to 7.0. If the soil pH is too high (alkaline), the plants may struggle to absorb essential nutrients like iron, manganese, and zinc, leading to nutrient deficiencies and stunted growth. Conversely, if the soil pH is too low (acidic), it can increase the availability of toxic elements like aluminum, which can harm the roots and inhibit growth. Before planting, it’s highly recommended to test your soil pH using a soil testing kit or by sending a sample to a local agricultural extension office. If the pH is outside the ideal range, you can amend the soil accordingly. Lime can be added to raise the pH, while sulfur or acidic organic matter can be added to lower it. Maintaining the correct soil pH ensures that the Romanesco plants can efficiently absorb the nutrients they need to grow healthy and produce beautiful, fractal-patterned heads.
What are the best companion plants for Romanesco cauliflower to deter pests?
Companion planting is a fantastic way to naturally deter pests and improve the overall health of your Romanesco cauliflower crop. Several plants work particularly well. Marigolds are a classic choice, as their strong scent repels many common pests, including nematodes and cabbage moths. Rosemary and thyme are also effective at deterring cabbage moths and other insects. Nasturtiums act as a trap crop, attracting aphids away from the Romanesco. Garlic and onions can help repel aphids, cabbage worms, and other pests with their pungent aroma. Interplanting with clover can improve soil fertility and attract beneficial insects that prey on pests. By strategically planting these companions alongside your Romanesco cauliflower, you can create a more resilient and pest-resistant garden.
How often should I water my Romanesco cauliflower plants?
Consistent watering is essential for growing healthy Romanesco cauliflower. The frequency of watering will depend on several factors, including the weather, soil type, and stage of growth. Generally, you should aim to keep the soil consistently moist but not waterlogged. During hot, dry weather, you may need to water daily or even twice a day, especially if your soil is sandy and drains quickly. In cooler, wetter weather, you may only need to water every few days. The best way to determine if your plants need water is to check the soil moisture level. Stick your finger about an inch into the soil. If it feels dry, it’s time to water. When watering, water deeply and thoroughly, ensuring that the water reaches the roots. Avoid shallow, frequent watering, as this can encourage shallow root growth and make the plants more susceptible to drought stress. Using a soaker hose or drip irrigation system can help deliver water directly to the roots and minimize water loss through evaporation.
What are the signs of common diseases affecting Romanesco cauliflower, and how can I prevent them?
Romanesco cauliflower, like other brassicas, is susceptible to several diseases. Being able to identify these diseases early is crucial for preventing widespread damage. Clubroot is a fungal disease that causes swollen, distorted roots, leading to stunted growth and wilting. To prevent clubroot, ensure good soil drainage, maintain a soil pH of 6.5 or higher, and practice crop rotation. Black rot is a bacterial disease that causes yellow, V-shaped lesions on the leaves, eventually leading to leaf drop. To prevent black rot, use disease-free seeds, avoid overhead watering, and practice crop rotation. Downy mildew is a fungal disease that causes yellow spots on the upper surface of the leaves and a white, fuzzy growth on the underside. To prevent downy mildew, ensure good air circulation, avoid overcrowding plants, and use a copper-based fungicide if necessary. By monitoring your plants regularly and taking preventative measures, you can minimize the risk of disease and ensure a healthy Romanesco cauliflower crop.
When is the right time to harvest Romanesco cauliflower?
Knowing when to harvest your Romanesco cauliflower is key to enjoying its optimal flavor and texture. The ideal time to harvest is when the head is firm, compact, and has reached its full size, typically around 6-8 inches in diameter. The individual florets should be tightly packed together and have a vibrant, healthy appearance. Avoid harvesting when the florets start to separate or become loose, as this indicates that the head is overripe and may have a bitter taste. Also, be sure to harvest before a hard frost, as freezing temperatures can damage the head. To harvest, use a sharp knife to cut the stem just below the head, leaving a few leaves attached for protection. Handle the head carefully to avoid bruising or damaging the delicate florets. Once harvested, Romanesco cauliflower can be stored in the refrigerator for up to a week.
Leave a Comment