
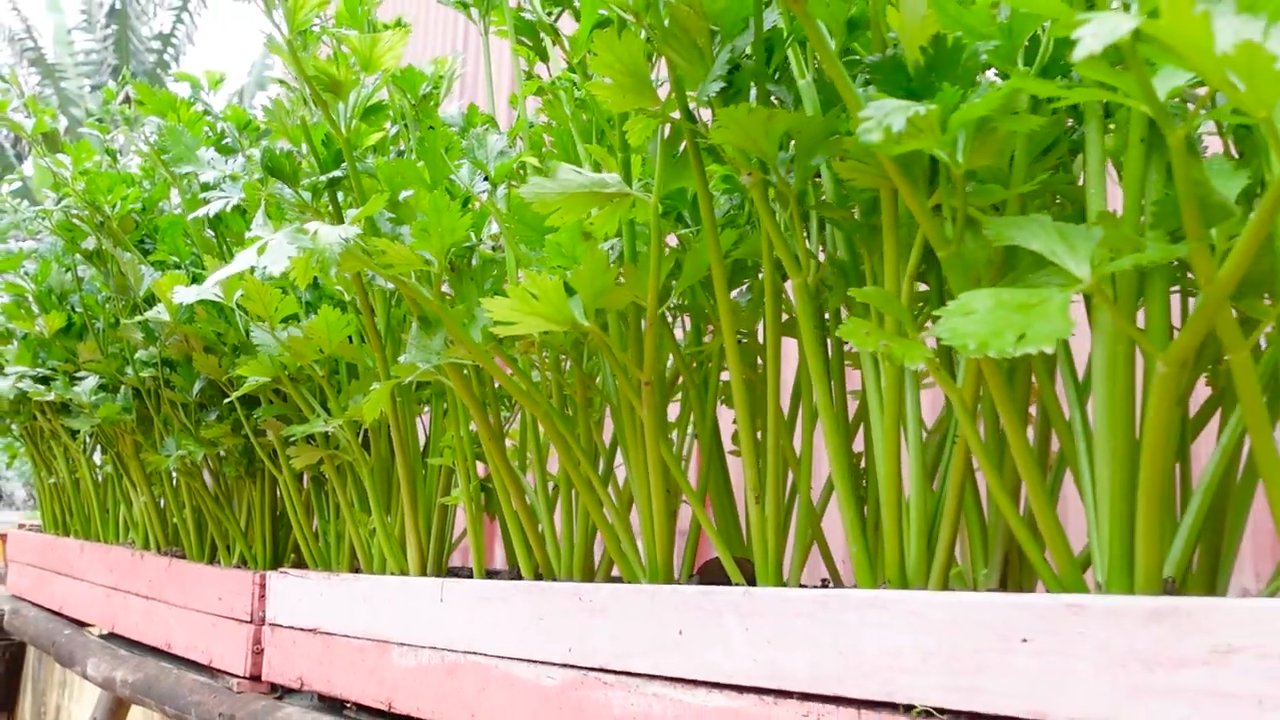
Growing Celery on a Fence? Sounds crazy, right? But trust me, this isn’t just some whimsical gardening fantasy! Imagine a vibrant green wall of crisp, juicy celery, not only adding a unique aesthetic to your garden but also maximizing your space and simplifying your harvest. For centuries, gardeners have been experimenting with vertical growing techniques, from ancient hanging gardens to modern-day hydroponics. While celery on a fence might not be as historically grand, it’s a brilliant adaptation of these principles for the everyday home gardener.
Let’s be honest, traditional celery growing can be a bit of a pain. It requires a lot of space, careful watering, and constant attention to prevent bolting. But what if I told you there’s a way to bypass many of these challenges? That’s where this DIY guide comes in! We’re going to explore a clever method of growing celery on a fence, transforming your garden into a vertical oasis. This isn’t just about novelty; it’s about efficiency, accessibility, and enjoying fresh, homegrown celery with minimal effort. So, grab your gardening gloves, and let’s get started on this exciting adventure!
Vertikaler Sellerie-Garten: So baust du Sellerie am Zaun an!
Hey Gartenfreunde! Habt ihr schon mal darüber nachgedacht, Sellerie an eurem Zaun anzubauen? Klingt verrückt, oder? Aber glaubt mir, es ist nicht nur platzsparend, sondern auch ein echter Hingucker! Ich zeige euch, wie ihr mit ein paar einfachen Schritten euren eigenen vertikalen Sellerie-Garten kreieren könnt. Los geht’s!
Was du brauchst: Die Materialliste
Bevor wir loslegen, hier eine Liste der Dinge, die du für dieses Projekt benötigst:
* Selleriesamen oder Selleriepflanzen: Ich empfehle, mit Jungpflanzen zu beginnen, da es schneller geht. Aber Samen funktionieren auch!
* Pflanztaschen oder vertikale Pflanzgefäße: Diese gibt es in verschiedenen Größen und Materialien. Wähle welche, die zu deinem Zaun passen.
* Gartenerde: Eine gute, nährstoffreiche Erde ist das A und O.
* Kompost: Für zusätzlichen Dünger und eine bessere Bodenstruktur.
* Zaunbefestigungen: Kabelbinder, Haken oder Schrauben, je nachdem, wie du deine Pflanztaschen befestigen möchtest.
* Gießkanne oder Gartenschlauch: Zum Bewässern deiner Selleriepflanzen.
* Schere oder Messer: Zum Zuschneiden von Materialien.
* Handschuhe: Um deine Hände sauber zu halten.
* Optional: Eine kleine Schaufel oder Kelle zum Befüllen der Pflanztaschen.
Schritt-für-Schritt-Anleitung: Dein vertikaler Sellerie-Garten entsteht
Jetzt, wo wir alles haben, können wir mit dem Bau unseres vertikalen Sellerie-Gartens beginnen. Keine Sorge, es ist einfacher als es aussieht!
Phase 1: Vorbereitung des Zauns und der Pflanztaschen
1. Zaun überprüfen: Stelle sicher, dass dein Zaun stabil genug ist, um das Gewicht der Pflanztaschen und der Erde zu tragen. Ein wackeliger Zaun ist keine gute Basis für unseren Garten.
2. Pflanztaschen anordnen: Lege deine Pflanztaschen auf den Boden und ordne sie so an, wie du sie später am Zaun haben möchtest. So bekommst du ein Gefühl für das Gesamtbild.
3. Befestigungspunkte markieren: Markiere mit einem Stift oder Kreide die Stellen am Zaun, an denen du die Pflanztaschen befestigen möchtest. Achte darauf, dass die Abstände gleichmäßig sind.
4. Pflanztaschen vorbereiten: Wenn deine Pflanztaschen Löcher für die Befestigung haben, überprüfe, ob sie an den markierten Stellen am Zaun passen.
Phase 2: Befestigung der Pflanztaschen am Zaun
1. Befestigungsmaterial auswählen: Entscheide dich für die Art der Befestigung, die am besten zu deinem Zaun und deinen Pflanztaschen passt. Kabelbinder sind einfach und schnell, Haken sind stabiler und Schrauben sind die sicherste Option.
2. Pflanztaschen befestigen: Befestige die Pflanztaschen an den markierten Stellen am Zaun. Achte darauf, dass sie fest sitzen und nicht herunterfallen können. Bei Kabelbindern ziehe sie fest an, bei Haken hänge die Taschen ein und bei Schrauben verwende einen Schraubenzieher oder Akkuschrauber.
3. Stabilität prüfen: Überprüfe nach dem Anbringen jeder Pflanztasche die Stabilität. Wackelt etwas? Dann musst du die Befestigung verstärken.
Phase 3: Befüllen der Pflanztaschen mit Erde
1. Erde vorbereiten: Mische die Gartenerde mit Kompost. Das sorgt für eine gute Nährstoffversorgung und eine lockere Bodenstruktur.
2. Pflanztaschen befüllen: Fülle die Pflanztaschen mit der Erdmischung. Lasse oben ein paar Zentimeter frei, damit beim Gießen nichts überläuft.
3. Erde andrücken: Drücke die Erde leicht an, damit sie sich setzt. Aber nicht zu fest, die Wurzeln brauchen noch Luft!
4. Gießen: Gieße die Erde in den Pflanztaschen, bis sie gut durchfeuchtet ist.
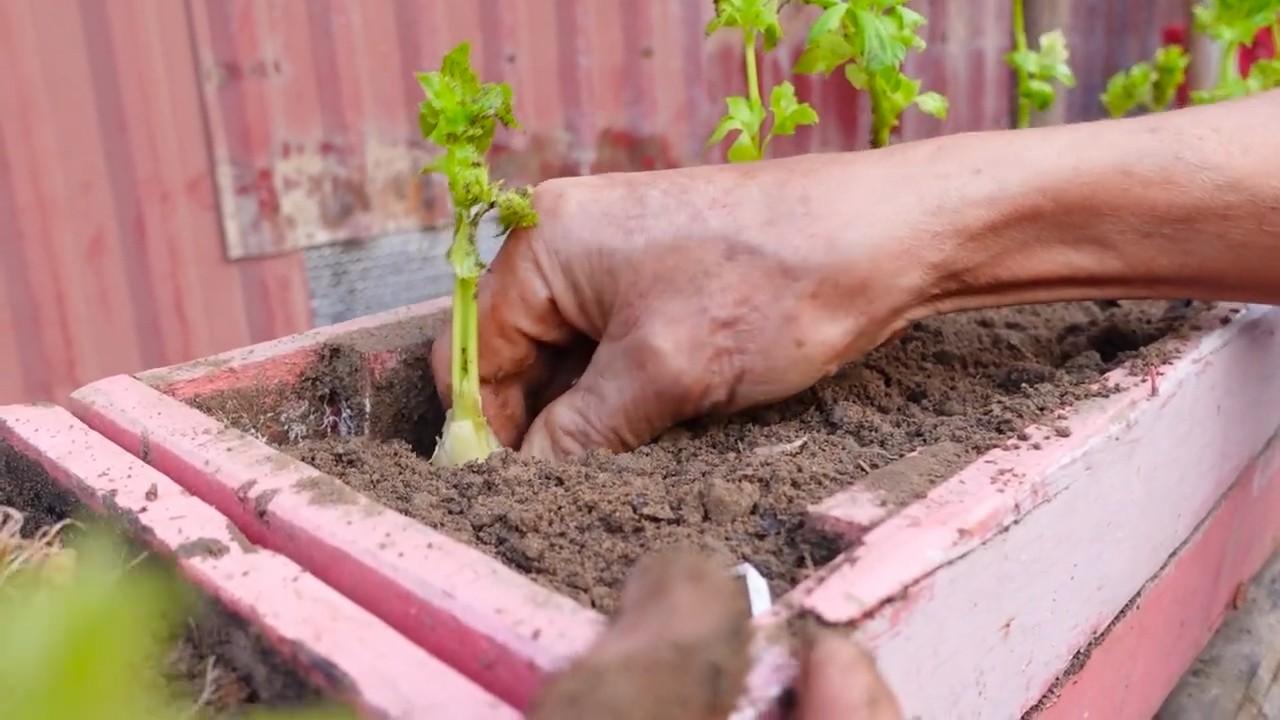
Phase 4: Einpflanzen des Selleries
1. Selleriepflanzen vorbereiten: Wenn du Jungpflanzen verwendest, nimm sie vorsichtig aus ihren Töpfen. Lockere die Wurzeln etwas auf, damit sie besser anwachsen können.
2. Pflanzlöcher graben: Grabe in jeder Pflanztasche kleine Löcher, die groß genug für die Wurzelballen der Selleriepflanzen sind.
3. Sellerie einpflanzen: Setze die Selleriepflanzen in die Löcher und fülle sie mit Erde auf. Drücke die Erde leicht an.
4. Gießen: Gieße die neu eingepflanzten Selleriepflanzen gründlich.
Phase 5: Pflege deines vertikalen Sellerie-Gartens
1. Regelmäßiges Gießen: Sellerie braucht viel Wasser. Gieße deine Pflanzen regelmäßig, besonders an heißen Tagen. Die Erde sollte immer feucht, aber nicht nass sein.
2. Düngen: Dünge deine Selleriepflanzen alle paar Wochen mit einem organischen Dünger. Das sorgt für ein gesundes Wachstum.
3. Schädlinge kontrollieren: Achte auf Schädlinge wie Blattläuse oder Schnecken. Bei Bedarf kannst du biologische Schädlingsbekämpfungsmittel einsetzen.
4. Unkraut entfernen: Entferne regelmäßig Unkraut aus den Pflanztaschen. Unkraut stiehlt den Selleriepflanzen Nährstoffe und Wasser.
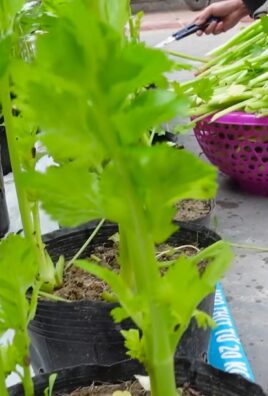
5. Ernten: Du kannst die äußeren Stängel des Selleries ernten, sobald sie groß genug sind. Schneide sie einfach mit einem Messer ab. Der Sellerie wird weiterwachsen und neue Stängel bilden.
Zusätzliche Tipps und Tricks für deinen Sellerie-Garten
* Standort: Sellerie braucht einen sonnigen Standort, aber nicht unbedingt den ganzen Tag volle Sonne. Ein halbschattiger Platz ist ideal.
* Boden: Achte darauf, dass die Erde gut durchlässig ist. Sellerie mag keine Staunässe.
* Sortenwahl: Es gibt verschiedene Selleriesorten. Wähle eine Sorte, die für den Anbau in Pflanzgefäßen geeignet ist.
* Mulchen: Mulche die Erde in den Pflanztaschen mit Stroh oder Rasenschnitt. Das hält die Feuchtigkeit im Boden und unterdrückt Unkraut.
* Überwinterung: Sellerie ist nicht winterhart. Wenn du ihn überwintern möchtest, musst du ihn ins Haus holen oder ihn mit Vlies abdecken.
* Kombinationspflanzung: Pflanze Sellerie zusammen mit anderen Pflanzen, die sich gegenseitig unterstützen. Gute Nachbarn sind zum Beispiel Tomaten, Zwiebeln und Knoblauch.
Häufige Fehler vermeiden: Was du nicht tun solltest
* Zu wenig gießen: Sellerie braucht viel Wasser. Wenn die Blätter welk werden, ist das ein Zeichen für Wassermangel.
* Zu viel düngen: Zu viel Dünger kann die Wurzeln verbrennen. Halte dich an die Dosierungsanleitung auf der Verpackung.
* Schädlinge ignorieren: Schädlinge können den Sellerie schädigen. Kontrolliere deine Pflanzen regelmäßig und bekämpfe Schädlinge frühzeitig.
* Falsche Erde verwenden: Verwende keine normale Gartenerde, sondern eine spezielle Pflanzerde. Gartenerde ist oft zu schwer und verdichtet sich schnell.
* Zu eng pflanzen: Gib den Selleriepflanzen genügend Platz zum Wachsen. Wenn sie zu eng stehen, können sie sich gegenseitig behindern.
Warum Sellerie am Zaun anbauen? Die Vorteile auf einen Blick
* Platzsparend: Ideal für kleine Gärten oder Balkone.
* Dekorativ: Ein vertikaler Sellerie-Garten ist ein echter Hingucker.
* Frischer Sellerie: Du hast immer frischen Sellerie zur Hand.
* Weniger Schädlinge: Durch die erhöhte Position sind die Pflanzen weniger anfällig für Schädlinge.
* Einfache Ernte: Die Ernte ist bequem und rückenschonend.
Conclusion
So, there you have it! Growing celery on a fence isn’t just a quirky gardening experiment; it’s a game-changer for small-space gardeners, a pest deterrent, and a visually stunning addition to your outdoor space. It’s a testament to the fact that with a little ingenuity, you can maximize your yields and minimize your gardening footprint. This method allows you to cultivate crisp, flavorful celery even if you’re limited to a balcony, patio, or have challenging soil conditions.
Why is this DIY trick a must-try? Because it’s efficient, sustainable, and frankly, incredibly satisfying. Imagine the pride of harvesting your own celery, grown vertically, right from your fence! You’ll not only enjoy fresh, organic produce, but you’ll also be contributing to a greener, more resourceful lifestyle. Plus, the unique aesthetic of celery growing vertically is a conversation starter and a beautiful addition to any garden.
But the benefits don’t stop there. By elevating your celery, you’re significantly reducing its susceptibility to common soil-borne pests and diseases. This means less need for pesticides and a healthier, more robust crop. The increased air circulation around the plants also promotes faster growth and prevents fungal issues.
Ready to take your fence gardening to the next level? Consider these variations:
* Experiment with different celery varieties: Try growing ‘Utah Tall’ for its classic flavor or ‘Golden Self-Blanching’ for a sweeter, milder taste.
* Companion planting: Plant herbs like parsley, sage, or thyme near your celery to further deter pests and enhance flavor.
* Vertical herb garden: Use the same fencing technique to grow other herbs like mint, basil, or oregano alongside your celery.
* Add a drip irrigation system: Automate watering for consistent moisture and optimal growth, especially during hot summer months.
* Use recycled materials: Get creative with your containers! Upcycle plastic bottles, old buckets, or even repurposed fabric bags to create your vertical growing system.
Don’t be afraid to experiment and adapt the technique to suit your specific needs and preferences. The beauty of DIY gardening is that it’s all about learning and growing (pun intended!) along the way.
We wholeheartedly encourage you to try this innovative method of growing celery on a fence. It’s a rewarding experience that will transform your gardening practices and provide you with a bountiful harvest of fresh, delicious celery. Once you’ve given it a try, we’d love to hear about your experience! Share your photos, tips, and challenges in the comments below. Let’s build a community of vertical celery growers and inspire others to embrace this sustainable and space-saving technique. Your insights could help fellow gardeners overcome obstacles and achieve even greater success. So, grab your celery seedlings, prepare your fence, and get ready to witness the magic of vertical gardening! Happy growing!
Frequently Asked Questions (FAQ)
What type of fence is best for growing celery?
The ideal fence for growing celery is one that is sturdy and provides adequate support for the plants as they grow. A chain-link fence, wooden fence, or even a sturdy trellis can work well. The key is to ensure that the fence is strong enough to hold the weight of the celery plants and the containers or growing medium you’ll be using. Consider the height of the fence as well; a taller fence will allow for more vertical growth and potentially a larger harvest. Also, make sure the fence receives adequate sunlight throughout the day, as celery needs at least 6 hours of sunlight to thrive.
How often should I water celery grown on a fence?
Celery requires consistent moisture to grow properly. When grown on a fence, the plants may dry out more quickly than those grown in the ground, especially during hot weather. Check the soil moisture daily, and water thoroughly whenever the top inch of soil feels dry to the touch. A good rule of thumb is to water deeply every 1-2 days, depending on the weather conditions. Consider using a drip irrigation system or soaker hose to provide a slow, steady supply of water directly to the roots. This will help prevent the soil from drying out too quickly and ensure that your celery plants receive the hydration they need.
What kind of soil should I use for growing celery vertically?
Celery thrives in rich, well-draining soil that is high in organic matter. When growing celery vertically in containers or hanging baskets, use a high-quality potting mix that is specifically formulated for container gardening. Amend the potting mix with compost or other organic matter to improve its fertility and water-retention capacity. Avoid using garden soil, as it can become compacted in containers and may not provide adequate drainage. A slightly acidic to neutral soil pH (around 6.0 to 7.0) is ideal for celery growth.
How do I protect my celery from pests and diseases when growing it on a fence?
Growing celery on a fence can help reduce the risk of soil-borne pests and diseases, but it’s still important to take precautions. Regularly inspect your plants for signs of pests, such as aphids, slugs, or caterpillars. Handpick any pests you find, or use organic pest control methods like insecticidal soap or neem oil. To prevent fungal diseases, ensure good air circulation around the plants and avoid overwatering. If you notice any signs of disease, such as yellowing leaves or spots, remove the affected leaves immediately. You can also apply a fungicide if necessary, but always follow the instructions on the label carefully. Companion planting with herbs like parsley or sage can also help deter pests.
Can I grow celery on a fence in a shady area?
Celery requires at least 6 hours of sunlight per day to grow properly. While it can tolerate some shade, it will not thrive in a completely shady area. If you only have a shady fence, consider using grow lights to supplement the natural sunlight. You can also try growing celery varieties that are more tolerant of shade, although they may not produce as large or flavorful stalks as those grown in full sun.
How long does it take to grow celery on a fence?
The time it takes to grow celery on a fence depends on several factors, including the variety of celery, the growing conditions, and the size of the seedlings you start with. Generally, it takes about 120-150 days from seed to harvest, or 80-100 days from transplanting seedlings. Be patient and provide your celery plants with the care they need, and you’ll be rewarded with a bountiful harvest of fresh, homegrown celery.
How do I harvest celery grown on a fence?
You can harvest celery grown on a fence by cutting the stalks at the base of the plant with a sharp knife. You can harvest individual stalks as needed, or harvest the entire plant at once. The celery is ready to harvest when the stalks are at least 6-8 inches long and have a firm, crisp texture. After harvesting, store the celery in the refrigerator to keep it fresh.
What are the benefits of growing celery on a fence compared to growing it in the ground?
Growing celery on a fence offers several advantages over traditional ground gardening. It saves space, making it ideal for small gardens or balconies. It reduces the risk of soil-borne pests and diseases. It improves air circulation around the plants, promoting faster growth and preventing fungal issues. It also makes harvesting easier, as you don’t have to bend down to reach the stalks. Finally, it adds a unique and visually appealing element to your garden.
Can I grow celery on a fence year-round?
Whether you can grow celery on a fence year-round depends on your climate. Celery is a cool-season crop that prefers temperatures between 60°F and 70°F. In areas with mild winters, you may be able to grow celery year-round. However, in areas with hot summers or cold winters, you may need to grow celery indoors or in a greenhouse during the off-season.
What if my celery stalks are bitter?
Bitter celery stalks can be caused by several factors, including insufficient watering, high temperatures, or nutrient deficiencies. Ensure that your celery plants receive consistent moisture and are protected from extreme heat. Fertilize regularly with a balanced fertilizer to provide the plants with the nutrients they need. You can also try blanching the celery stalks by wrapping them in paper or cardboard for a few weeks before harvesting. This will help reduce the bitterness and improve the flavor.

Leave a Comment