Growing Bok Choy at Home can seem intimidating, especially if you’re new to gardening. But trust me, it’s easier than you think! I’m here to share some simple DIY tricks and hacks that will have you harvesting your own delicious, crisp bok choy in no time. Forget those wilted, overpriced heads at the grocery store – imagine stepping into your backyard and picking fresh, vibrant greens for your stir-fries and soups.
Bok choy, also known as pak choi, has been a staple in Asian cuisine for centuries. Originating in China, this nutritious leafy green has a rich history and cultural significance, often symbolizing good fortune and prosperity. It’s no wonder it’s become increasingly popular worldwide! But why buy it when you can easily growing Bok Choy at Home?
In today’s world, where we’re all looking for ways to eat healthier, save money, and connect with nature, home gardening is booming. And bok choy is the perfect plant to start with! It’s fast-growing, relatively pest-resistant, and thrives in cooler weather, making it ideal for many climates. Plus, knowing exactly where your food comes from and how it’s grown is incredibly rewarding. So, let’s dive into some easy DIY tricks that will transform your garden into a bok choy haven!

Growing Bok Choy at Home: A Beginner’s Guide
Hey there, fellow gardening enthusiasts! I’m so excited to share my experience with growing bok choy at home. It’s surprisingly easy, even if you’re a complete newbie like I was not too long ago. Bok choy, also known as pak choi, is a delicious and nutritious leafy green that’s perfect for stir-fries, soups, and salads. Plus, it grows relatively quickly, so you’ll be enjoying your homegrown harvest in no time!
What You’ll Need
Before we dive in, let’s gather our supplies. Here’s a list of everything you’ll need to successfully grow bok choy at home:
- Bok Choy Seeds: Choose a variety that suits your climate and preferences. There are several types, including dwarf varieties that are great for containers.
- Seed Starting Trays or Small Pots: These are optional but highly recommended for starting your seeds indoors.
- Potting Mix: Use a well-draining potting mix specifically designed for starting seeds.
- Garden Soil: If you’re planting directly in the ground, make sure your soil is rich in organic matter and well-draining. Amend it with compost if needed.
- Compost or Aged Manure: This will provide essential nutrients for your bok choy plants.
- Fertilizer: A balanced fertilizer (e.g., 10-10-10) or a fertilizer specifically formulated for leafy greens will help your plants thrive.
- Watering Can or Hose: For regular watering.
- Gardening Gloves: To keep your hands clean and protected.
- Trowel or Hand Shovel: For planting and transplanting.
- Row Covers (Optional): These can protect your plants from pests and extreme weather.
Choosing the Right Time to Plant
Timing is key when it comes to growing bok choy. It’s a cool-season crop, which means it thrives in cooler temperatures and doesn’t do well in the heat.
- Spring Planting: Plant your seeds 2-4 weeks before the last expected frost.
- Fall Planting: Plant your seeds 6-8 weeks before the first expected frost. This is often the best time to grow bok choy, as the cooler temperatures help prevent bolting (premature flowering).
Starting Seeds Indoors (Optional but Recommended)
Starting your seeds indoors gives you a head start on the growing season and allows you to control the environment. Here’s how I do it:
- Fill Your Seed Starting Trays or Pots: Fill your seed starting trays or small pots with a good quality potting mix. Gently press the soil down to remove any air pockets.
- Sow the Seeds: Sow 2-3 seeds per cell or pot, about ¼ inch deep.
- Water Gently: Water the soil gently to moisten it. Avoid overwatering, as this can lead to damping off (a fungal disease that can kill seedlings).
- Provide Light: Place the trays or pots in a warm, sunny location or under grow lights. If using grow lights, keep them on for 14-16 hours per day.
- Keep the Soil Moist: Keep the soil consistently moist but not soggy. Check the soil moisture daily and water as needed.
- Thin Seedlings (If Necessary): Once the seedlings emerge and have a few true leaves, thin them to one plant per cell or pot. Choose the strongest seedling and snip off the others at the soil line.
Preparing the Garden Bed
Whether you’re transplanting seedlings or direct sowing, preparing your garden bed is crucial for success.
- Choose a Sunny Location: Bok choy needs at least 4-6 hours of sunlight per day.
- Prepare the Soil: Loosen the soil to a depth of 12 inches. Remove any rocks, weeds, and debris.
- Amend the Soil: Incorporate plenty of compost or aged manure into the soil to improve its fertility and drainage.
- Level the Soil: Rake the soil to create a smooth, even surface.
Transplanting Seedlings (If Starting Indoors)
Once your seedlings have developed a few true leaves and the weather is suitable, it’s time to transplant them into the garden.
- Harden Off Seedlings: Before transplanting, you need to harden off your seedlings. This means gradually exposing them to outdoor conditions over a period of 7-10 days. Start by placing them in a sheltered location for a few hours each day, gradually increasing the amount of time they spend outdoors.
- Dig Holes: Dig holes in the prepared garden bed, spacing them 6-12 inches apart, depending on the variety of bok choy you’re growing.
- Carefully Remove Seedlings: Gently remove the seedlings from their trays or pots, being careful not to damage the roots.
- Plant Seedlings: Place the seedlings in the holes, making sure the top of the root ball is level with the soil surface.
- Fill Holes and Water: Fill the holes with soil and gently firm the soil around the seedlings. Water thoroughly.
Direct Sowing Seeds (If Not Starting Indoors)
If you’re not starting your seeds indoors, you can direct sow them directly into the garden.
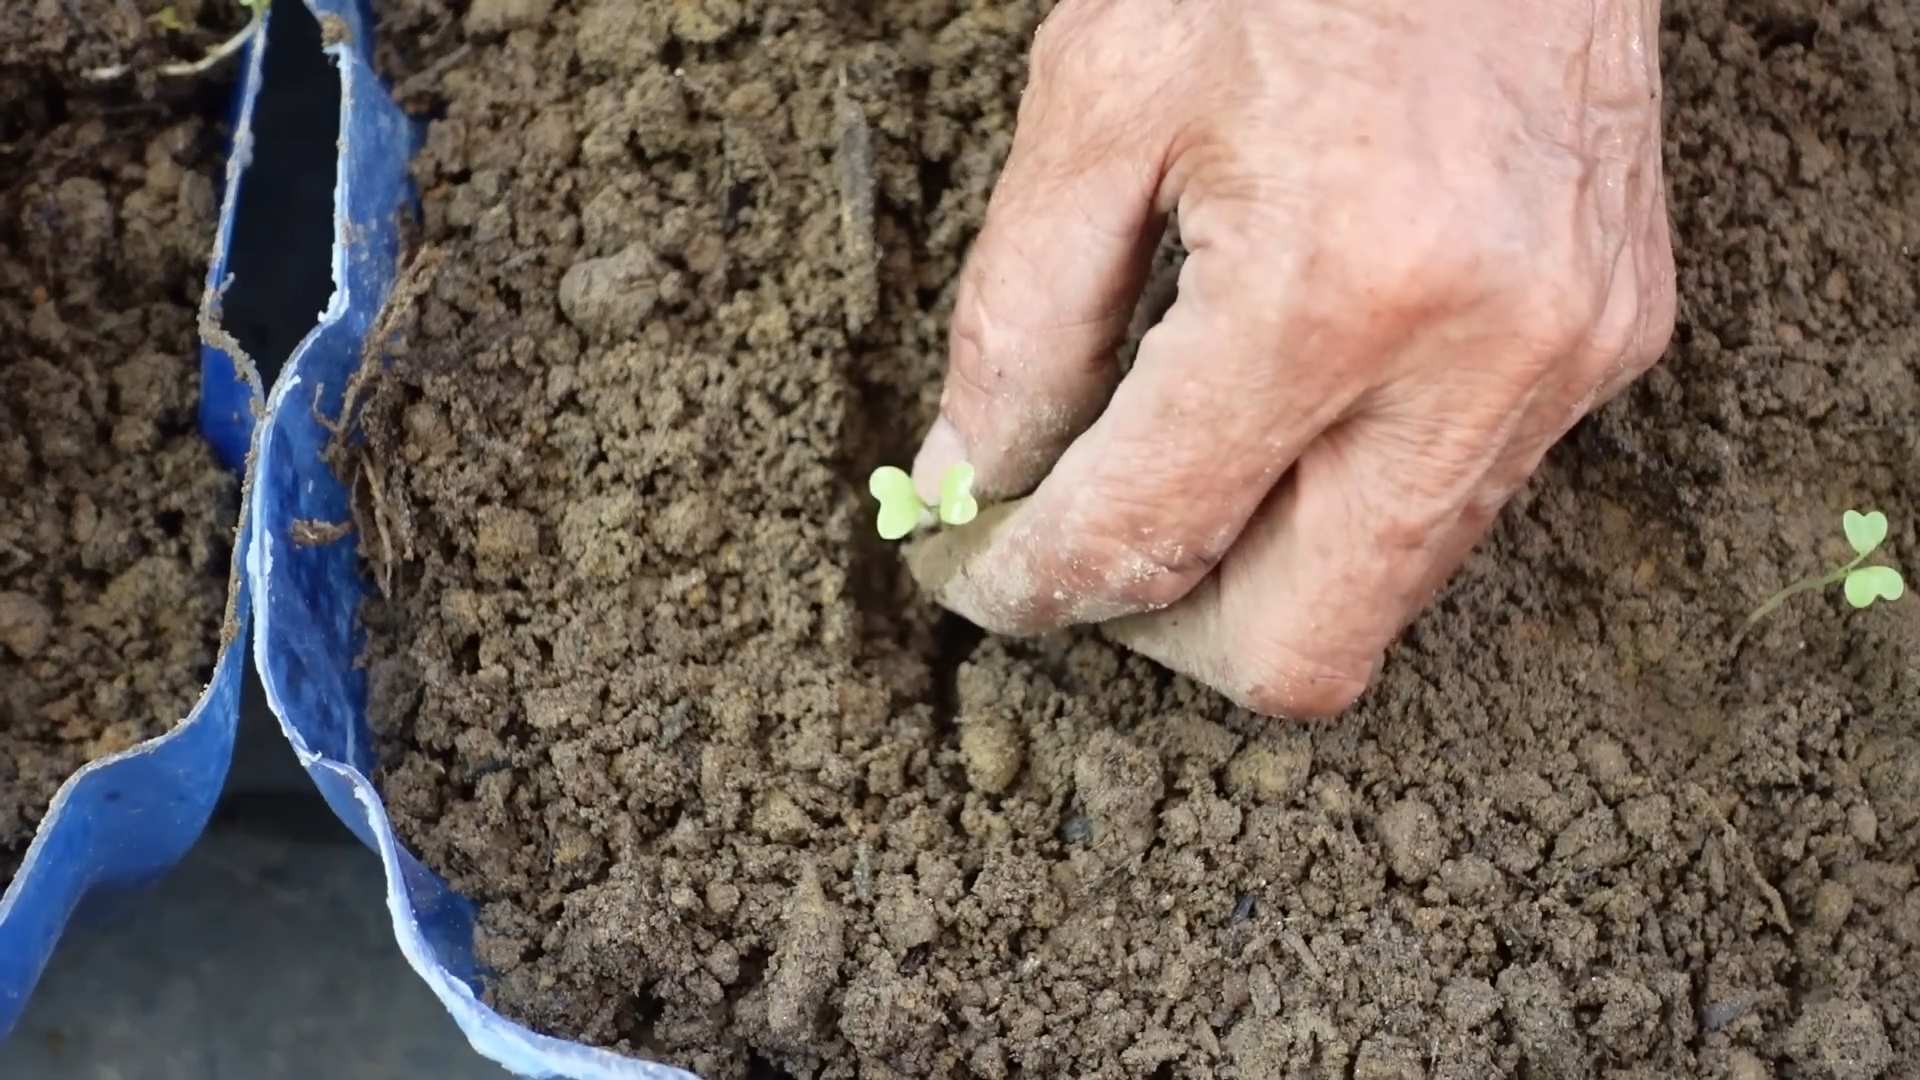
- Sow Seeds: Sow the seeds about ½ inch deep and 1-2 inches apart in rows that are 6-12 inches apart.
- Water Gently: Water the soil gently to moisten it.
- Thin Seedlings: Once the seedlings emerge and have a few true leaves, thin them to 6-12 inches apart, depending on the variety of bok choy you’re growing.
Caring for Your Bok Choy Plants
Once your bok choy plants are in the ground, it’s important to provide them with the care they need to thrive.
- Water Regularly: Bok choy needs consistent moisture to grow well. Water deeply whenever the top inch of soil feels dry. Avoid overwatering, as this can lead to root rot.
- Fertilize: Fertilize your bok choy plants every 2-3 weeks with a balanced fertilizer or a fertilizer specifically formulated for leafy greens. Follow the instructions on the fertilizer package.
- Weed Regularly: Keep the garden bed free of weeds, as they can compete with your bok choy plants for nutrients and water.
- Protect from Pests: Bok choy can be susceptible to pests such as aphids, cabbage worms, and flea beetles. Inspect your plants regularly and take action if you see any signs of infestation. You can use insecticidal soap, neem oil, or row covers to protect your plants.
- Protect from Bolting: Bolting is when a plant prematurely flowers, which can make the leaves bitter. To prevent bolting, keep the soil consistently moist, provide shade during hot weather, and harvest your bok choy before it gets too mature.
Harvesting Your Bok Choy
You can start harvesting your bok choy when the leaves are about 6-8 inches long.
- Harvest Individual Leaves: You can harvest individual leaves as needed, starting with the outer leaves. This will allow the inner leaves to continue to grow.
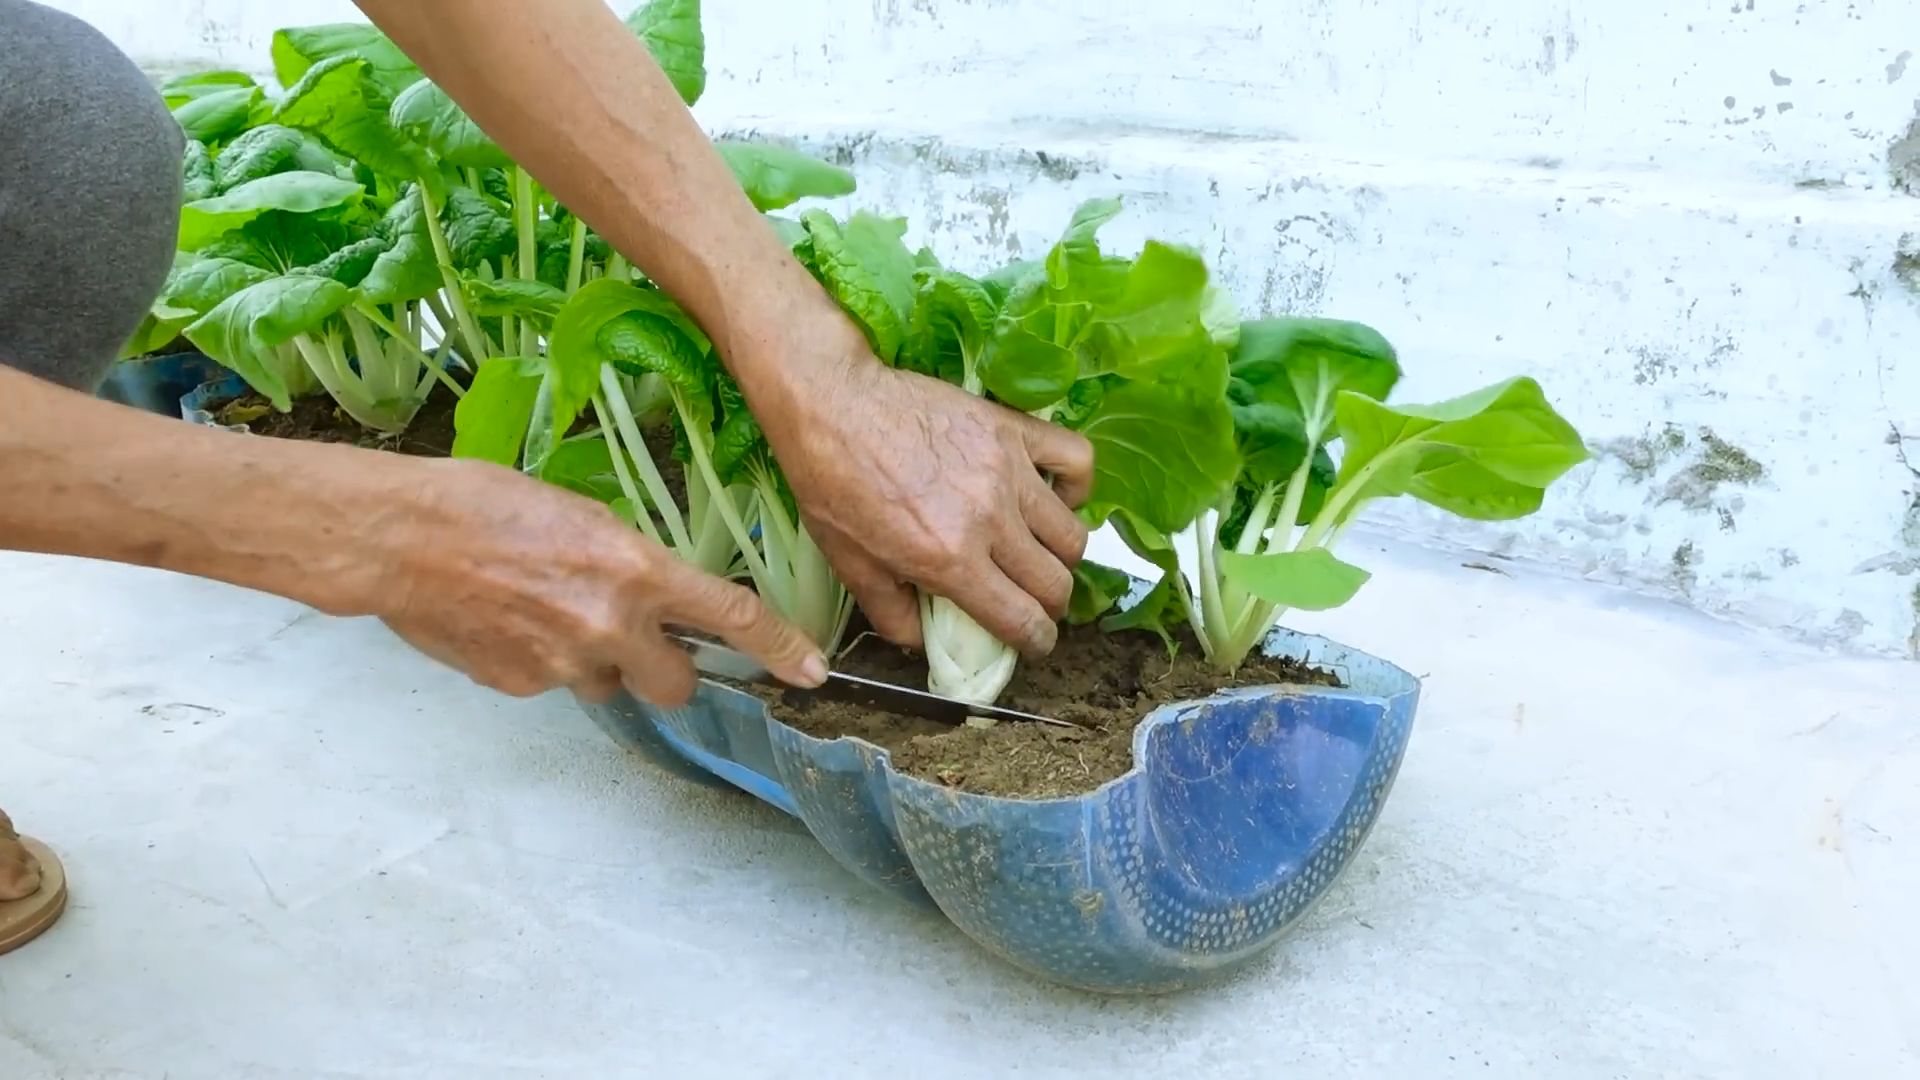
- Harvest the Entire Plant: You can also harvest the entire plant at once. To do this, cut the plant at the base with a sharp knife.
- Wash and Store: Wash your harvested bok choy thoroughly and store it in the refrigerator in a plastic bag or container. It will keep for several days.
Troubleshooting
Even with the best care, you may encounter some problems when growing bok choy. Here are some common issues and how to address them:
- Bolting: As mentioned earlier, bolting is when a plant prematurely flowers. To prevent bolting, keep the soil consistently moist, provide shade during hot weather, and harvest your bok choy before it gets too mature.
- Aphids: Aphids are small, sap-sucking insects that can infest bok choy plants. They can be controlled with insecticidal soap or neem oil.
- Cabbage Worms: Cabbage worms are the larvae of cabbage white butterflies. They can eat the leaves of bok choy plants. They can be controlled with Bacillus thuringiensis (Bt), a natural insecticide.
- Flea Beetles: Flea beetles are small, jumping insects that can chew holes in the leaves of bok choy plants. They can be controlled

Conclusion
So, there you have it! Growing your own bok choy at home is not only surprisingly simple, but it’s also incredibly rewarding. Imagine stepping out into your garden or onto your balcony and harvesting fresh, crisp bok choy whenever you need it. No more last-minute trips to the grocery store or settling for wilted, pre-packaged greens. This DIY trick empowers you to have a constant supply of this nutritious and versatile vegetable right at your fingertips.
But why is this a must-try? Beyond the convenience, growing your own bok choy offers a superior flavor profile. Homegrown bok choy tends to be sweeter and more tender than store-bought varieties, especially when harvested young. You also have complete control over the growing process, ensuring that your bok choy is free from harmful pesticides and herbicides. This means you’re not only enjoying a delicious vegetable, but you’re also making a healthier choice for yourself and your family.
Furthermore, cultivating bok choy is a fantastic way to connect with nature and learn about the food you eat. It’s a calming and therapeutic activity that can reduce stress and promote a sense of well-being. Plus, it’s a wonderful project to involve children in, teaching them about gardening, healthy eating, and the importance of sustainability.
Don’t be afraid to experiment with different varieties of bok choy. From the classic green-stemmed bok choy to the petite and flavorful baby bok choy, there’s a type to suit every taste and preference. You can also try growing different colored varieties, such as purple bok choy, for a visually stunning addition to your garden and your plate.
Consider companion planting your bok choy with other vegetables and herbs. Marigolds can help deter pests, while dill and chamomile can attract beneficial insects. This not only protects your bok choy but also creates a thriving and diverse ecosystem in your garden.
For those with limited space, container gardening is an excellent option. Bok choy thrives in pots and containers, making it perfect for balconies, patios, and even windowsills. Just be sure to choose a container that is at least 6 inches deep and provides adequate drainage.
Ready to embark on your bok choy growing adventure? We encourage you to give this DIY trick a try. It’s easier than you think, and the rewards are well worth the effort. Once you’ve harvested your first batch of homegrown bok choy, we’d love to hear about your experience! Share your tips, tricks, and photos in the comments below. Let’s build a community of bok choy enthusiasts and inspire others to grow their own food. Happy gardening!
Frequently Asked Questions (FAQ)
What is the best time of year to plant bok choy?
Bok choy is a cool-season crop, meaning it thrives in cooler temperatures. The best time to plant bok choy is in early spring or late summer/early fall. Avoid planting during the hottest months of summer, as the heat can cause the bok choy to bolt (go to seed) prematurely, resulting in a bitter taste. For a spring crop, start seeds indoors 4-6 weeks before the last expected frost. For a fall crop, sow seeds directly into the garden in late summer or early fall.
How much sunlight does bok choy need?
Bok choy prefers partial shade, especially during the hottest part of the day. While it can tolerate full sun, it’s best to provide some protection from the intense afternoon sun to prevent bolting. Aim for at least 4-6 hours of sunlight per day. If you’re growing bok choy in containers, you can easily move them to a shadier location as needed.
What kind of soil is best for growing bok choy?
Bok choy prefers well-drained, fertile soil that is rich in organic matter. Amend your soil with compost or well-rotted manure before planting to improve its fertility and drainage. The ideal soil pH for bok choy is between 6.0 and 7.5. You can test your soil pH using a soil testing kit available at most garden centers.
How often should I water bok choy?
Bok choy needs consistent moisture to thrive. Water regularly, especially during dry periods, to keep the soil evenly moist but not waterlogged. Avoid overhead watering, as this can increase the risk of fungal diseases. Instead, water at the base of the plants. Mulching around the plants can help retain moisture and suppress weeds.
What are some common pests and diseases that affect bok choy?
Some common pests that can affect bok choy include aphids, cabbage worms, flea beetles, and slugs. To control these pests, you can use organic pest control methods such as insecticidal soap, neem oil, or diatomaceous earth. You can also handpick pests off the plants. Common diseases that can affect bok choy include downy mildew and clubroot. To prevent these diseases, ensure good air circulation around the plants and avoid overhead watering. Crop rotation can also help prevent soilborne diseases.
How do I harvest bok choy?
You can harvest bok choy at any stage of growth, depending on your preference. For baby bok choy, harvest when the leaves are about 4-6 inches long. For mature bok choy, harvest when the heads are firm and compact. To harvest, simply cut the entire head of bok choy at the base of the plant with a sharp knife. You can also harvest individual leaves as needed, starting with the outer leaves.
Can I grow bok choy indoors?
Yes, you can grow bok choy indoors, especially baby bok choy. Choose a sunny windowsill or use grow lights to provide adequate light. Use a well-draining potting mix and water regularly. Be sure to provide good air circulation to prevent fungal diseases.
How do I prevent bok choy from bolting?
Bolting is when a plant prematurely flowers and goes to seed, often due to stress from heat or lack of water. To prevent bok choy from bolting, plant it during the cool season, provide partial shade, water regularly, and avoid stressing the plants. Choose bolt-resistant varieties if you live in a warmer climate.
What are some ways to use bok choy in cooking?
Bok choy is a versatile vegetable that can be used in a variety of dishes. It can be stir-fried, steamed, boiled, or added to soups and stews. It’s also delicious raw in salads. The entire plant is edible, including the leaves and stems. Bok choy pairs well with garlic, ginger, soy sauce, sesame oil, and other Asian flavors.
Can I save seeds from my bok choy plants?
Yes, you can save seeds from your bok choy plants, but it requires allowing the plants to bolt and produce seed pods. This process takes time and requires specific conditions. Be aware that if you are growing multiple varieties of bok choy, they may cross-pollinate, resulting in seeds that produce plants with mixed characteristics. If you want to save true-to-type seeds, you’ll need to isolate the plants to prevent cross-pollination.


Leave a Comment