
Grow Celery at Home – sounds ambitious, right? But trust me, it’s totally achievable, even if you’re like me and sometimes struggle to keep a cactus alive! Forget those sad, limp stalks from the grocery store; imagine crisp, flavorful celery, fresh from your own garden. This isn’t just about saving money; it’s about connecting with nature and enjoying the satisfaction of growing your own food.
Celery, believe it or not, has a fascinating history. It wasn’t always the crunchy snack we know and love. In ancient times, it was valued more for its medicinal properties and aromatic leaves. The Romans even used it to crown victors in athletic competitions! Now, we’re bringing it back to our homes, not for crowns, but for delicious salads, soups, and snacks.
Why should you learn this DIY trick? Because store-bought celery can be expensive and often lacks flavor. Plus, growing your own allows you to control what goes into your food, avoiding harmful pesticides and chemicals. I’m going to share some simple, effective methods to grow celery at home, regardless of your gardening experience. Get ready to impress your friends and family with your green thumb – let’s get started!
Growing Bok Choy at Home: A Beginner’s Guide
Hey there, fellow gardening enthusiasts! I’m so excited to share my experience with growing bok choy at home. It’s surprisingly easy, even if you’re a complete newbie like I was. Bok choy, also known as pak choi, is a delicious and nutritious leafy green that’s perfect for stir-fries, soups, and salads. Plus, it grows relatively quickly, so you’ll be enjoying your homegrown harvest in no time!
What You’ll Need
Before we dive in, let’s gather all the necessary supplies. Here’s a checklist to make sure you’re prepared:
* Bok Choy Seeds: Choose a variety that suits your climate. I personally love the ‘Mei Qing Choi’ variety for its compact size and mild flavor.
* Seed Starting Trays or Small Pots: These are essential for starting your seeds indoors.
* Seed Starting Mix: This is a light and airy soil mix specifically designed for seedlings.
* Larger Pots or Garden Bed: Once your seedlings are ready, you’ll need a place to transplant them.
* Potting Soil or Garden Soil: Choose a well-draining soil rich in organic matter.
* Watering Can or Hose: For keeping your bok choy hydrated.
* Fertilizer (Optional): A balanced fertilizer can help boost growth. I prefer using organic options like compost tea or fish emulsion.
* Gardening Gloves: To keep your hands clean and protected.
* Trowel or Small Shovel: For transplanting seedlings.
* Row Covers (Optional): To protect your plants from pests and extreme weather.
Starting Your Seeds Indoors (Recommended)
Starting your bok choy seeds indoors gives them a head start, especially if you live in an area with a short growing season. Here’s how I do it:
1. Prepare Your Seed Starting Trays: Fill each cell of your seed starting tray with seed starting mix. Gently pat it down to remove any air pockets.
2. Sow the Seeds: Place 2-3 bok choy seeds in each cell, about ¼ inch deep. Cover the seeds with a thin layer of seed starting mix.
3. Water Gently: Use a watering can with a gentle rose to water the seeds. You want to moisten the soil without disturbing the seeds.
4. Provide Warmth and Light: Place the seed starting tray in a warm location, ideally between 65-75°F (18-24°C). A heat mat can be helpful if your home is cooler. Provide plenty of light, either from a sunny windowsill or a grow light. I use a grow light for about 14-16 hours a day.
5. Keep the Soil Moist: Check the soil moisture daily and water as needed to keep it consistently moist but not soggy.
6. Thin the Seedlings: Once the seedlings have emerged and have a couple of true leaves (the second set of leaves that appear after the initial seed leaves), thin them to one seedling per cell. Choose the strongest looking seedling and gently snip off the others at the soil line.
Transplanting Your Seedlings
Once your seedlings have grown a bit and the weather outside has warmed up, it’s time to transplant them into larger pots or your garden bed.
1. Harden Off the Seedlings: Before transplanting, you need to “harden off” the seedlings. This means gradually exposing them to outdoor conditions to help them adjust. Start by placing the seed starting tray outdoors in a sheltered location for a few hours each day, gradually increasing the amount of time they spend outside over the course of a week.
2. Prepare Your Planting Location: Choose a location that receives at least 4-6 hours of sunlight per day. Bok choy prefers well-draining soil that is rich in organic matter. If you’re planting in pots, choose pots that are at least 6 inches deep and wide. If you’re planting in a garden bed, amend the soil with compost or other organic matter.
3. Transplant the Seedlings: Gently remove the seedlings from the seed starting tray. Be careful not to damage the roots. Dig a hole in the soil that is slightly larger than the root ball of the seedling. Place the seedling in the hole and gently backfill with soil. Water thoroughly. Space the plants about 6-12 inches apart.
Caring for Your Bok Choy
Now that your bok choy is planted, it’s time to provide the care it needs to thrive.
1. Watering: Bok choy needs consistent moisture to grow well. Water regularly, especially during dry periods. Aim to keep the soil consistently moist but not waterlogged. I usually water deeply every 2-3 days, depending on the weather.
2. Fertilizing: Bok choy is a heavy feeder, so it benefits from regular fertilization. You can use a balanced fertilizer or an organic option like compost tea or fish emulsion. Apply fertilizer according to the package directions. I fertilize my bok choy every 2-3 weeks.
3. Weeding: Keep the area around your bok choy free of weeds. Weeds compete with your plants for nutrients and water.
4. Pest Control: Bok choy can be susceptible to pests like aphids, cabbage worms, and flea beetles. Inspect your plants regularly for signs of pests. If you find any, you can try using insecticidal soap, neem oil, or handpicking the pests off the plants. Row covers can also help prevent pests from reaching your plants.
5. Bolting Prevention: Bolting (when the plant prematurely flowers) can be a problem with bok choy, especially in hot weather. To prevent bolting, choose bolt-resistant varieties, provide shade during the hottest part of the day, and water regularly.
Harvesting Your Bok Choy
The best part of growing bok choy is harvesting it! You can harvest bok choy at any stage of growth, depending on your preference.
1. When to Harvest: You can start harvesting baby bok choy leaves as soon as they are large enough to eat, usually about 3-4 weeks after transplanting. For mature bok choy, wait until the heads are about 6-12 inches tall, usually about 45-50 days after transplanting.
2. How to Harvest: To harvest baby bok choy leaves, simply snip off the outer leaves with scissors or a knife. To harvest mature bok choy, cut the entire head off at the base of the plant.
3. Succession Planting: To ensure a continuous harvest of bok choy, plant new seeds every 2-3 weeks. This is called succession planting.
Troubleshooting
Even with the best care, you might encounter some problems while growing bok choy. Here are some common issues and how to address them:
* Yellowing Leaves: This can be caused by overwatering, underwatering, nutrient deficiencies, or pests. Check the soil moisture and adjust your watering accordingly. Fertilize your plants with a balanced fertilizer. Inspect your plants for pests and treat them as needed.
* Holes in Leaves: This is usually caused by pests like cabbage worms or flea beetles. Inspect your plants for pests and treat them as needed. Row covers can also help prevent pests from reaching your plants.
* Bolting: As mentioned earlier, bolting can be a problem in hot weather. Choose bolt-resistant varieties, provide shade during the hottest part of the day, and water regularly.
* Slow Growth: This can be caused by poor soil, lack of sunlight, or nutrient deficiencies. Amend the soil with compost or other organic matter. Make sure your plants are getting at least 4-6 hours of sunlight per day. Fertilize your plants with a balanced fertilizer.
Enjoying Your Harvest
Now that you’ve harvested your bok choy, it’s time to enjoy it! Bok choy is a versatile vegetable that can be used in a variety of dishes. Here are some of my favorite ways to use it:
* Stir-fries: Bok choy is a classic ingredient in stir-fries. Simply chop it up and add it to your favorite stir-fry recipe.
* Soups: Bok choy adds a delicious and nutritious boost to soups. Add it to your favorite soup recipe during the last few minutes of cooking.
* Salads: Baby bok choy leaves can be used in salads. They have a mild flavor and a crisp texture.
* Steamed or Sautéed: Bok choy can also be steamed or sautéed as a side dish. Simply steam or sauté it until it’s tender-crisp.
I hope this guide has inspired you to grow your own bok choy at home. It’s a rewarding experience that will provide you with fresh, delicious, and nutritious vegetables. Happy gardening!

Conclusion
So, there you have it! Growing celery at home from scraps isn’t just a fun experiment; it’s a genuinely rewarding way to reduce food waste, enjoy fresh, organic celery, and add a touch of green to your kitchen. It’s a sustainable practice that connects you to your food in a more meaningful way. Forget those limp, store-bought stalks – imagine the crisp, flavorful celery you can harvest right from your windowsill!
This DIY trick is a must-try for several reasons. First, it’s incredibly easy and requires minimal effort. You’re essentially giving new life to something you’d normally throw away. Second, it’s cost-effective. You’re saving money on groceries while simultaneously reducing your environmental footprint. Third, it’s a fantastic learning experience, especially for kids. It teaches them about plant life cycles and the importance of sustainability. Finally, the taste of homegrown celery is simply superior. It’s fresher, more vibrant, and bursting with flavor.
But don’t stop there! Once you’ve mastered the basic technique, feel free to experiment with variations. Try different types of celery, such as Pascal or Utah varieties, to see which ones thrive best in your environment. You can also experiment with different growing mediums, such as hydroponics, for a faster and more efficient growth rate. Consider adding companion plants like onions or garlic to your garden to deter pests and enhance the flavor of your celery.
The key to success is patience and consistent care. Remember to provide your celery with plenty of sunlight, water, and nutrients. Don’t be discouraged if your first attempt isn’t perfect. Like any gardening endeavor, growing celery at home requires a bit of trial and error.
We are confident that you’ll find this DIY project both enjoyable and beneficial. So, grab that celery base, follow our simple steps, and get ready to harvest your own delicious, homegrown celery. We encourage you to try this fantastic method of growing celery at home and share your experiences with us! Let us know how it goes, what challenges you faced, and what tips you discovered along the way. Share your photos and stories on social media using #HomegrownCelery and inspire others to join the movement. Happy growing!
Frequently Asked Questions (FAQs)
1. What kind of celery works best for regrowing?
Any type of celery you buy from the grocery store should work, as long as it has a healthy base with the roots still attached. However, some varieties might be more resilient than others. Pascal celery is a common and reliable choice. Look for celery with a firm, compact base and healthy-looking stalks. Avoid celery that is wilted, discolored, or has signs of rot. The fresher the celery base, the better your chances of successful regrowth.
2. How long does it take to regrow celery from a base?
The initial sprouting of new growth can take anywhere from 5 to 7 days. After that, it will take several weeks (around 2-3 months) to grow a substantial amount of celery that you can harvest. The exact timeframe depends on factors such as sunlight, water, temperature, and nutrient availability. Be patient and consistent with your care, and you’ll be rewarded with fresh celery in due time.
3. How much sunlight does regrowing celery need?
Celery thrives in bright, indirect sunlight. Aim for at least 6 hours of sunlight per day. If you’re growing your celery indoors, place it near a sunny window, preferably one that faces south or east. If you don’t have access to enough natural light, you can supplement with a grow light. Be careful not to expose your celery to direct, intense sunlight, as this can scorch the leaves.
4. How often should I water my regrowing celery?
Celery needs consistent moisture to thrive. Water your celery regularly, keeping the soil consistently moist but not waterlogged. Check the soil moisture level daily and water when the top inch feels dry to the touch. Avoid letting the soil dry out completely, as this can stress the plant and hinder its growth. When watering, water deeply, allowing the water to reach the roots.
5. What kind of soil is best for growing celery?
Celery prefers rich, well-draining soil that is high in organic matter. A good potting mix amended with compost or aged manure is ideal. The soil should be able to retain moisture without becoming waterlogged. You can also add perlite or vermiculite to improve drainage. Avoid using heavy clay soil, as it can compact and suffocate the roots.
6. Can I grow celery indoors year-round?
Yes, you can grow celery indoors year-round, as long as you provide it with the right conditions. This includes adequate sunlight, consistent moisture, and a suitable growing medium. Indoor growing is a great option for those who live in colder climates or have limited outdoor space. You may need to supplement with a grow light during the winter months to ensure your celery receives enough light.
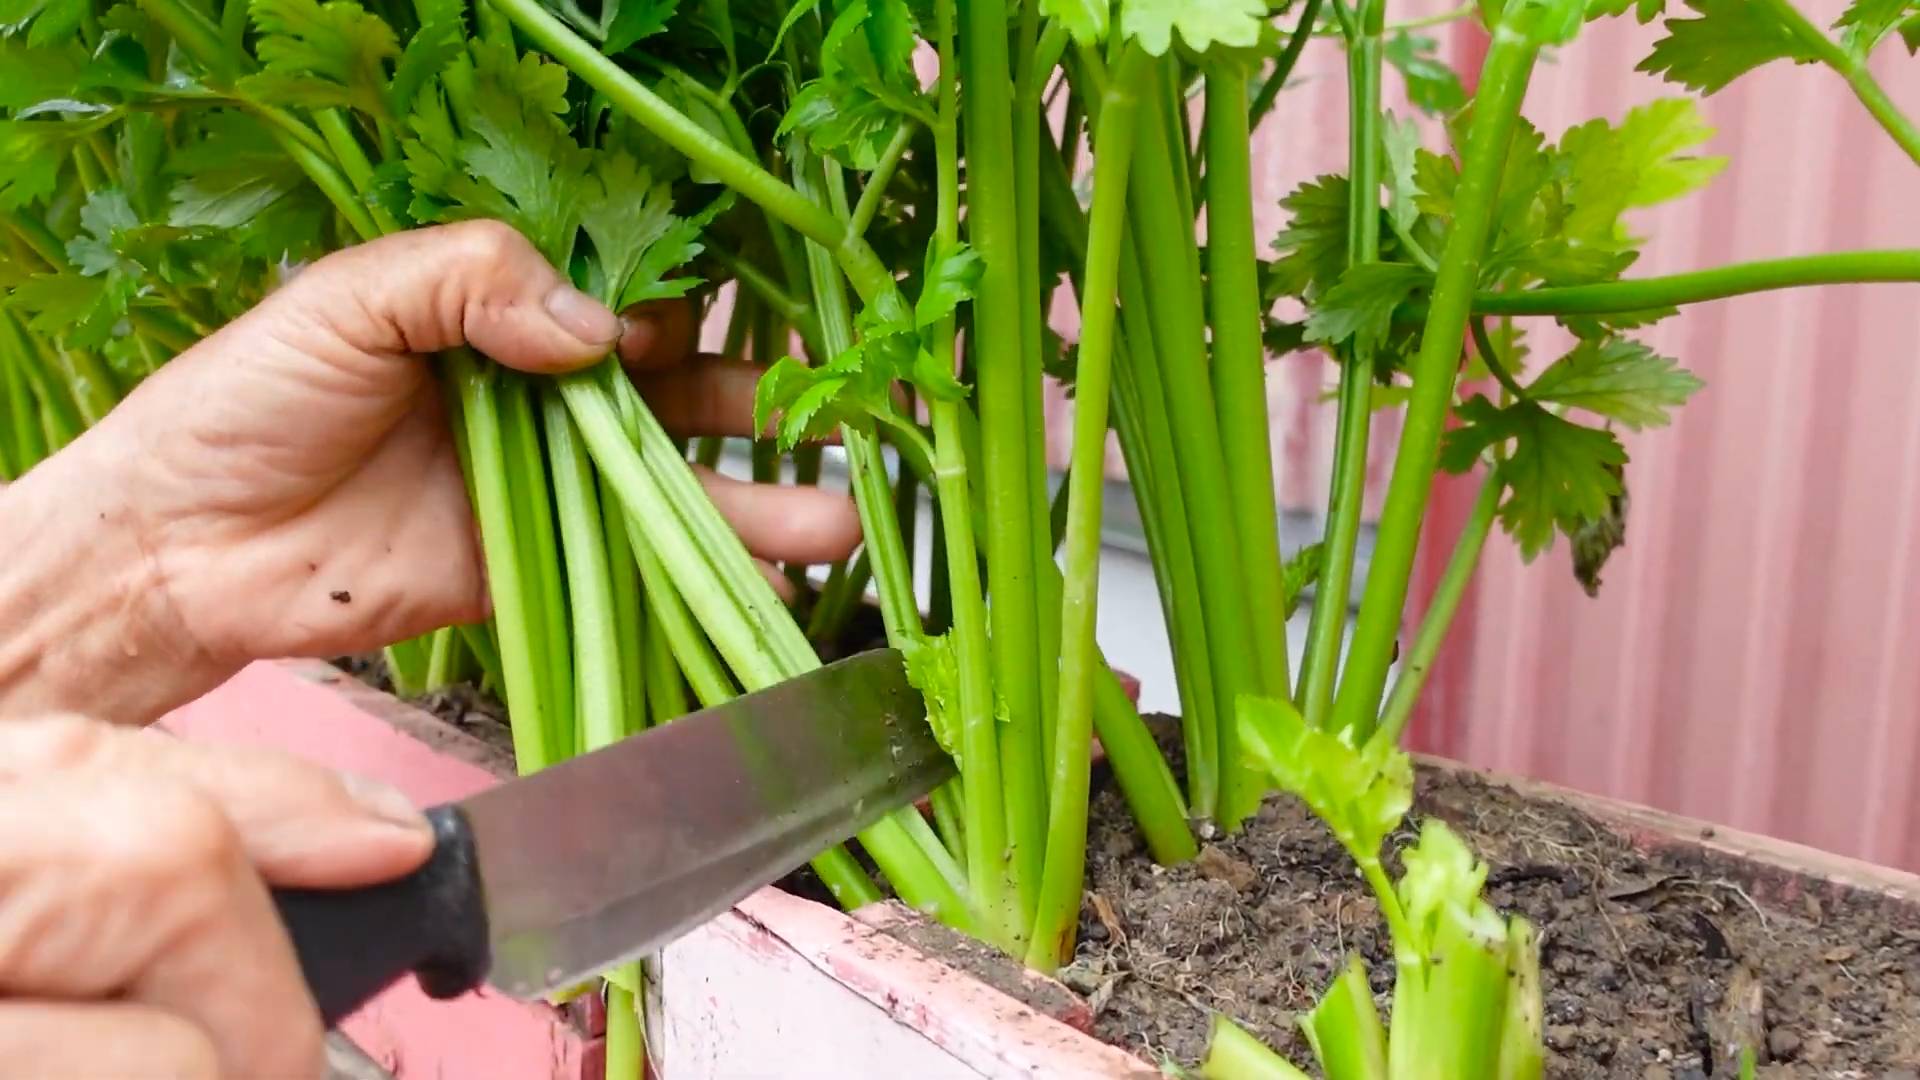
7. How do I harvest my regrown celery?
Once your celery has grown to a decent size (around 6-8 inches tall), you can start harvesting the outer stalks. Simply cut them off at the base with a sharp knife or scissors. Avoid harvesting all the stalks at once, as this can weaken the plant. Instead, harvest only what you need, allowing the remaining stalks to continue growing.
8. What are some common problems when growing celery and how do I fix them?
Some common problems when growing celery include pests, diseases, and nutrient deficiencies. Pests such as aphids and slugs can damage the leaves and stalks. You can control these pests with insecticidal soap or by handpicking them off the plant. Diseases such as blight and fungal infections can also affect celery. Prevent these diseases by providing good air circulation and avoiding overwatering. Nutrient deficiencies can cause yellowing or stunted growth. Fertilize your celery regularly with a balanced fertilizer to ensure it receives the nutrients it needs.
9. Can I use fertilizer to help my celery grow?
Yes, fertilizing your celery can help it grow faster and produce more abundant stalks. Use a balanced fertilizer that is specifically formulated for vegetables. Follow the instructions on the fertilizer package for application rates and frequency. Avoid over-fertilizing, as this can burn the roots and damage the plant. You can also use organic fertilizers such as compost tea or fish emulsion.
10. Is regrowing celery from a base truly sustainable?
Yes, regrowing celery from a base is a sustainable practice because it reduces food waste and minimizes the need to purchase new celery from the store. By regrowing celery, you’re essentially giving new life to something that would otherwise end up in the landfill. This helps to conserve resources and reduce your environmental footprint. It’s a small but meaningful step towards a more sustainable lifestyle. Plus, you get to enjoy fresh, homegrown celery!

Leave a Comment