
Grow Chili Peppers Easily, even if you think you don’t have a green thumb! Have you ever dreamed of adding a fiery kick to your meals with peppers you’ve grown yourself? Imagine the satisfaction of harvesting vibrant, spicy chilies right from your own backyard or balcony. This isn’t just a pipe dream; it’s totally achievable with a few simple tricks and DIY hacks.
Chili peppers have a rich history, dating back thousands of years in South America, where they were not only a food source but also held cultural and medicinal significance. From ancient Aztec rituals to modern-day culinary adventures, chilies have always added zest to life.
But why should *you* bother learning to grow chili peppers easily? Well, store-bought chilies can be expensive and sometimes lack the intense flavor you’re craving. Plus, growing your own allows you to control the entire process, ensuring you’re using organic methods and getting the freshest, most flavorful peppers possible. I’m going to share some of my favorite DIY tricks that will help you cultivate a thriving chili pepper garden, no matter your experience level. Get ready to spice up your life!
Grow Chili Peppers Easily: From Seed to Spicy Harvest!
Hey there, fellow chili enthusiasts! I’m so excited to share my tried-and-true method for growing chili peppers at home. Whether you’re a seasoned gardener or just starting out, this guide will walk you through every step, ensuring you have a bountiful harvest of fiery goodness. I’ve learned a lot over the years, and I’m confident you can grow amazing peppers, even if you don’t have a huge garden!
Choosing Your Chili Pepper Variety
Before we dive into the nitty-gritty, let’s talk about choosing the right chili pepper for you. There are literally hundreds of varieties, ranging from mild and sweet to face-meltingly hot. Consider your taste preferences and how you plan to use your peppers.
* Mild Peppers: If you’re new to chili peppers or prefer a subtle kick, consider varieties like Anaheim, Poblano, or Shishito. These are great for stuffing, roasting, or adding a touch of flavor to your dishes.
* Medium Peppers: For a bit more heat, try Jalapeño, Serrano, or Cayenne peppers. These are versatile and can be used in salsas, sauces, and chili.
* Hot Peppers: If you’re a true chili head, you might want to venture into the realm of Habanero, Scotch Bonnet, or even Ghost peppers. Be warned, these pack a serious punch! Handle with care!
* Super Hot Peppers: For the brave souls, there are the super hots like Carolina Reaper, Trinidad Scorpion, and Dragon’s Breath. These are not for the faint of heart and should be used sparingly.
Once you’ve decided on your variety, you can purchase seeds online, at your local garden center, or even save seeds from peppers you’ve bought at the grocery store (though the results might be unpredictable with store-bought peppers).
Starting Your Chili Pepper Seeds Indoors
Starting your seeds indoors gives them a head start, especially if you live in a region with a shorter growing season. I usually start my seeds about 6-8 weeks before the last expected frost.
Materials You’ll Need:
* Chili pepper seeds
* Seed starting tray or small pots
* Seed starting mix (a light, well-draining soil)
* Spray bottle
* Heat mat (optional, but highly recommended)
* Grow light (optional, but helps prevent leggy seedlings)
* Clear plastic dome or plastic wrap
Step-by-Step Instructions:
1. Prepare Your Seed Starting Tray: Fill your seed starting tray or small pots with seed starting mix. Gently tap the tray to settle the soil.
2. Sow the Seeds: Make a small indentation (about ¼ inch deep) in the soil of each cell or pot. Place 1-2 seeds in each indentation. Cover the seeds with a thin layer of soil.
3. Water Gently: Use a spray bottle to gently moisten the soil. Avoid overwatering, as this can lead to damping off (a fungal disease that can kill seedlings).
4. Create a Humid Environment: Cover the seed starting tray with a clear plastic dome or plastic wrap. This will help retain moisture and create a humid environment, which is essential for germination.
5. Provide Warmth: Place the seed starting tray on a heat mat. Chili pepper seeds germinate best in warm temperatures (around 80-85°F). If you don’t have a heat mat, you can place the tray in a warm location, such as on top of your refrigerator.
6. Provide Light: Place the seed starting tray under a grow light or in a sunny window. If using a window, rotate the tray regularly to prevent the seedlings from leaning towards the light.
7. Monitor and Water: Check the soil moisture daily. Keep the soil consistently moist, but not soggy. Water gently with a spray bottle as needed.
8. Remove the Dome: Once the seeds have germinated (usually within 7-14 days), remove the plastic dome or plastic wrap.
9. Thin the Seedlings: If you planted more than one seed per cell or pot, thin the seedlings to one per cell or pot. Choose the strongest seedling and snip off the others at the soil line.
10. Harden Off the Seedlings: About a week before you plan to transplant the seedlings outdoors, you’ll need to “harden them off.” This process gradually acclimates the seedlings to outdoor conditions. Start by placing the seedlings outdoors in a sheltered location for a few hours each day, gradually increasing the amount of time they spend outdoors. Protect them from direct sunlight and strong winds.
Transplanting Your Chili Pepper Seedlings Outdoors
Once the danger of frost has passed and the soil has warmed up, it’s time to transplant your chili pepper seedlings outdoors.
Materials You’ll Need:
* Chili pepper seedlings
* Gardening gloves
* Trowel or shovel
* Compost or well-rotted manure
* Watering can or hose
* Mulch (optional)
* Stakes or cages (optional, for taller varieties)
Step-by-Step Instructions:
1. Choose a Sunny Location: Chili peppers need at least 6-8 hours of sunlight per day. Choose a location in your garden that receives plenty of sun.
2. Prepare the Soil: Chili peppers prefer well-draining soil that is rich in organic matter. Amend the soil with compost or well-rotted manure before planting.
3. Dig the Holes: Dig holes that are slightly larger than the root balls of your seedlings. Space the holes about 18-24 inches apart, depending on the variety of chili pepper.
4. Remove the Seedlings from Their Containers: Gently remove the seedlings from their seed starting tray or pots. Be careful not to damage the roots.
5. Plant the Seedlings: Place the seedlings in the holes and backfill with soil. Gently firm the soil around the base of the plants.
6. Water Thoroughly: Water the seedlings thoroughly after planting.
7. Mulch (Optional): Apply a layer of mulch around the base of the plants. Mulch helps retain moisture, suppress weeds, and regulate soil temperature.
8. Stake or Cage (Optional): If you’re growing taller varieties of chili peppers, you may want to stake or cage them to provide support. This will prevent the plants from falling over, especially when they are laden with fruit.
Caring for Your Chili Pepper Plants
Once your chili pepper plants are in the ground, it’s important to provide them with proper care to ensure a healthy and productive harvest.
Watering:
* Water your chili pepper plants regularly, especially during hot, dry weather.
* Water deeply, allowing the soil to soak thoroughly.
* Avoid overwatering, as this can lead to root rot.
* Water in the morning to allow the foliage to dry before nightfall.
Fertilizing:
* Fertilize your chili pepper plants every 2-3 weeks with a balanced fertilizer.
* Look for a fertilizer that is specifically formulated for vegetables or tomatoes.
* Follow the instructions on the fertilizer label.
* Avoid over-fertilizing, as this can lead to excessive foliage growth and reduced fruit production.
Pruning:
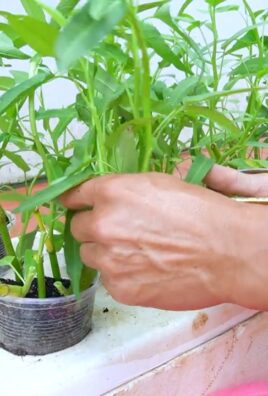
* Pruning is not essential for chili pepper plants, but it can help improve air circulation and sunlight penetration.
* Remove any dead or yellowing leaves.
* Pinch off the tips of the branches to encourage bushier growth.
Pest and Disease Control:
* Chili pepper plants can be susceptible to various pests and diseases.
* Inspect your plants regularly for signs of pests or diseases.
* Use organic pest control methods, such as insecticidal soap or neem oil, to control pests.
* Remove any diseased leaves or plants to prevent the spread of disease.
* Good air circulation and proper watering can help prevent many diseases.
Harvesting Your Chili Peppers
The moment you’ve been waiting for! Harvesting your chili peppers is the most rewarding part of the process.
When to Harvest:
* The time it takes for chili peppers to mature depends on the variety.
* Most chili peppers are ready to harvest when they have reached their mature size and color.
* Some chili peppers will change color as they ripen, while others will remain the same color.
* You can harvest chili peppers at any stage of ripeness, but they will be hotter when they are fully ripe.
How to Harvest:
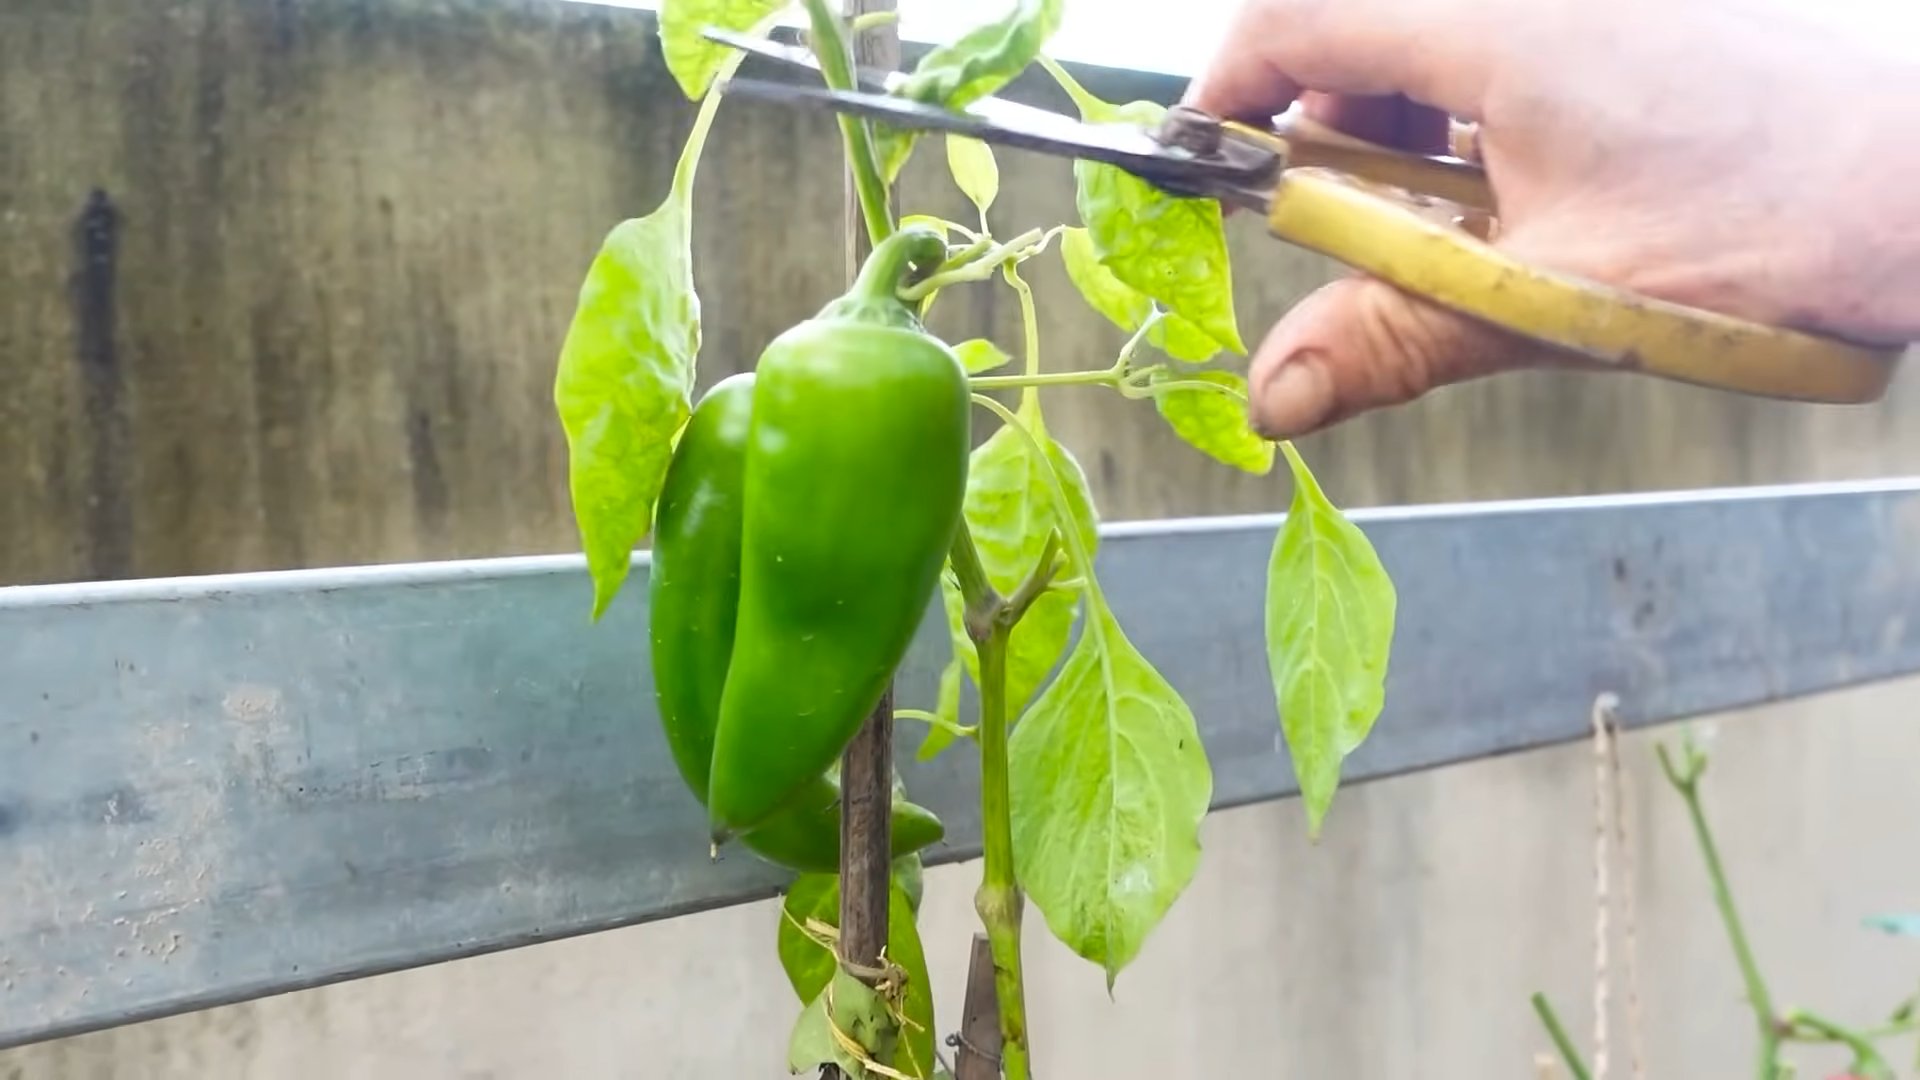
* Use pruning shears or scissors to cut the chili peppers from the plant.
* Leave a small stem attached to the pepper.
* Handle hot peppers with gloves to avoid skin irritation.
Storing Your Chili Peppers:
* Fresh chili peppers can be stored in the refrigerator for up to a week.
* You can also dry, freeze, or pickle chili peppers for longer storage.
*
Conclusion
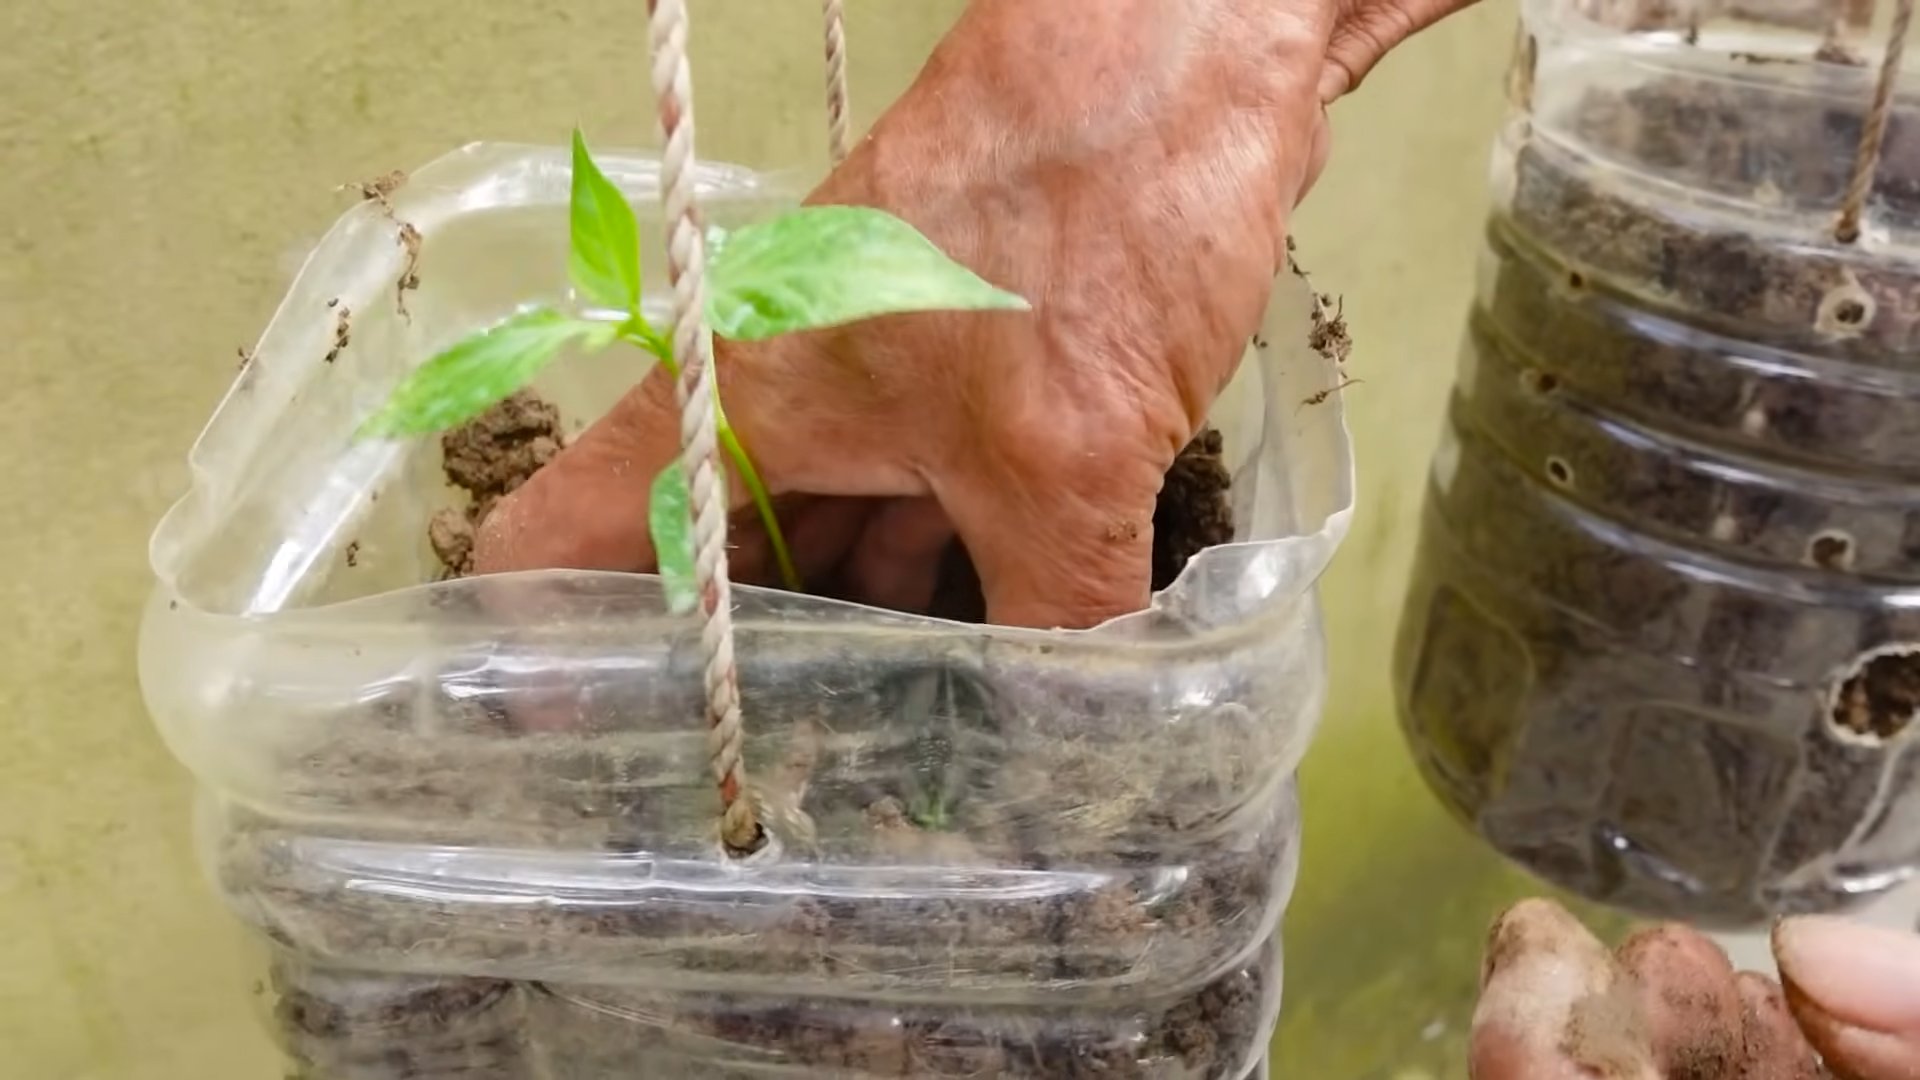
So, there you have it! Growing chili peppers easily doesn’t have to be a daunting task. By implementing this simple yet effective DIY trick, you’re setting yourself up for a bountiful harvest of fiery goodness. Forget expensive gardening equipment or complicated techniques; this method focuses on maximizing your chili pepper plants’ potential with minimal effort and resources.
Why is this a must-try? Because it addresses the core needs of chili pepper plants: consistent moisture, warmth, and nutrient availability. By creating a mini-greenhouse environment around the base of your plants, you’re fostering optimal conditions for root development and overall growth. This translates to healthier, more productive plants that yield a larger and more flavorful crop of chili peppers.
But don’t stop there! Feel free to experiment with variations on this DIY trick. For example, if you live in a particularly hot climate, consider using a lighter-colored plastic bottle to prevent overheating. You could also add a layer of mulch around the base of the plant inside the bottle to further retain moisture and suppress weeds. Another variation is to add some slow-release fertilizer to the soil before placing the bottle, providing a sustained source of nutrients for your chili pepper plants. You can also use different sizes of bottles depending on the size of your chili pepper plants. For smaller plants, a smaller bottle will suffice, while larger plants will benefit from a larger bottle.
Consider using different types of bottles as well. Clear bottles allow for maximum sunlight penetration, while colored bottles can provide some shade and protection from intense heat. Experiment with different colors to see which works best for your specific climate and chili pepper variety.
We’ve found that this method is particularly effective for varieties like jalapeños, habaneros, and serranos, but it can be adapted for virtually any type of chili pepper. The key is to monitor your plants regularly and adjust the technique as needed based on their individual needs.
Ultimately, the success of this DIY trick hinges on your willingness to experiment and adapt. Don’t be afraid to try different variations and see what works best for you and your chili pepper plants. The rewards – a vibrant, healthy crop of delicious chili peppers – are well worth the effort.
Now it’s your turn! We encourage you to try this DIY trick for growing chili peppers easily and share your experiences with us. Let us know what variations you tried, what challenges you faced, and what successes you achieved. Your feedback will help us refine this technique and make it even more effective for chili pepper growers everywhere. Share your photos and stories in the comments section below – we can’t wait to see your chili pepper plants thrive!
Frequently Asked Questions (FAQ)
What type of plastic bottle should I use?
Ideally, you should use a clear plastic bottle, such as a soda or water bottle. Clear bottles allow maximum sunlight to reach the plant, which is essential for photosynthesis. However, if you live in a very hot climate, you might consider using a slightly opaque or colored bottle to provide some shade and prevent the soil from overheating. Avoid using dark-colored bottles, as they can absorb too much heat and potentially damage the plant. Make sure the bottle is clean and free of any residue before using it.
How often should I water my chili pepper plants when using this method?
The frequency of watering will depend on several factors, including the climate, soil type, and the size of the plant. However, the plastic bottle helps to retain moisture, so you’ll likely need to water less frequently than you would without it. A good rule of thumb is to check the soil moisture level every few days. If the soil feels dry to the touch about an inch below the surface, it’s time to water. When watering, pour the water directly into the bottle, allowing it to slowly seep into the soil. Avoid overwatering, as this can lead to root rot.
Can I use this method for other types of plants besides chili peppers?
While this DIY trick is particularly effective for chili peppers, it can also be used for other plants that benefit from consistent moisture and warmth, such as tomatoes, peppers, and eggplants. The principle is the same: the plastic bottle creates a mini-greenhouse environment that promotes healthy root development and overall growth. However, you may need to adjust the size of the bottle and the watering frequency depending on the specific needs of the plant.
What if I live in a very hot climate? Will the plastic bottle overheat the plant?
In very hot climates, there is a risk of the plastic bottle overheating the plant. To mitigate this risk, you can take a few precautions. First, use a lighter-colored or slightly opaque bottle to reflect some of the sunlight. Second, make sure the bottle is well-ventilated by cutting larger holes in the top or removing the cap entirely. Third, consider providing some additional shade for the plant during the hottest part of the day. You can do this by placing a shade cloth over the plant or by planting it in a location that receives partial shade.
How long should I leave the plastic bottle on the plant?
You can leave the plastic bottle on the plant for as long as it provides a benefit. Typically, this is during the early stages of growth, when the plant is most vulnerable to environmental stressors. Once the plant has established a strong root system and is growing vigorously, you can remove the bottle. However, you may want to keep the bottle in place if you live in an area with unpredictable weather or if you want to continue to retain moisture in the soil.
What if I don’t have any plastic bottles? Are there any alternatives?
If you don’t have any plastic bottles, you can use other materials to create a similar mini-greenhouse environment. For example, you can use a glass jar, a plastic container, or even a clear plastic bag. The key is to choose a material that is transparent or translucent and that can be easily placed over the plant. You can also use organic materials like straw or hay to mulch around the base of the plant, which will help to retain moisture and regulate soil temperature.
Will this method protect my plants from pests?
While the plastic bottle can provide some protection from pests, it is not a foolproof solution. Pests can still find their way into the bottle through the holes or by crawling underneath it. To further protect your plants from pests, you can use organic pest control methods, such as neem oil or insecticidal soap. You can also inspect your plants regularly for signs of pests and take action to remove them promptly.
Can I use this method for container gardening?
Yes, this method is perfectly suitable for container gardening. In fact, it can be even more effective in containers, as it helps to retain moisture and prevent the soil from drying out quickly. When using this method in containers, make sure the container is large enough to accommodate the plant’s root system and that it has adequate drainage holes. You may also need to adjust the watering frequency depending on the size of the container and the type of soil you are using.
Does this method work for all varieties of chili peppers?
This method is generally effective for most varieties of chili peppers. However, some varieties may be more sensitive to heat or moisture than others, so it’s important to monitor your plants closely and adjust the technique as needed. For example, if you are growing a variety that is known to be susceptible to root rot, you may need to water less frequently or use a well-draining soil mix.
How does this DIY trick help in growing chili peppers easily?
This DIY trick simplifies chili pepper cultivation by creating a controlled microclimate. The plastic bottle acts as a miniature greenhouse, trapping warmth and humidity, which are crucial for seed germination and early plant growth. It also protects the young plants from harsh weather conditions like strong winds, heavy rain, and frost. Furthermore, it reduces water evaporation, ensuring consistent moisture levels in the soil, which is vital for healthy root development and overall plant vigor. By providing these optimal conditions, the DIY trick significantly increases the chances of a successful chili pepper harvest with minimal effort.
Leave a Comment