
Hydroponic veggie garden setup – sounds intimidating, right? But trust me, it’s not as complicated as it seems! Imagine harvesting fresh, crisp lettuce, juicy tomatoes, and vibrant herbs right from your own home, all without the hassle of soil. That’s the magic of hydroponics, and I’m here to guide you through creating your very own thriving hydroponic veggie garden.
While hydroponics might seem like a modern marvel, its roots actually stretch back centuries. From the Hanging Gardens of Babylon to the floating gardens of the Aztecs, humans have been experimenting with soilless cultivation for a long time. Today, with growing concerns about food security and sustainable living, hydroponics is experiencing a major resurgence. It allows us to grow food in smaller spaces, use less water, and control the growing environment, leading to higher yields and healthier plants.
But why should *you* consider a hydroponic veggie garden setup? Well, think about it: no more weeding, less pest problems, and the ability to grow your favorite veggies year-round, regardless of the weather outside. Plus, it’s a fantastic way to connect with nature, learn new skills, and enjoy the satisfaction of growing your own food. In this article, I’ll break down the process into easy-to-follow steps, so you can start enjoying the benefits of hydroponics in no time. Let’s get growing!

DIY Hydroponic Veggie Garden: From Seed to Salad on Your Countertop!
Hey there, fellow plant enthusiasts! Ever dreamed of having fresh, delicious veggies right at your fingertips, no matter the season or the size of your yard? Well, get ready to turn that dream into reality with this super-easy, super-rewarding DIY hydroponic veggie garden! I’m going to walk you through every step, from gathering your supplies to harvesting your first crop. Trust me, if I can do it, you can too!
What is Hydroponics, Anyway?
Before we dive in, let’s quickly cover the basics. Hydroponics is simply growing plants without soil, using nutrient-rich water solutions. It’s a fantastic way to save space, water, and time, and it often results in faster growth and bigger yields. Plus, it’s just plain cool!
Choosing Your Hydroponic System: Kratky Method for the Win!
There are tons of different hydroponic systems out there, but for beginners, I highly recommend the Kratky method. It’s passive, meaning it doesn’t require pumps, air stones, or electricity. It’s basically a set-it-and-forget-it system, perfect for busy folks like us!
Gathering Your Supplies: The Shopping List
Okay, let’s get down to business. Here’s what you’ll need to build your Kratky hydroponic garden:
* Containers: I like to use opaque plastic storage totes or buckets. Opaque is key to prevent algae growth. The size depends on what you want to grow. For leafy greens like lettuce and spinach, a 5-gallon bucket works great. For larger plants like tomatoes or peppers, you’ll want something bigger, like a 10-20 gallon tote.
* Net Pots: These are small, slotted pots that hold your plants and allow the roots to grow down into the nutrient solution. You can find them at most garden centers or online. 2-inch or 3-inch net pots are a good starting point.
* Growing Medium: This is what you’ll use to support your seedlings in the net pots. I recommend coco coir or rockwool cubes. They’re both excellent at retaining moisture and providing good aeration.
* Nutrient Solution: This is the lifeblood of your hydroponic garden! You’ll need a balanced nutrient solution specifically formulated for hydroponics. Look for a two-part or three-part nutrient solution for best results. General Hydroponics Flora Series is a popular and reliable option.
* pH Meter and pH Up/Down: Maintaining the correct pH is crucial for nutrient absorption. A pH meter will help you monitor the pH of your nutrient solution, and pH up/down solutions will allow you to adjust it as needed.
* Seeds: Choose your favorite veggies! Leafy greens like lettuce, spinach, kale, and herbs like basil and mint are excellent choices for beginners. You can also try strawberries, peppers, or even tomatoes, but they’ll require larger containers and more light.
* Seed Starting Tray and Dome: For starting your seeds indoors.
* Grow Lights (Optional but Recommended): If you don’t have a sunny windowsill, you’ll need grow lights to provide your plants with the light they need to thrive. LED grow lights are energy-efficient and work great.
* Drill and Hole Saw Attachment: To create holes in your container for the net pots.
* Measuring Cups and Spoons: For accurately measuring your nutrient solution.
* Water: Tap water is usually fine, but if your tap water is heavily chlorinated, let it sit out for 24 hours to allow the chlorine to evaporate.
* Dark Spray Paint (Optional): If your container isn’t completely opaque, you can spray paint the outside to block out light and prevent algae growth.
Step-by-Step Instructions: Building Your Kratky Garden
Alright, let’s get our hands dirty! Here’s how to build your very own Kratky hydroponic garden:
1. Prepare Your Container:
* First, clean your container thoroughly with soap and water. Rinse it well to remove any soap residue.
* If your container isn’t opaque, spray paint the outside with dark spray paint. Let it dry completely before moving on.
* Decide how many plants you want to grow in your container. For leafy greens, you can usually fit 4-6 plants in a 5-gallon bucket.
* Using your hole saw attachment, drill holes in the lid of your container that are slightly smaller than the diameter of your net pots. This will ensure a snug fit. Space the holes evenly across the lid.
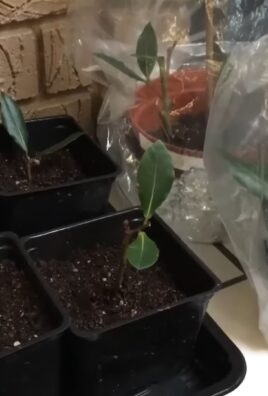
2. Start Your Seeds:
* While you’re waiting for your container to dry (if you painted it), start your seeds in a seed starting tray.
* Moisten your growing medium (coco coir or rockwool) with water.
* Place one or two seeds in each cell of the seed starting tray.
* Cover the tray with a dome to create a humid environment.
* Place the tray under grow lights or in a sunny windowsill.
* Keep the growing medium moist but not soggy.
* Once your seedlings have sprouted and have a few sets of true leaves (usually after 2-3 weeks), they’re ready to be transplanted into your hydroponic system.
3. Prepare Your Nutrient Solution:
* Follow the instructions on your nutrient solution to mix the correct concentration. Start with a diluted solution, especially for young seedlings.
* Fill your container with the nutrient solution, leaving a few inches of space at the top. The roots need air as well as water.
* Use your pH meter to check the pH of the solution. The ideal pH range for most hydroponic vegetables is between 5.5 and 6.5.
* If the pH is too high, add a small amount of pH down solution. If it’s too low, add a small amount of pH up solution.
* Stir the solution well after adding pH adjusters and recheck the pH.
4. Transplant Your Seedlings:
* Gently remove your seedlings from the seed starting tray.
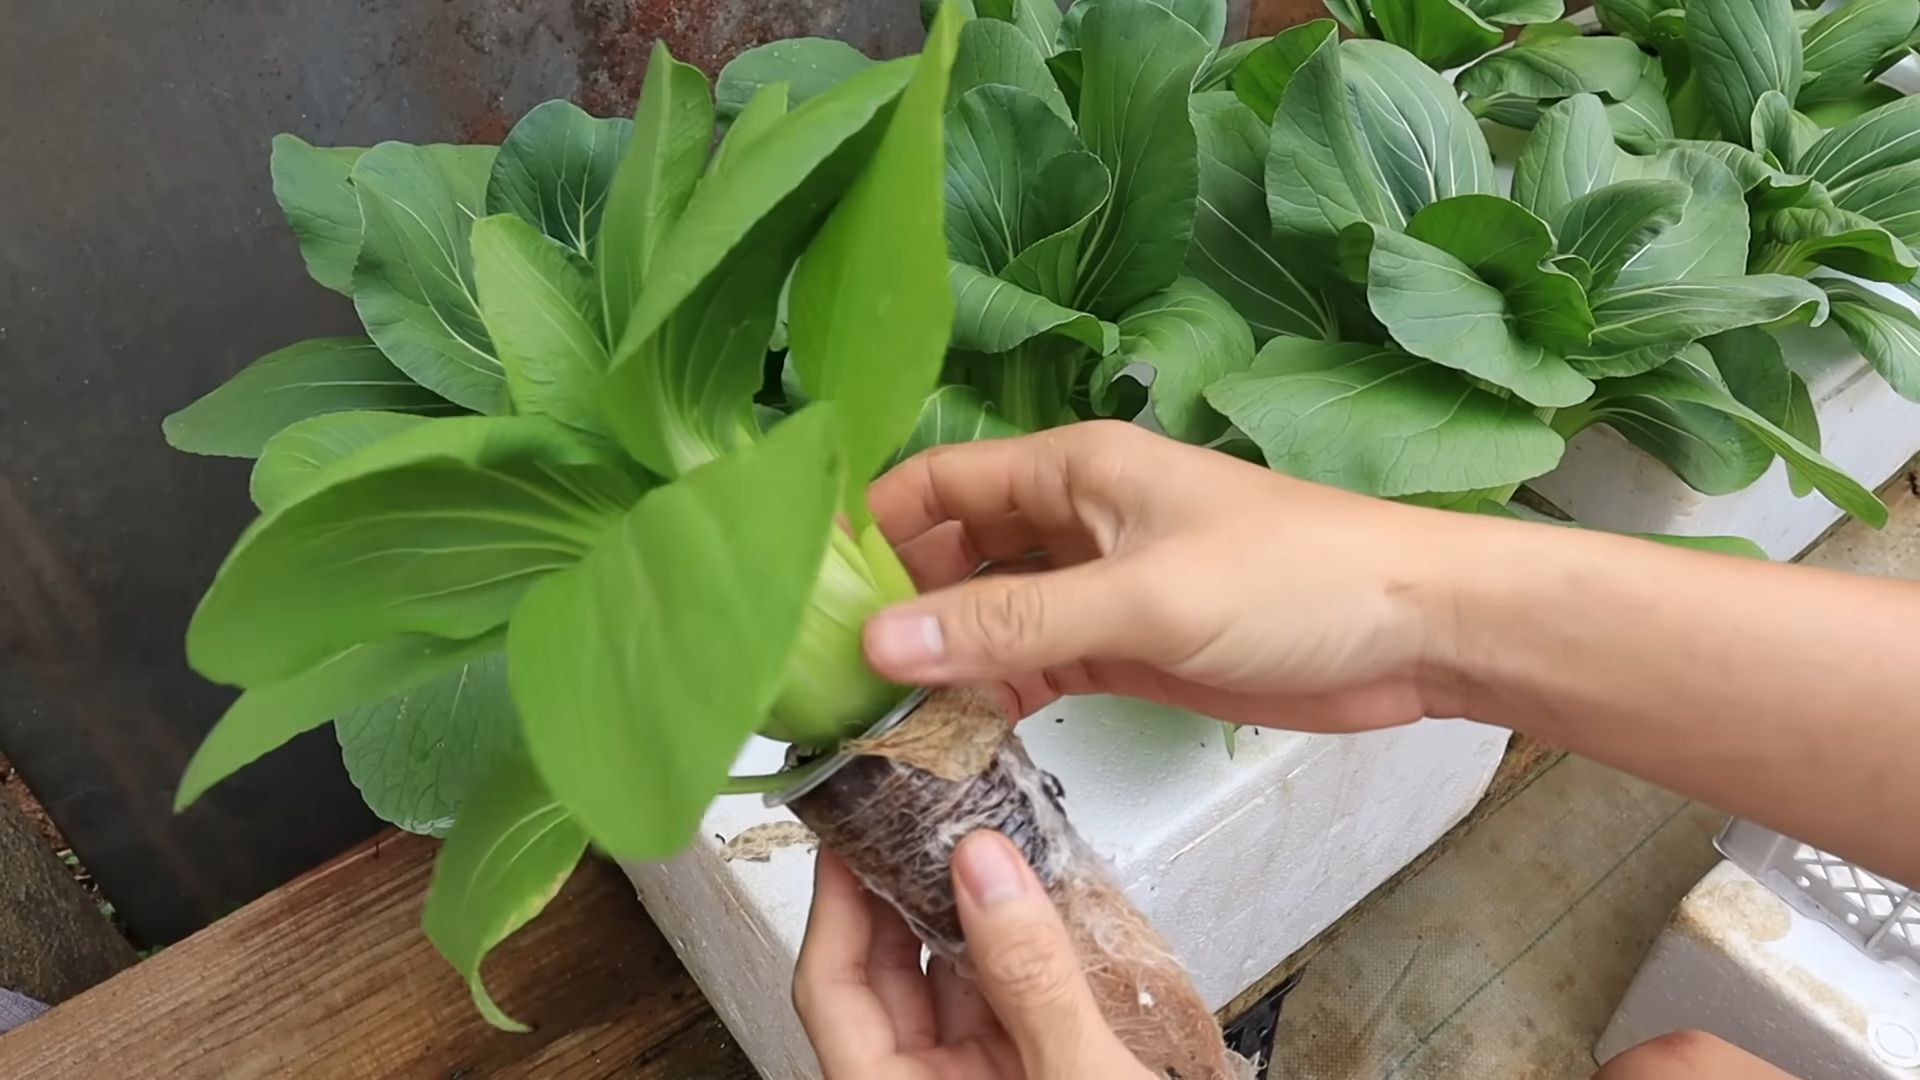
* Place each seedling in a net pot, filling the pot with more of your growing medium to support the plant.
* Make sure the roots are pointing downwards.
* Place the net pots into the holes in the lid of your container.
* The bottom of the net pots should be submerged in the nutrient solution.
5. Provide Light and Air:
* If you’re using grow lights, position them about 6-12 inches above your plants.
* Leave the lights on for 14-16 hours per day.
* Make sure your plants have good air circulation. A small fan can help with this.
6. Monitor and Maintain:
* Check the water level in your container regularly. As the plants grow, they’ll absorb water, so you’ll need to top it off with more nutrient solution.
* Check the pH of the solution weekly and adjust as needed.
* Change the nutrient solution every 2-3 weeks to prevent nutrient deficiencies.
* Inspect your plants regularly for pests or diseases. If you find any, treat them promptly with an appropriate organic pesticide or fungicide.
Troubleshooting Tips: Common Problems and Solutions
Even with the simplest systems, sometimes things don’t go exactly as planned. Here are a few common issues you might encounter and how to fix them:
* Algae Growth: Algae can grow in your nutrient solution if it’s exposed to light. To prevent this, use an opaque container or paint the outside of your container with dark spray paint. You can also add a small amount of hydrogen peroxide to the nutrient solution to kill algae.
* Nutrient Deficiencies: If your plants are showing signs of nutrient deficiencies (e.g., yellowing leaves, stunted growth), make sure you’re using a balanced nutrient solution and that the pH is within the correct range. You may also need to increase the concentration of the nutrient solution.
* Pests: Common pests like aphids, spider mites, and whiteflies can attack your hydroponic plants. Inspect your plants regularly and treat them promptly with an appropriate organic pesticide.
* Root Rot: Root rot is a fungal disease that can occur if the roots are constantly submerged in water and don’t have enough oxygen. To prevent root rot, make sure the bottom of the net pots are only partially submerged in the nutrient solution. You can also add an air stone to the solution to increase oxygen levels.
Harvesting Your Veggies: The Sweet Reward
The best part of hydroponics is, of course, harvesting your delicious veggies! You can start harvesting leafy greens like lettuce and spinach as soon as they’re big enough to eat. Simply cut off the outer leaves, leaving the inner leaves to continue growing. For other veggies like tomatoes and
Conclusion
So, there you have it! Setting up your own hydroponic veggie garden isn’t just a trendy project; it’s a game-changer for fresh, flavorful produce right at your fingertips. We’ve walked you through the essentials, from choosing the right system to nurturing your seedlings, and hopefully demystified the process along the way.
Why is this DIY trick a must-try? Because it empowers you to take control of your food source, regardless of your space constraints or gardening experience. Imagine plucking ripe tomatoes in the dead of winter, or enjoying crisp lettuce grown entirely indoors. Hydroponics offers a sustainable, efficient, and incredibly rewarding way to grow your own food. Plus, it’s a fantastic learning experience for the whole family!
Don’t be afraid to experiment! Once you’ve mastered the basics, the possibilities are endless. Try different nutrient solutions to see how they affect growth and flavor. Explore vertical hydroponic systems to maximize space. Consider adding companion plants to your setup for natural pest control. You could even integrate smart technology to automate watering and lighting, creating a truly hands-off gardening experience.
For variations, consider starting small with a simple Kratky method setup using recycled containers. This is a great way to dip your toes into hydroponics without a significant investment. Alternatively, if you’re feeling ambitious, explore deep water culture (DWC) or nutrient film technique (NFT) systems for faster growth and higher yields. Remember to research the specific needs of the vegetables you choose to grow, as some varieties thrive better in certain hydroponic systems than others.
The key to success with your hydroponic veggie garden is observation and adaptation. Pay close attention to your plants, monitor their growth, and adjust your nutrient solutions and environmental conditions as needed. Don’t be discouraged by initial setbacks; every gardener, even experienced hydroponic growers, faces challenges along the way. The important thing is to learn from your mistakes and keep experimenting.
We are confident that with a little patience and dedication, you’ll be enjoying the fruits (and vegetables!) of your labor in no time. The satisfaction of harvesting your own homegrown produce, knowing exactly where it came from and how it was grown, is truly unparalleled.
So, what are you waiting for? Gather your supplies, choose your system, and get started on your hydroponic adventure today! We’re eager to hear about your experiences. Share your successes, your challenges, and your tips in the comments below. Let’s build a community of hydroponic enthusiasts and inspire others to embrace this innovative and rewarding way of growing food. We encourage you to share pictures of your setup and your harvests. Let us know what vegetables you are growing and what challenges you faced. Your experience can help others who are just starting out.
Remember, the beauty of hydroponics lies in its adaptability and its potential to revolutionize the way we grow food. By embracing this technology, you’re not only providing yourself with fresh, healthy produce, but you’re also contributing to a more sustainable and resilient food system. So, dive in, get your hands wet (figuratively speaking!), and discover the joys of hydroponic gardening. Happy growing!
Frequently Asked Questions (FAQ)
What are the best vegetables to grow in a hydroponic system?
The best vegetables for hydroponics are generally those that are quick to mature and don’t require extensive root systems. Leafy greens like lettuce, spinach, kale, and herbs such as basil, mint, and cilantro are excellent choices for beginners. Tomatoes, peppers, cucumbers, and strawberries also thrive in hydroponic systems, but they may require more space and support. Root vegetables like carrots and potatoes are generally not recommended for hydroponics due to their extensive root systems and space requirements. However, smaller varieties of radishes and beets can be grown successfully in some systems. Ultimately, the best vegetables for your hydroponic garden will depend on your personal preferences, the size of your system, and your level of experience.
How often should I change the nutrient solution in my hydroponic system?
The frequency of nutrient solution changes depends on the size of your system, the type of plants you’re growing, and the environmental conditions. As a general rule, you should change the nutrient solution every 1-2 weeks for smaller systems and every 2-4 weeks for larger systems. However, it’s important to monitor the nutrient levels and pH of your solution regularly and adjust your changing schedule accordingly. If you notice a significant drop in nutrient levels or a drastic change in pH, it’s a sign that the solution needs to be changed sooner. Additionally, if you’re growing plants that are heavy feeders, you may need to change the solution more frequently. Regularly changing the nutrient solution helps to prevent the buildup of harmful salts and maintain optimal nutrient levels for healthy plant growth.
What is the ideal pH level for a hydroponic nutrient solution?
The ideal pH level for a hydroponic nutrient solution is typically between 5.5 and 6.5. This range allows plants to effectively absorb the nutrients they need for healthy growth. If the pH is too high or too low, certain nutrients may become unavailable to the plants, leading to nutrient deficiencies. It’s important to monitor the pH of your nutrient solution regularly using a pH meter or test kit and adjust it as needed using pH up or pH down solutions. Maintaining the correct pH level is crucial for ensuring that your plants can thrive in a hydroponic system.
How much light do my hydroponic vegetables need?
The amount of light your hydroponic vegetables need depends on the type of plants you’re growing. Leafy greens generally require less light than fruiting vegetables like tomatoes and peppers. As a general rule, most hydroponic vegetables need at least 6-8 hours of light per day. If you’re growing your plants indoors, you’ll likely need to supplement natural light with artificial grow lights. LED grow lights are a popular choice for hydroponics because they are energy-efficient and produce a spectrum of light that is beneficial for plant growth. The distance between the grow lights and your plants will also affect the amount of light they receive. Be sure to follow the manufacturer’s recommendations for your specific grow lights.
What are some common problems I might encounter with my hydroponic veggie garden, and how can I fix them?
Some common problems you might encounter with your hydroponic veggie garden include nutrient deficiencies, pH imbalances, algae growth, and pest infestations. Nutrient deficiencies can be identified by yellowing leaves, stunted growth, or other abnormal symptoms. To fix nutrient deficiencies, ensure you are using a balanced nutrient solution and adjust the concentration as needed. pH imbalances can also cause nutrient deficiencies, so it’s important to monitor and adjust the pH of your nutrient solution regularly. Algae growth can be prevented by keeping your system clean and using opaque containers to block out light. Pest infestations can be treated with organic pesticides or by introducing beneficial insects. Regularly inspecting your plants for signs of problems and taking prompt action can help you prevent and resolve these issues.
Can I use tap water in my hydroponic system?
Whether you can use tap water in your hydroponic system depends on the quality of your tap water. If your tap water is relatively clean and has a pH within the acceptable range (5.5-6.5), it may be suitable for use in hydroponics. However, if your tap water is hard or contains high levels of chlorine or other contaminants, it’s best to use filtered or distilled water instead. Hard water can cause mineral buildup in your system, while chlorine can harm beneficial microbes. You can test your tap water using a water testing kit to determine its suitability for hydroponics. If you’re unsure about the quality of your tap water, it’s always best to err on the side of caution and use filtered or distilled water.
How do I prevent algae growth in my hydroponic system?
Preventing algae growth in your hydroponic system is crucial for maintaining a healthy environment for your plants. Algae can compete with your plants for nutrients and oxygen, and it can also clog your system. To prevent algae growth, keep your system clean and use opaque containers to block out light. Algae needs light to grow, so preventing light from reaching the nutrient solution will significantly reduce algae growth. You can also add hydrogen peroxide to your nutrient solution to kill algae, but be careful not to use too much, as it can also harm your plants. Regularly cleaning your system and maintaining good hygiene practices will help to prevent algae growth and keep your hydroponic garden thriving.

Leave a Comment