
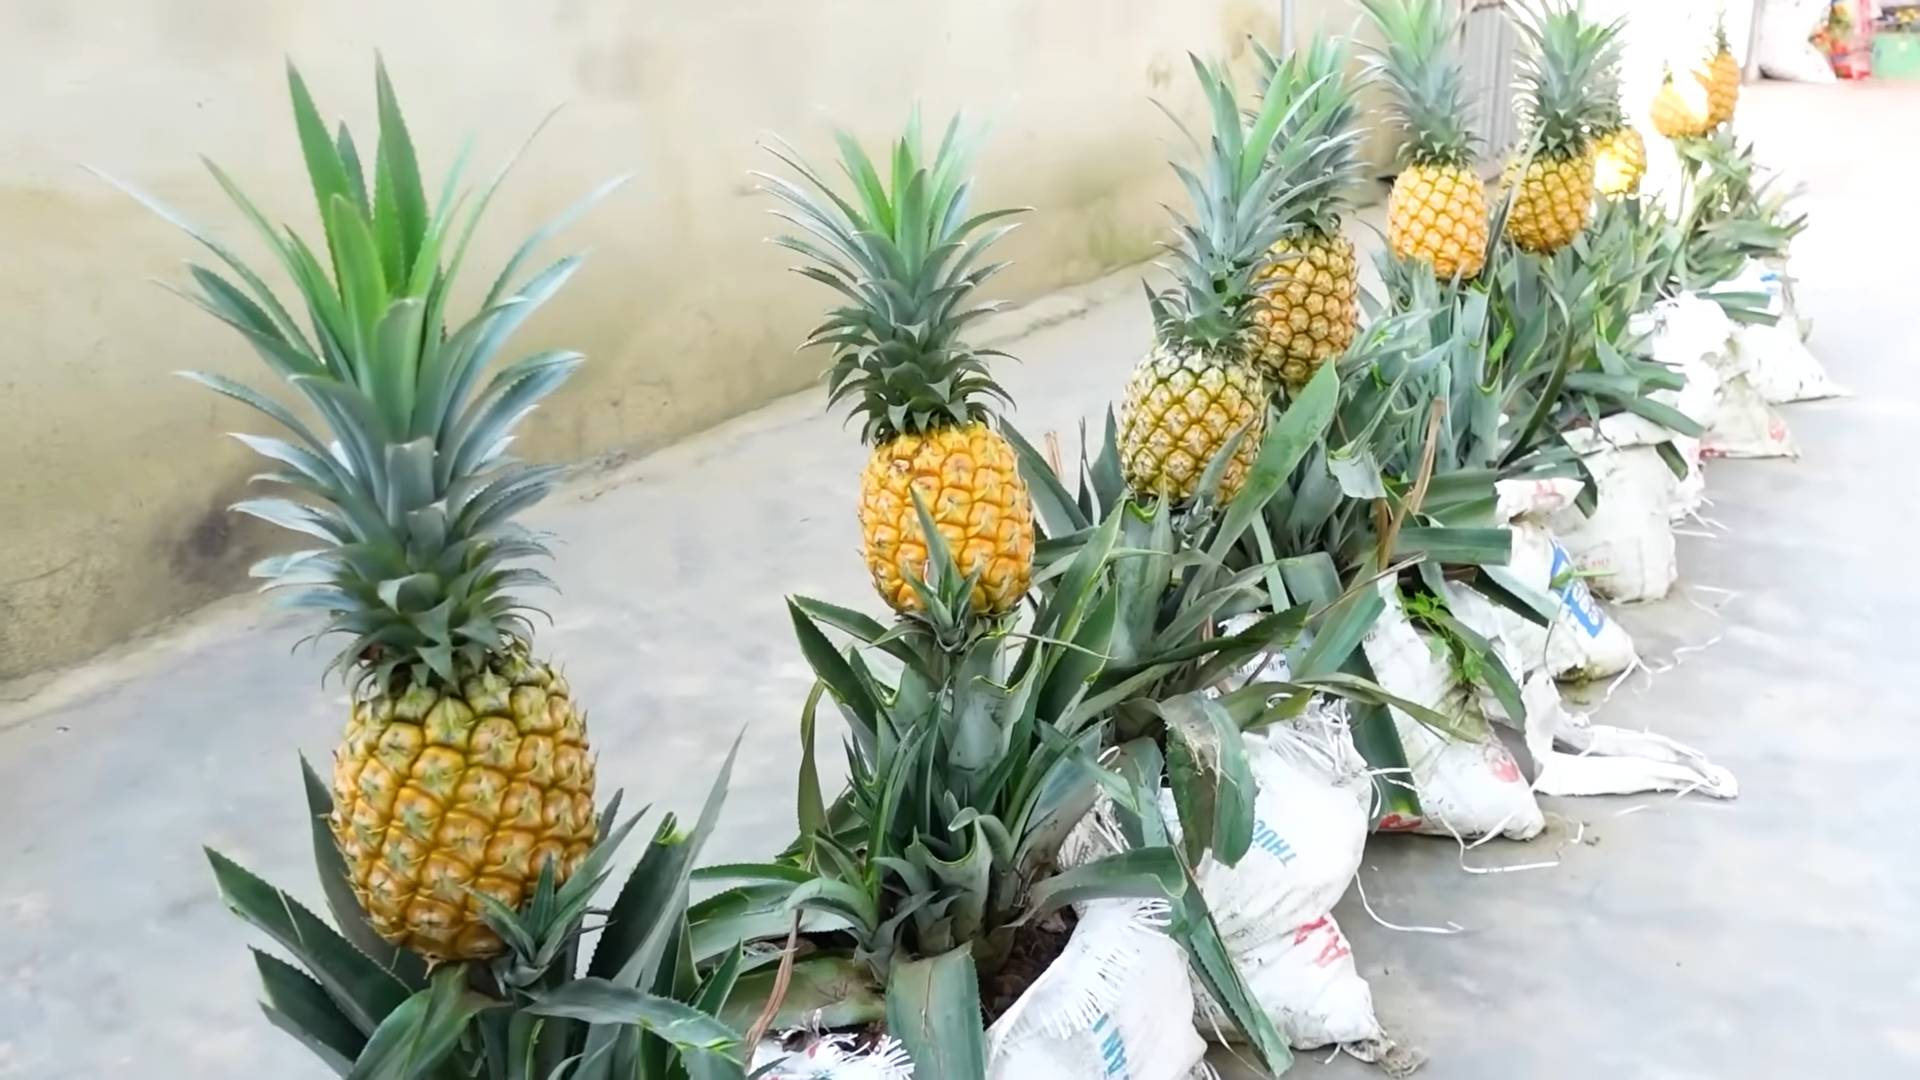
Pineapple Farming at Home might sound like a tropical dream reserved for sun-drenched plantations, but I’m here to tell you it’s a surprisingly achievable reality, even in your own backyard! Forget those expensive grocery store pineapples – imagine the satisfaction of harvesting your own juicy, homegrown fruit.
For centuries, the pineapple has been a symbol of hospitality and luxury, gracing royal tables and signifying welcome in colonial America. Its exotic appeal has always captivated us, and now, thanks to some clever DIY tricks, you can bring that tropical charm right to your doorstep.
Why should you try pineapple farming at home? Well, beyond the sheer joy of growing your own food, it’s a fantastic way to reduce your carbon footprint, avoid harmful pesticides, and add a unique touch to your garden. Plus, let’s be honest, who wouldn’t want to impress their friends and family with a homegrown pineapple? This article is packed with simple, step-by-step instructions and insider tips to guide you through the entire process, from selecting the perfect pineapple top to enjoying your sweet, homegrown harvest. So, grab your gardening gloves, and let’s get started on this exciting tropical adventure!
Growing Pineapples at Home: A Tropical Treat You Can DIY!
Okay, so you want to grow pineapples at home? Awesome! It’s surprisingly easier than you might think, and there’s nothing quite like the taste of a homegrown pineapple. I’ve been doing this for a few years now, and I’m excited to share my secrets with you. Get ready to bring a little bit of the tropics to your backyard (or even your balcony!).
What You’ll Need: The Pineapple Starter Kit
Before we dive in, let’s gather our supplies. This is a pretty low-cost project, which is always a win in my book!
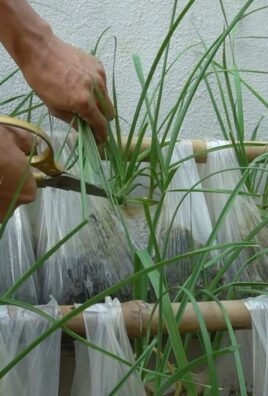
* A Fresh Pineapple: This is the most important ingredient! Look for a ripe pineapple with healthy-looking green leaves. Avoid pineapples with brown or damaged leaves. The fresher, the better.
* A Sharp Knife: You’ll need this to remove the top of the pineapple.
* Potting Soil: Use a well-draining potting mix. I like to use a mix specifically formulated for citrus or tropical plants, but a general-purpose mix will work too.
* A Pot: Choose a pot that’s at least 6 inches in diameter. The bigger, the better, as pineapples need room to grow. Make sure it has drainage holes!
* Water: Essential for keeping your pineapple happy and hydrated.
* Optional: Rooting Hormone: While not strictly necessary, rooting hormone can help speed up the rooting process.
* Optional: Gardening Gloves: Protect your hands from the soil and any potential pineapple sap irritation.
Phase 1: Preparing the Pineapple Top
This is where the magic begins! We’re going to turn the top of a pineapple into a brand new plant.
1. Twist or Cut Off the Top: The easiest way is to firmly grasp the leaves and twist the top off the pineapple. If it doesn’t come off easily, use your sharp knife to carefully cut it off, leaving about an inch of fruit attached to the leaves.
2. Remove the Excess Fruit: This is crucial! Any remaining fruit will rot and can prevent the pineapple top from rooting. Carefully peel away or cut off all the fruit, exposing the bottom of the stem. Don’t worry if you accidentally remove a few of the bottom leaves in the process.
3. Peel Away the Bottom Leaves: Gently peel away the bottom few layers of leaves from the base of the pineapple top. This will expose the root nodes (small bumps) that will eventually grow into roots. Expose about an inch or two of the stem.
4. Let it Dry Out (Important!): This is a step many people skip, but it’s vital to prevent rot. Place the pineapple top in a cool, dry place for 3-7 days. This allows the cut end to callous over, reducing the risk of fungal infections. I usually just leave mine on a paper towel on my kitchen counter.
Phase 2: Rooting the Pineapple Top
Now that our pineapple top is prepped, it’s time to encourage those roots to grow! You have two main options here: rooting in water or directly in soil. I’ve tried both, and I’ve found rooting in water to be a bit more reliable, so that’s what I’ll focus on.
1. Rooting in Water (My Preferred Method):
* Find a Container: Choose a glass or jar that’s wide enough to hold the pineapple top upright.
* Add Water: Fill the container with enough water to cover the exposed stem, but not the leaves.
* Place the Pineapple Top: Carefully place the pineapple top in the water, making sure the bottom of the stem is submerged.
* Find a Sunny Spot: Place the container in a bright, indirect sunlight location. Avoid direct sunlight, which can scorch the leaves.
* Change the Water Regularly: Change the water every 2-3 days to prevent algae growth and keep the water fresh.
* Be Patient: It can take several weeks (sometimes even a month or two) for roots to appear. Don’t get discouraged! Just keep changing the water and providing bright light. You’ll start to see small white roots emerging from the stem.
2. Rooting Directly in Soil (Alternative Method):
* Prepare the Pot: Fill your pot with well-draining potting mix.
* Plant the Pineapple Top: Dig a small hole in the center of the pot and plant the pineapple top, burying the exposed stem.
* Water Lightly: Water the soil lightly, just enough to moisten it.
* Provide Support (Optional): If the pineapple top is wobbly, you can use small sticks or skewers to provide support.
* Find a Sunny Spot: Place the pot in a bright, indirect sunlight location.
* Keep the Soil Moist (But Not Soggy): Water sparingly, allowing the soil to dry out slightly between waterings. Overwatering can lead to rot.
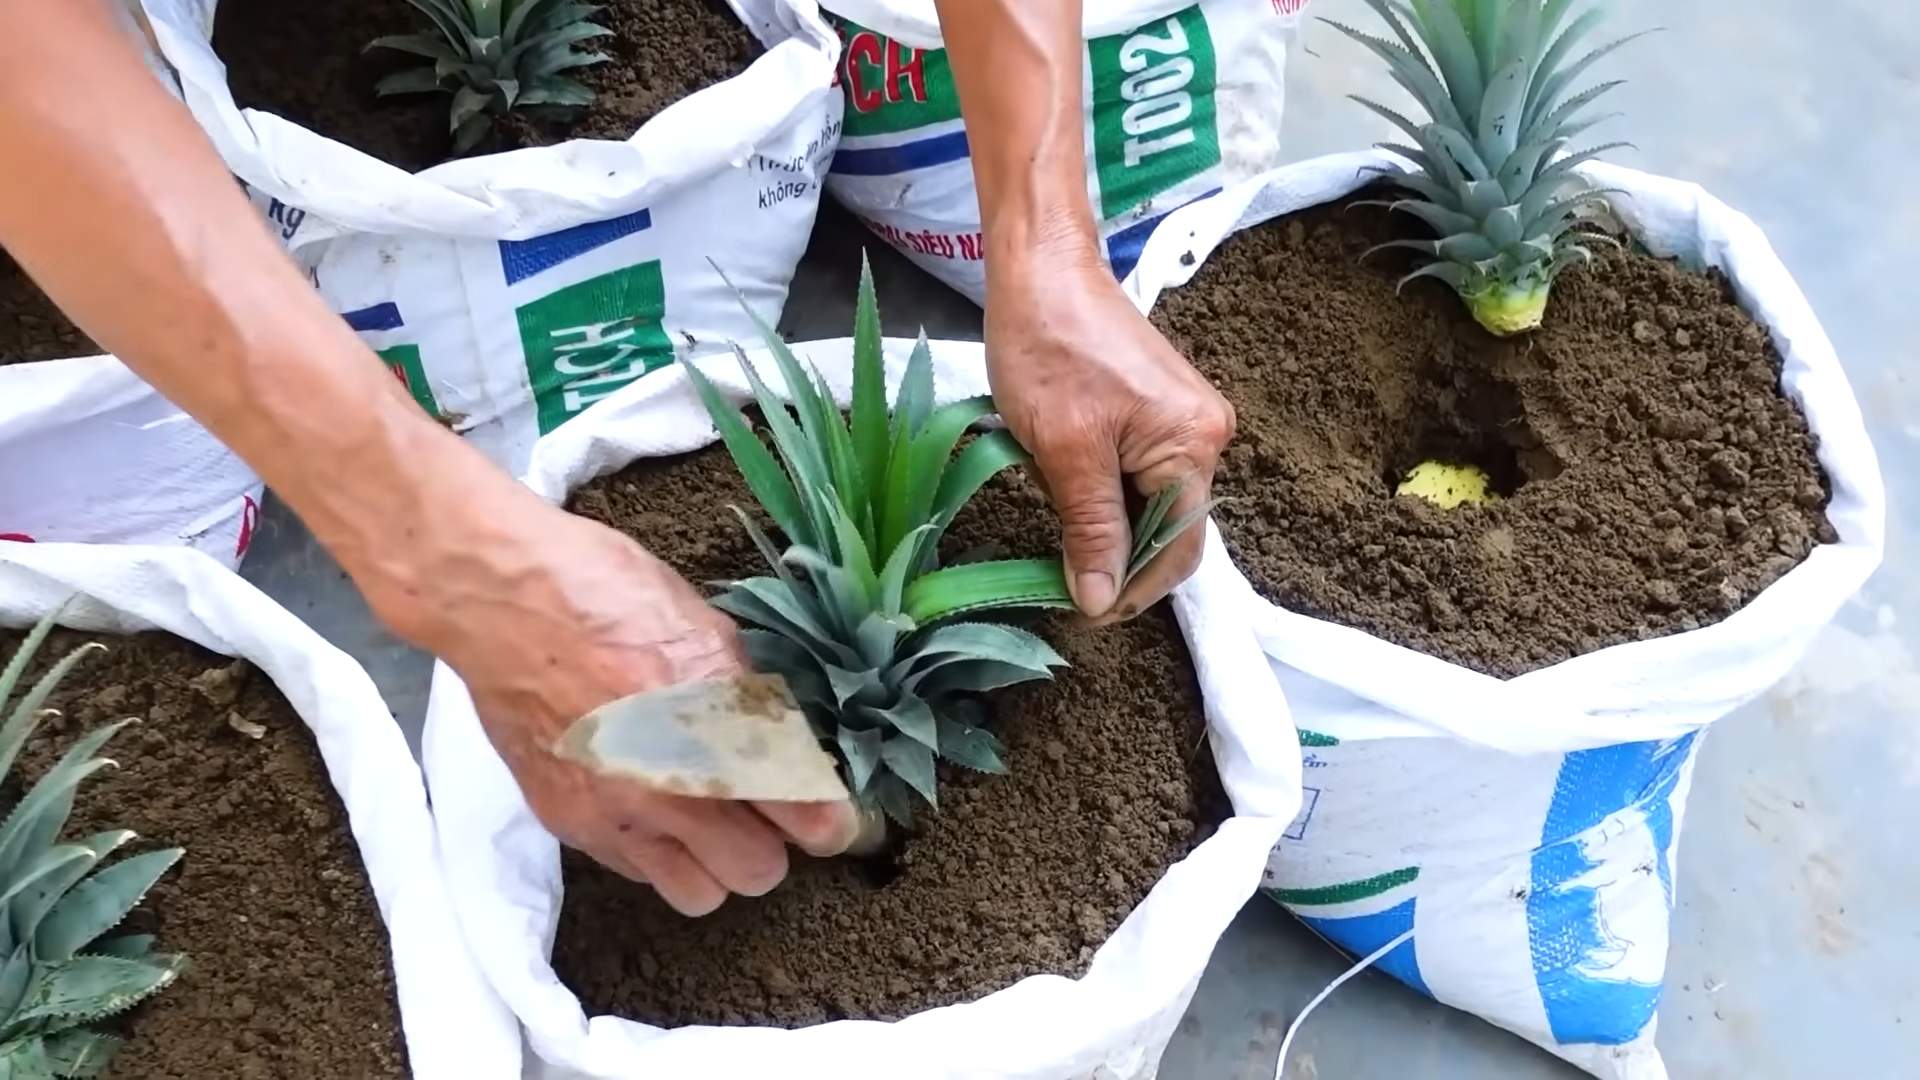
Phase 3: Planting Your Rooted Pineapple Top
Once your pineapple top has developed a good root system (at least an inch or two of roots), it’s time to plant it in soil.
1. Prepare the Pot: If you rooted your pineapple top in water, you’ll need to prepare a pot with well-draining potting mix. If you rooted it directly in soil, you can skip this step.
2. Carefully Remove the Pineapple Top: If you rooted in water, gently remove the pineapple top from the container, being careful not to damage the roots.
3. Dig a Hole: Dig a hole in the center of the pot that’s large enough to accommodate the root ball.
4. Plant the Pineapple Top: Carefully place the pineapple top in the hole, making sure the roots are spread out.
5. Fill the Hole: Fill the hole with potting mix, gently pressing down to secure the pineapple top.
6. Water Thoroughly: Water the soil thoroughly until water drains out of the bottom of the pot.
Phase 4: Caring for Your Pineapple Plant
Now that your pineapple plant is planted, it’s time to provide it with the care it needs to thrive.
1. Sunlight: Pineapples love sunlight! Place your plant in a location that receives at least 6 hours of direct sunlight per day. If you’re growing it indoors, a south-facing window is ideal. You might need to supplement with a grow light, especially during the winter months.
2. Watering: Water your pineapple plant regularly, allowing the soil to dry out slightly between waterings. Overwatering can lead to root rot, so be careful not to overdo it. I usually water mine about once a week, but this will vary depending on the climate and the size of the pot.
3. Fertilizing: Feed your pineapple plant with a balanced fertilizer every 2-3 months during the growing season (spring and summer). I like to use a fertilizer specifically formulated for citrus or tropical plants. Follow the instructions on the fertilizer label.
4. Temperature: Pineapples thrive in warm temperatures, ideally between 65°F and 85°F (18°C and 29°C). Protect your plant from frost and cold temperatures. If you live in a colder climate, you’ll need to bring your pineapple plant indoors during the winter months.
5. Humidity: Pineapples appreciate humidity. If you live in a dry climate, you can increase the humidity around your plant by misting it regularly or placing it on a tray filled with pebbles and water.
6. Repotting: As your pineapple plant grows, it will eventually need to be repotted into a larger pot. Repot it when the roots start to outgrow the pot, usually every 1-2 years.
Phase 5: Waiting (and Hoping!) for Fruit
This is the most challenging part: patience! It can take anywhere from 2 to 3 years for a pineapple plant to produce fruit. Don’t get discouraged if you don’t see any fruit right away. Just keep providing your plant with the care it needs, and eventually, it will reward you with a delicious pineapple.
1. Encouraging Fruiting (Optional): There’s a trick you can try to encourage your pineapple plant to fruit. Place an apple core or a banana peel near the base of the plant. The ethylene gas released by the fruit can stimulate flowering. You can also cover the plant with a clear plastic bag for a few days to trap the ethylene gas. Be careful not to leave the bag on for too long, as this can lead to fungal growth.
2. Recognizing a Flower: The first sign of fruiting is the appearance of a flower stalk in the center of the plant. The flower stalk will eventually develop into a small pineapple.
3. Harvesting Your Pineapple: Once the pineapple is ripe, it will turn
Conclusion
So, there you have it! Cultivating your own pineapple at home isn’t just a fun project; it’s a rewarding experience that brings a touch of the tropics right to your doorstep. We’ve walked you through the simple steps, from selecting the perfect pineapple top to nurturing it into a thriving plant. Why is this DIY trick a must-try? Because it’s sustainable, cost-effective, and incredibly satisfying to harvest a fruit you’ve personally grown. Imagine the bragging rights when you serve a dish featuring your homegrown pineapple!
Beyond the basic method, there’s room for experimentation. Consider using different types of potting mix to see which yields the best results in your climate. Some gardeners swear by adding a slow-release fertilizer specifically formulated for tropical plants to boost growth. You could also try growing multiple pineapple plants at once, staggering their planting times to ensure a more consistent harvest throughout the year. For those living in colder climates, consider growing your pineapple in a container that can be easily moved indoors during the winter months. This allows you to enjoy the process of **pineapple farming at home** regardless of the weather outside.
Don’t be afraid to get creative with your pineapple plant’s environment. Experiment with different levels of sunlight exposure to find the sweet spot for optimal growth. Some gardeners even use grow lights to supplement natural sunlight, especially during the darker months. Remember to monitor your plant regularly for any signs of pests or diseases and take appropriate action to keep it healthy.
The beauty of this DIY project lies in its simplicity and adaptability. Whether you’re a seasoned gardener or a complete beginner, you can successfully grow your own pineapple with a little patience and care. The taste of a homegrown pineapple is simply unmatched – sweeter, juicier, and bursting with flavor compared to store-bought varieties. Plus, you’ll have the satisfaction of knowing exactly where your food came from and how it was grown.
We wholeheartedly encourage you to give this DIY pineapple farming trick a try. It’s a fantastic way to connect with nature, learn about plant life cycles, and enjoy the delicious fruits of your labor. Once you’ve embarked on your pineapple growing journey, we’d love to hear about your experiences! Share your photos, tips, and challenges in the comments below. Let’s create a community of home pineapple farmers and inspire others to embrace this rewarding hobby. What are you waiting for? Get your pineapple top ready and start growing your own tropical paradise today!
Frequently Asked Questions (FAQ)
How long does it take to grow a pineapple from a top?
Patience is key! Growing a pineapple from a top can take anywhere from 2 to 3 years to produce a mature fruit. The exact timeframe depends on several factors, including climate, sunlight exposure, soil quality, and the specific variety of pineapple. Don’t get discouraged if you don’t see fruit right away. Consistent care and attention will eventually pay off.
What is the best type of pineapple to use for propagation?
Any commercially available pineapple with a healthy-looking top can be used for propagation. However, some varieties may be more readily available or better suited to your local climate. Look for pineapples with vibrant green leaves and a firm, undamaged base. Avoid pineapples with brown or wilted leaves, as these may not root successfully.
What kind of soil is best for growing pineapples?
Pineapples thrive in well-draining, slightly acidic soil. A mixture of potting soil, perlite, and peat moss is a good option. The perlite helps improve drainage, while the peat moss adds acidity. Avoid using heavy clay soil, as it can retain too much moisture and lead to root rot. You can also purchase specialized potting mixes formulated for tropical plants.
How much sunlight does a pineapple plant need?
Pineapples need plenty of sunlight to thrive. Aim for at least 6 hours of direct sunlight per day. If you’re growing your pineapple indoors, place it near a sunny window or supplement with grow lights. Insufficient sunlight can result in slow growth and reduced fruit production.
How often should I water my pineapple plant?
Water your pineapple plant regularly, but avoid overwatering. Allow the soil to dry out slightly between waterings. During the warmer months, you may need to water more frequently than during the cooler months. Check the soil moisture by sticking your finger into the soil. If it feels dry to the touch, it’s time to water.
How do I know when my pineapple is ripe?
Several signs indicate that a pineapple is ripe. The fruit will turn from green to yellow or golden in color. It will also emit a sweet, fragrant aroma. Gently tug on one of the leaves near the top of the fruit. If it comes off easily, the pineapple is likely ripe. You can also tap the side of the pineapple. A ripe pineapple will sound hollow.
Can I grow a pineapple indoors?
Yes, you can grow a pineapple indoors, especially if you live in a colder climate. Choose a large pot with drainage holes and use a well-draining potting mix. Place the pot near a sunny window or supplement with grow lights. Water regularly and fertilize every few months. Remember that indoor-grown pineapples may take longer to fruit than those grown outdoors.
What are some common problems with growing pineapples?
Some common problems with growing pineapples include root rot, mealybugs, and scale insects. Root rot is caused by overwatering and poor drainage. Mealybugs and scale insects are sap-sucking pests that can weaken the plant. To prevent these problems, ensure proper drainage, avoid overwatering, and inspect your plant regularly for pests. Treat any infestations promptly with insecticidal soap or neem oil.
Do I need to fertilize my pineapple plant?
Yes, fertilizing your pineapple plant can help promote healthy growth and fruit production. Use a balanced fertilizer specifically formulated for tropical plants. Apply the fertilizer according to the package instructions. Fertilize every few months during the growing season (spring and summer).
What do I do with the pineapple plant after harvesting the fruit?
After harvesting the fruit, the mother plant will eventually die. However, it will often produce “pups” or offshoots around its base. These pups can be separated from the mother plant and replanted to grow new pineapple plants. This allows you to continue the cycle of **pineapple farming at home** indefinitely.
Leave a Comment