
Grow Yardlong Beans, and prepare to be amazed! Imagine harvesting beans that are literally a yard long – it’s not just a gardening feat, it’s a conversation starter! For centuries, these impressive legumes, also known as asparagus beans or Chinese long beans, have been a staple in Asian cuisine, adding a unique texture and subtly sweet flavor to stir-fries, salads, and more.
But why should you consider growing yardlong beans? Well, beyond their impressive length and delicious taste, they’re surprisingly easy to cultivate, especially with a few clever DIY tricks up your sleeve. I’ve found that even beginner gardeners can achieve a bountiful harvest with the right techniques.
In this article, I’m going to share my favorite home gardening hacks for successfully growing yardlong beans. From simple trellis designs to DIY pest control solutions, these tips will help you maximize your yield and enjoy fresh, homegrown beans all season long. Forget expensive store-bought vegetables; let’s get our hands dirty and grow yardlong beans that will make your garden the envy of the neighborhood!
Grow Your Own Yardlong Beans: A DIY Guide
Hey there, fellow gardening enthusiasts! Ever dreamt of harvesting beans so long they practically touch the ground? Well, get ready to turn that dream into reality! I’m going to walk you through everything you need to know to successfully grow yardlong beans (also known as asparagus beans or Chinese long beans) right in your own backyard. It’s easier than you think, and the reward of those incredibly long, delicious beans is totally worth it.
What You’ll Need
Before we dive in, let’s gather our supplies. Here’s a checklist of everything you’ll need to get started:
* **Yardlong Bean Seeds:** Choose a variety that suits your climate. I personally love the ‘Red Noodle’ variety for its vibrant color and excellent flavor.
* **Well-Draining Soil:** Yardlong beans aren’t too picky, but they thrive in soil that’s rich in organic matter and drains well.
* **Compost or Aged Manure:** This will help enrich your soil and provide essential nutrients.
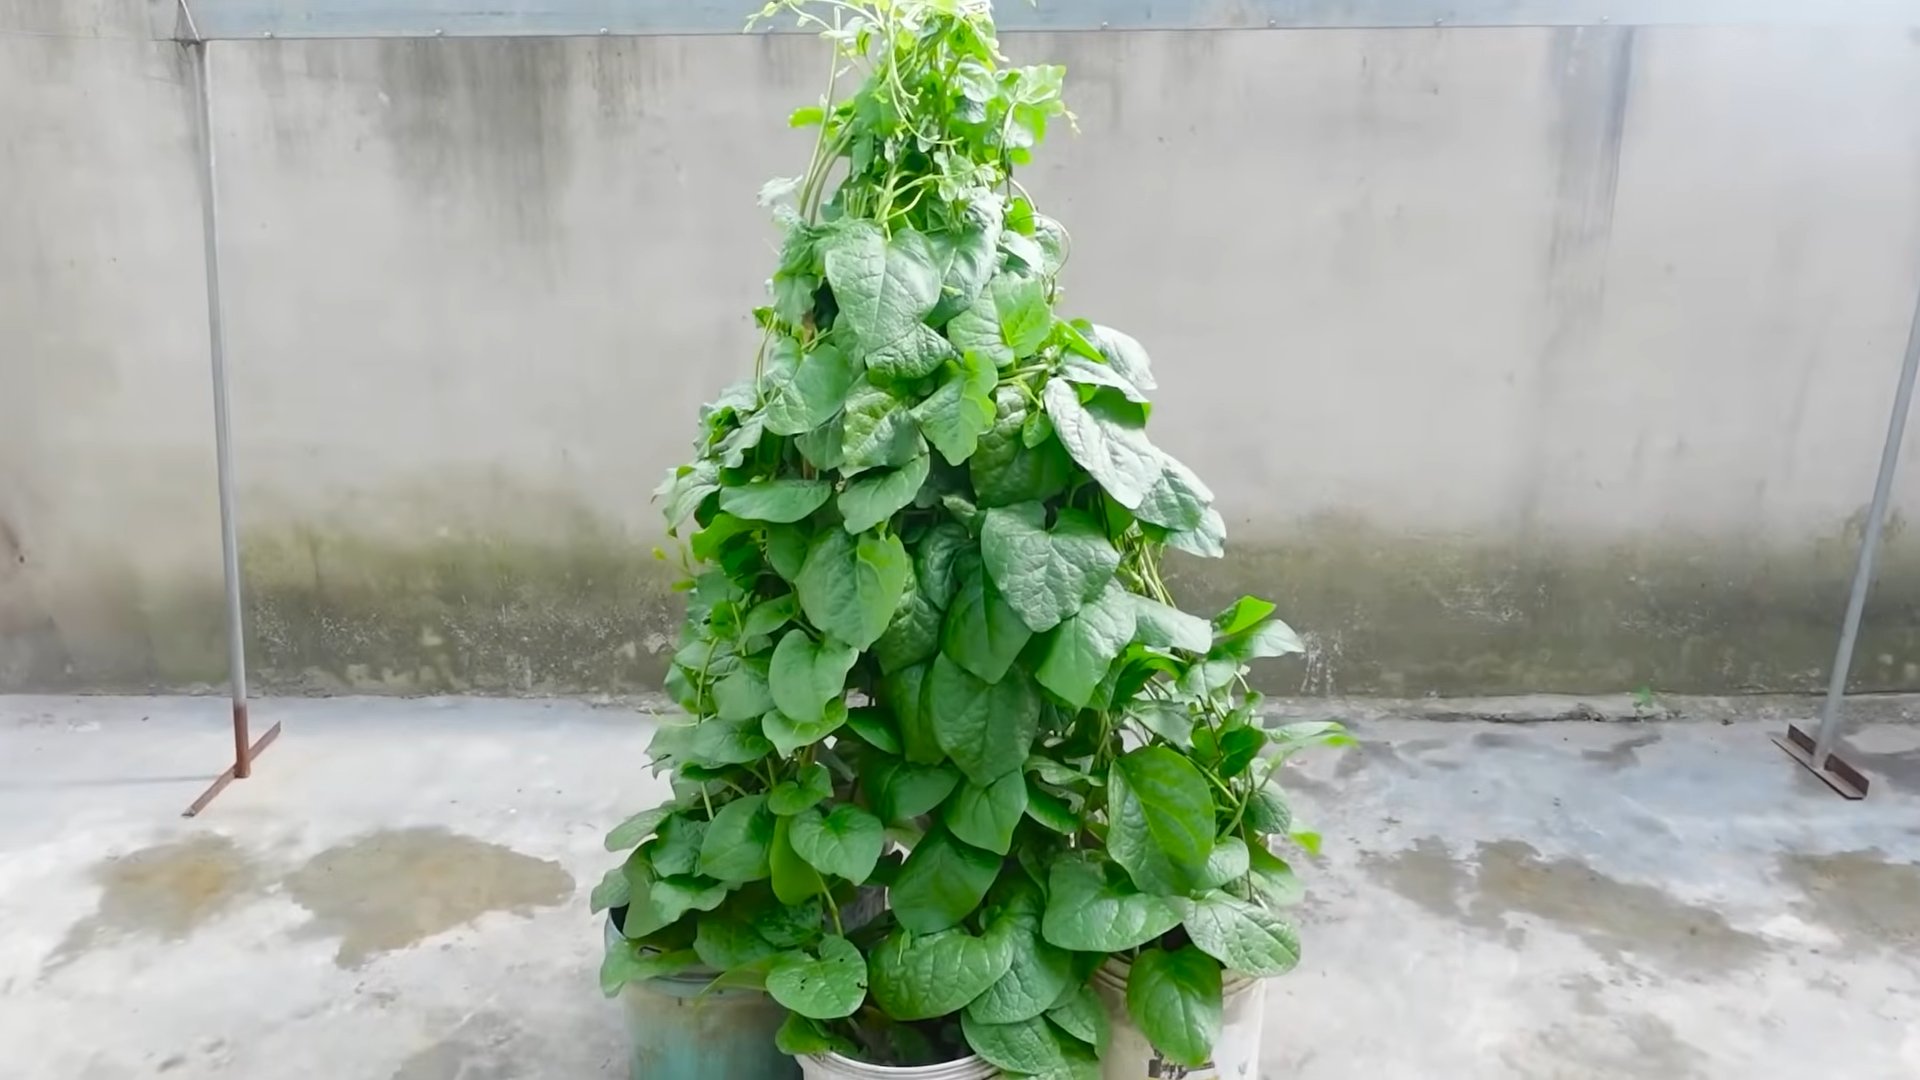
* **Trellis or Support Structure:** These beans are climbers, so they need something to grow on. A trellis, fence, or even sturdy bamboo poles will work.
* **Gardening Gloves:** To keep your hands clean and protected.
* **Hand Trowel or Shovel:** For planting and amending the soil.
* **Watering Can or Hose:** To keep your beans hydrated.
* **Fertilizer (Optional):** A balanced fertilizer can give your beans an extra boost.
* **Mulch (Optional):** Mulch helps retain moisture and suppress weeds.
Getting Started: Planting Your Yardlong Beans
Okay, now that we have everything we need, let’s get our hands dirty!
1. **Choose the Right Time to Plant:** Yardlong beans are warm-weather crops, so it’s crucial to wait until the danger of frost has passed and the soil has warmed up to at least 65°F (18°C). I usually plant mine in late spring or early summer.
2. **Prepare the Soil:** This is a crucial step for healthy bean growth. Start by clearing the planting area of any weeds, rocks, or debris. Then, dig in plenty of compost or aged manure to improve the soil’s fertility and drainage. I like to work the amendments in to a depth of about 6-8 inches.
3. **Install Your Trellis:** Before you plant, make sure your trellis or support structure is securely in place. This will prevent you from disturbing the young plants later on. I prefer using a sturdy trellis made of wood or metal. Make sure it’s tall enough to accommodate the full growth of the beans, which can easily reach 6-8 feet.
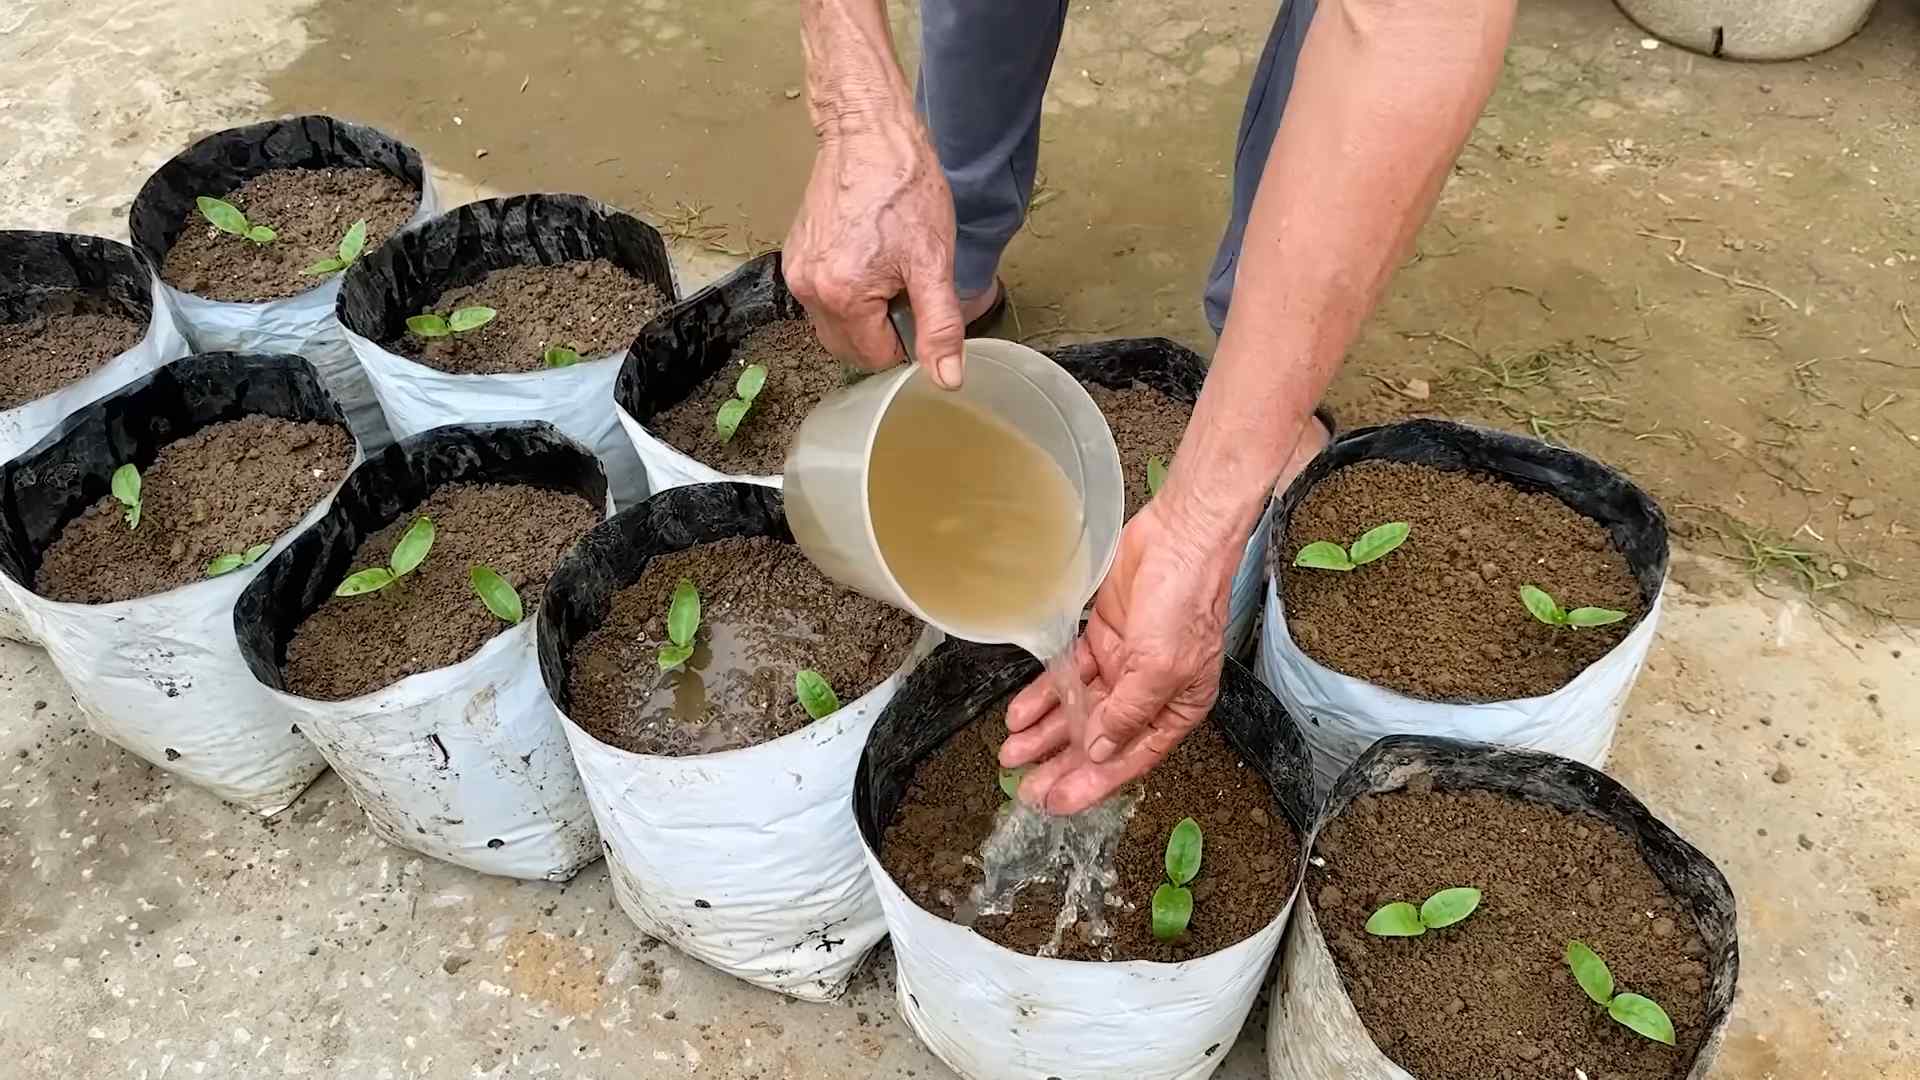
4. **Sow the Seeds:** Now for the fun part! Sow the seeds directly into the ground, about 1 inch deep and 4-6 inches apart. If you’re planting in rows, space the rows about 2-3 feet apart. I usually plant a few extra seeds in each spot to ensure good germination.
5. **Water Gently:** After planting, water the seeds gently to moisten the soil. Be careful not to overwater, as this can cause the seeds to rot. I like to use a watering can with a gentle shower setting.
6. **Mark the Planting Area:** It’s always a good idea to mark the planting area so you don’t accidentally disturb the seedlings as they emerge. I use small plant markers with the name of the bean variety and the planting date.
Caring for Your Yardlong Beans: From Seedling to Harvest
Once your yardlong beans have sprouted, it’s time to provide them with the care they need to thrive.
1. **Water Regularly:** Yardlong beans need consistent moisture, especially during hot, dry weather. Water deeply and regularly, aiming to keep the soil consistently moist but not waterlogged. I usually water my beans every 2-3 days, depending on the weather.
2. **Provide Support:** As the beans grow, they’ll start to climb. Gently guide the vines onto the trellis or support structure. You may need to tie them loosely with twine or plant ties to help them get started. I check my beans every few days and guide any stray vines onto the trellis.
3. **Fertilize (Optional):** If your soil is lacking in nutrients, you can fertilize your yardlong beans every few weeks with a balanced fertilizer. Follow the instructions on the fertilizer package carefully. I prefer using an organic fertilizer, such as fish emulsion or seaweed extract.
4. **Weed Regularly:** Keep the planting area free of weeds, as they can compete with the beans for nutrients and water. I like to hand-pull weeds regularly to prevent them from getting out of control.
5. **Mulch (Optional):** Applying a layer of mulch around the base of the plants can help retain moisture, suppress weeds, and regulate soil temperature. I use straw or wood chips as mulch.
6. **Pest and Disease Control:** Keep an eye out for common bean pests, such as aphids, bean beetles, and spider mites. If you notice any pests, treat them promptly with an appropriate insecticide or organic pest control method. I prefer using insecticidal soap or neem oil for pest control. Also, watch out for fungal diseases like powdery mildew. Ensure good air circulation around the plants and avoid overhead watering to minimize the risk of disease.
Harvesting Your Yardlong Beans: The Moment of Truth!
After all your hard work, it’s finally time to harvest your yardlong beans!
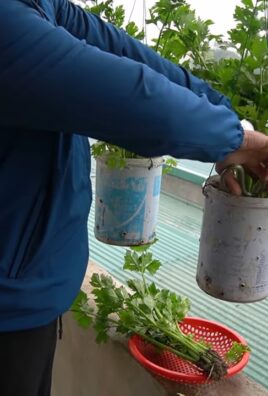
1. **Harvest Time:** Yardlong beans are typically ready to harvest about 60-80 days after planting. The beans should be long and slender, but still tender and pliable. I usually harvest mine when they’re about 12-18 inches long, but you can harvest them at any length you prefer.
2. **Harvesting Technique:** Use scissors or pruning shears to cut the beans from the vine. Be careful not to damage the plant. I like to hold the bean gently with one hand and snip it off with the other.
3. **Harvest Regularly:** Harvest your yardlong beans regularly to encourage continued production. The more you harvest, the more beans the plant will produce. I usually harvest my beans every few days during peak season.
4. **Enjoy Your Harvest:** Yardlong beans are delicious steamed, stir-fried, or added to soups and stews. They have a slightly sweet and nutty flavor. I love stir-frying them with garlic and ginger.
Troubleshooting: Common Problems and Solutions
Even with the best care, you might encounter some challenges along the way. Here are a few common problems and how to solve them:
* **Poor Germination:** If your seeds aren’t germinating, it could be due to cold soil, overwatering, or old seeds. Make sure the soil is warm enough before planting, avoid overwatering, and use fresh seeds.
* **Yellowing Leaves:** Yellowing leaves can be a sign of nutrient deficiency, overwatering, or disease. Check the soil’s pH and nutrient levels, adjust your watering schedule, and treat any diseases promptly.
* **Lack of Flowers or Beans:** If your plants are growing well but not producing flowers or beans, it could be due to lack of sunlight, poor pollination, or excessive nitrogen fertilizer. Make sure your plants are getting at least 6 hours of sunlight per day, encourage pollination by planting flowers nearby, and avoid using fertilizers that are high in nitrogen.
* **Pest Infestations:** As mentioned earlier, keep an eye out for common bean pests and treat them promptly with an appropriate insecticide or organic pest control method.
Tips for Success
Here are a few extra tips to help you grow the best yardlong beans possible:
* Choose the right variety: Select a variety that is well-suited to your climate and growing conditions.
* Provide adequate support: Make sure your trellis or support structure is strong enough to support the weight of the mature plants.
* Water deeply and regularly: Yardlong beans need consistent moisture, especially during hot, dry weather.
* Fertilize as needed: If your soil is lacking in nutrients, fertilize your plants every few weeks with a balanced fertilizer.
* Harvest regularly: Harvest your beans regularly to encourage continued production.
* Practice crop rotation: Avoid planting beans in the same spot year after year to prevent soilborne diseases.
Growing yardlong beans is a rewarding experience that will provide you with a bountiful harvest of delicious and unique vegetables. With a little bit of care and attention, you can enjoy these amazing beans right from your own backyard. Happy gardening!
Conclusion
So, there you have it! Growing yardlong beans doesn’t have to be a daunting task reserved for seasoned gardeners. With a little preparation, the right conditions, and this simple DIY trick, you can cultivate a thriving crop of these delicious and impressive legumes right in your own backyard. This method, focusing on [mention the specific DIY trick from the main article, e.g., “vertical support using repurposed materials”], offers a cost-effective and environmentally friendly way to maximize your yield and minimize space.
Why is this a must-try? Because it addresses some of the most common challenges faced when growing yardlong beans. The vertical support not only provides the necessary structure for these vigorous climbers but also improves air circulation, reducing the risk of fungal diseases. Furthermore, it makes harvesting a breeze, allowing you to easily spot and pick those long, slender beans at their peak of freshness.
But don’t stop there! Feel free to experiment with variations to suit your specific needs and preferences. For example, if you live in a particularly windy area, consider using a sturdier material for your support structure, such as metal poles or thick bamboo. You could also try companion planting with herbs like basil or rosemary to deter pests and enhance the flavor of your beans. Another interesting variation is to try different varieties of yardlong beans. Some are more heat-tolerant, while others offer unique colors and flavors. Explore the options and find the ones that thrive best in your climate and satisfy your taste buds.
The beauty of this DIY approach is its adaptability. You can customize it to fit your available space, budget, and skill level. Whether you’re a seasoned gardener or a complete beginner, this trick is accessible and rewarding.
We wholeheartedly encourage you to give this DIY trick a try. Imagine the satisfaction of harvesting your own homegrown yardlong beans, knowing that you nurtured them from seed to table using a sustainable and effective method. Picture the delicious meals you can create with these versatile vegetables, from stir-fries and salads to curries and soups.
And most importantly, we want to hear about your experience! Share your photos, tips, and challenges in the comments section below. Let’s build a community of yardlong bean enthusiasts who are passionate about growing their own food and sharing their knowledge with others. Your insights could inspire and help fellow gardeners achieve success. So, get your hands dirty, embrace the challenge, and discover the joy of growing your own delicious and impressive yardlong beans! This DIY project is more than just a gardening hack; it’s a gateway to a more sustainable and fulfilling lifestyle.
Frequently Asked Questions (FAQ)
What exactly *are* yardlong beans, and why should I grow them?
Yardlong beans, also known as asparagus beans or Chinese long beans, are a type of legume characterized by their exceptionally long pods, which can grow up to three feet in length! They are a popular vegetable in Asian cuisine, prized for their crisp texture and slightly sweet flavor. Growing them yourself offers several advantages: you get fresher, more flavorful beans than you can typically find in stores; you can control the growing conditions and avoid harmful pesticides; and you’ll have the satisfaction of harvesting your own homegrown produce. Plus, they are a visually stunning addition to any garden.
How much sunlight do yardlong beans need?
Yardlong beans are sun-loving plants and require at least 6-8 hours of direct sunlight per day to thrive. Insufficient sunlight can lead to stunted growth, reduced yields, and increased susceptibility to diseases. Choose a location in your garden that receives ample sunlight throughout the day. If you live in a particularly hot climate, some afternoon shade may be beneficial to prevent the plants from overheating.
What kind of soil is best for growing yardlong beans?
Yardlong beans prefer well-drained soil that is rich in organic matter. Before planting, amend your soil with compost or well-rotted manure to improve its fertility and drainage. The ideal soil pH for yardlong beans is between 6.0 and 7.0. You can test your soil pH using a soil testing kit and adjust it accordingly with lime or sulfur. Avoid heavy clay soils, as they can become waterlogged and inhibit root growth.
How often should I water my yardlong beans?
Yardlong beans need consistent moisture, especially during hot and dry weather. Water deeply and regularly, aiming to keep the soil consistently moist but not waterlogged. Avoid overhead watering, as this can promote fungal diseases. Instead, water at the base of the plants using a soaker hose or drip irrigation system. Mulching around the plants can also help to retain moisture and suppress weeds.
When is the best time to plant yardlong beans?
Yardlong beans are warm-season crops and should be planted after the last frost when the soil has warmed up to at least 60°F (15°C). In most regions, this is typically in late spring or early summer. You can start seeds indoors 4-6 weeks before the last frost and transplant them outdoors once the weather is warm enough. Alternatively, you can direct sow seeds directly into the garden.
How do I know when to harvest yardlong beans?
Yardlong beans are typically ready to harvest about 60-70 days after planting. The pods should be long, slender, and firm, but not overly thick or bulging. Harvest them when they are about 12-18 inches long, before the seeds inside become too large and tough. Use scissors or pruning shears to cut the pods from the vine, being careful not to damage the plant. Regular harvesting will encourage the plant to produce more beans.
What are some common pests and diseases that affect yardlong beans?
Yardlong beans can be susceptible to various pests and diseases, including aphids, bean beetles, spider mites, and fungal diseases like powdery mildew and anthracnose. To prevent pest and disease problems, practice good garden hygiene, such as removing weeds and debris, and providing adequate air circulation. Inspect your plants regularly for signs of pests or diseases and take action promptly. Organic pest control methods, such as insecticidal soap or neem oil, can be effective for controlling many common pests. For fungal diseases, consider using a copper-based fungicide or a baking soda solution.
Can I grow yardlong beans in containers?
Yes, you can grow yardlong beans in containers, but you will need to choose a large container that is at least 12 inches in diameter and depth. Use a well-draining potting mix and provide adequate support for the vines to climb. Container-grown yardlong beans may require more frequent watering and fertilization than those grown in the ground.
What are some good companion plants for yardlong beans?
Companion planting can be a beneficial way to improve the growth and health of your yardlong beans. Some good companion plants include basil, rosemary, marigolds, and nasturtiums, which can help to deter pests. Corn and sunflowers can also provide support for the vines to climb. Avoid planting yardlong beans near onions or garlic, as they can inhibit their growth.
How can I save seeds from my yardlong beans?
To save seeds from your yardlong beans, allow some of the pods to mature fully on the vine until they are dry and brown. Harvest the pods and remove the seeds. Spread the seeds out on a tray to dry completely for several days before storing them in an airtight container in a cool, dry place. Be aware that if you are growing multiple varieties of yardlong beans, they may cross-pollinate, resulting in seeds that are not true to type.
Leave a Comment