
Rooftop Corn Gardening DIY: Imagine stepping onto your rooftop and being greeted by the rustling leaves of your own corn stalks, ready to be harvested for a delicious summer meal! Sounds like a dream, right? Well, it doesn’t have to be! This article is your ultimate guide to transforming your urban space into a thriving cornfield in the sky.
Growing corn has deep roots (pun intended!) in human history, dating back thousands of years in Mesoamerica. It’s been a staple crop, a symbol of abundance, and a vital part of countless cultures. While traditionally grown in sprawling fields, modern ingenuity allows us to adapt this ancient practice to even the most compact environments.
Why should you try rooftop corn gardening DIY? Well, beyond the sheer novelty and satisfaction of growing your own food, it’s a fantastic way to connect with nature, reduce your carbon footprint, and enjoy the freshest, most flavorful corn you’ve ever tasted. Plus, let’s be honest, who wouldn’t want to impress their friends and neighbors with a rooftop cornfield? I know I would!
Many people think growing corn is only for those with acres of land, but I’m here to tell you that’s simply not true. With a few clever tricks and some DIY spirit, you can successfully cultivate corn on your rooftop, balcony, or even a sunny patio. This guide will walk you through everything you need to know, from choosing the right varieties to providing the perfect growing conditions. So, grab your gardening gloves, and let’s get started on this exciting rooftop adventure!
Rooftop Corn Gardening: A DIY Guide to Growing Your Own Stalks in the Sky!
Okay, so you’re thinking about growing corn on your roof? Awesome! I know it sounds a little crazy, but trust me, with a little planning and elbow grease, you can have your own mini cornfield soaring above the neighborhood. I’m going to walk you through everything you need to know to make this happen. Let’s get started!
Assessing Your Rooftop and Gathering Supplies
Before we even think about seeds, we need to make sure your rooftop is up to the task. This is the most crucial step, so don’t skip it!
* **Weight Capacity:** This is HUGE. Corn plants, especially when mature and laden with ears, are heavy. Add in the weight of the soil, containers, and water, and you’re looking at a significant load. Consult a structural engineer or qualified contractor to determine your roof’s weight-bearing capacity. Seriously, don’t guess! Safety first!
* **Sunlight:** Corn needs at least 6-8 hours of direct sunlight per day. Observe your rooftop throughout the day to see how much sun it gets. If it’s shady, this project might not be feasible.
* **Water Access:** Hauling water up to your roof is a pain. Consider installing an outdoor faucet or using a long hose. Think about drainage too! You don’t want water pooling on your roof.
* **Accessibility:** How easy is it to get up to your roof? You’ll be making regular trips for planting, watering, fertilizing, and harvesting. A sturdy ladder or staircase is essential.
* **Roofing Material:** Some roofing materials are more delicate than others. Protect your roof from scratches and punctures by using a protective layer (like rubber roofing material or thick plastic sheeting) under your containers.
Once you’ve assessed your rooftop and are confident it can handle a corn garden, it’s time to gather your supplies. Here’s what you’ll need:
* **Large Containers:** We’re talking BIG. Each corn plant needs at least 12 inches of space in diameter and depth. Think large pots, raised beds, or even repurposed livestock troughs. Make sure they have drainage holes!
* **High-Quality Potting Mix:** Don’t skimp on this! Corn is a heavy feeder, so you need a rich, well-draining potting mix. I recommend a mix specifically formulated for vegetables.
* **Corn Seeds:** Choose a variety that’s suitable for container gardening and your climate. Shorter varieties like ‘Golden Bantam’ or ‘On Deck’ are good choices.
* **Fertilizer:** A balanced fertilizer (like 10-10-10) is essential for healthy corn growth. You’ll also want a nitrogen-rich fertilizer for the early stages of growth.
* **Watering Can or Hose:** For, well, watering!
* **Protective Layer for Your Roof:** Rubber roofing material, thick plastic sheeting, or even old carpet scraps will work.
* **Tools:** Shovel, trowel, gardening gloves.
* **Optional: Stakes or Trellis:** To support the corn stalks if they get too tall or are exposed to strong winds.
* **Optional: Bird Netting:** To protect your precious corn from hungry birds.
Planting Your Corn
Alright, now for the fun part! Let’s get those seeds in the ground (or, in this case, the container).
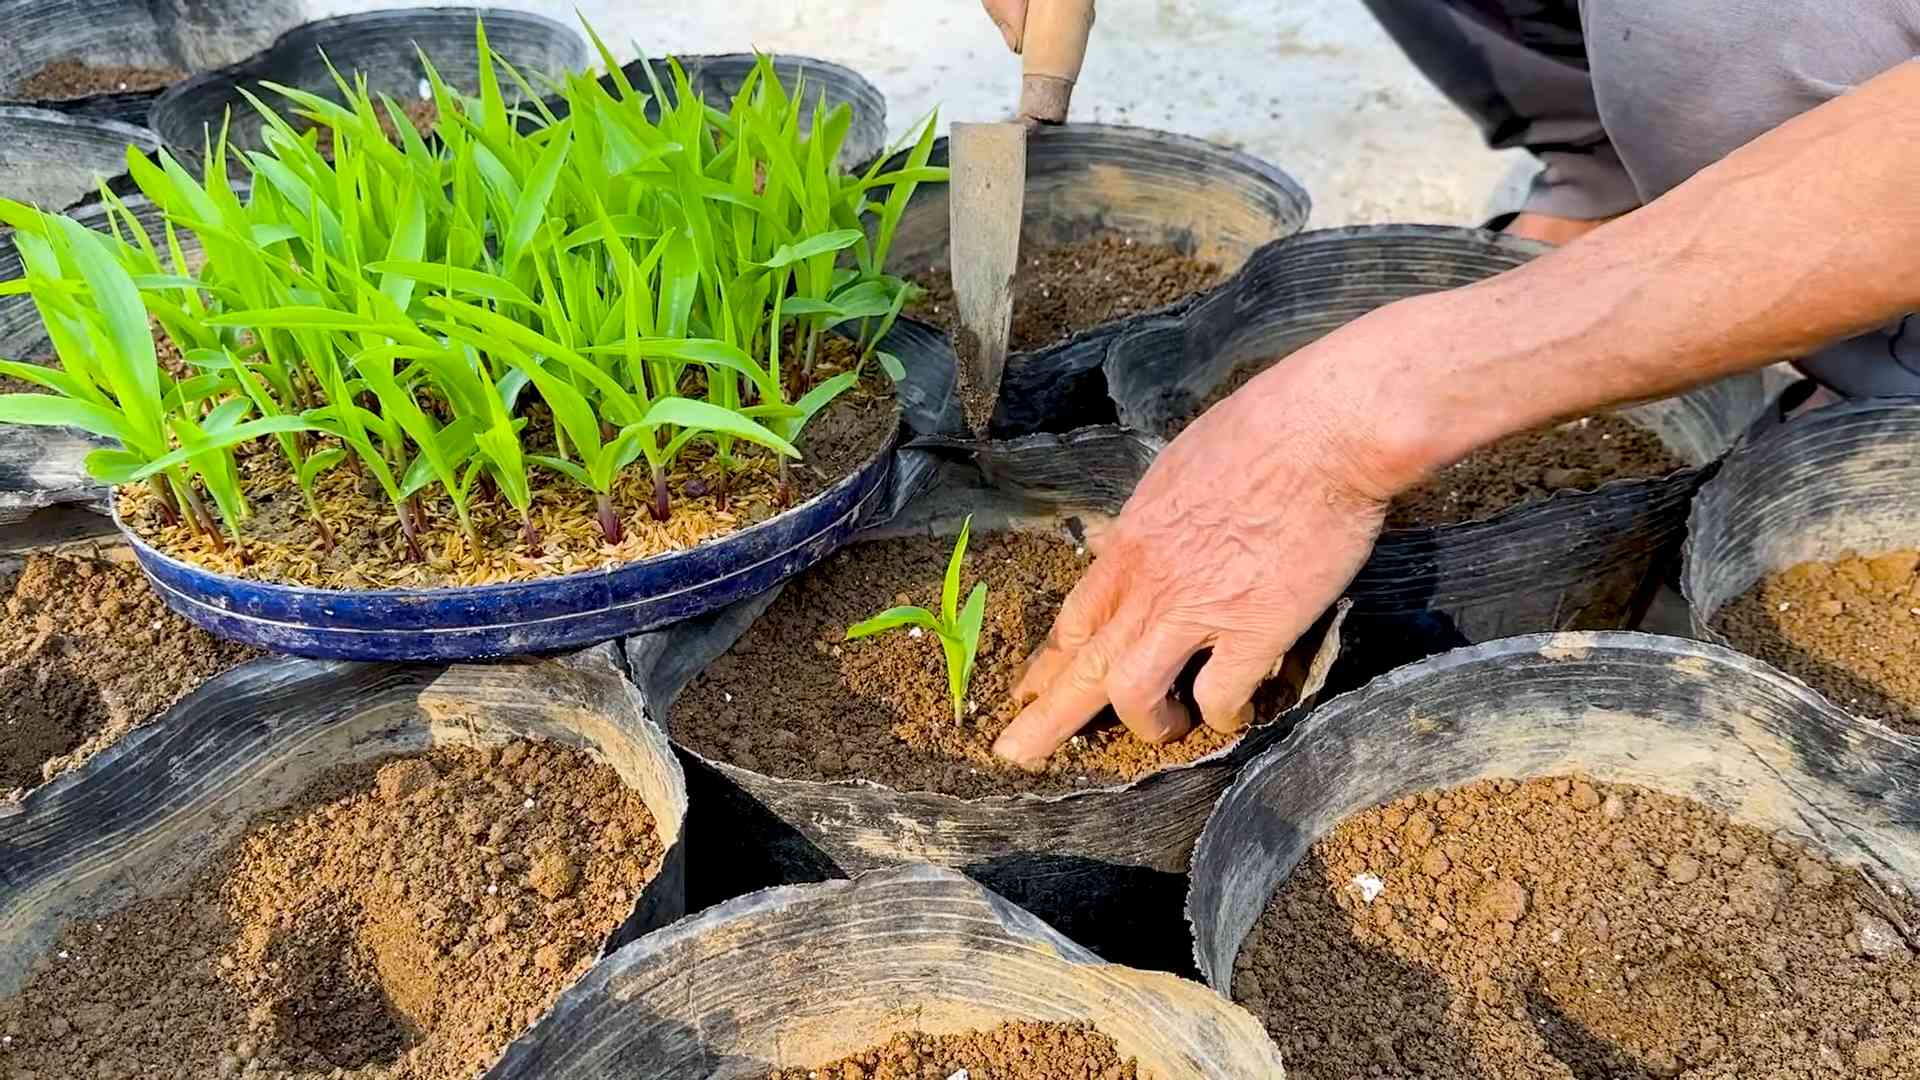
1. **Prepare Your Containers:** Line the bottom of each container with your protective layer. This will prevent soil from escaping and protect your roof. Then, fill the containers with your high-quality potting mix, leaving a few inches of space at the top.
2. **Sow the Seeds:** Plant the corn seeds about 1-2 inches deep and 4-6 inches apart. Plant at least 3-4 seeds per container to ensure good pollination. Corn is wind-pollinated, so planting in blocks rather than rows is crucial.
3. **Water Thoroughly:** Gently water the containers until the soil is evenly moist. Be careful not to overwater, as this can cause the seeds to rot.
4. **Keep Warm:** Corn seeds germinate best in warm soil (around 60-70°F). If the weather is cool, you can cover the containers with plastic wrap to help retain heat.
5. **Wait and Watch:** Germination usually takes about 7-10 days. Once the seedlings emerge, remove the plastic wrap (if you used it) and thin them to 2-3 plants per container, selecting the strongest seedlings.
Caring for Your Corn Plants
Once your corn seedlings are up and growing, it’s important to provide them with the care they need to thrive.
1. **Water Regularly:** Corn needs consistent moisture, especially during hot weather. Water deeply whenever the top inch of soil feels dry to the touch. Avoid overhead watering, as this can promote fungal diseases.
2. **Fertilize:** Corn is a heavy feeder, so you’ll need to fertilize regularly. Start with a nitrogen-rich fertilizer when the plants are young to promote leafy growth. Once the plants start to tassel (produce the male flowers), switch to a balanced fertilizer. Follow the instructions on the fertilizer package for application rates.
3. **Weed Control:** Keep the containers free of weeds, as they can compete with the corn plants for nutrients and water. Hand-pull any weeds that appear.
4. **Pollination Assistance (If Needed):** Since you’re growing corn in containers, pollination might be a bit tricky. If you notice that the silks (the strands that emerge from the developing ears) are not being pollinated, you can assist the process by gently shaking the plants or using a small paintbrush to transfer pollen from the tassels to the silks. Do this in the morning when the pollen is fresh.
5. **Pest and Disease Control:** Keep an eye out for common corn pests like corn earworms and aphids. You can control these pests with insecticidal soap or neem oil. Fungal diseases can also be a problem, especially in humid conditions. Prevent fungal diseases by providing good air circulation and avoiding overhead watering. If you notice any signs of disease, treat with a fungicide.
6. **Support:** As your corn plants grow taller, they may need support, especially if they’re exposed to strong winds. Use stakes or a trellis to keep the stalks from falling over.
Harvesting Your Corn
The moment you’ve been waiting for! Harvesting your own homegrown corn is incredibly rewarding.
1. **Check for Ripeness:** Corn is usually ready to harvest about 3 weeks after the silks emerge. The silks will turn brown and dry, and the ears will feel plump and full.
2. **Peel Back the Husk:** Gently peel back a portion of the husk to check the kernels. The kernels should be plump and milky when punctured. If the liquid is clear, the corn is not ripe yet. If it’s pasty, the corn is overripe.
3. **Harvest:** To harvest, grasp the ear firmly and twist it downward. The ear should snap off easily from the stalk.
4. **Enjoy!** Freshly harvested corn is best eaten right away. You can grill it, boil it, roast it, or use it in your favorite recipes.
Troubleshooting
Even with the best planning, things can sometimes go wrong. Here are a few common problems you might encounter and how to fix them:
* **Poor Germination:** If your seeds aren’t germinating, make sure the soil is warm enough and that you’re not overwatering. You can also try soaking the seeds in water for 24 hours before planting.
* **Yellow Leaves:** Yellow leaves can indicate a nutrient deficiency, usually nitrogen. Fertilize with a nitrogen-rich fertilizer.
* **Stunted Growth:** Stunted growth can be caused by a variety of factors, including poor soil, lack of sunlight, or pests. Make sure your plants are getting enough sunlight, water, and nutrients. Check for pests and treat accordingly.
* **Poor Pollination:** If your ears are not
Okay, so you’re thinking about growing corn on your roof? Awesome! I know it sounds a little crazy, but trust me, with a little planning and elbow grease, you can have your own mini cornfield soaring above the neighborhood. I’m going to walk you through everything you need to know to make this happen. Let’s get started!
Assessing Your Rooftop and Gathering Supplies
Before we even think about seeds, we need to make sure your rooftop is up to the task. This is the most crucial step, so don’t skip it!
* **Weight Capacity:** This is HUGE. Corn plants, especially when mature and laden with ears, are heavy. Add in the weight of the soil, containers, and water, and you’re looking at a significant load. Consult a structural engineer or qualified contractor to determine your roof’s weight-bearing capacity. Seriously, don’t guess! Safety first!
* **Sunlight:** Corn needs at least 6-8 hours of direct sunlight per day. Observe your rooftop throughout the day to see how much sun it gets. If it’s shady, this project might not be feasible.
* **Water Access:** Hauling water up to your roof is a pain. Consider installing an outdoor faucet or using a long hose. Think about drainage too! You don’t want water pooling on your roof.
* **Accessibility:** How easy is it to get up to your roof? You’ll be making regular trips for planting, watering, fertilizing, and harvesting. A sturdy ladder or staircase is essential.
* **Roofing Material:** Some roofing materials are more delicate than others. Protect your roof from scratches and punctures by using a protective layer (like rubber roofing material or thick plastic sheeting) under your containers.
Once you’ve assessed your rooftop and are confident it can handle a corn garden, it’s time to gather your supplies. Here’s what you’ll need:
* **Large Containers:** We’re talking BIG. Each corn plant needs at least 12 inches of space in diameter and depth. Think large pots, raised beds, or even repurposed livestock troughs. Make sure they have drainage holes!
* **High-Quality Potting Mix:** Don’t skimp on this! Corn is a heavy feeder, so you need a rich, well-draining potting mix. I recommend a mix specifically formulated for vegetables.
* **Corn Seeds:** Choose a variety that’s suitable for container gardening and your climate. Shorter varieties like ‘Golden Bantam’ or ‘On Deck’ are good choices.
* **Fertilizer:** A balanced fertilizer (like 10-10-10) is essential for healthy corn growth. You’ll also want a nitrogen-rich fertilizer for the early stages of growth.
* **Watering Can or Hose:** For, well, watering!
* **Protective Layer for Your Roof:** Rubber roofing material, thick plastic sheeting, or even old carpet scraps will work.
* **Tools:** Shovel, trowel, gardening gloves.
* **Optional: Stakes or Trellis:** To support the corn stalks if they get too tall or are exposed to strong winds.
* **Optional: Bird Netting:** To protect your precious corn from hungry birds.
Planting Your Corn
Alright, now for the fun part! Let’s get those seeds in the ground (or, in this case, the container).
1. **Prepare Your Containers:** Line the bottom of each container with your protective layer. This will prevent soil from escaping and protect your roof. Then, fill the containers with your high-quality potting mix, leaving a few inches of space at the top.
2. **Sow the Seeds:** Plant the corn seeds about 1-2 inches deep and 4-6 inches apart. Plant at least 3-4 seeds per container to ensure good pollination. Corn is wind-pollinated, so planting in blocks rather than rows is crucial.
3. **Water Thoroughly:** Gently water the containers until the soil is evenly moist. Be careful not to overwater, as this can cause the seeds to rot.
4. **Keep Warm:** Corn seeds germinate best in warm soil (around 60-70°F). If the weather is cool, you can cover the containers with plastic wrap to help retain heat.
5. **Wait and Watch:** Germination usually takes about 7-10 days. Once the seedlings emerge, remove the plastic wrap (if you used it) and thin them to 2-3 plants per container, selecting the strongest seedlings.
Caring for Your Corn Plants
Once your corn seedlings are up and growing, it’s important to provide them with the care they need to thrive.
1. **Water Regularly:** Corn needs consistent moisture, especially during hot weather. Water deeply whenever the top inch of soil feels dry to the touch. Avoid overhead watering, as this can promote fungal diseases.
2. **Fertilize:** Corn is a heavy feeder, so you’ll need to fertilize regularly. Start with a nitrogen-rich fertilizer when the plants are young to promote leafy growth. Once the plants start to tassel (produce the male flowers), switch to a balanced fertilizer. Follow the instructions on the fertilizer package for application rates.
3. **Weed Control:** Keep the containers free of weeds, as they can compete with the corn plants for nutrients and water. Hand-pull any weeds that appear.
4. **Pollination Assistance (If Needed):** Since you’re growing corn in containers, pollination might be a bit tricky. If you notice that the silks (the strands that emerge from the developing ears) are not being pollinated, you can assist the process by gently shaking the plants or using a small paintbrush to transfer pollen from the tassels to the silks. Do this in the morning when the pollen is fresh.
5. **Pest and Disease Control:** Keep an eye out for common corn pests like corn earworms and aphids. You can control these pests with insecticidal soap or neem oil. Fungal diseases can also be a problem, especially in humid conditions. Prevent fungal diseases by providing good air circulation and avoiding overhead watering. If you notice any signs of disease, treat with a fungicide.
6. **Support:** As your corn plants grow taller, they may need support, especially if they’re exposed to strong winds. Use stakes or a trellis to keep the stalks from falling over.
Harvesting Your Corn
The moment you’ve been waiting for! Harvesting your own homegrown corn is incredibly rewarding.
1. **Check for Ripeness:** Corn is usually ready to harvest about 3 weeks after the silks emerge. The silks will turn brown and dry, and the ears will feel plump and full.
2. **Peel Back the Husk:** Gently peel back a portion of the husk to check the kernels. The kernels should be plump and milky when punctured. If the liquid is clear, the corn is not ripe yet. If it’s pasty, the corn is overripe.
3. **Harvest:** To harvest, grasp the ear firmly and twist it downward. The ear should snap off easily from the stalk.
4. **Enjoy!** Freshly harvested corn is best eaten right away. You can grill it, boil it, roast it, or use it in your favorite recipes.
Troubleshooting
Even with the best planning, things can sometimes go wrong. Here are a few common problems you might encounter and how to fix them:
* **Poor Germination:** If your seeds aren’t germinating, make sure the soil is warm enough and that you’re not overwatering. You can also try soaking the seeds in water for 24 hours before planting.
* **Yellow Leaves:** Yellow leaves can indicate a nutrient deficiency, usually nitrogen. Fertilize with a nitrogen-rich fertilizer.
* **Stunted Growth:** Stunted growth can be caused by a variety of factors, including poor soil, lack of sunlight, or pests. Make sure your plants are getting enough sunlight, water, and nutrients. Check for pests and treat accordingly.
* **Poor Pollination:** If your ears are not filling out properly, it could be due to poor pollination. Assist pollination by shaking the plants or using a paintbrush to transfer pollen.
* **Falling Over:** If your corn stalks are falling over, provide support with stakes or a trellis.
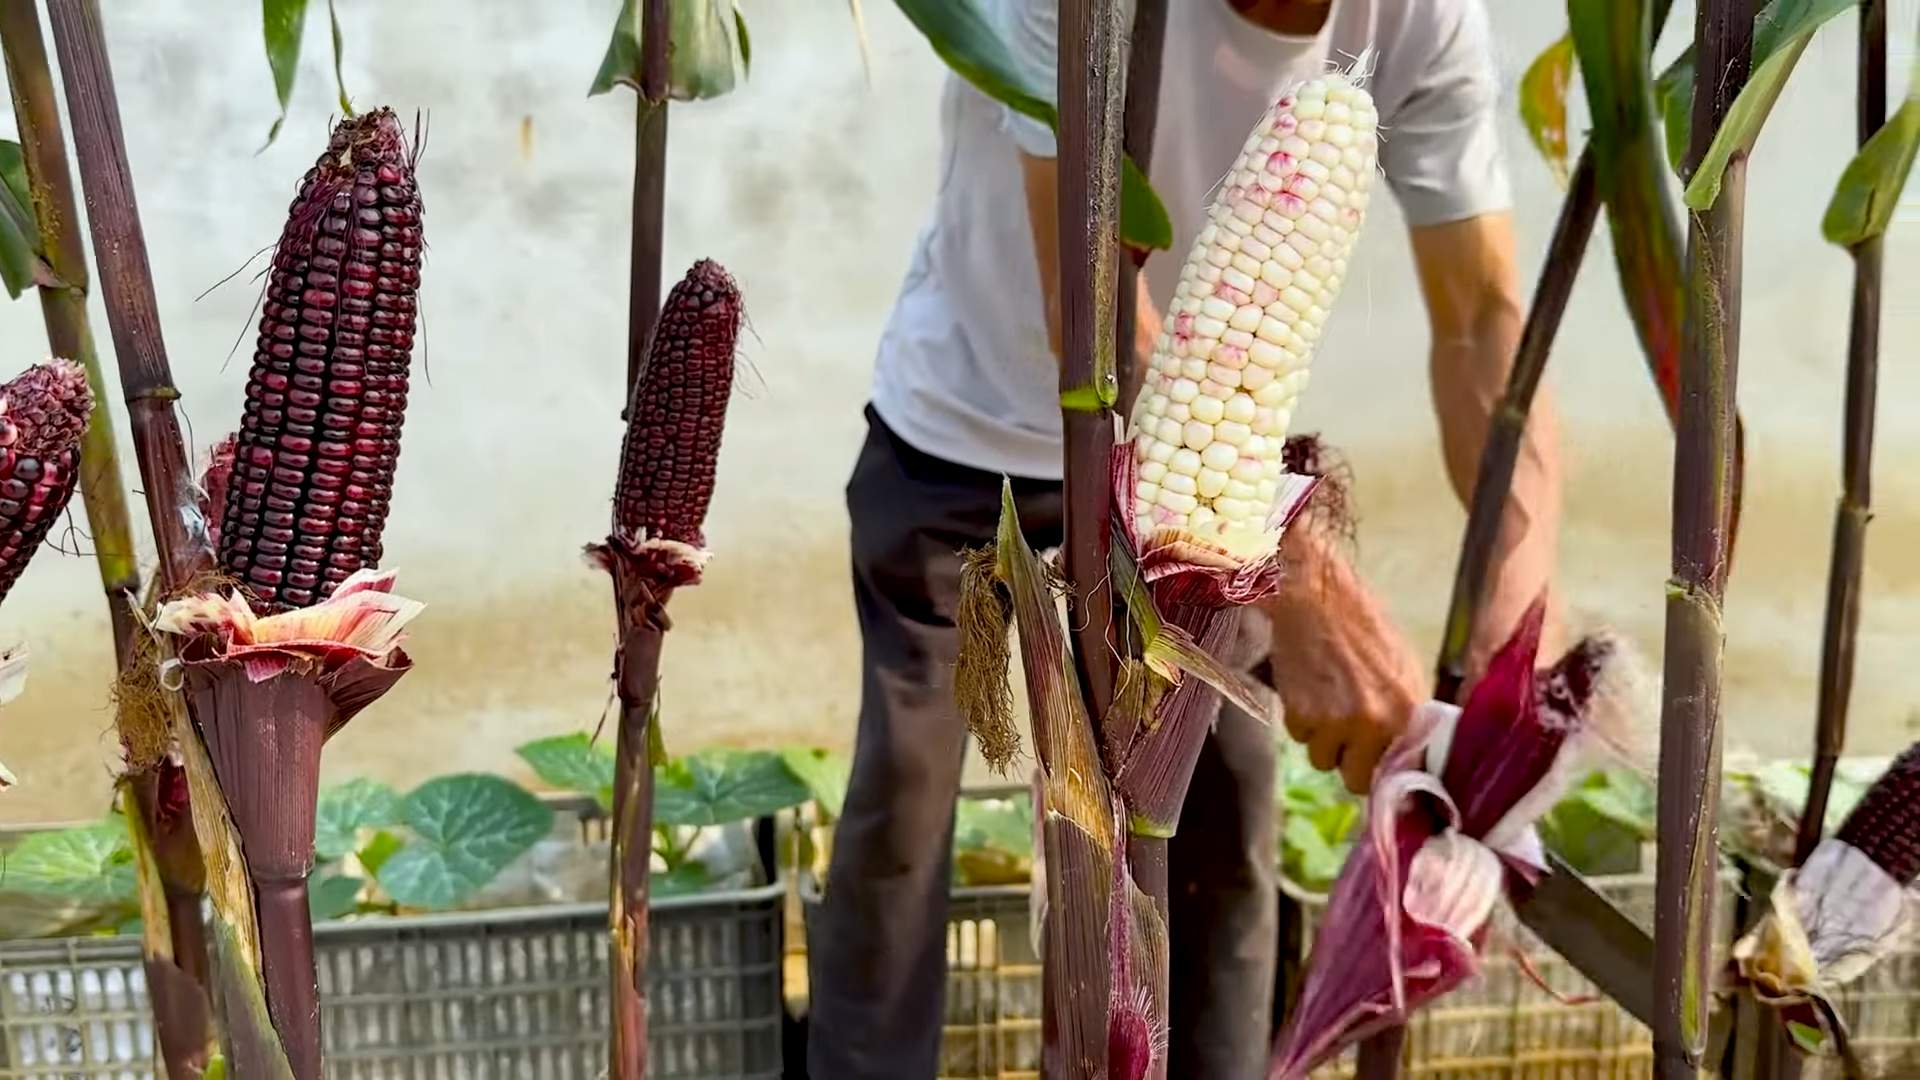
Choosing the Right Corn Variety
Selecting the right corn variety is crucial for success in a rooftop garden. Here’s what to consider:
* **Days to Maturity:** This refers to the number of days from planting to harvest. Choose a variety with a shorter maturity time, especially if you have a short growing season.
* **Plant Height:** Opt for shorter varieties that are less likely to topple over in windy conditions. Dwarf or semi-dwarf varieties are ideal.
* **Disease Resistance:** Select varieties that are resistant to common corn diseases in your area.
* **Taste:** Consider your personal preferences. Do you prefer sweet corn, dent corn, or flint corn?
Here are a few specific varieties that are well-suited for container gardening:
* **’Golden Bantam’:** A classic sweet corn variety with a short maturity time
Conclusion
So, there you have it! Transforming your rooftop into a thriving corn garden is not only possible, but incredibly rewarding. We’ve walked you through the steps, from selecting the right containers and soil to ensuring proper pollination and harvesting your golden bounty. This DIY project is more than just a gardening endeavor; it’s an opportunity to connect with nature, reduce your carbon footprint, and enjoy the unparalleled taste of homegrown corn.
Why is this a must-try? Because it’s accessible, sustainable, and delicious! Even if you’re a complete beginner, the instructions are straightforward and the results are tangible. Imagine stepping onto your rooftop and picking fresh corn for dinner – a truly satisfying experience. Plus, you’re contributing to a greener environment by utilizing otherwise unused space and reducing your reliance on commercially grown produce.
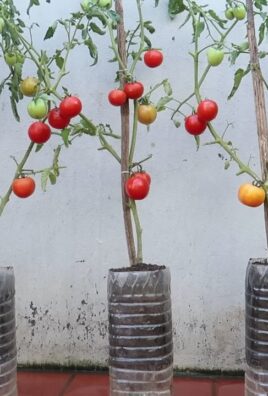
But don’t stop there! Feel free to experiment with different corn varieties. Try growing sweet corn for grilling, or dent corn for making your own cornmeal. You can also companion plant with beans and squash, creating a miniature “Three Sisters” garden right on your rooftop. Consider adding marigolds to deter pests naturally, or incorporating a small compost bin to enrich your soil with organic matter. The possibilities are endless!
We understand that rooftop gardening can seem daunting at first, but we assure you, the effort is well worth it. The joy of watching your corn stalks grow tall and strong, the satisfaction of harvesting your own food, and the delicious taste of fresh, homegrown corn are experiences you won’t soon forget.
We are confident that with a little planning and effort, you can successfully create your own rooftop corn garden. This DIY project is not just about growing corn; it’s about fostering a connection with nature, promoting sustainability, and enjoying the fruits (or rather, vegetables) of your labor.
So, what are you waiting for? Grab your containers, soil, and seeds, and get started on your rooftop corn gardening adventure today! We encourage you to share your experiences with us. Post photos of your progress, ask questions, and let us know what works best for you. Together, we can create a community of rooftop gardeners and inspire others to embrace sustainable living. We can’t wait to see your rooftop corn gardens flourish!
Frequently Asked Questions (FAQ)
Q: What is the best type of corn to grow on a rooftop?
A: The best type of corn for rooftop gardening is typically a shorter, more compact variety. Sweet corn varieties like ‘Golden Bantam’ or ‘Sugar Baby’ are excellent choices because they mature quickly and don’t require as much space as taller varieties. Dent corn, used for cornmeal, can also be grown, but choose a shorter cultivar. Consider the size of your containers and the amount of sunlight your rooftop receives when making your selection. Also, remember that corn is wind-pollinated, so planting multiple rows or a block of corn will increase your chances of a successful harvest.
Q: How much sunlight does rooftop corn gardening require?
A: Corn needs at least 6-8 hours of direct sunlight per day to thrive. Choose a location on your rooftop that receives ample sunlight throughout the day. If your rooftop is partially shaded, try to position your containers to maximize sun exposure. You can also use reflective materials, such as white paint or aluminum foil, to bounce sunlight onto your plants. If you are in a very shady area, rooftop corn gardening might not be the best option.
Q: What type of soil is best for growing corn in containers?
A: A well-draining, nutrient-rich soil mix is essential for growing corn in containers. A good mix would include equal parts of potting soil, compost, and perlite or vermiculite. The potting soil provides a base for the plants, the compost adds nutrients, and the perlite or vermiculite improves drainage and aeration. Avoid using garden soil, as it can be too heavy and compact for containers. You can also add a slow-release fertilizer to the soil mix to provide a steady supply of nutrients throughout the growing season.
Q: How often should I water my rooftop corn plants?
A: Corn plants need consistent moisture, especially during hot weather. Water deeply whenever the top inch of soil feels dry to the touch. Avoid overwatering, as this can lead to root rot. The frequency of watering will depend on the weather conditions, the size of your containers, and the type of soil you are using. Check the soil moisture regularly and adjust your watering schedule accordingly. Consider using a drip irrigation system or self-watering containers to ensure consistent moisture levels.
Q: How do I pollinate corn on my rooftop?
A: Corn is wind-pollinated, which can be a challenge on a rooftop with limited airflow. To ensure proper pollination, you can hand-pollinate your corn plants. When the tassels (the male flowers at the top of the plant) begin to shed pollen, gently shake the stalks to release the pollen. Then, use a small brush or cotton swab to collect the pollen and transfer it to the silks (the female flowers that emerge from the developing ears of corn). Repeat this process every day for several days to ensure that all the silks are pollinated. Planting your corn in blocks rather than single rows will also help with pollination.
Q: What are some common pests and diseases that affect corn, and how can I prevent them?
A: Common pests that can affect corn include corn earworms, aphids, and spider mites. Diseases include corn smut and leaf blight. To prevent these problems, inspect your plants regularly for signs of pests or diseases. You can use organic pest control methods, such as insecticidal soap or neem oil, to control pests. Ensure good air circulation around your plants to prevent fungal diseases. Remove any infected leaves or plants immediately to prevent the spread of disease. Companion planting with marigolds can also help deter pests.
Q: How do I know when my corn is ready to harvest?
A: The time to harvest corn depends on the variety you are growing. Generally, sweet corn is ready to harvest about 20-25 days after the silks appear. The silks will turn brown and dry, and the kernels will be plump and milky when pierced with a fingernail. Dent corn is ready to harvest when the kernels are hard and dry. To harvest, gently twist and pull the ear of corn from the stalk.
Q: Can I grow corn in a small container?
A: While corn plants can get quite large, you can still grow them in containers. Choose a container that is at least 12 inches in diameter and 12 inches deep. The larger the container, the better, as it will provide more room for the roots to grow. Make sure the container has drainage holes to prevent waterlogging. You may need to stake your corn plants to provide support, especially in windy conditions.
Q: What are some variations I can try with my rooftop corn garden?
A: There are many variations you can try with your rooftop corn garden. You can experiment with different corn varieties, such as colorful Indian corn or miniature popcorn. You can also companion plant with other vegetables, such as beans and squash, to create a “Three Sisters” garden. Consider adding herbs, such as basil or oregano, to attract beneficial insects. You can also use your corn stalks as a trellis for climbing plants, such as cucumbers or tomatoes. Get creative and have fun experimenting with different combinations!


Leave a Comment