
Growing Rosemary Indoors Hydroponically might sound like something out of a futuristic garden, but trust me, it’s surprisingly simple and incredibly rewarding! Are you tired of your rosemary plant withering away despite your best efforts? Do you dream of having fresh, fragrant rosemary at your fingertips all year round, regardless of the weather outside? Then you’re in the right place!
Rosemary, with its rich history dating back to ancient civilizations, has always been cherished for its culinary and medicinal properties. The Egyptians, Greeks, and Romans all revered it, associating it with remembrance and fidelity. While traditionally grown outdoors in sunny Mediterranean climates, we’re going to unlock the secrets to successfully growing rosemary indoors hydroponically, bringing this ancient herb into the modern home.
Why hydroponics? Well, it eliminates the guesswork of soil-based gardening, providing your rosemary with the perfect balance of nutrients and water. Plus, it’s a fantastic space-saver, ideal for apartment dwellers or anyone with limited outdoor space. I’m going to guide you through a step-by-step DIY process that will have you harvesting fresh rosemary in no time. Get ready to ditch the dirt and embrace the future of indoor gardening!
Growing Rosemary Indoors Hydroponically: A Beginner’s Guide
Hey there, fellow plant enthusiasts! Have you ever dreamed of having fresh rosemary at your fingertips, no matter the season? Well, I’m here to tell you that it’s totally achievable, even without a traditional garden! We’re going to dive into the wonderful world of hydroponics and learn how to grow rosemary indoors, using just water and a few simple supplies. Trust me, it’s easier than you think, and the rewards are incredibly fragrant.
Why Hydroponic Rosemary?
Before we get started, let’s talk about why hydroponics is a fantastic option for growing rosemary indoors.
* Space-Saving: Hydroponics is perfect for small spaces like apartments or condos. You don’t need a huge garden to enjoy fresh herbs.
* Faster Growth: Plants grown hydroponically often grow faster than those grown in soil because they have direct access to nutrients.
* Less Mess: No soil means no soil-borne pests or diseases, and less mess to clean up.
* Year-Round Harvest: You can grow rosemary indoors year-round, regardless of the weather outside.
* Control: You have complete control over the nutrients your rosemary receives, ensuring optimal growth.
What You’ll Need
Okay, let’s gather our supplies. Don’t worry, you probably already have some of these lying around!
* Rosemary Cuttings or Seedlings: You can either take cuttings from an existing rosemary plant or purchase seedlings from a local nursery. I personally prefer cuttings because it’s more cost-effective and satisfying to propagate your own plants.
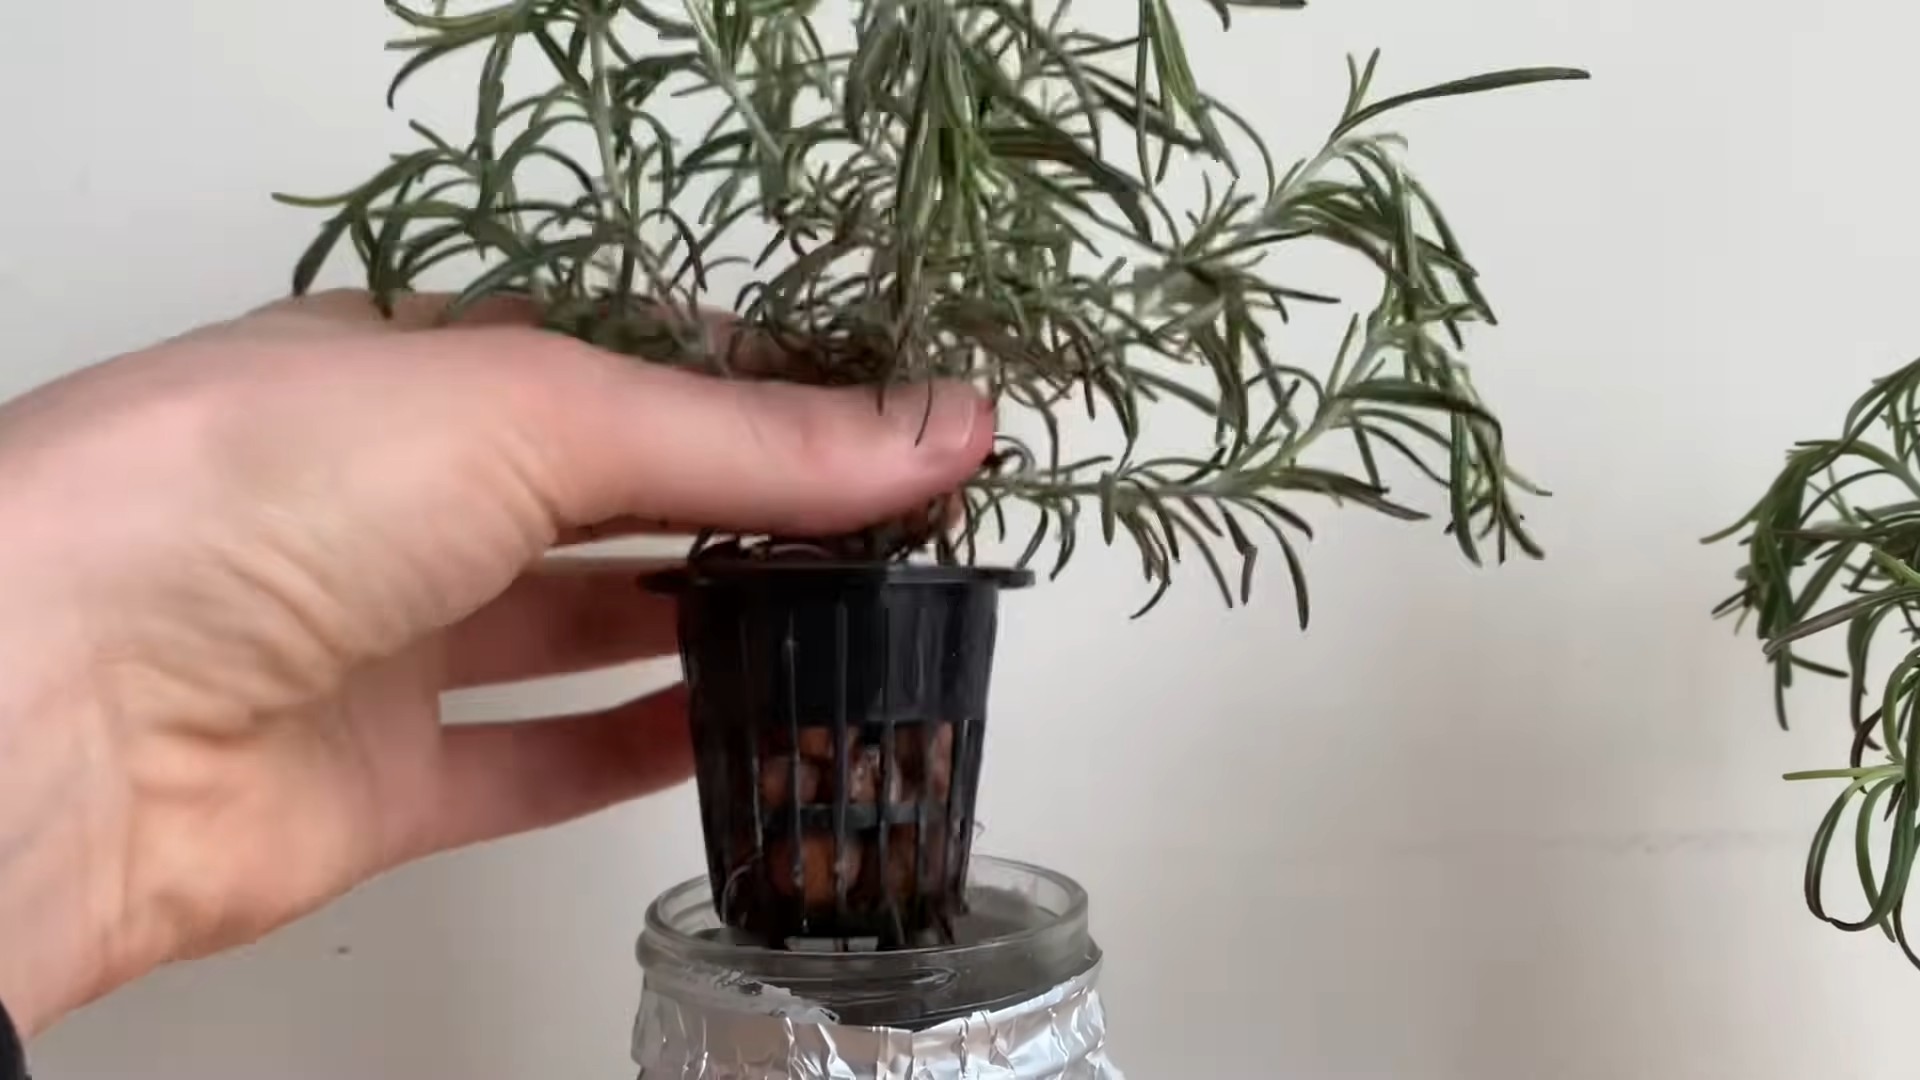
* Net Pots: These are small, plastic pots with holes in the sides and bottom. They’ll hold your rosemary plants and allow the roots to access the nutrient solution.
* Growing Medium: This is what will support your rosemary plants in the net pots. I recommend using rockwool cubes, coco coir, or clay pebbles (hydroton). Rockwool is easy to use and retains moisture well, while coco coir is a sustainable and eco-friendly option. Clay pebbles provide excellent drainage and aeration.
* Hydroponic Nutrient Solution: This is a specially formulated fertilizer that contains all the essential nutrients your rosemary needs to thrive. Make sure to choose a nutrient solution specifically designed for herbs or leafy greens.
* Reservoir: This is a container that will hold your nutrient solution. A plastic tub, bucket, or even a large storage container will work perfectly.
* Air Pump and Air Stone: These will oxygenate the nutrient solution, which is crucial for healthy root growth.
* pH Meter or Test Strips: Maintaining the correct pH level is essential for nutrient absorption. A pH meter is more accurate, but test strips are a more affordable option.
* Grow Lights (Optional but Recommended): Rosemary needs plenty of light to grow well. If you don’t have a sunny windowsill, grow lights will provide the necessary illumination. LED grow lights are energy-efficient and work great.
* Timer (Optional): If you’re using grow lights, a timer will automatically turn them on and off, ensuring a consistent light cycle.
* Water: Use filtered or distilled water for the best results. Tap water can contain chlorine and other chemicals that can harm your plants.
* Measuring Cups and Spoons: For accurately measuring the nutrient solution.
* Scissors or Pruning Shears: For taking cuttings and trimming your rosemary plants.
Taking Rosemary Cuttings (If You’re Not Using Seedlings)
If you’re starting with cuttings, here’s how to do it:
1. Choose Healthy Stems: Select healthy, non-flowering stems from a mature rosemary plant. The stems should be about 4-6 inches long.
2. Prepare the Cuttings: Remove the leaves from the bottom inch or two of each stem. This will encourage root growth.
3. Rooting Hormone (Optional): Dip the cut ends of the stems in rooting hormone powder or liquid. This will help the cuttings root faster and more reliably.
4. Rooting Medium: You can root rosemary cuttings in water or directly in a rooting medium like perlite or vermiculite.
* Water Rooting: Place the cuttings in a glass of water, making sure the leaves are above the water line. Change the water every few days. Roots should start to appear in a week or two.
* Rooting Medium: Dip the cuttings in rooting hormone (optional), then insert them into a pot filled with moistened perlite or vermiculite. Cover the pot with a plastic bag or dome to create a humid environment. Keep the rooting medium moist but not soggy.
5. Wait for Roots: It usually takes 2-4 weeks for rosemary cuttings to develop roots. Once the roots are about an inch long, they’re ready to be transplanted into your hydroponic system.
Setting Up Your Hydroponic System
Now for the fun part! Let’s set up your hydroponic system. I’m going to describe a simple Deep Water Culture (DWC) system, which is perfect for beginners.
1. Prepare the Reservoir: Clean your reservoir thoroughly with soap and water. Rinse it well to remove any soap residue.
2. Add Nutrient Solution: Fill the reservoir with water, leaving a few inches of space at the top. Add the hydroponic nutrient solution according to the manufacturer’s instructions. It’s crucial to follow the instructions carefully to avoid over- or under-fertilizing your plants.
3. Check and Adjust pH: Use your pH meter or test strips to check the pH of the nutrient solution. Rosemary prefers a pH between 5.5 and 6.5. If the pH is too high, add a pH-down solution. If it’s too low, add a pH-up solution. Adjust the pH gradually and recheck it after each adjustment.
4. Install Air Pump and Air Stone: Place the air stone in the bottom of the reservoir and connect it to the air pump with tubing. Turn on the air pump to oxygenate the nutrient solution. You should see bubbles rising to the surface.
5. Prepare the Net Pots: Fill the net pots with your chosen growing medium (rockwool, coco coir, or clay pebbles). If you’re using rockwool, soak it in water for a few hours before using it.
6. Transplant the Rosemary:
* From Cuttings: Gently remove the rooted rosemary cuttings from the water or rooting medium. Carefully place each cutting into a net pot filled with growing medium, making sure the roots are surrounded by the medium.
* From Seedlings: Gently remove the rosemary seedlings from their containers. Carefully place each seedling into a net pot filled with growing medium.
7. Place Net Pots in Reservoir: Place the net pots into the holes in the lid of the reservoir, or suspend them above the nutrient solution so that the bottom of the net pot is just touching the water. The roots will eventually grow down into the nutrient solution.
8. Position Grow Lights (If Using): If you’re using grow lights, position them about 6-12 inches above the rosemary plants. Set the timer to provide 14-16 hours of light per day.
Caring for Your Hydroponic Rosemary
Now that your hydroponic system is set up, here’s how to care for your rosemary plants:
1. Monitor Nutrient Solution: Check the nutrient solution regularly (at least once a week) and replenish it as needed. The water level will decrease as the plants absorb water.
2. Check and Adjust pH: Continue to monitor the pH of the nutrient solution and adjust it as needed to maintain a pH between 5.5 and 6.5.
3. Change Nutrient Solution: Completely change the nutrient solution every 2-3 weeks to prevent nutrient imbalances and the buildup of harmful bacteria.
4. Prune Regularly: Prune your rosemary plants regularly to encourage bushier growth and prevent them from becoming leggy. You can harvest the pruned stems for cooking or drying.
5. Provide Adequate Light: Rosemary needs plenty of light to thrive. If you’re not using grow lights, place your hydroponic system in a sunny windowsill that receives at least 6 hours of direct sunlight per day.
6. Maintain Proper Air Circulation: Good air circulation is important to prevent fungal diseases. Make sure there’s adequate ventilation around your rosemary plants. A small fan can help improve air circulation.
7. Watch for Pests and Diseases: Although hydroponics reduces the risk of pests and diseases, it’s still important to monitor your plants regularly. If you notice any signs of pests or diseases, take action immediately. Insecticidal soap or neem oil can be used to control pests, and copper fungicide can be used to treat fungal diseases.
Harvesting Your Rosemary
You can start harvesting rosemary once the plants are about 6-8 inches tall. Simply snip off stems

Conclusion
So, there you have it! Growing rosemary indoors hydroponically isn’t just a trendy experiment; it’s a genuinely rewarding way to enjoy fresh, fragrant rosemary year-round, regardless of your outdoor climate or garden space. We’ve walked through the simple steps, from selecting the right cuttings to maintaining a thriving hydroponic system. The benefits are undeniable: faster growth, reduced risk of pests and diseases, and the sheer satisfaction of nurturing your own herb garden within the comfort of your home.
Why is this DIY trick a must-try? Because it empowers you to take control of your herb supply. No more wilted, overpriced rosemary sprigs from the grocery store! Imagine the aroma filling your kitchen as you snip fresh rosemary to season your favorite dishes. Think of the money you’ll save by avoiding constant herb purchases. And consider the environmental impact of reducing your reliance on commercially grown and transported herbs.
But the real magic lies in the adaptability of this method. Feel free to experiment with different hydroponic systems. While we’ve focused on a simple Kratky setup, you could explore deep water culture (DWC) or nutrient film technique (NFT) for even faster growth rates. You can also try different nutrient solutions to see which one yields the best results for your rosemary.
Variations to consider:
* Lighting: While natural sunlight is ideal, supplement with grow lights, especially during winter months or in dimly lit spaces. Experiment with different light spectrums to optimize growth.
* Nutrient Solutions: Research and compare different hydroponic nutrient solutions specifically formulated for herbs. Some solutions may be better suited for rosemary than others.
* Container Size: Adjust the size of your hydroponic container based on the size of your rosemary plant. Larger plants will require more space and nutrient solution.
* Companion Planting: While hydroponics is a self-contained system, consider placing your rosemary near other herbs that enjoy similar conditions, such as thyme or oregano, to create a mini indoor herb garden.
Don’t be intimidated by the term “hydroponics.” It’s far simpler than it sounds, and the rewards are well worth the effort. This method is perfect for beginners and experienced gardeners alike. It’s a fantastic way to introduce children to the wonders of plant science and sustainable living.
We wholeheartedly encourage you to give growing rosemary indoors hydroponically a try. It’s a fun, educational, and ultimately delicious experience. Once you’ve harvested your first batch of homegrown rosemary, you’ll be hooked!
And most importantly, we want to hear about your experiences! Share your successes, your challenges, and your tips in the comments below. Let’s build a community of hydroponic rosemary growers and learn from each other. Post pictures of your thriving rosemary plants, share your favorite rosemary recipes, and let us know what variations you’ve tried. Together, we can unlock the full potential of this amazing herb and enjoy its fresh, fragrant goodness all year long. Let’s get growing!
Frequently Asked Questions (FAQ)
What kind of rosemary is best for hydroponics?
While you can technically grow any variety of rosemary hydroponically, some tend to perform better than others. Upright varieties like ‘Blue Spires’ or ‘Tuscan Blue’ are generally recommended because they are easier to manage in a confined space. Prostrate varieties, while beautiful, can become quite sprawling and may require more support. Ultimately, the best rosemary for you will depend on your personal preferences and the space you have available. Experiment with different varieties to see which one thrives best in your hydroponic setup.
How often should I change the nutrient solution?
The frequency of nutrient solution changes depends on several factors, including the size of your container, the size of your rosemary plant, and the concentration of the nutrient solution. As a general rule, you should change the nutrient solution every 2-3 weeks. However, it’s essential to monitor the water level and the overall health of your plant. If the water level drops significantly or the nutrient solution becomes cloudy or discolored, it’s time for a change. Regularly topping off the reservoir with fresh water between changes is also crucial to maintain the proper nutrient concentration.
What are the signs of nutrient deficiency in hydroponic rosemary?
Nutrient deficiencies can manifest in various ways, depending on which nutrient is lacking. Common signs include yellowing leaves (chlorosis), stunted growth, leaf curling, and discoloration of the stems. For example, a nitrogen deficiency might cause older leaves to turn yellow, while a potassium deficiency could lead to brown spots on the leaf edges. If you suspect a nutrient deficiency, consult a hydroponic nutrient chart to identify the likely cause and adjust your nutrient solution accordingly. Remember to use a balanced nutrient solution specifically formulated for herbs to prevent deficiencies.
Can I use tap water for my hydroponic system?
While tap water can be used in some cases, it’s generally recommended to use filtered or distilled water for your hydroponic system. Tap water often contains chlorine, chloramine, and other minerals that can be harmful to plants or interfere with nutrient absorption. If you must use tap water, let it sit out for 24 hours to allow the chlorine to evaporate. However, it’s still best to test your tap water for pH and mineral content before using it in your hydroponic system. Filtered or distilled water provides a clean slate, allowing you to control the nutrient levels more precisely.
How much light does hydroponic rosemary need?
Rosemary thrives in bright, sunny conditions. Ideally, your hydroponic rosemary should receive at least 6-8 hours of direct sunlight per day. If you don’t have access to enough natural light, you’ll need to supplement with grow lights. LED grow lights are a popular choice because they are energy-efficient and provide the full spectrum of light that plants need to grow. Position the grow lights close enough to the plants to provide adequate illumination, but not so close that they burn the leaves. Experiment with different light intensities and durations to find what works best for your rosemary.
How do I prevent algae growth in my hydroponic system?
Algae growth is a common problem in hydroponic systems, especially those exposed to sunlight. Algae can compete with your rosemary for nutrients and oxygen, and it can also clog your system. To prevent algae growth, keep your nutrient solution out of direct sunlight. Use opaque containers to block light from reaching the solution. You can also add a small amount of hydrogen peroxide to the nutrient solution to kill algae. Regularly clean your hydroponic system to remove any algae that does grow.
Is hydroponically grown rosemary as flavorful as soil-grown rosemary?
In many cases, hydroponically grown rosemary can be just as flavorful, if not more so, than soil-grown rosemary. The controlled environment of a hydroponic system allows you to optimize nutrient levels and growing conditions, which can enhance the flavor and aroma of the herb. However, the flavor can also be influenced by the variety of rosemary you grow and the specific nutrient solution you use. Experiment with different varieties and nutrient solutions to find what produces the most flavorful rosemary for your taste.
How do I harvest rosemary from my hydroponic system?
Harvesting rosemary from your hydroponic system is simple. Use clean, sharp scissors or pruning shears to snip off stems as needed. Avoid cutting more than one-third of the plant at a time, as this can stress the plant. Harvest rosemary in the morning, after the dew has dried, for the best flavor. You can use the fresh rosemary immediately or dry it for later use. To dry rosemary, hang the stems upside down in a cool, dry place or use a dehydrator.
Can I propagate rosemary cuttings from my hydroponic system?
Yes, you can absolutely propagate rosemary cuttings from your hydroponic system. In fact, hydroponics can be an excellent way to root rosemary cuttings. Simply take a 4-6 inch cutting from a healthy stem, remove the lower leaves, and place the cutting in a small container of water or a rooting hormone solution. Keep the cutting in a warm, bright location, and change the water or solution every few days. Once the cutting has developed roots, you can transplant it into a new hydroponic system or into soil. This is a great way to expand your rosemary collection and share your plants with friends and family.


Leave a Comment