
Time Saving Cleaning Tricks – who doesn’t want more of those in their life? Let’s be honest, cleaning isn’t usually anyone’s favorite pastime. We all crave a sparkling home, but the thought of spending hours scrubbing and tidying can be incredibly daunting. But what if I told you that achieving a clean and organized space doesn’t have to consume your entire weekend?
For centuries, people have sought clever ways to streamline their chores. From ancient Roman bathhouses meticulously maintained by slaves to the Victorian era’s obsession with domestic efficiency, the desire for a clean and orderly home has always been present. Today, we’re armed with modern tools and a wealth of knowledge, allowing us to take cleaning shortcuts that our ancestors could only dream of.
That’s where these time saving cleaning tricks come in! In this article, I’m going to share my favorite DIY hacks and strategies that will help you conquer clutter and grime without sacrificing your precious free time. We’ll explore everything from quick daily habits to ingenious cleaning solutions you can whip up with ingredients you probably already have in your pantry. Because let’s face it, life’s too short to spend it all cleaning! So, get ready to reclaim your weekends and discover the joy of a sparkling home, achieved with minimal effort.
Time-Saving Cleaning Tricks: Conquer Your Chores Like a Pro!
Hey everyone! Let’s face it, cleaning isn’t exactly anyone’s favorite pastime. But a clean home is a happy home, right? So, I’m going to share some of my absolute favorite time-saving cleaning tricks that will help you get the job done faster and more efficiently, leaving you with more time to do the things you actually enjoy. Get ready to reclaim your weekends!
Speed Cleaning Strategies: The Foundation for Efficiency
Before we dive into the specific hacks, let’s talk about some general strategies that will significantly cut down your cleaning time.
* Declutter First: This is HUGE. Seriously. The less stuff you have lying around, the less you have to move and clean around. Spend 15 minutes each day decluttering one small area. You’ll be amazed at the difference it makes.
* Gather Your Supplies: Nothing is more frustrating than starting a cleaning task and realizing you’re missing a crucial supply. Before you begin, gather everything you need in a caddy or bucket. This includes cleaning solutions, cloths, sponges, gloves, and any other tools you’ll be using.
* Top-Down Approach: Always clean from top to bottom. This way, any dust or debris you knock down will fall onto the floor, which you’ll clean last.
* Multi-Tasking Magic: While waiting for a cleaning solution to soak, tackle another quick task. For example, while your oven cleaner is working, wipe down the kitchen counters.
* Preventative Measures: The best way to save time cleaning is to prevent messes in the first place! Wipe up spills immediately, take your shoes off at the door, and make it a habit to tidy up as you go.
Hack #1: Microwave Cleaning Made Easy (No Scrubbing Required!)
Microwaves can get incredibly gross, incredibly fast. Splattered food, dried-on sauces…yuck! But this trick makes cleaning them a breeze.
What You’ll Need:
* 1 cup water
* 1 tablespoon white vinegar or lemon juice
* Microwave-safe bowl
* Sponge or cloth
Step-by-Step Instructions:
1. Combine Water and Vinegar/Lemon Juice: In the microwave-safe bowl, mix the water and vinegar (or lemon juice). The vinegar or lemon juice helps to loosen the grime.
2. Microwave for 5 Minutes: Place the bowl in the microwave and heat on high for 5 minutes. The water will boil and create steam, which will coat the inside of the microwave.
3. Let it Sit: After the 5 minutes, don’t open the microwave door! Let it sit for another 5 minutes. This allows the steam to further loosen the grime.
4. Wipe Clean: Carefully remove the bowl (it will be hot!). Use a sponge or cloth to easily wipe away the loosened food particles. You’ll be amazed at how easily everything comes off!
Hack #2: Sparkling Shower Heads with a Plastic Bag
Hard water deposits can clog shower heads and reduce water pressure. This simple trick will restore your shower head to its former glory.
What You’ll Need:
* White vinegar
* Plastic bag (sandwich bag or larger, depending on the size of your shower head)
* Rubber band or twist tie
Step-by-Step Instructions:
1. Fill the Bag with Vinegar: Pour enough white vinegar into the plastic bag to completely submerge the shower head.
2. Secure the Bag: Carefully place the bag over the shower head, ensuring the shower head is fully immersed in the vinegar. Use a rubber band or twist tie to secure the bag to the shower head.
3. Soak Overnight: Let the shower head soak in the vinegar overnight (or for at least a few hours). The vinegar will dissolve the mineral deposits.
4. Remove and Rinse: Remove the bag and discard the vinegar. Rinse the shower head thoroughly with water.
5. Wipe Clean: Use a cloth to wipe away any remaining residue. Your shower head should now be sparkling clean and have improved water pressure!
Hack #3: Blinds Cleaning: The Sock Method
Cleaning blinds can be a tedious task. This sock method makes it much faster and easier.
What You’ll Need:
* Old sock (clean, of course!)
* White vinegar or all-purpose cleaner
* Spray bottle
* Bucket of warm water (optional)
Step-by-Step Instructions:
1. Prepare the Sock: Dampen the sock with water and wring out the excess. You can also spray the sock with a diluted solution of white vinegar or your favorite all-purpose cleaner.
2. Slip the Sock On: Put the sock on your hand like a puppet.
3. Clean the Blinds: Use your sock-covered hand to wipe each slat of the blinds. The sock will pick up dust and grime.
4. Rinse and Repeat: If the sock gets too dirty, rinse it in a bucket of warm water or replace it with a clean sock. Repeat the process until all the blinds are clean.
5. Dry the Blinds: Allow the blinds to air dry completely. You can also use a clean, dry sock to wipe them dry.
Hack #4: Garbage Disposal Refresh: Citrus Power!
Garbage disposals can get stinky over time. This simple trick will freshen them up and help prevent clogs.
What You’ll Need:
* Citrus peels (lemon, lime, orange, grapefruit)
* Ice cubes
* Water
Step-by-Step Instructions:
1. Gather Citrus Peels: Save your citrus peels after eating oranges, lemons, limes, or grapefruits.
2. Freeze Citrus Peels (Optional): For an extra boost, freeze the citrus peels. This will help them grind more effectively and provide a more intense cleaning action.
3. Add Ice Cubes: Place a handful of ice cubes into the garbage disposal.
4. Add Citrus Peels: Add the citrus peels to the disposal.
5. Run Cold Water: Turn on the cold water to a steady stream.
6. Turn on the Disposal: Turn on the garbage disposal and let it run for about 30 seconds to a minute. The ice cubes will help to scrub the disposal blades, while the citrus peels will freshen the scent and help break down any grease or food buildup.
Hack #5: Streak-Free Stainless Steel Cleaning
Stainless steel appliances can be beautiful, but they’re also notorious for showing fingerprints and streaks. This simple solution will leave them sparkling.
What You’ll Need:
* Microfiber cloth
* White vinegar
* Olive oil (optional)
Step-by-Step Instructions:
1. Wipe with Vinegar: Lightly dampen a microfiber cloth with white vinegar. Wipe down the stainless steel appliance, following the grain of the metal. The vinegar will help to remove fingerprints, grease, and grime.
2. Dry with a Clean Cloth: Use a clean, dry microfiber cloth to dry the appliance thoroughly. This will help to prevent streaks.
3. Optional: Polish with Olive Oil: For an extra shine, put a tiny amount of olive oil on a clean microfiber cloth. Buff the stainless steel appliance, following the grain of the metal. Be careful not to use too much olive oil, as it can leave a greasy residue.
Hack #6: Dusting Like a Pro: The Pillowcase Trick
Dusting ceiling fan blades can be a messy job. This pillowcase trick keeps the dust contained.
What You’ll Need:
* Old pillowcase
* Ladder or step stool
Step-by-Step Instructions:
1. Position the Pillowcase: Carefully slide the pillowcase over one of the ceiling fan blades, encasing the blade completely.
2. Wipe the Blade: Press the pillowcase against the blade and wipe, pulling the pillowcase towards you. This will trap the dust inside the pillowcase.
3. Repeat for Each Blade: Repeat the process for each blade of the ceiling fan.
4. Empty the Pillowcase: Once you’ve cleaned all the blades, take the pillowcase outside and shake it out to remove the dust. You can also wash the pillowcase.
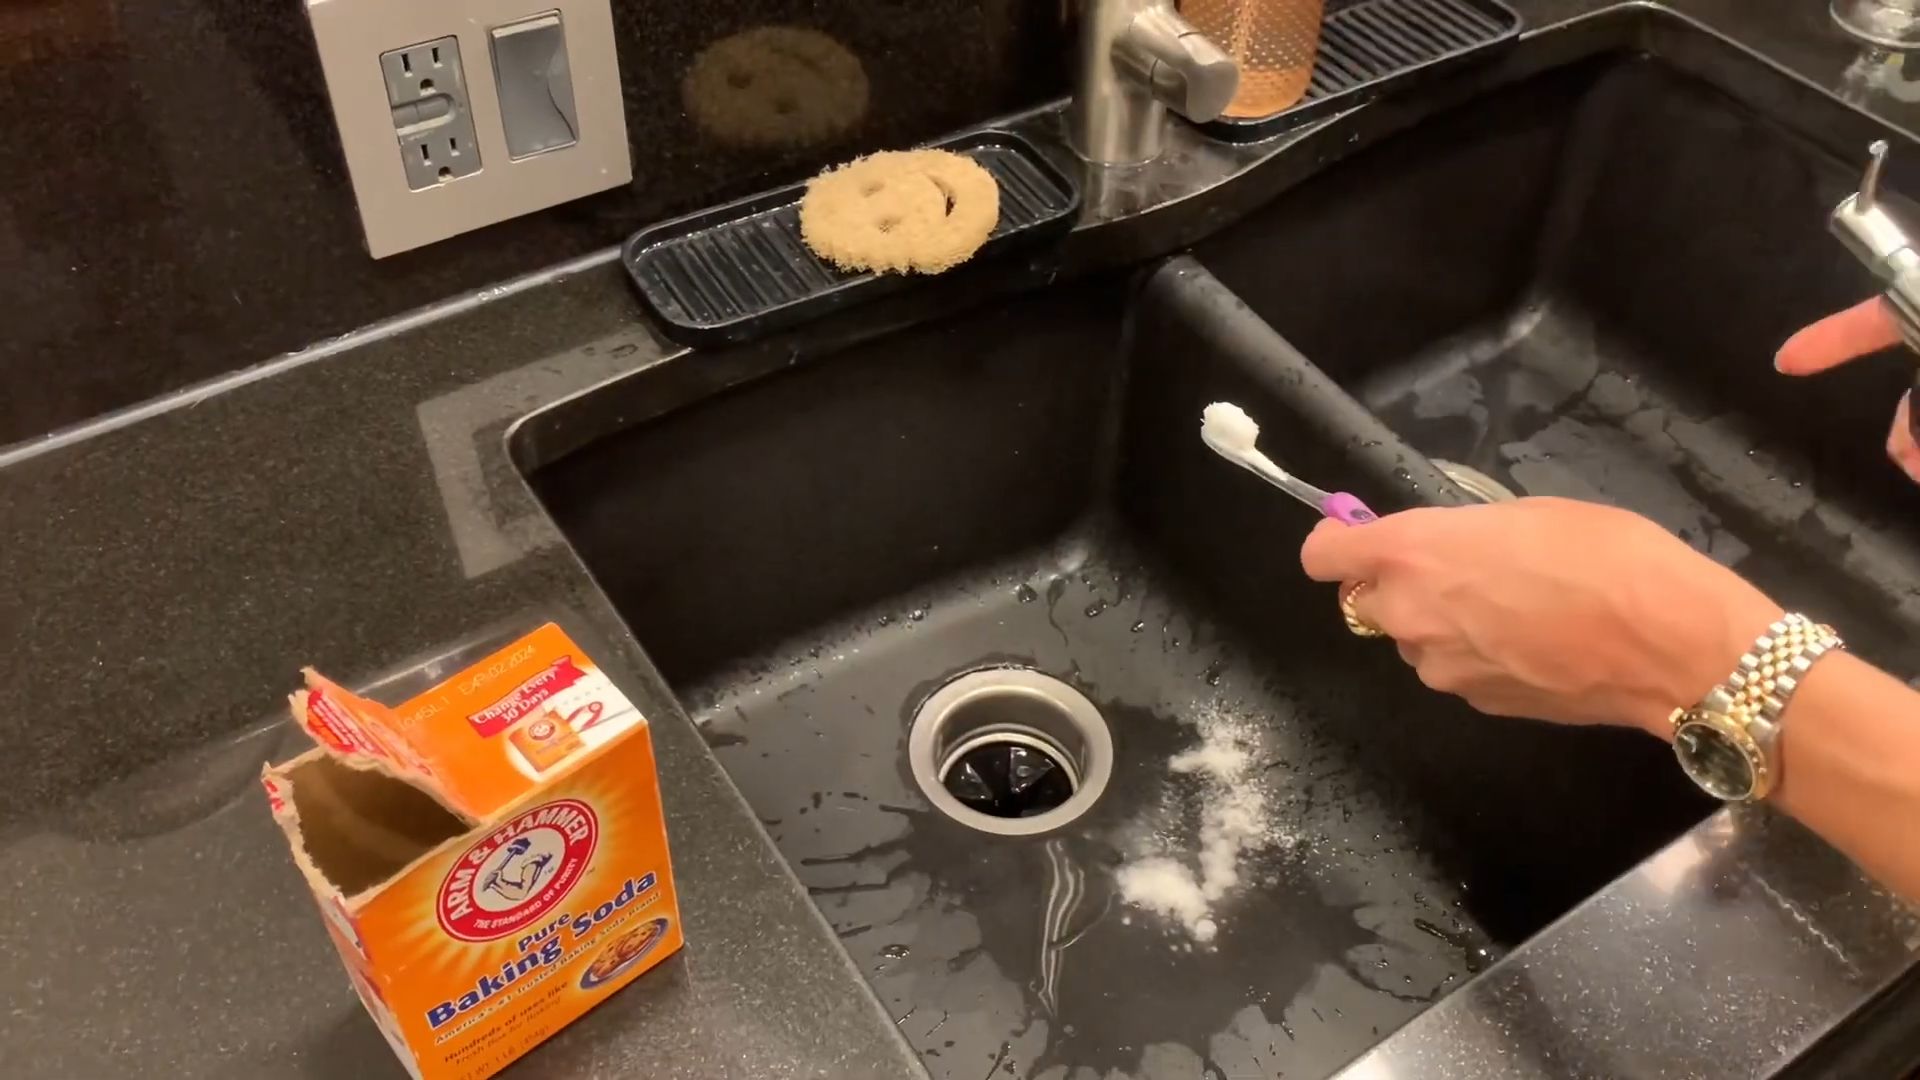
Hack #7: Quick Toilet Bowl Cleaning: Fizzing Freshness
This is a super quick way to freshen up your toilet bowl between deep cleans.
What You’ll Need:
* 1 cup white vinegar
* 1/2 cup baking soda
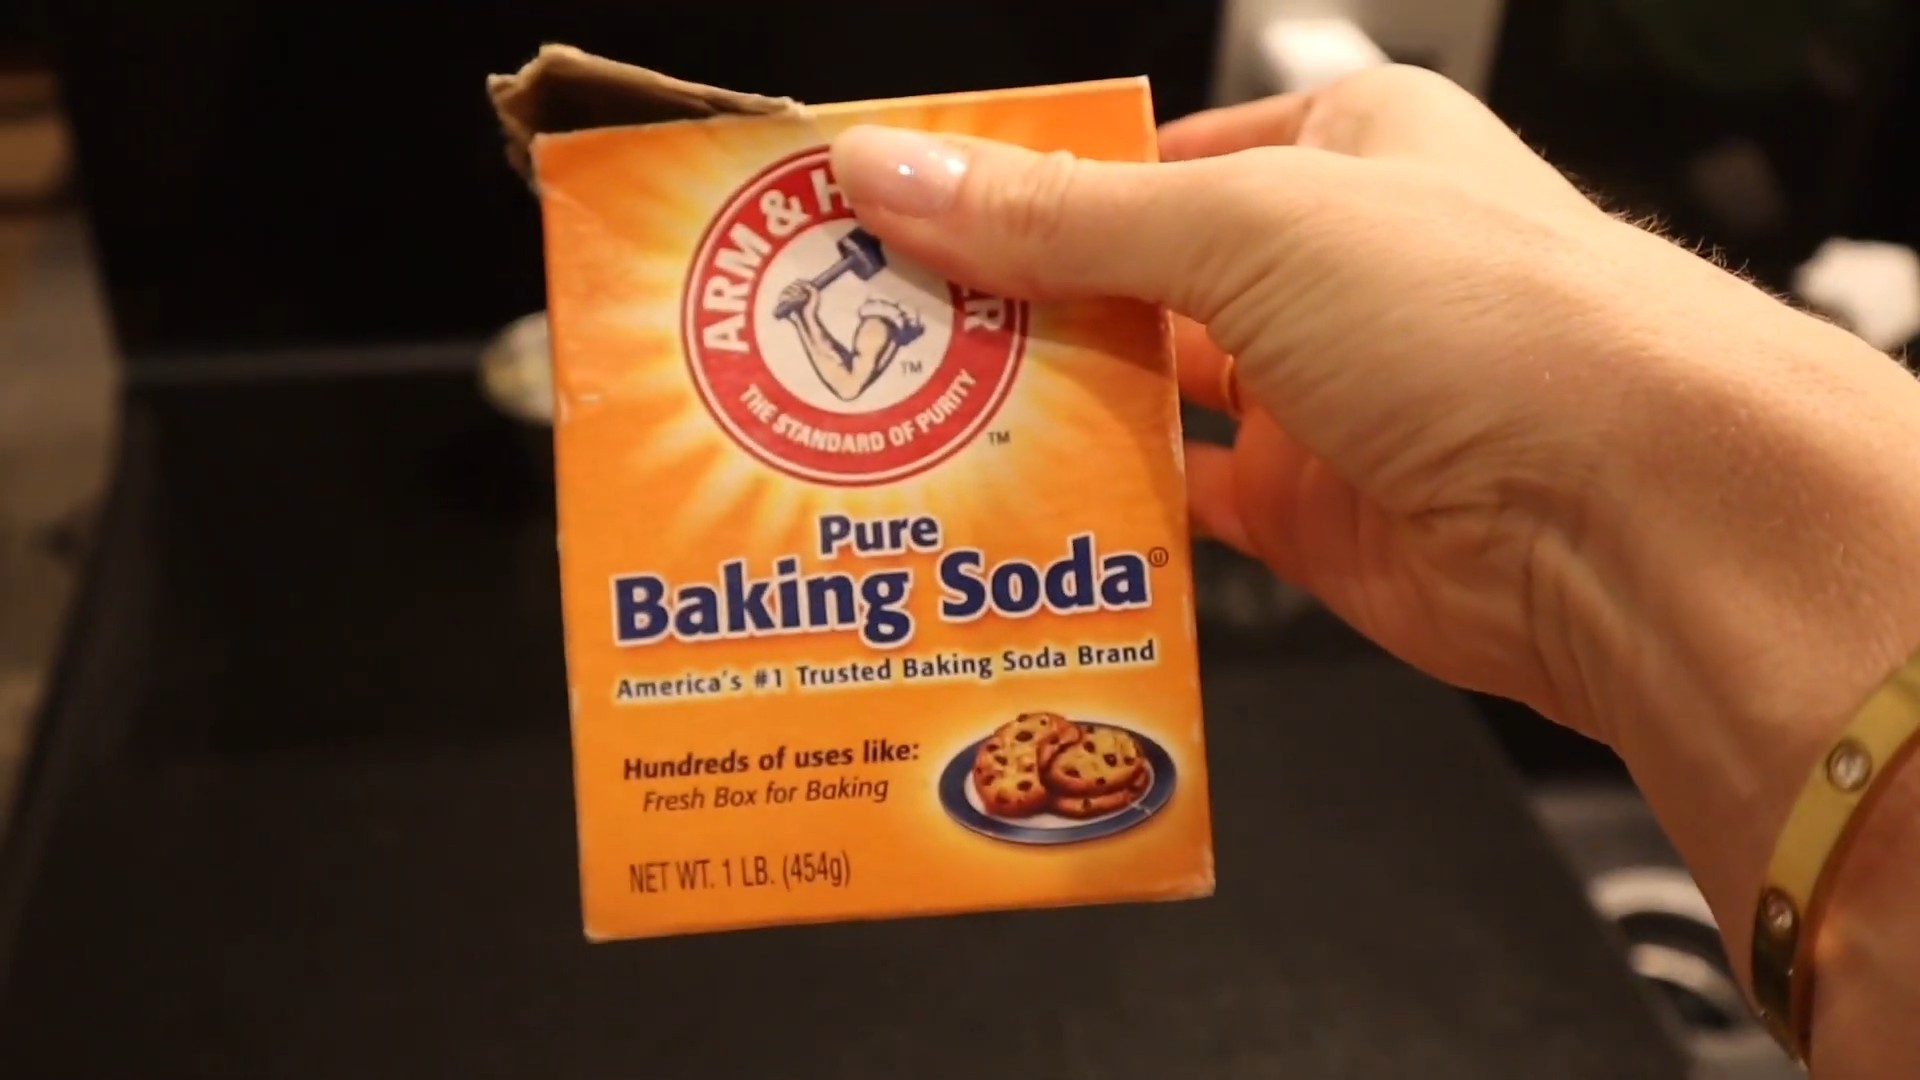
Step-by-Step Instructions:
1. Pour in Vinegar: Pour the white vinegar into the toilet bowl.
2. Add Baking Soda: Immediately add the baking soda. The mixture will fizz and bubble.
3. Let it Fizz:
Conclusion
So, there you have it! These time-saving cleaning tricks aren’t just about making your life easier; they’re about reclaiming your precious time and energy. Imagine spending less time scrubbing and more time doing the things you truly enjoy. From the effortless oven cleaning hack to the streak-free window solution, each of these methods is designed to deliver maximum results with minimal effort.
The beauty of these DIY cleaning solutions lies in their simplicity and accessibility. You likely already have most, if not all, of the ingredients needed right in your pantry. No more expensive, chemical-laden cleaners that promise the world but often fall short. These natural alternatives are not only effective but also gentler on your home, your family, and the environment.
But don’t just take our word for it. The real magic happens when you put these tricks to the test in your own home. We encourage you to experiment and find what works best for you. Perhaps you’ll discover that adding a few drops of essential oil to your all-purpose cleaner not only boosts its cleaning power but also leaves your home smelling divine. Or maybe you’ll find that using a microfiber cloth instead of paper towels makes a significant difference in achieving a streak-free shine.
Consider these variations to personalize your cleaning routine:
* **For a stronger degreaser:** Add a tablespoon of borax to your all-purpose cleaner for tackling stubborn grease stains in the kitchen.
* **For a natural disinfectant:** Incorporate tea tree oil or eucalyptus oil into your cleaning solutions for their antibacterial and antiviral properties.
* **For a refreshing scent:** Infuse your vinegar cleaning solution with citrus peels for a pleasant and invigorating aroma. Simply soak the peels in vinegar for a few days before using.
* **For delicate surfaces:** Always test your cleaning solution on an inconspicuous area first to ensure it doesn’t cause any damage or discoloration.
Remember, the key to successful cleaning is consistency. Incorporate these time-saving cleaning tricks into your regular routine, and you’ll be amazed at how much easier it becomes to maintain a clean and organized home. No more weekend-long cleaning marathons!
We are confident that these methods will revolutionize your cleaning routine. They are cost-effective, environmentally friendly, and, most importantly, they save you valuable time. So, ditch the harsh chemicals and embrace the power of DIY cleaning.
Now, it’s your turn! We’re eager to hear about your experiences with these time-saving cleaning tricks. Did you discover a new variation that works wonders? Did you find a particular hack that completely transformed your cleaning routine? Share your tips, tricks, and stories in the comments below. Let’s create a community of clean-home enthusiasts who are passionate about saving time and energy. Your feedback will not only help us improve our content but also inspire others to embrace the joy of effortless cleaning. Let us know which of these **time saving cleaning tricks** worked best for you!
Frequently Asked Questions (FAQ)
Q: Are these DIY cleaning solutions safe for all surfaces?
A: While most of these DIY cleaning solutions are generally safe for a wide range of surfaces, it’s always best to test them on an inconspicuous area first, especially on delicate materials like wood, marble, or granite. Vinegar, for example, can be too acidic for some natural stone surfaces. When in doubt, consult the manufacturer’s instructions for your specific surface. For wood, a mixture of olive oil and lemon juice can be a great alternative to harsh chemicals. Always use a soft cloth to avoid scratching.
Q: Can I use these cleaning solutions if I have allergies or sensitivities?
A: If you have allergies or sensitivities, it’s crucial to be cautious when using any cleaning product, even natural ones. Some essential oils, for example, can trigger allergic reactions in sensitive individuals. Start by testing a small amount of the cleaning solution on your skin to check for any adverse reactions. Wear gloves and a mask while cleaning to minimize exposure. If you experience any symptoms like skin irritation, respiratory problems, or headaches, discontinue use immediately. Consider using hypoallergenic alternatives or consulting with a doctor or allergist for personalized recommendations.
Q: How long can I store these DIY cleaning solutions?
A: The shelf life of DIY cleaning solutions can vary depending on the ingredients used. Solutions containing water are more prone to bacterial growth and should be used within a week or two. Solutions made with vinegar or alcohol tend to have a longer shelf life, lasting for several months. Store your cleaning solutions in airtight containers in a cool, dark place to prevent spoilage. Always label your containers clearly with the date and ingredients. If you notice any changes in color, odor, or consistency, discard the solution.
Q: Can I use these cleaning solutions on my pet’s belongings?
A: When cleaning pet belongings, it’s essential to use pet-safe cleaning solutions to avoid exposing your furry friends to harmful chemicals. While some of these DIY cleaning solutions are relatively safe, it’s best to err on the side of caution. Avoid using solutions containing essential oils, as some can be toxic to pets. Opt for simple solutions like diluted vinegar or baking soda, and always rinse thoroughly with water after cleaning. Ensure that all surfaces are completely dry before allowing your pet to come into contact with them.
Q: How do I get rid of stubborn stains using these DIY cleaning tricks?
A: Stubborn stains often require a bit more effort and targeted treatment. For grease stains, try applying a paste of baking soda and water to the affected area and letting it sit for several hours before scrubbing. For water stains on wood, try rubbing the area with a mixture of equal parts vinegar and olive oil. For mildew stains in the bathroom, spray the area with a solution of equal parts bleach and water, let it sit for a few minutes, and then scrub with a brush. Always test your cleaning solution on an inconspicuous area first to ensure it doesn’t damage the surface.
Q: What are the best essential oils to use in my DIY cleaning solutions?
A: Several essential oils have antibacterial, antiviral, and antifungal properties that make them ideal for use in DIY cleaning solutions. Some popular choices include tea tree oil, eucalyptus oil, lavender oil, lemon oil, and peppermint oil. Tea tree oil is known for its powerful antiseptic properties, while eucalyptus oil is effective against mold and mildew. Lavender oil adds a pleasant scent and has calming properties, while lemon oil is a great degreaser. Peppermint oil can help repel insects and leave a refreshing aroma. When using essential oils, always dilute them properly and avoid using them on surfaces that may be damaged by oils.
Q: How can I make my own reusable cleaning wipes?
A: Making your own reusable cleaning wipes is a great way to reduce waste and save money. Simply cut up an old t-shirt or towel into squares, and then soak them in a cleaning solution of your choice. You can use a mixture of water, vinegar, and essential oils, or any of the other DIY cleaning solutions mentioned in this article. Store the wipes in an airtight container, and use them as you would disposable wipes. When you’re done, simply wash them in the washing machine and reuse them.
Q: Are these time saving cleaning tricks really effective?
A: Absolutely! The effectiveness of these **time saving cleaning tricks** stems from the natural cleaning properties of the ingredients used. Vinegar, for example, is a powerful disinfectant and degreaser, while baking soda is a gentle abrasive that can remove stubborn stains. By combining these ingredients in the right proportions, you can create cleaning solutions that are just as effective as store-bought products, but without the harsh chemicals. Plus, these tricks are designed to streamline your cleaning routine, saving you time and effort in the long run.
Leave a Comment