
Grow String Beans at Home – imagine stepping into your backyard and plucking fresh, crisp string beans right off the vine for dinner! It’s not just a dream; it’s an achievable reality with a little know-how. For generations, cultivating your own food has been a source of pride and sustenance. From ancient civilizations tending their gardens to modern families embracing sustainable living, the desire to connect with nature and nourish ourselves with homegrown goodness remains strong.
But let’s be honest, the idea of starting a garden can feel overwhelming. Where do you even begin? That’s where these simple DIY tricks and hacks come in! I’m here to show you that you don’t need a green thumb or acres of land to successfully grow string beans at home. Whether you have a sprawling garden, a sunny balcony, or just a windowsill, I’ll share easy-to-follow tips and tricks that will have you harvesting your own delicious string beans in no time.
Why string beans, you ask? Well, they’re relatively easy to grow, incredibly versatile in the kitchen, and packed with nutrients. Plus, there’s nothing quite like the taste of a freshly picked, homegrown string bean. So, ditch the supermarket veggies and let’s embark on this exciting gardening adventure together! I promise, you’ll be amazed at how rewarding it is to nurture your own little patch of green and enjoy the fruits (or rather, vegetables!) of your labor.
Grow String Beans at Home: A Beginner’s Guide
Hey there, fellow gardening enthusiasts! I’m so excited to share my experience with growing string beans at home. It’s surprisingly easy and incredibly rewarding to harvest your own fresh, crisp beans. This guide will walk you through every step, from choosing the right variety to dealing with common pests. Let’s get started!
Choosing Your String Bean Variety
Before you even think about planting, you need to decide which type of string bean you want to grow. There are two main categories: bush beans and pole beans.
* Bush Beans: These are compact and don’t require any support. They’re perfect for smaller gardens or containers. They produce a large harvest all at once, making them ideal for canning or freezing. Some popular bush bean varieties include Blue Lake Bush, Contender, and Provider.
* Pole Beans: These beans are climbers and need a trellis or other support to grow. They produce beans over a longer period, giving you a continuous harvest. They’re also known for being more flavorful. Popular pole bean varieties include Kentucky Wonder, Blue Lake Pole, and Scarlet Runner.
I personally love growing Kentucky Wonder pole beans because they’re incredibly prolific and have a fantastic flavor. But for this guide, I’ll cover both types, so you can choose what works best for you.
Preparing Your Planting Area
String beans need plenty of sunlight and well-drained soil. Here’s how to get your planting area ready:
* Sunlight: String beans need at least 6-8 hours of direct sunlight per day. Choose a spot in your garden that gets plenty of sun.
* Soil: String beans prefer well-drained soil that’s rich in organic matter. If your soil is heavy clay or sandy, amend it with compost or well-rotted manure. This will improve drainage and provide essential nutrients.
* Soil pH: String beans grow best in soil with a pH between 6.0 and 7.0. You can test your soil pH with a soil testing kit from your local garden center. If your soil is too acidic, add lime to raise the pH. If it’s too alkaline, add sulfur to lower the pH.
* Tilling or Digging: Loosen the soil to a depth of about 12 inches. This will make it easier for the bean roots to grow. Remove any rocks, weeds, or other debris.
* Adding Compost: Mix in a generous amount of compost or well-rotted manure into the soil. This will provide nutrients and improve drainage.
Planting Your String Beans
Now for the fun part – planting! Here’s how to plant both bush and pole beans:
Planting Bush Beans
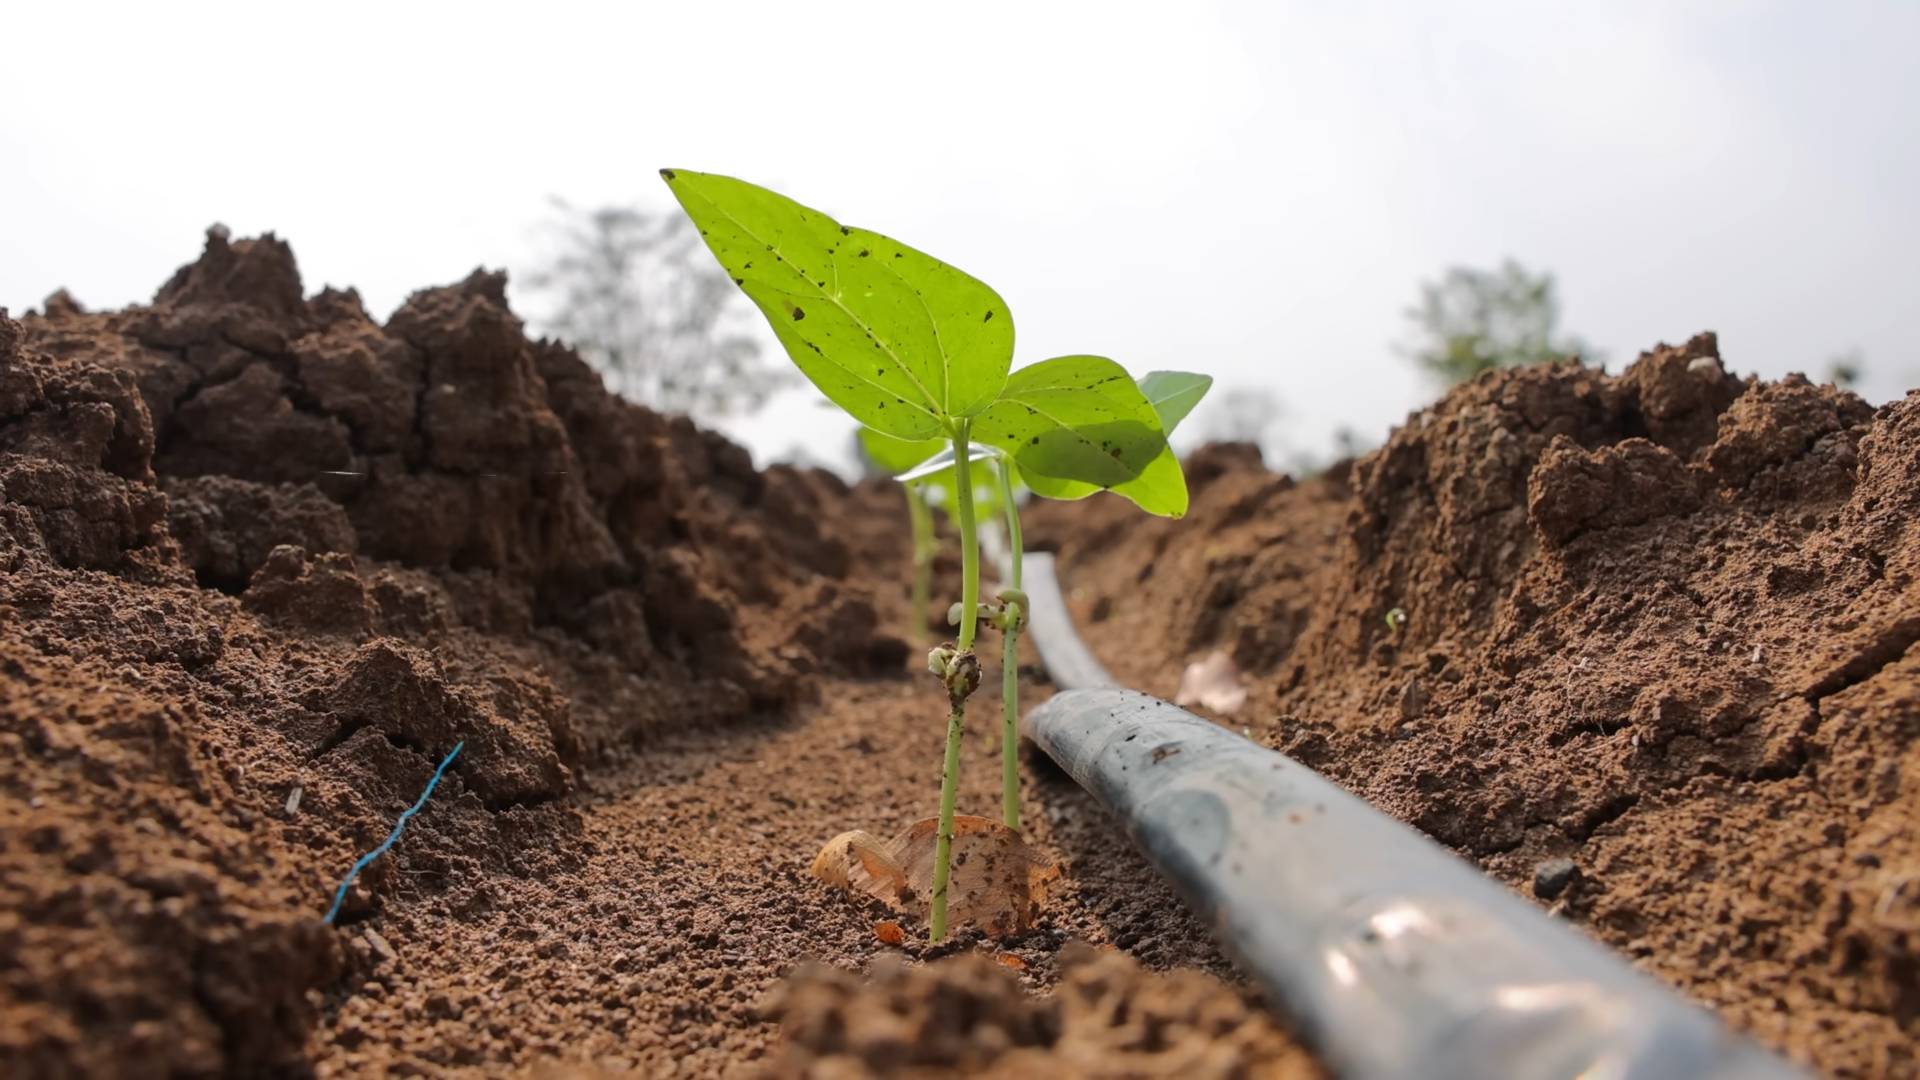
1. Timing: Plant bush beans after the last frost when the soil has warmed to at least 60°F (15°C). You can plant them directly in the ground or start them indoors a few weeks before the last frost.
2. Spacing: Sow seeds 1 inch deep and 2-3 inches apart in rows that are 18-24 inches apart.
3. Watering: Water the soil thoroughly after planting. Keep the soil moist but not soggy until the seeds germinate.
4. Germination: Bush beans typically germinate in 5-10 days, depending on the soil temperature.
Planting Pole Beans
1. Timing: Plant pole beans after the last frost when the soil has warmed to at least 60°F (15°C).
2. Trellis Installation: Before planting, install a trellis or other support for the beans to climb. You can use a bamboo trellis, a wire fence, or even a teepee made of branches. Make sure the trellis is sturdy enough to support the weight of the mature bean plants.
3. Spacing: Sow seeds 1 inch deep and 4-6 inches apart at the base of the trellis.
4. Watering: Water the soil thoroughly after planting. Keep the soil moist but not soggy until the seeds germinate.
5. Germination: Pole beans typically germinate in 5-10 days, depending on the soil temperature.
6. Training: As the bean plants grow, gently guide them onto the trellis. They will eventually start to climb on their own.
Caring for Your String Bean Plants
Once your string beans have sprouted, it’s important to provide them with the care they need to thrive.
* Watering: Water your string bean plants regularly, especially during dry weather. Aim to keep the soil consistently moist but not waterlogged. Water deeply at the base of the plants to avoid wetting the foliage, which can lead to fungal diseases.
* Fertilizing: String beans don’t need a lot of fertilizer, but a light feeding of a balanced fertilizer (like 10-10-10) can help them grow. Apply the fertilizer according to the package directions. Avoid over-fertilizing, as this can lead to excessive foliage growth and fewer beans.
* Weeding: Keep the area around your string bean plants free of weeds. Weeds compete with the beans for water and nutrients. Hand-pull weeds regularly or use a hoe to cultivate the soil.
* Mulching: Apply a layer of mulch around your string bean plants to help retain moisture, suppress weeds, and regulate soil temperature. Organic mulches like straw, hay, or shredded leaves are ideal.
* Pest Control: String beans can be susceptible to several pests, including aphids, bean beetles, and spider mites. Inspect your plants regularly for signs of pests. If you find any, you can try to control them with insecticidal soap, neem oil, or by hand-picking them off the plants.
* Disease Control: String beans can also be susceptible to fungal diseases like powdery mildew and bean rust. To prevent these diseases, avoid overhead watering, provide good air circulation, and remove any infected leaves. You can also use a fungicide if necessary.
Dealing with Common String Bean Pests and Diseases
Let’s dive a little deeper into those pesky pests and diseases that can affect your string bean crop. Knowing how to identify and manage them is crucial for a successful harvest.
Common Pests
* Aphids: These tiny, sap-sucking insects can cluster on the undersides of leaves and stems, causing them to become distorted and yellowed. A strong blast of water from a hose can dislodge them. You can also use insecticidal soap or neem oil.
* Bean Beetles: These beetles and their larvae feed on bean leaves, creating holes and skeletonizing the foliage. Hand-picking them off the plants is effective, especially in small gardens. You can also use row covers to prevent them from reaching the plants.
* Spider Mites: These tiny mites are difficult to see with the naked eye, but their presence is often indicated by fine webbing on the leaves. They suck sap from the leaves, causing them to become stippled and yellowed. Increase humidity around the plants by misting them with water. You can also use insecticidal soap or neem oil.
Common Diseases
* Powdery Mildew: This fungal disease appears as a white, powdery coating on the leaves. It’s most common in humid conditions. Improve air circulation around the plants by spacing them properly and pruning any overcrowded foliage. You can also use a fungicide.
* Bean Rust: This fungal disease causes small, reddish-brown pustules to appear on the leaves. It’s most common in wet conditions. Avoid overhead watering and provide good air circulation. Remove any infected leaves. You can also use a fungicide.
Harvesting Your String Beans
The moment you’ve been waiting for – harvesting your string beans!
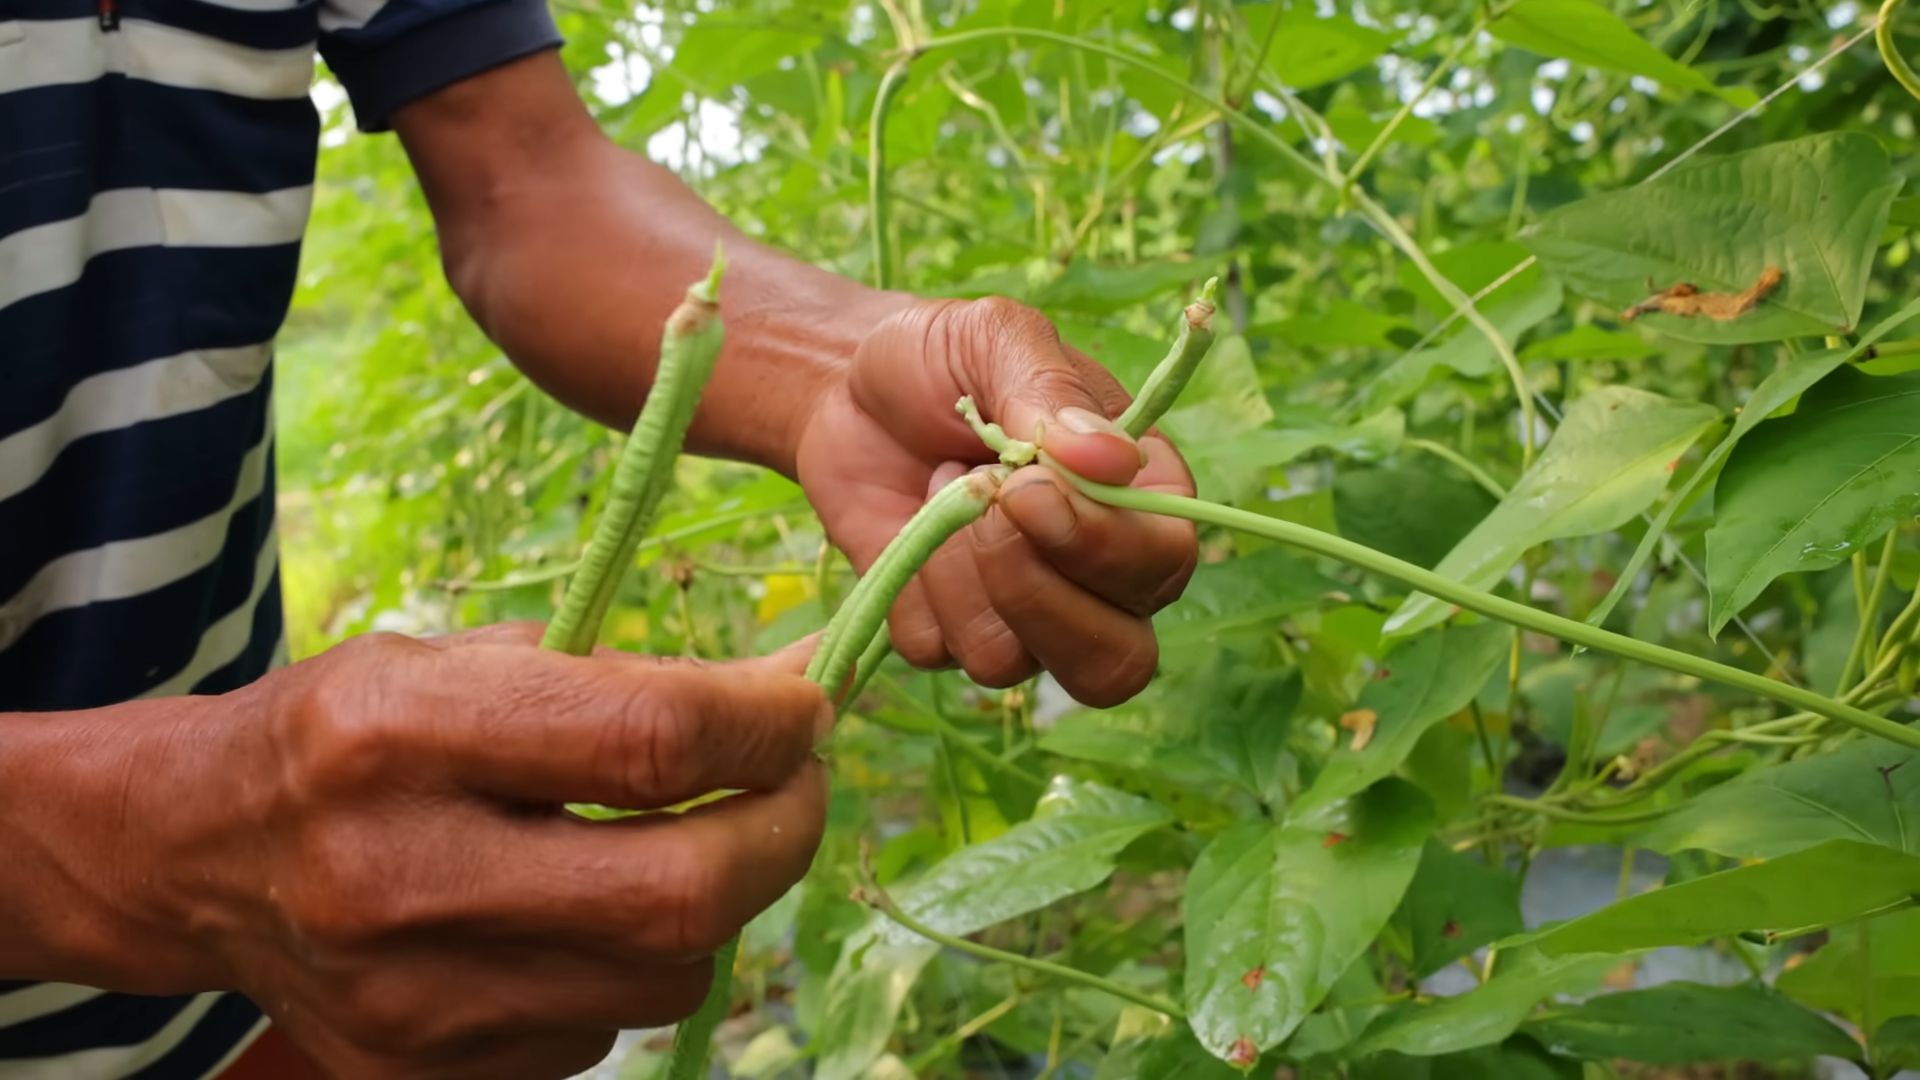
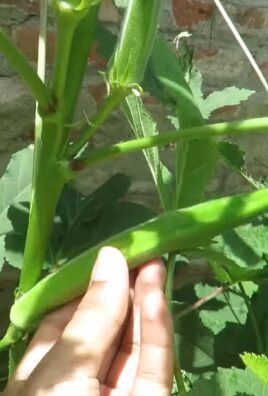
* Timing: String beans are typically ready to harvest 50-60 days after planting, depending on the variety. Harvest them when the pods are firm, crisp, and about the size of a pencil.
* Technique: Gently snap the beans off the plant, being careful not to damage the stems. Harvest regularly to encourage the plant to produce more beans.
* Frequency: Bush beans will produce a large harvest all at once, while pole beans will produce beans over a longer period. Harvest pole beans every few days to keep them producing.
* Storage: Freshly harvested string beans can be stored in the refrigerator for up to a week. For longer storage, you can blanch and freeze them.
Enjoying Your Homegrown String Beans
Congratulations! You’ve successfully grown your own string beans. Now it’s time to enjoy the fruits (or rather, vegetables) of your labor.
* Fresh: String beans are delicious eaten fresh, either raw or cooked. They can be added to salads, stir-fries, or steamed as a side dish.
* Canned: If you have a large harvest, you can can your string beans for later use.
* Frozen: String beans can also be frozen for longer storage. Blanch them in boiling water for a few minutes, then cool
Conclusion
So, there you have it! Growing string beans at home is not only achievable but also incredibly rewarding. Forget those limp, flavorless beans from the grocery store. Imagine stepping into your garden, or even onto your balcony, and harvesting crisp, vibrant string beans bursting with freshness. This DIY trick transforms the way you think about fresh produce, putting control back in your hands and offering a taste experience that store-bought simply can’t match.
Why is this a must-try? Because it’s more than just growing vegetables; it’s about connecting with nature, understanding where your food comes from, and enjoying the unparalleled flavor of homegrown goodness. Plus, it’s a fantastic way to reduce your carbon footprint and save money on your grocery bill. Who wouldn’t want that?
But the beauty of growing string beans at home lies in its adaptability. Feel free to experiment with different varieties. Bush beans are perfect for containers and smaller spaces, while pole beans offer a more abundant harvest if you have the room for a trellis. Consider trying heirloom varieties for unique flavors and colors. You can also explore companion planting, pairing your string beans with herbs like rosemary or marigolds to deter pests naturally.
Don’t be afraid to get your hands dirty and embrace the learning process. Gardening is a journey, and every mistake is a lesson learned. The satisfaction of nurturing a plant from seed to harvest is truly unmatched. And the taste of those first homegrown string beans? Absolutely divine.
We wholeheartedly encourage you to try this DIY trick for growing string beans at home. It’s easier than you think, and the rewards are immeasurable. Once you’ve experienced the joy of harvesting your own fresh beans, you’ll never look at store-bought ones the same way again.
So, grab your seeds, prepare your soil, and get ready to embark on a delicious adventure. And most importantly, don’t forget to share your experience with us! We’d love to hear about your successes, your challenges, and any tips you discover along the way. Share your photos and stories in the comments below – let’s build a community of home gardeners passionate about fresh, flavorful string beans! Let us know what kind of fertilizer you used, what kind of soil you used, and what kind of sunlight you had. All of this information will help other readers.
Frequently Asked Questions (FAQs)
What is the best time of year to plant string beans?
The ideal time to plant string beans is after the last frost in spring, when the soil has warmed to at least 60°F (15°C). String beans are warm-season crops and are sensitive to frost. Planting too early can result in poor germination or stunted growth. In many regions, this typically falls between late spring and early summer. For a continuous harvest, consider succession planting, sowing new seeds every two to three weeks throughout the growing season. This ensures a steady supply of fresh string beans for your table. You can also plant a fall crop of string beans if you live in a warmer climate with a long growing season. Just be sure to plant them early enough so they have time to mature before the first frost.
What kind of soil do string beans need?
String beans thrive in well-drained soil that is rich in organic matter. The ideal soil pH is between 6.0 and 7.0. Before planting, amend your soil with compost or well-rotted manure to improve its fertility and drainage. Avoid heavy clay soils, as they can become waterlogged and hinder root growth. If you have clay soil, consider adding sand and organic matter to improve its texture. A soil test can help you determine the pH and nutrient levels of your soil, allowing you to make necessary adjustments before planting. Good drainage is crucial to prevent root rot and other fungal diseases.
How much sunlight do string beans need?
String beans require at least 6-8 hours of direct sunlight per day to produce a good harvest. Choose a planting location that receives full sun throughout the day. If you are growing string beans in containers, make sure to place them in a sunny spot. Insufficient sunlight can result in leggy plants with fewer beans. If you live in a particularly hot climate, some afternoon shade may be beneficial to prevent the plants from overheating. Observe your garden throughout the day to determine the areas that receive the most sunlight and plan your planting accordingly.
How often should I water my string beans?
String beans need consistent moisture, especially during flowering and pod development. Water deeply and regularly, aiming to keep the soil consistently moist but not waterlogged. Avoid overhead watering, as this can promote fungal diseases. Instead, water at the base of the plants using a soaker hose or drip irrigation system. The frequency of watering will depend on the weather conditions and the type of soil. Check the soil moisture regularly by sticking your finger into the soil about an inch deep. If the soil feels dry, it’s time to water. Mulching around the plants can help retain moisture and suppress weeds.
Do string beans need fertilizer?
While string beans don’t require heavy fertilization, a balanced fertilizer can help promote healthy growth and abundant yields. Apply a fertilizer that is low in nitrogen and higher in phosphorus and potassium. Too much nitrogen can result in excessive foliage growth at the expense of bean production. You can also use organic fertilizers such as compost tea or fish emulsion. Apply fertilizer according to the package directions, being careful not to over-fertilize. Side-dressing with compost or well-rotted manure during the growing season can also provide a boost of nutrients.
How do I prevent pests and diseases from affecting my string beans?
Several pests and diseases can affect string beans, including aphids, bean beetles, and fungal diseases like powdery mildew. To prevent these problems, practice good garden hygiene. Remove any dead or diseased plant material promptly. Encourage beneficial insects like ladybugs and lacewings, which prey on aphids and other pests. Companion planting with herbs like rosemary or marigolds can also help deter pests. If you notice signs of pests or diseases, treat them promptly with organic insecticides or fungicides. Crop rotation can also help prevent soilborne diseases from building up.
When are string beans ready to harvest?
String beans are typically ready to harvest about 50-60 days after planting. The pods should be firm, crisp, and snap easily when bent. Harvest the beans regularly to encourage continued production. Overripe beans will become tough and stringy. Check your plants every few days and harvest any beans that are ready. The more you harvest, the more beans the plant will produce. Use scissors or pruning shears to cut the beans from the plant, being careful not to damage the stems.
Can I grow string beans in containers?
Yes, you can successfully grow string beans in containers, especially bush bean varieties. Choose a container that is at least 12 inches deep and wide to provide enough room for the roots to grow. Use a well-draining potting mix and ensure that the container has drainage holes. Place the container in a sunny location and water regularly. You may need to fertilize more frequently when growing string beans in containers, as the nutrients can leach out more quickly. Provide support for the plants if you are growing pole bean varieties in containers.
What are some good companion plants for string beans?
String beans benefit from companion planting with several other vegetables and herbs. Good companions include carrots, cucumbers, radishes, rosemary, and marigolds. Carrots and radishes help to loosen the soil, making it easier for string bean roots to grow. Cucumbers provide shade, which can help protect the beans from overheating in hot weather. Rosemary and marigolds deter pests. Avoid planting string beans near onions or garlic, as these can inhibit their growth.
How do I store string beans after harvesting?
After harvesting, store string beans in the refrigerator in a plastic bag or container. They will typically last for about a week. For longer storage, you can blanch and freeze them. To blanch, boil the beans for 2-3 minutes, then immediately plunge them into ice water to stop the cooking process. Drain the beans and pack them into freezer bags or containers. Frozen string beans will last for several months. You can also pickle or can string beans for long-term storage.


Leave a Comment