
Growing Yellow Habanero Peppers can seem daunting, but trust me, with a few simple tricks and a little DIY spirit, you can cultivate these fiery delights right in your own backyard! For centuries, peppers, including the habanero, have been prized for their flavor and medicinal properties, playing a significant role in cuisines around the globe. From adding a kick to traditional dishes to being used in natural remedies, the habanero boasts a rich history.
Have you ever dreamed of adding a burst of sunshine and intense heat to your culinary creations? Imagine plucking vibrant yellow habaneros straight from your garden, knowing you nurtured them from tiny seedlings to fiery fruits. That’s the magic of home gardening! But let’s be honest, sometimes getting those peppers to thrive can feel like a real challenge. That’s where these DIY tricks come in.
I’m here to share some easy-to-follow hacks that will help you master the art of growing Yellow Habanero Peppers. Whether you’re a seasoned gardener or just starting out, these tips will empower you to create the perfect environment for your peppers to flourish. Say goodbye to lackluster harvests and hello to a bounty of flavorful, fiery habaneros! Let’s get started!
Growing Yellow Habanero Peppers: A Fiery DIY Guide
Hey there, fellow chili enthusiasts! Ready to turn up the heat in your garden and your kitchen? I’m going to walk you through everything you need to know to successfully grow your own vibrant and scorching yellow habanero peppers. Trust me, the satisfaction of harvesting these beauties is totally worth the effort. Let’s get started!
Choosing Your Seeds and Starting Indoors
Yellow habaneros need a long growing season, so starting them indoors is crucial, especially if you live in a cooler climate.
* Seed Selection: Opt for high-quality seeds from a reputable source. Look for varieties specifically labeled “Yellow Habanero” or “Golden Habanero.” I’ve had good luck with seeds from online retailers specializing in chili peppers.
* Timing is Key: Start your seeds indoors about 8-10 weeks before the last expected frost in your area. This gives them a head start and ensures they’re strong enough to handle transplanting.
* Seed Starting Mix: Use a seed starting mix, not regular potting soil. Seed starting mix is lighter and provides better drainage, which is essential for germination.
* Containers: You can use seed trays, peat pots, or even recycled yogurt cups with drainage holes. I personally prefer seed trays with a humidity dome to maintain consistent moisture.
Step-by-Step Instructions:
1. Prepare Your Containers: Fill your chosen containers with seed starting mix, leaving about half an inch of space at the top. Gently tap the containers to settle the mix.
2. Sow the Seeds: Place 2-3 seeds in the center of each container, about ¼ inch deep. Don’t bury them too deep, as they need light to germinate.
3. Water Gently: Use a spray bottle to mist the soil thoroughly. You want it moist but not soggy.
4. Create a Humid Environment: Cover the containers with a humidity dome or plastic wrap to retain moisture. This is crucial for germination.
5. Provide Warmth: Place the containers in a warm location, ideally between 80-85°F (27-29°C). A heat mat designed for seed starting can be incredibly helpful.
6. Monitor Germination: Check the containers daily. Germination typically takes 7-21 days. Once the seedlings emerge, remove the humidity dome or plastic wrap.
7. Provide Light: Once the seedlings emerge, they need plenty of light. Place them under grow lights or in a very sunny window. If using a window, rotate the seedlings regularly to prevent them from leaning towards the light. I use a simple LED grow light setup and it works wonders.
8. Water Regularly: Keep the soil consistently moist, but avoid overwatering. Let the top inch of soil dry out slightly between waterings.
9. Thin the Seedlings: Once the seedlings have their first true leaves (the second set of leaves that appear after the initial seed leaves), thin them to one seedling per container. Choose the strongest, healthiest-looking seedling and snip off the others at the soil line. Don’t pull them out, as this can disturb the roots of the remaining seedling.
Hardening Off Your Seedlings
Before transplanting your habanero seedlings outdoors, you need to “harden them off.” This process gradually acclimates them to the outdoor environment, reducing the risk of shock.
* Gradual Introduction: Start by placing the seedlings outdoors in a sheltered location for just an hour or two each day.
* Increase Exposure: Gradually increase the amount of time they spend outdoors each day, over a period of 7-10 days.
* Protect from Harsh Conditions: Protect them from direct sunlight, strong winds, and extreme temperatures during the hardening-off process.
* Monitor for Stress: Watch for signs of stress, such as wilting or leaf burn. If you see these signs, bring the seedlings back indoors and reduce their outdoor exposure.
Step-by-Step Instructions:
1. Day 1-2: Place the seedlings in a shady, sheltered location outdoors for 1-2 hours.
2. Day 3-4: Increase the outdoor exposure to 3-4 hours, still in a shady location.
3. Day 5-6: Gradually introduce them to a few hours of morning sun.
4. Day 7-8: Increase the amount of sun exposure each day.
5. Day 9-10: Leave them outdoors for the entire day, but bring them back indoors at night if temperatures are expected to drop below 50°F (10°C).
Transplanting Outdoors
Once the danger of frost has passed and your seedlings are hardened off, it’s time to transplant them into your garden or containers.
* Choose the Right Location: Yellow habaneros need at least 6-8 hours of sunlight per day. Choose a location with well-drained soil.
* Soil Preparation: Amend the soil with compost or other organic matter to improve drainage and fertility. Habaneros prefer slightly acidic soil with a pH of 6.0-6.8.
* Spacing: Space the plants 18-24 inches apart in the garden. If growing in containers, use pots that are at least 5 gallons in size.
* Watering: Water the plants thoroughly after transplanting.
Step-by-Step Instructions:
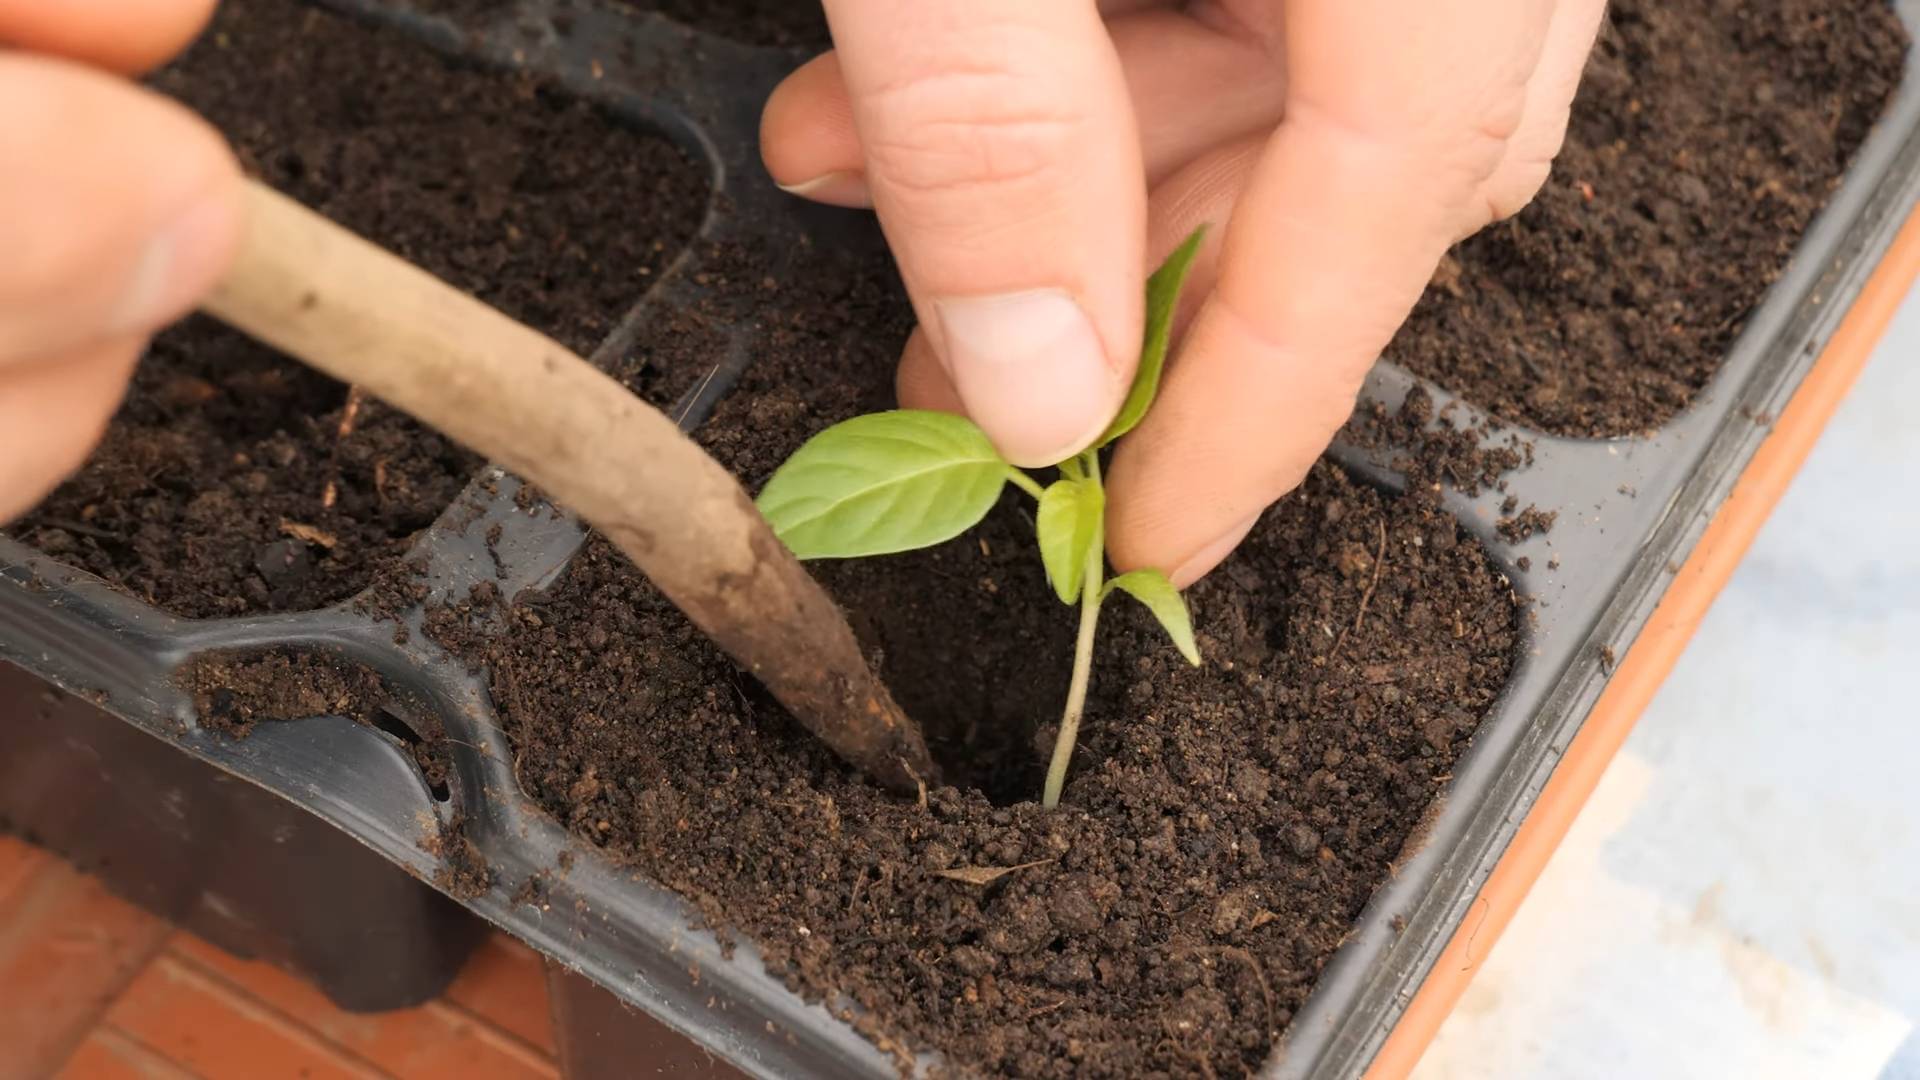
1. Dig the Holes: Dig holes that are slightly larger than the root balls of your seedlings.
2. Remove the Seedlings: Gently remove the seedlings from their containers. If they are in peat pots, you can plant the entire pot, but make sure to tear off the top portion of the pot to allow the roots to grow freely.
3. Plant the Seedlings: Place the seedlings in the holes and backfill with soil. Gently firm the soil around the base of the plants.
4. Water Thoroughly: Water the plants thoroughly after transplanting.
5. Mulch: Apply a layer of mulch around the base of the plants to help retain moisture and suppress weeds. I like to use straw or wood chips.
6. Stake or Cage: As the plants grow, they may need staking or caging to support the heavy fruit. I find that using tomato cages works well.
Caring for Your Habanero Plants
Proper care is essential for producing a bountiful harvest of yellow habaneros.
* Watering: Water regularly, especially during hot, dry weather. Habaneros need consistent moisture, but avoid overwatering, which can lead to root rot.
* Fertilizing: Fertilize every 2-3 weeks with a balanced fertilizer or a fertilizer specifically formulated for peppers. I like to use a liquid fertilizer diluted to half strength.
* Pest Control: Monitor your plants regularly for pests, such as aphids, spider mites, and whiteflies. Treat infestations promptly with insecticidal soap or neem oil.
* Pruning: Pruning is not essential, but it can help improve air circulation and encourage bushier growth. You can remove any suckers (small shoots that grow from the base of the plant) to promote more fruit production.
* Sun Scald Prevention: In extremely hot climates, protect your plants from sun scald by providing some afternoon shade.
Step-by-Step Instructions:
1. Watering: Check the soil moisture regularly. Water when the top inch of soil feels dry to the touch. Water deeply, allowing the water to soak into the soil.
2. Fertilizing: Follow the instructions on your chosen fertilizer. Apply the fertilizer evenly around the base of the plants.
3. Pest Control: Inspect your plants regularly for pests. If you find any, treat them promptly with insecticidal soap or neem oil. Follow the instructions on the product label.
4. Pruning: Remove any suckers that grow from the base of the plant. You can also remove any yellowing or dead leaves.
5. Sun Scald Prevention: If you live in a hot climate, provide some afternoon shade for your plants. You can use shade cloth or plant them in a location that receives some afternoon shade.
Harvesting Your Yellow Habaneros
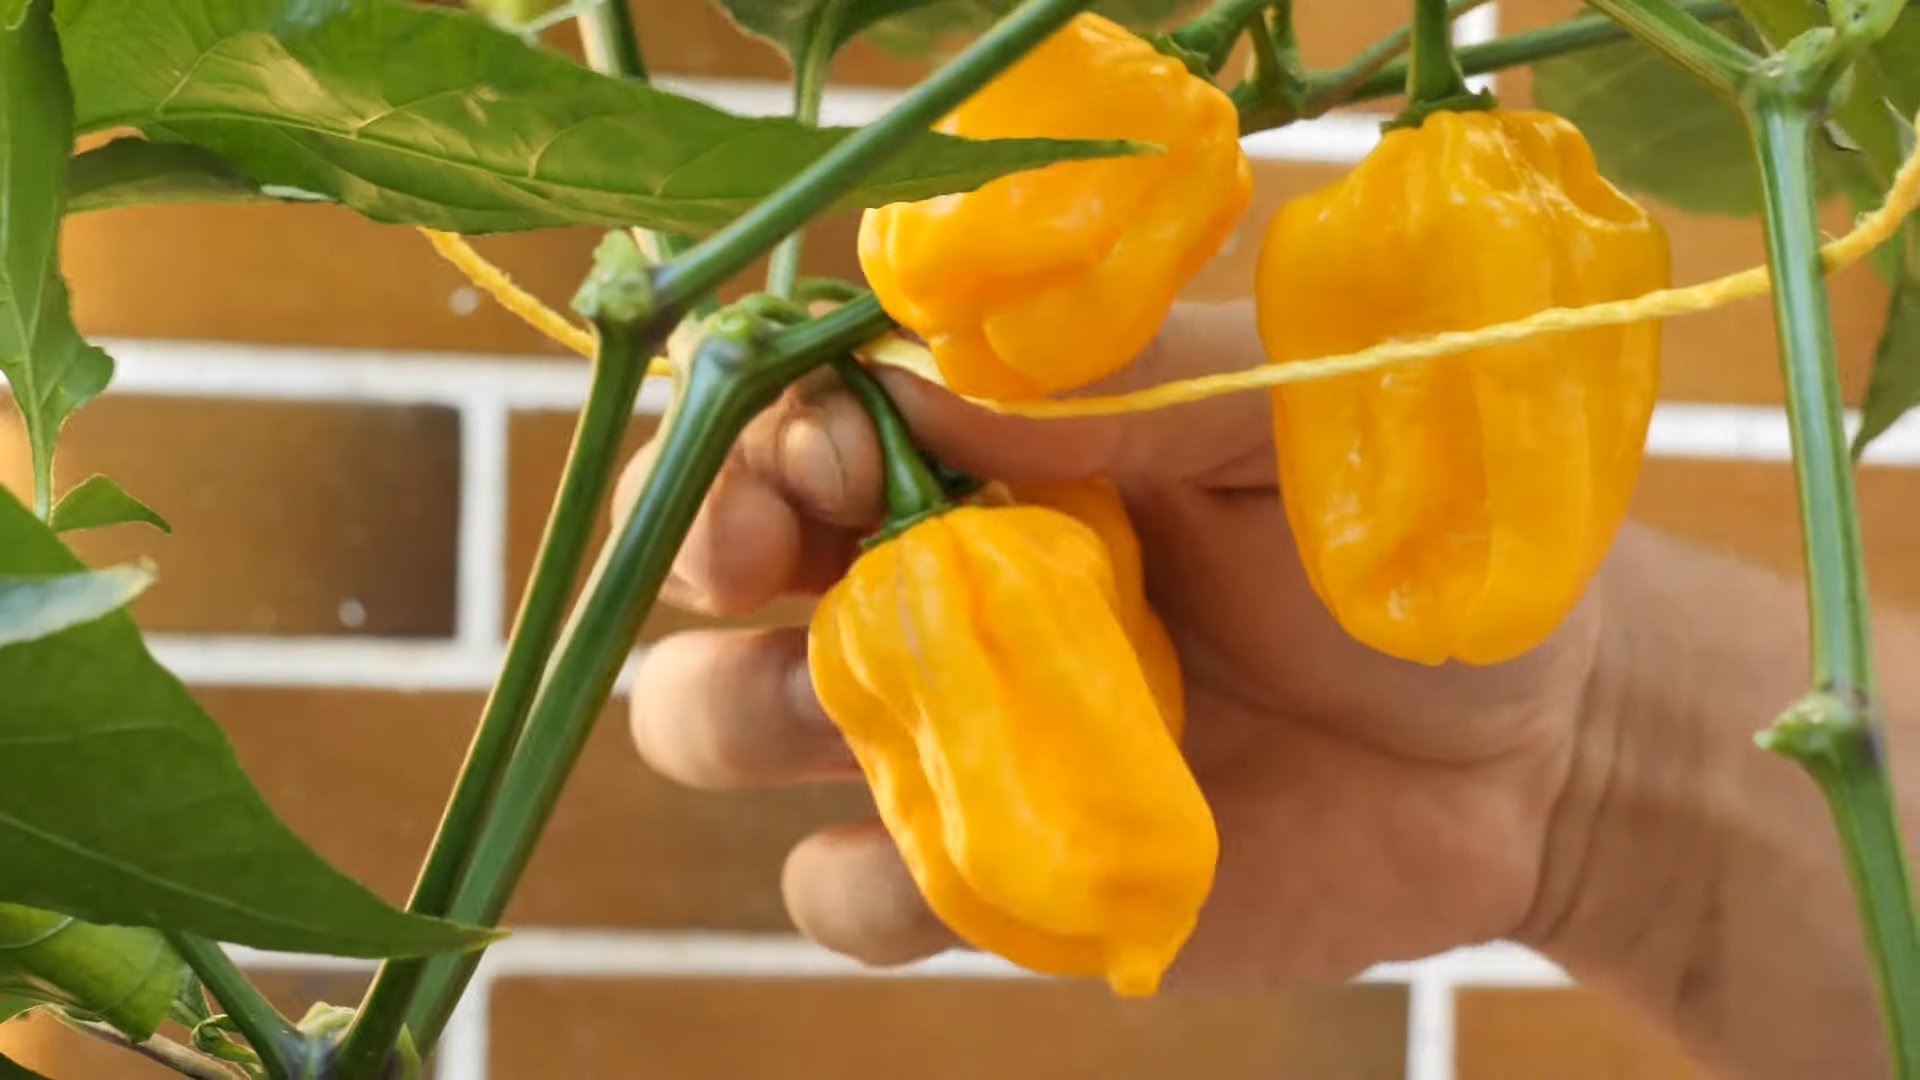
The moment you’ve been waiting for! Harvesting your own fiery yellow habaneros.
* Timing: Habaneros are typically ready to harvest about 80-100 days after transplanting. The peppers will turn from green to a vibrant yellow or golden color when they are ripe.
* Harvesting Technique: Use pruning shears or scissors to cut the peppers from the plant. Be careful not to damage the plant.
* Safety Precautions: Wear gloves when handling habaneros, as the capsaicin oil can irritate your skin. Avoid touching your eyes or face while handling the peppers.
Step-by-Step Instructions:
1.
Conclusion
So, there you have it! Growing your own yellow habanero peppers is not only achievable, but it’s also incredibly rewarding. From the vibrant color they add to your garden to the fiery kick they bring to your culinary creations, these peppers are a true garden gem. We’ve walked you through the essential steps, from selecting the right seeds and nurturing seedlings to providing optimal growing conditions and harvesting your bountiful crop.
But why is this DIY trick a must-try? Simply put, it’s about control, freshness, and flavor. When you grow your own yellow habaneros, you know exactly what’s going into them – no mystery pesticides or questionable growing practices. You get to harvest them at their peak ripeness, ensuring the most intense flavor and heat. And let’s be honest, there’s a certain satisfaction that comes from nurturing a plant from seed to table.
Beyond the basic method, there are plenty of ways to customize your yellow habanero growing experience. Consider experimenting with different soil amendments to see how they affect the pepper’s flavor and heat level. Try growing them in containers if you have limited space or want to move them indoors during colder months. You can even explore different companion planting strategies to deter pests and promote healthy growth. For example, basil is known to repel certain insects that might bother your pepper plants. Marigolds are another great option, adding beauty to your garden while also keeping unwanted pests away.
Don’t be afraid to get creative with your harvest, too! While yellow habaneros are fantastic in salsas and hot sauces, they can also add a unique twist to jams, jellies, and even desserts. Imagine a mango habanero jam or a chocolate habanero brownie – the possibilities are endless!
We understand that growing peppers can sometimes feel daunting, especially for beginners. But with a little patience, attention, and the right information, you can successfully cultivate your own thriving yellow habanero plants. Remember to start small, be observant, and don’t be afraid to experiment.
Now, it’s your turn! We wholeheartedly encourage you to give this DIY trick a try. Start your seeds, prepare your garden, and get ready to experience the joy of growing your own yellow habanero peppers. And most importantly, don’t forget to share your experiences with us! We’d love to hear about your successes, challenges, and any unique tips or tricks you discover along the way. Share your photos, recipes, and stories in the comments below. Let’s build a community of passionate pepper growers and celebrate the fiery goodness of homegrown yellow habaneros! Happy growing!
Frequently Asked Questions (FAQ)
What is the best time to start yellow habanero pepper seeds?
The ideal time to start your yellow habanero pepper seeds indoors is typically 6-8 weeks before the last expected frost in your area. This allows the seedlings ample time to develop a strong root system before being transplanted outdoors. Check your local weather forecasts and gardening resources to determine the average last frost date for your region. Starting seeds too early can result in leggy, weak seedlings that struggle to thrive once transplanted. Starting too late may mean a shorter growing season and a smaller harvest.
How much sunlight do yellow habanero pepper plants need?
Yellow habanero pepper plants thrive in full sun, requiring at least 6-8 hours of direct sunlight per day. Insufficient sunlight can lead to stunted growth, reduced fruit production, and less intense flavor. When selecting a location for your pepper plants, choose a spot that receives ample sunlight throughout the day. If you’re growing them in containers, you can move them around to maximize their sun exposure. If you live in an area with extremely hot summers, providing some afternoon shade can help prevent sunscald on the peppers.
What type of soil is best for growing yellow habanero peppers?
Yellow habanero peppers prefer well-draining, fertile soil with a slightly acidic to neutral pH (around 6.0-7.0). Amend your garden soil with compost, aged manure, or other organic matter to improve drainage and nutrient content. Avoid heavy clay soils that retain too much moisture, as this can lead to root rot. You can also grow yellow habaneros successfully in raised beds or containers using a high-quality potting mix specifically formulated for vegetables.
How often should I water my yellow habanero pepper plants?
Water your yellow habanero pepper plants regularly, especially during hot, dry weather. The goal is to keep the soil consistently moist but not waterlogged. Check the soil moisture level by sticking your finger about an inch deep into the soil. If it feels dry, it’s time to water. Avoid overhead watering, as this can promote fungal diseases. Instead, water at the base of the plant, using a soaker hose or drip irrigation system. During periods of heavy rain, you may need to reduce watering frequency to prevent overwatering.
How do I fertilize my yellow habanero pepper plants?
Yellow habanero pepper plants benefit from regular fertilization throughout the growing season. Start with a balanced fertilizer (e.g., 10-10-10) when transplanting seedlings into the garden. Once the plants begin to flower and set fruit, switch to a fertilizer with a higher phosphorus content (e.g., 5-10-5) to promote fruit development. Follow the instructions on the fertilizer label for application rates and frequency. You can also supplement with organic fertilizers, such as compost tea or fish emulsion. Avoid over-fertilizing, as this can lead to excessive foliage growth at the expense of fruit production.
What are some common pests and diseases that affect yellow habanero peppers?
Common pests that can affect yellow habanero peppers include aphids, spider mites, whiteflies, and pepper weevils. Regularly inspect your plants for signs of infestation and take action promptly. You can often control these pests with insecticidal soap, neem oil, or by introducing beneficial insects like ladybugs. Common diseases that can affect yellow habanero peppers include blossom end rot, fungal leaf spots, and viral diseases. Ensure proper watering and fertilization to prevent blossom end rot. Use disease-resistant varieties and practice good sanitation to minimize the risk of fungal and viral diseases.
How do I harvest yellow habanero peppers?
Yellow habanero peppers are typically ready to harvest when they turn a vibrant yellow color and feel firm to the touch. Use pruning shears or scissors to cut the peppers from the plant, leaving a small stem attached. Avoid pulling the peppers off, as this can damage the plant. Wear gloves when handling habanero peppers, as the capsaicin oil can irritate your skin. Harvest peppers regularly to encourage continued fruit production.
How hot are yellow habanero peppers?
Yellow habanero peppers are known for their intense heat, typically ranging from 100,000 to 350,000 Scoville heat units (SHU). This makes them significantly hotter than jalapeño peppers, which typically range from 2,500 to 8,000 SHU. Handle yellow habanero peppers with caution and use them sparingly in your cooking. Always wash your hands thoroughly after handling them.
Can I grow yellow habanero peppers indoors?
Yes, you can grow yellow habanero peppers indoors, provided you can provide them with adequate light and warmth. Use grow lights to supplement natural sunlight, especially during the winter months. Choose a pot that is at least 5 gallons in size and use a well-draining potting mix. Water regularly and fertilize as needed. Indoor-grown pepper plants may not produce as many peppers as those grown outdoors, but you can still enjoy a decent harvest.
How do I store yellow habanero peppers?
Freshly harvested yellow habanero peppers can be stored in the refrigerator for up to a week. For longer storage, you can dry them, freeze them, or pickle them. To dry them, string the peppers together and hang them in a well-ventilated area until they are completely dry. To freeze them, wash and dry the peppers, then place them in a freezer-safe bag or container. To pickle them, follow a recipe for pickled peppers, using vinegar, water, salt, and spices.

Leave a Comment