
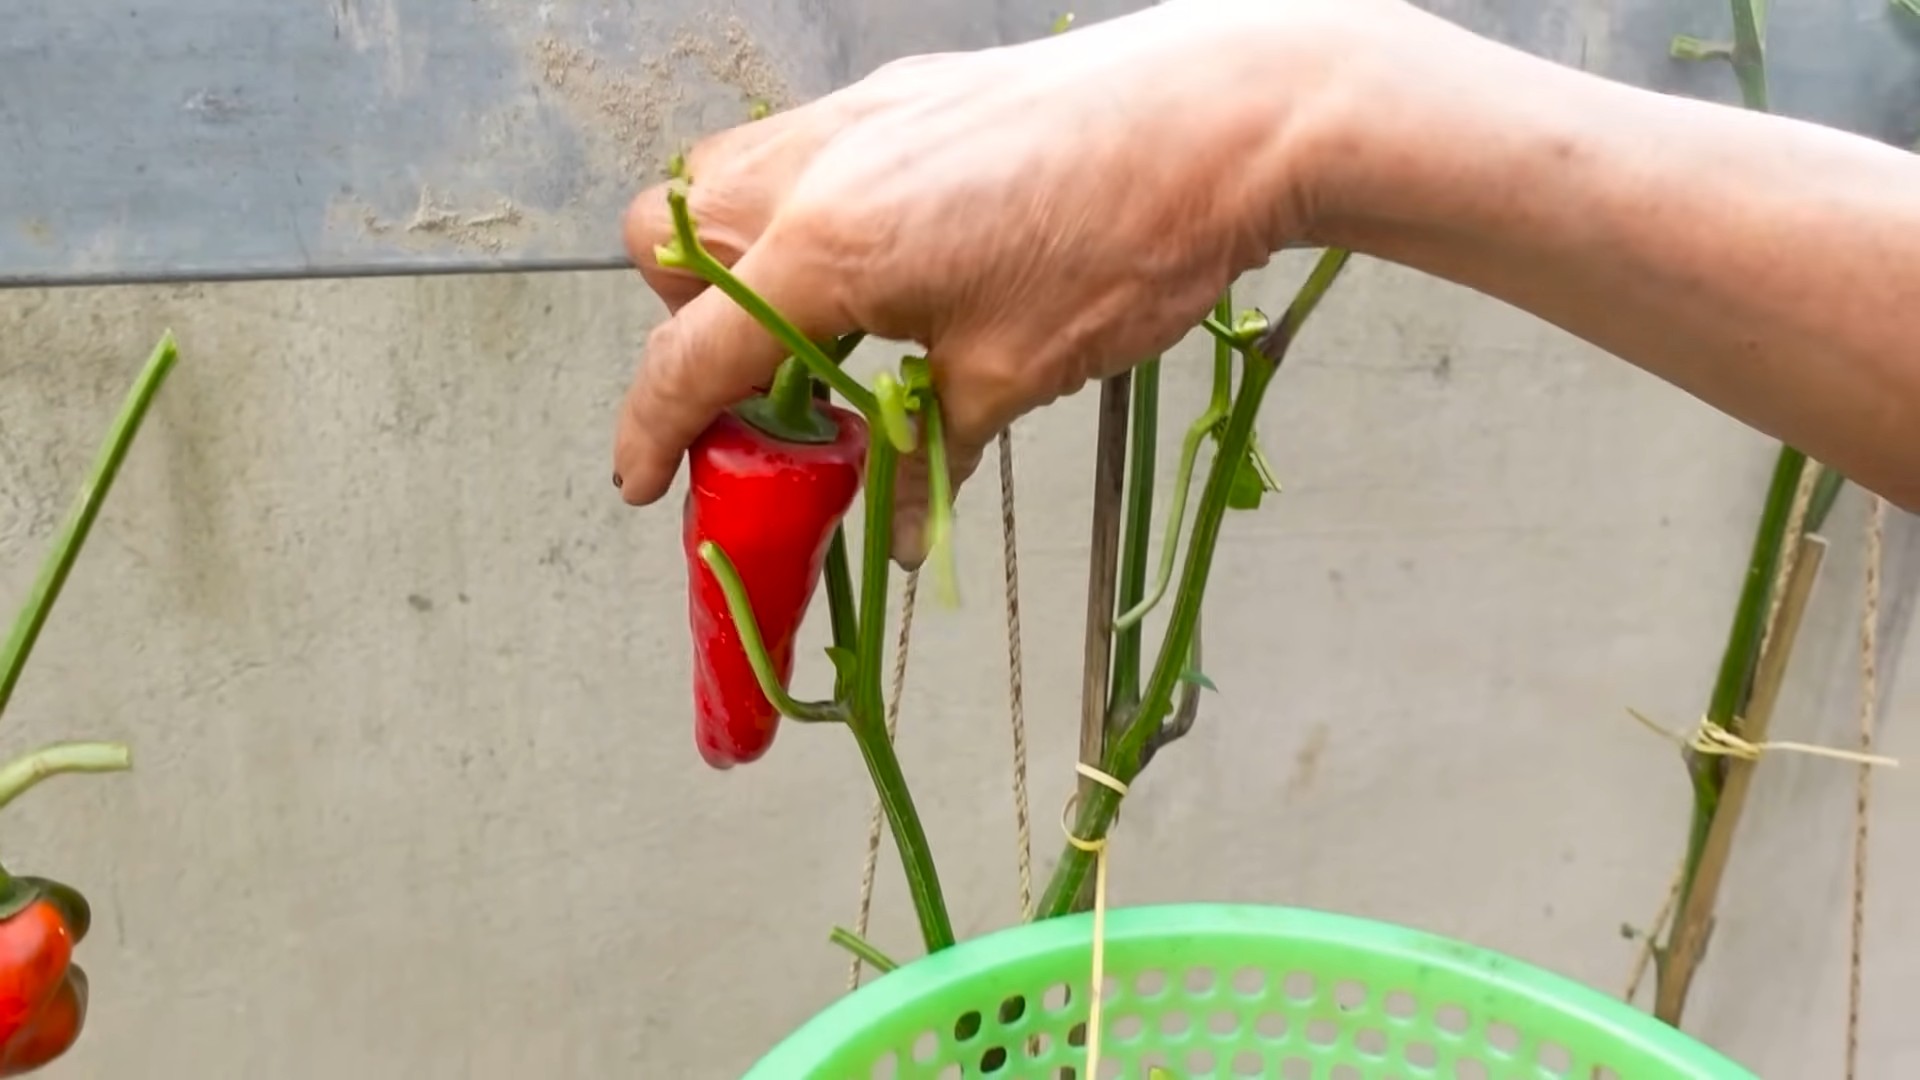
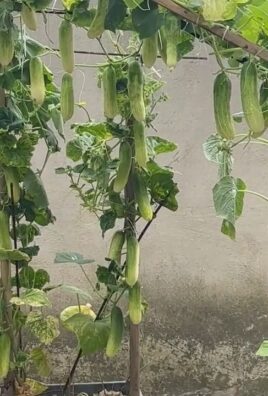
Grow Chili Peppers Tips are what every aspiring home gardener needs to unlock a world of fiery flavors right in their backyard! Imagine plucking vibrant, sun-ripened chili peppers straight from your own plants, ready to spice up your favorite dishes. Sounds amazing, right? For centuries, chili peppers have been more than just a culinary ingredient; they’ve been woven into the cultural tapestry of civilizations across the globe, from ancient Mesoamerica to the bustling markets of Asia.
But let’s be honest, sometimes growing these little firecrackers can feel a bit intimidating. Maybe you’ve tried before and ended up with lackluster results, or perhaps you’re a complete beginner unsure where to even start. That’s where these DIY tricks and hacks come in! I’m here to share my tried-and-true secrets to help you grow chili peppers tips successfully, even if you don’t have a green thumb.
This isn’t just about growing plants; it’s about empowering you to create a thriving garden that brings joy, flavor, and a touch of heat to your life. So, ditch the store-bought peppers and get ready to embark on a rewarding journey of homegrown deliciousness. Let’s dive in and discover the simple yet effective techniques that will transform your garden into a chili pepper paradise!
DIY Coffee Table Transformation: From Drab to Fab!
Hey there, fellow DIY enthusiasts! Are you tired of that boring coffee table sitting in your living room? Do you crave a statement piece that reflects your unique style without breaking the bank? Well, you’ve come to the right place! Today, I’m going to walk you through a complete coffee table transformation. We’ll take that lackluster piece and turn it into a stunning focal point that you’ll be proud to show off. Get ready to unleash your inner artist!
What You’ll Need: The Essential Supplies
Before we dive in, let’s gather our supplies. Having everything on hand will make the process smooth and enjoyable. Trust me, there’s nothing worse than having to stop mid-project to run to the store!
* Your Existing Coffee Table: Obviously! Make sure it’s structurally sound. Minor scratches and dents are okay; we’ll be addressing those.
* Sandpaper: I recommend a variety pack with different grits (80, 120, 220). We’ll start with the coarser grit to remove old finishes and smooth out imperfections, then move to finer grits for a silky-smooth surface.
* Primer: A good quality primer is essential for proper paint adhesion and a long-lasting finish. Choose a primer that’s compatible with the type of paint you’ll be using.
* Paint: This is where you can really let your creativity shine! Consider the overall aesthetic of your living room and choose a color that complements your existing décor. Chalk paint, latex paint, and even spray paint are all viable options.
* Paintbrushes and/or Paint Rollers: I prefer using a combination of both. A brush is great for getting into corners and details, while a roller provides a smooth, even finish on larger surfaces.
* Painter’s Tape: This is your best friend for creating clean lines and protecting areas you don’t want to paint.
* Drop Cloth or Old Newspaper: Protect your work area from paint splatters and spills.
* Wood Filler (Optional): If your coffee table has any significant dents or gouges, wood filler will help you create a flawless surface.
* Putty Knife (Optional): For applying wood filler.
* Sealer or Topcoat: This will protect your newly painted coffee table from scratches, stains, and everyday wear and tear. Polyurethane, wax, or varnish are all good options.
* Clean Rags: For wiping away dust and spills.
* Screwdriver or Drill: Depending on the coffee table’s construction, you might need these to disassemble parts for easier painting.
* Safety Glasses and Dust Mask: Protect your eyes and lungs from dust and paint fumes.
* Design Inspiration: Browse Pinterest, magazines, or online blogs for ideas and inspiration. Having a clear vision will help you stay focused and create a coffee table you truly love.
Phase 1: Preparation is Key
This is arguably the most important step in the entire process. A well-prepared surface is crucial for a professional-looking finish. Don’t skip this step!
1. Disassemble the Coffee Table (If Possible): If your coffee table has removable legs or other components, take them apart. This will make sanding and painting much easier. Keep track of all the screws and hardware!
2. Clean the Surface: Use a damp rag to wipe down the entire coffee table, removing any dust, dirt, or grime. Let it dry completely.
3. Sand the Surface: This is where the elbow grease comes in! Start with a coarser grit sandpaper (80 or 120) to remove any existing finish, scratches, or imperfections. Sand in the direction of the wood grain (if applicable). Once you’ve removed the old finish, switch to a finer grit sandpaper (220) to smooth out the surface.
4. Fill Any Imperfections (Optional): If your coffee table has any dents or gouges, use a putty knife to apply wood filler to the affected areas. Let the wood filler dry completely according to the manufacturer’s instructions. Once dry, sand the filled areas smooth with fine-grit sandpaper.
5. Wipe Away Dust: Use a clean, dry rag to remove all sanding dust from the coffee table. A tack cloth works even better for this.
6. Tape Off Areas (If Necessary): If you’re planning on creating a two-toned look or leaving some areas unpainted, use painter’s tape to mask off those sections. Make sure the tape is firmly adhered to the surface to prevent paint bleed.
Phase 2: Priming and Painting – Bringing Your Vision to Life
Now for the fun part! This is where you’ll start to see your coffee table transformation take shape.
1. Apply Primer: Apply a thin, even coat of primer to the entire coffee table using a paintbrush or roller. Make sure to get into all the nooks and crannies. Let the primer dry completely according to the manufacturer’s instructions. This is super important!
2. Lightly Sand the Primer (Optional): Once the primer is dry, you can lightly sand it with fine-grit sandpaper to create an even smoother surface for painting. This step is optional, but it can make a big difference in the final result.
3. Apply the First Coat of Paint: Now it’s time to apply your first coat of paint! Use a paintbrush or roller to apply a thin, even coat of paint to the entire coffee table. Again, make sure to get into all the nooks and crannies. Let the paint dry completely according to the manufacturer’s instructions.
4. Apply Additional Coats of Paint (If Necessary): Depending on the color and coverage of your paint, you may need to apply a second or even a third coat. Allow each coat to dry completely before applying the next. Lightly sand between coats for an even smoother finish.
5. Remove Painter’s Tape (If Used): Once the paint is completely dry, carefully remove the painter’s tape. Pull the tape away from the painted surface at a 45-degree angle to prevent chipping.
Phase 3: Sealing and Finishing – Protecting Your Masterpiece
This final phase is all about protecting your hard work and ensuring that your coffee table looks beautiful for years to come.
1. Apply Sealer or Topcoat: Apply a thin, even coat of sealer or topcoat to the entire coffee table using a paintbrush or roller. This will protect the paint from scratches, stains, and everyday wear and tear. Choose a sealer or topcoat that’s appropriate for the type of paint you used. Polyurethane is a durable option, while wax provides a softer, more matte finish.
2. Let the Sealer Dry Completely: Allow the sealer or topcoat to dry completely according to the manufacturer’s instructions. This is crucial for proper protection.
3. Apply Additional Coats of Sealer (If Desired): For extra protection, you can apply a second or even a third coat of sealer. Allow each coat to dry completely before applying the next.
4. Reassemble the Coffee Table: If you disassembled the coffee table in the first step, now it’s time to put it back together. Make sure all the screws and hardware are tightened securely.
5. Admire Your Handiwork! Step back and admire your newly transformed coffee table! You did it!
Extra Tips and Tricks for a Professional Finish
* Don’t Rush the Process: Take your time and allow each coat of primer, paint, and sealer to dry completely before moving on to the next step. Rushing the process can lead to a less-than-perfect finish.
* Use Quality Materials: Investing in good quality sandpaper, primer, paint, and sealer will make a big difference in the final result.
* Practice Your Painting Technique: Before you start painting your coffee table, practice your technique on a piece of scrap wood or cardboard. This will help you get a feel for the paint and ensure that you’re applying it evenly.
* Consider Adding Decorative Elements: Once your coffee table is painted and sealed, you can add decorative elements such as stencils, decals, or even new hardware to further personalize it.
* Clean Your Brushes and Rollers Immediately: Clean your brushes and rollers immediately after use to prevent the paint from drying and ruining them.
* Choose the Right Paint Finish: Consider the overall look you’re going for when choosing your paint finish. Matte finishes are great for a more rustic or farmhouse look, while glossy finishes are more modern and sleek.
* Distressing Techniques: If you’re going for a vintage or distressed look, you can use sandpaper to lightly sand away some of the paint in certain areas. This will reveal the underlying wood and create a worn, aged appearance.
* Staining Instead of Painting: If you prefer the look of natural wood, you can stain your coffee table instead of painting it. Choose a stain color that complements your existing décor.
* Protect
Conclusion
So, there you have it! Mastering the art of growing chili peppers doesn’t require a green thumb blessed by the gardening gods. It’s about understanding their needs and providing the right environment. This DIY trick, focusing on [specific aspect of the trick mentioned in the main article, e.g., creating a nutrient-rich soil mix, building a mini-greenhouse, or using coffee grounds as fertilizer], is a game-changer because it directly addresses [explain why it’s so effective, e.g., the chili peppers’ need for well-draining soil, protection from early frosts, or a boost of nitrogen]. It’s not just about saving money; it’s about giving your chili peppers the personalized care they deserve, leading to a more abundant and flavorful harvest.
Why is this a must-try? Because it empowers you to take control of your chili pepper growing journey. You’re no longer reliant on expensive store-bought solutions or generic advice. You’re crafting a solution tailored to your specific climate, soil conditions, and chili pepper variety. Imagine the satisfaction of harvesting vibrant, fiery peppers knowing you nurtured them from seedling to fruit using your own ingenuity.
But don’t stop there! Experimentation is key. Try different variations of this DIY trick to see what works best for you. For example, if you’re using [example of the trick], you could try adding [suggested variation, e.g., bone meal for extra phosphorus or Epsom salts for magnesium]. If you’re in a particularly hot climate, consider [another variation, e.g., providing afternoon shade or using a lighter-colored mulch]. The possibilities are endless!
Growing chili peppers is a rewarding experience, and this DIY trick is your secret weapon to success. It’s a simple, effective, and sustainable way to boost your chili pepper yield and enjoy the fruits (or rather, peppers) of your labor.
We’re confident that this DIY trick will revolutionize your chili pepper growing game. But the real magic happens when you put it into practice. So, grab your gardening gloves, gather your supplies, and get ready to witness the transformation.
Don’t just take our word for it. We encourage you to try this DIY trick and share your experience with us. Post photos of your thriving chili pepper plants, tell us about any variations you tried, and let us know how this trick helped you achieve a bountiful harvest. Your insights will not only inspire other gardeners but also help us refine and improve this technique for everyone. Let’s build a community of chili pepper enthusiasts, sharing our knowledge and passion for these fiery delights!
Frequently Asked Questions (FAQ)
Q: What types of chili peppers will benefit most from this DIY trick?
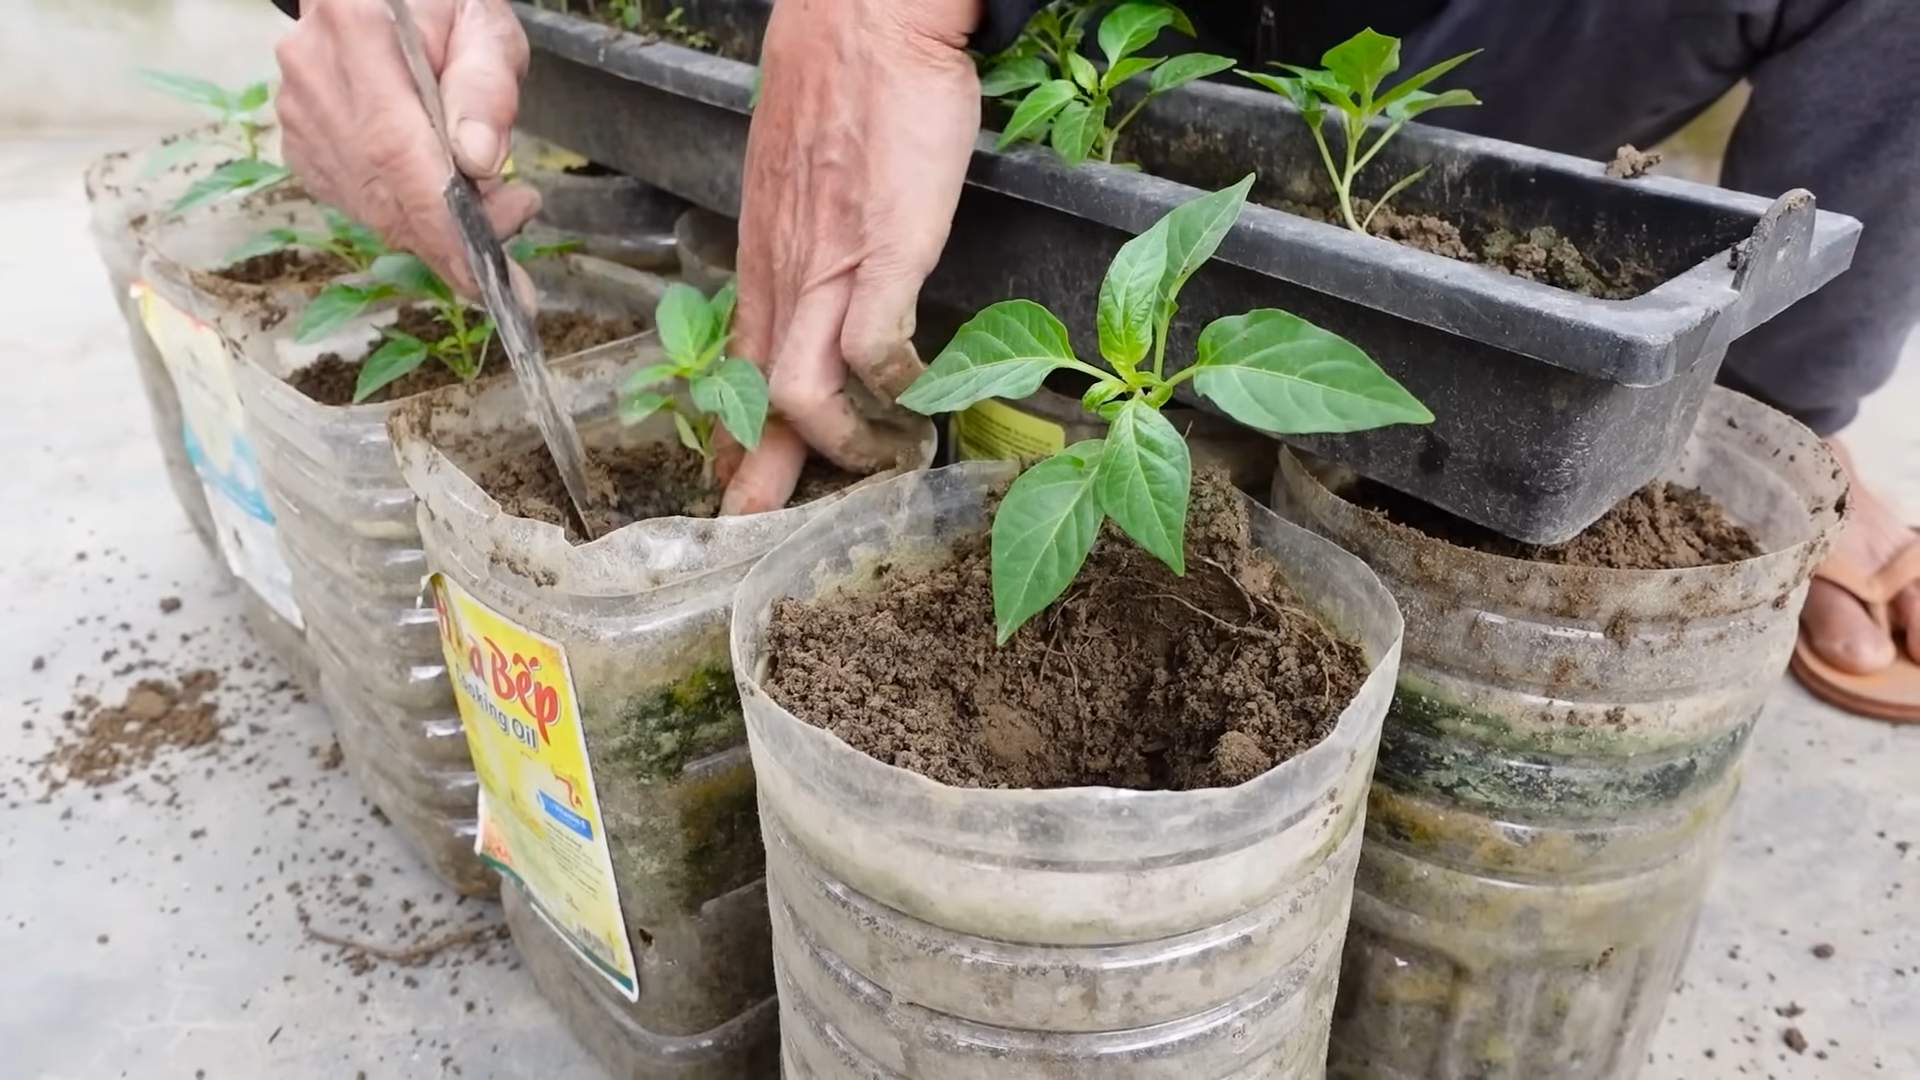
A: While this DIY trick is generally beneficial for all types of chili peppers, it’s particularly effective for varieties that are known to be heavy feeders or require specific soil conditions. For example, hotter varieties like habaneros, scotch bonnets, and ghost peppers often thrive with the extra nutrients provided by this trick. Similarly, if you’re growing chili peppers in containers, where soil nutrients can deplete quickly, this DIY solution can be a lifesaver. However, even milder varieties like jalapeños and bell peppers will appreciate the improved soil health and nutrient availability. The key is to observe your plants and adjust the application of the trick based on their individual needs.
Q: How often should I apply this DIY trick to my chili pepper plants?
A: The frequency of application depends on several factors, including the age of your plants, the type of soil you’re using, and the climate you live in. As a general guideline, you can start applying this trick every 2-3 weeks during the active growing season (spring and summer). If you’re using a particularly potent solution, such as one with a high concentration of nutrients, you may want to reduce the frequency to once a month. Monitor your plants closely for any signs of over-fertilization, such as leaf burn or excessive growth. If you notice these symptoms, reduce the frequency or dilute the solution further. Conversely, if your plants appear to be lacking nutrients, you may need to increase the frequency of application.
Q: Can I use this DIY trick on chili pepper seedlings?
A: Yes, but with caution. Seedlings are more sensitive to nutrient imbalances than mature plants. When applying this trick to seedlings, it’s crucial to dilute the solution significantly. Start with a very weak concentration (e.g., half or even a quarter of the recommended strength) and observe how your seedlings respond. If they show no signs of stress, you can gradually increase the concentration over time. Avoid applying the solution directly to the leaves of the seedlings, as this can cause burning. Instead, water the soil around the base of the plants.
Q: What are some signs that my chili pepper plants are lacking nutrients?
A: Several signs can indicate nutrient deficiencies in chili pepper plants. Yellowing leaves, especially older leaves, can be a sign of nitrogen deficiency. Stunted growth and purplish leaves can indicate phosphorus deficiency. Leaf curling and brown spots can be a sign of potassium deficiency. If you notice any of these symptoms, it’s important to address the underlying issue promptly. This DIY trick can help to correct nutrient deficiencies and restore your plants to health. However, it’s also important to rule out other potential causes, such as pests, diseases, or improper watering.
Q: Is this DIY trick safe for organic gardening?
A: The safety of this DIY trick for organic gardening depends on the ingredients you use. If you’re using all-natural and organic ingredients, such as compost, coffee grounds, and bone meal, then the trick is perfectly safe for organic gardening. However, if you’re using synthetic fertilizers or other non-organic materials, then the trick would not be considered organic. Always check the labels of your ingredients to ensure that they are certified organic if you’re committed to organic gardening practices.
Q: Can I use this DIY trick in hydroponic systems?
A: While this DIY trick is primarily designed for soil-based gardening, it may be possible to adapt it for hydroponic systems. However, it’s important to proceed with caution and do your research first. Hydroponic systems require precise nutrient solutions, and using a DIY trick could potentially disrupt the delicate balance of nutrients. If you’re considering using this trick in a hydroponic system, it’s best to start with a small-scale experiment and monitor your plants closely. You may also need to adjust the concentration of the solution to suit the specific needs of your hydroponic system.
Q: What if I don’t see results after using this DIY trick?
A: If you don’t see results after using this DIY trick, don’t get discouraged. It’s important to remember that gardening is a process of trial and error. There could be several reasons why the trick isn’t working as expected. First, make sure you’re applying the trick correctly and consistently. Second, consider whether there might be other factors affecting your plants, such as pests, diseases, or improper watering. Third, be patient. It can take time for plants to respond to changes in their environment. If you’ve ruled out other potential causes and you’re still not seeing results, you may need to adjust the ingredients or frequency of application of the trick. You can also consult with a local gardening expert for personalized advice. Remember, growing chili peppers is a journey, and every gardener faces challenges along the way.
Leave a Comment