
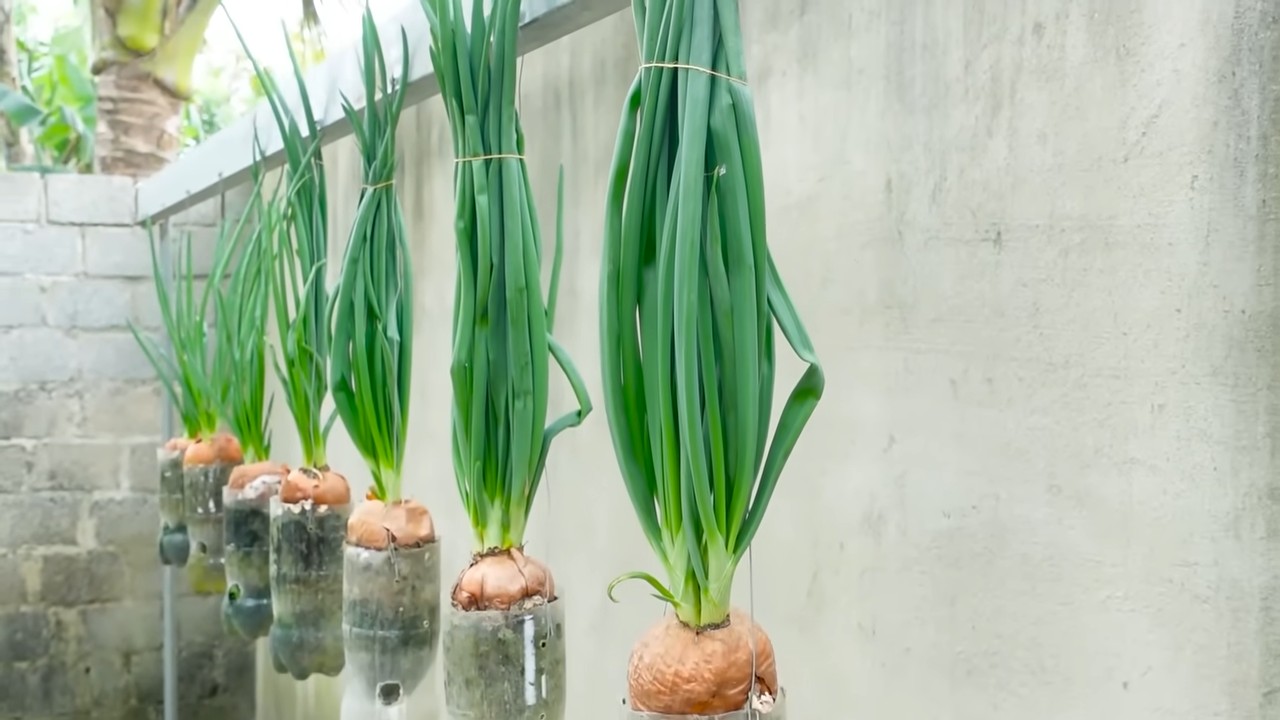
Growing onions in plastic bottles might sound like something out of a science fiction novel, but trust me, it’s a surprisingly effective and incredibly rewarding way to cultivate these kitchen staples right in your own home! Forget those sprawling garden beds – we’re talking about maximizing space and minimizing waste with this ingenious DIY trick.
For centuries, onions have been a cornerstone of cuisines worldwide, adding depth and flavor to countless dishes. From the ancient Egyptians, who revered them, to the humble family gardens of today, onions have always held a special place. But what if you live in an apartment, have limited outdoor space, or simply want a fun and eco-friendly gardening project? That’s where this clever hack comes in!
Let’s face it, buying onions from the store can be expensive, and sometimes they just don’t have that fresh, vibrant flavor you crave. Plus, who wants to deal with those pesky onion tears when you can harvest your own right from your windowsill? Growing onions in plastic bottles not only saves you money and provides you with the freshest possible ingredients, but it also reduces your environmental footprint by repurposing those discarded bottles. I’m excited to share this simple yet effective method that will have you enjoying homegrown onions in no time. Get ready to transform your kitchen into a mini-garden and impress your friends with your green thumb!
Zwiebeln in Plastikflaschen ziehen: Eine einfache DIY-Anleitung
Hallo liebe Gartenfreunde! Habt ihr euch jemals gefragt, ob es eine einfache und platzsparende Möglichkeit gibt, Zwiebeln anzubauen, besonders wenn ihr keinen großen Garten habt? Dann habe ich heute genau das Richtige für euch: Zwiebeln in Plastikflaschen ziehen! Es ist ein super einfaches DIY-Projekt, das nicht nur Spaß macht, sondern auch eine tolle Möglichkeit ist, Plastikmüll zu recyceln. Lasst uns loslegen!
Was ihr braucht:
* Leere Plastikflaschen (2-Liter-Flaschen sind ideal, aber auch andere Größen funktionieren)
* Ein scharfes Messer oder eine Schere
* Erde (am besten Blumenerde oder Gemüseerde)
* Zwiebelsetzlinge oder Zwiebeln, die bereits ausgetrieben haben
* Wasser
* Optional: Drainagematerial (Kieselsteine, Blähton)
Die Vorbereitung der Plastikflaschen
1. Reinigung der Flaschen: Zuerst müsst ihr die Plastikflaschen gründlich reinigen. Entfernt alle Etiketten und spült sie mit warmem Seifenwasser aus. Achtet darauf, dass keine Seifenreste zurückbleiben.
2. Schneiden der Flaschen: Jetzt kommt der spannende Teil! Mit einem scharfen Messer oder einer Schere schneidet ihr die Flaschen. Es gibt verschiedene Möglichkeiten, wie ihr das machen könnt:
* Option 1: Schneidet die Flasche horizontal in der Mitte durch. Der obere Teil wird später umgedreht und in den unteren Teil gesteckt.
* Option 2: Schneidet ein großes rechteckiges Fenster in die Seite der Flasche. Diese Methode ist besonders gut, wenn ihr mehrere Zwiebeln in einer Flasche anbauen möchtet.
* Option 3: Schneidet den oberen Teil der Flasche ab, lasst aber den Hals intakt. Dies ist ideal, wenn ihr nur eine Zwiebel pro Flasche anbauen möchtet.
Ich persönlich bevorzuge Option 2, da sie mir mehr Flexibilität beim Pflanzen gibt. Aber probiert einfach aus, was für euch am besten funktioniert!
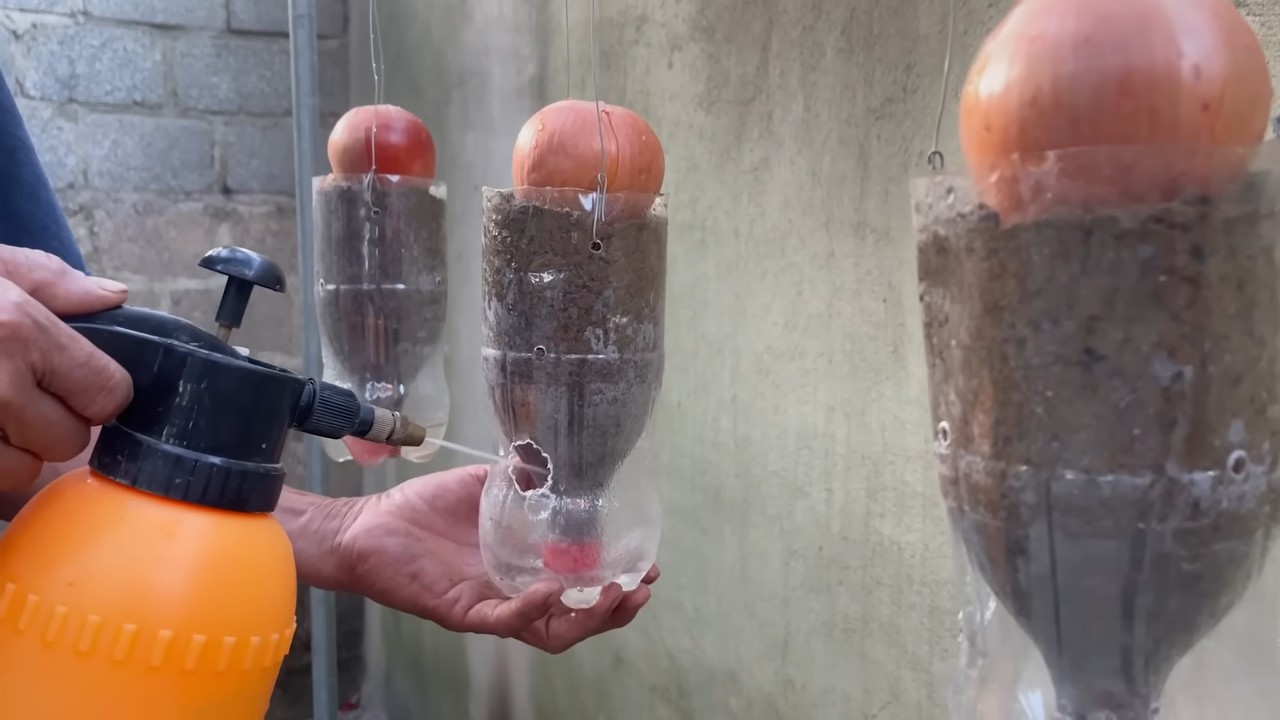
3. Drainagelöcher bohren: Egal für welche Schneidmethode ihr euch entscheidet, es ist wichtig, dass ihr Drainagelöcher in den Boden der Flasche bohrt. Diese Löcher sorgen dafür, dass überschüssiges Wasser ablaufen kann und die Zwiebeln nicht faulen. Ihr könnt dafür ein Messer, eine Schere oder einen Schraubenzieher verwenden. Achtet darauf, dass die Löcher nicht zu groß sind, damit die Erde nicht herausfällt.
Das Bepflanzen der Flaschen
1. Drainagematerial einfüllen (optional): Wenn ihr möchtet, könnt ihr eine Schicht Drainagematerial (Kieselsteine oder Blähton) auf den Boden der Flasche geben. Dies verbessert die Drainage zusätzlich und verhindert Staunässe.
2. Erde einfüllen: Füllt die Flasche mit Erde. Achtet darauf, dass die Erde locker und luftig ist. Drückt sie nicht zu fest an, da die Zwiebeln sonst Schwierigkeiten haben, Wurzeln zu schlagen. Lasst etwa 2-3 cm Platz bis zum Rand der Flasche.
3. Zwiebeln pflanzen: Nun könnt ihr die Zwiebeln pflanzen. Wenn ihr Zwiebelsetzlinge verwendet, setzt sie einfach in die Erde und bedeckt sie mit etwas Erde. Achtet darauf, dass die Spitze der Zwiebel noch aus der Erde herausschaut. Wenn ihr Zwiebeln verwendet, die bereits ausgetrieben haben, könnt ihr sie entweder ganz in die Erde setzen oder nur den unteren Teil. Auch hier sollte die Spitze herausschauen.
Wenn ihr mehrere Zwiebeln in einer Flasche anbauen möchtet, achtet darauf, dass ihr genügend Abstand zwischen den Zwiebeln lasst. Etwa 5-7 cm sind ideal.
4. Angießen: Gießt die Zwiebeln nach dem Pflanzen gründlich an. Achtet darauf, dass die Erde gut durchfeuchtet ist, aber nicht zu nass.
Die Pflege der Zwiebeln
1. Standort: Zwiebeln brauchen viel Sonne, also stellt die bepflanzten Flaschen an einen sonnigen Standort. Ein Südfenster oder ein Balkon mit viel Sonne sind ideal.
2. Gießen: Gießt die Zwiebeln regelmäßig, aber nicht zu viel. Die Erde sollte immer leicht feucht sein, aber nicht nass. Achtet darauf, dass das Wasser gut ablaufen kann, um Staunässe zu vermeiden.
3. Düngen (optional): Wenn ihr möchtet, könnt ihr die Zwiebeln während der Wachstumsphase düngen. Verwendet dafür einen organischen Flüssigdünger oder Komposttee. Düngt aber nicht zu oft, da zu viel Dünger das Wachstum der Zwiebeln beeinträchtigen kann.
4. Schädlinge und Krankheiten: Achtet auf Schädlinge und Krankheiten. Zwiebeln können von Zwiebelfliegen, Thripsen oder Pilzkrankheiten befallen werden. Wenn ihr Schädlinge oder Krankheiten entdeckt, behandelt die Zwiebeln mit einem geeigneten Mittel.
5. Ernte: Die Erntezeit hängt von der Sorte und den Wachstumsbedingungen ab. In der Regel sind Zwiebeln nach etwa 3-4 Monaten erntereif. Ihr erkennt, dass die Zwiebeln reif sind, wenn das Laub gelb wird und umknickt. Zieht die Zwiebeln vorsichtig aus der Erde und lasst sie an einem trockenen und luftigen Ort trocknen.
Weitere Tipps und Tricks
* Verschiedene Zwiebelsorten: Ihr könnt verschiedene Zwiebelsorten in Plastikflaschen anbauen, z.B. Gemüsezwiebeln, Schalotten oder Frühlingszwiebeln.
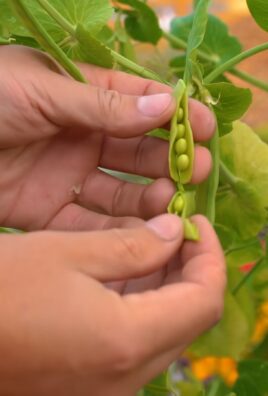
* Kombination mit anderen Pflanzen: Ihr könnt die Zwiebeln auch mit anderen Pflanzen kombinieren, z.B. mit Kräutern wie Petersilie oder Schnittlauch.
* Vertikaler Garten: Wenn ihr mehrere Plastikflaschen bepflanzt, könnt ihr einen vertikalen Garten anlegen. Befestigt die Flaschen einfach an einer Wand oder einem Zaun.
* Beschriftung: Beschriftet die Flaschen mit dem Namen der Zwiebelsorte und dem Pflanzdatum. So behaltet ihr den Überblick.
* Recycling: Wenn die Zwiebeln abgeerntet sind, könnt ihr die Erde kompostieren und die Plastikflaschen wiederverwenden oder recyceln.
Häufige Probleme und Lösungen
* Zwiebeln faulen: Wenn die Zwiebeln faulen, liegt das meistens an Staunässe. Achtet darauf, dass die Erde gut drainiert ist und gießt nicht zu viel.
* Zwiebeln wachsen nicht: Wenn die Zwiebeln nicht wachsen, kann das an zu wenig Sonne, zu wenig Dünger oder an Schädlingen liegen. Überprüft die Wachstumsbedingungen und behandelt die Zwiebeln gegebenenfalls.
* Schädlinge: Wenn die Zwiebeln von Schädlingen befallen sind, behandelt sie mit einem geeigneten Mittel. Ihr könnt auch natürliche Schädlingsbekämpfungsmittel verwenden, z.B. Neemöl oder Knoblauchsud.
Zusammenfassung
Das Anbauen von Zwiebeln in Plastikflaschen ist eine einfache und platzsparende Möglichkeit, frische Zwiebeln zu ernten. Es ist ein tolles DIY-Projekt, das nicht nur Spaß macht, sondern auch eine gute Möglichkeit ist, Plastikmüll zu recyceln. Mit den richtigen Tipps und Tricks könnt ihr auch ohne großen Garten erfolgreich Zwiebeln anbauen. Probiert es einfach aus und lasst euch überraschen! Ich wünsche euch viel Erfolg beim Gärtnern!
Conclusion
So, there you have it! Growing onions in plastic bottles isn’t just a quirky gardening experiment; it’s a genuinely effective way to maximize your yield, especially if you’re short on space or dealing with less-than-ideal soil conditions. This method allows for precise control over watering and fertilization, leading to healthier, more robust onion bulbs. Think about it: no more battling weeds competing for nutrients, no more worrying about overcrowding, and a significantly reduced risk of soilborne diseases. It’s a win-win!
But the benefits extend beyond mere practicality. This DIY trick offers a unique opportunity to connect with your food source, to witness the miracle of growth firsthand, and to appreciate the resourcefulness of sustainable gardening practices. It’s a fantastic project for families, a rewarding hobby for seasoned gardeners, and a testament to the power of innovation in the pursuit of fresh, homegrown produce.
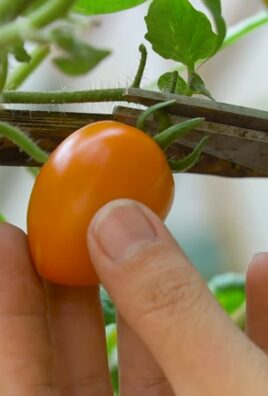
Don’t be afraid to experiment! Try different varieties of onions – red, yellow, white, or even shallots – to see which thrive best in your bottle garden. Consider adding companion plants like marigolds or basil to deter pests naturally. You could even create a tiered system by stacking multiple bottle gardens vertically, maximizing your vertical space and creating a visually stunning display.
The possibilities are endless, and the rewards are plentiful. Imagine the satisfaction of harvesting your own plump, flavorful onions, knowing that you nurtured them from tiny seedlings to culinary treasures, all within the confines of recycled plastic bottles. It’s a testament to your ingenuity and a delicious addition to your kitchen.
We wholeheartedly encourage you to give this DIY onion-growing method a try. It’s simple, cost-effective, and incredibly rewarding. Once you’ve experienced the joy of harvesting your own bottle-grown onions, you’ll wonder why you didn’t start sooner.
And most importantly, we want to hear about your experiences! Share your tips, tricks, and triumphs in the comments below. Post photos of your bottle gardens on social media and tag us. Let’s build a community of resourceful gardeners, sharing our knowledge and inspiring others to embrace the magic of growing their own food, one plastic bottle at a time. Let’s all become experts at growing onions in plastic bottles!
Frequently Asked Questions (FAQ)
What type of plastic bottles are best for growing onions?
Ideally, you should use sturdy, food-grade plastic bottles that are at least 2 liters in size. Clear or translucent bottles are preferable as they allow you to monitor the soil moisture levels and root development. Avoid using bottles that have contained harmful chemicals or pesticides. Thoroughly clean the bottles with soap and water before planting. Darker bottles can also be used, but you’ll need to be more diligent about checking the soil moisture.
How do I prepare the plastic bottles for planting?
First, thoroughly clean the bottles to remove any residue. Then, cut off the top portion of the bottle, leaving enough space for the onion to grow. Make drainage holes at the bottom of the bottle to prevent waterlogging. You can use a drill, a hot nail, or a sharp knife to create these holes. Be careful not to make the holes too large, as this could allow soil to escape.
What type of soil should I use for growing onions in plastic bottles?
A well-draining potting mix is essential. You can use a commercially available potting mix or create your own by combining equal parts of garden soil, compost, and perlite or vermiculite. The soil should be rich in organic matter and have good drainage to prevent root rot. Avoid using heavy clay soil, as it can become compacted and restrict root growth.
How often should I water my onions grown in plastic bottles?
Water your onions regularly, keeping the soil consistently moist but not waterlogged. The frequency of watering will depend on the weather conditions and the type of soil you’re using. Check the soil moisture by inserting your finger into the soil. If the top inch feels dry, it’s time to water. Avoid overwatering, as this can lead to root rot.
How much sunlight do onions need when grown in plastic bottles?
Onions need at least 6-8 hours of direct sunlight per day to thrive. Place your bottle gardens in a sunny location, such as a south-facing window or a sunny balcony. If you don’t have enough natural sunlight, you can supplement with grow lights. Rotate the bottles regularly to ensure that all sides of the onions receive adequate sunlight.
What kind of fertilizer should I use for onions in plastic bottles?
Onions are heavy feeders, so they need regular fertilization. Use a balanced fertilizer with a ratio of 10-10-10 or 20-20-20. You can also use organic fertilizers, such as compost tea or fish emulsion. Fertilize your onions every 2-3 weeks, following the instructions on the fertilizer package. Avoid over-fertilizing, as this can burn the roots.
How do I protect my onions from pests and diseases when growing them in plastic bottles?
Regularly inspect your onions for signs of pests or diseases. Common onion pests include onion maggots, thrips, and aphids. You can control these pests with insecticidal soap or neem oil. Common onion diseases include downy mildew and onion rot. Prevent these diseases by providing good air circulation and avoiding overwatering. You can also use fungicides if necessary. Companion planting with marigolds or basil can also help deter pests.
When are the onions ready to harvest from plastic bottles?
Onions are typically ready to harvest when the tops start to turn yellow and fall over. This usually happens about 90-120 days after planting. Gently pull the onions from the bottles and allow them to dry in the sun for a few days before storing them.
Can I reuse the plastic bottles for growing onions again?
Yes, you can reuse the plastic bottles for growing onions again. However, it’s important to thoroughly clean and disinfect the bottles before replanting. This will help prevent the spread of diseases. You may also need to replace the soil if it has become depleted of nutrients.
What are some variations I can try when growing onions in plastic bottles?
You can try growing different varieties of onions, such as red onions, yellow onions, or white onions. You can also try growing shallots or garlic in plastic bottles. Experiment with different soil mixes and fertilizers to see what works best for you. You can also try creating a vertical garden by stacking multiple bottle gardens on top of each other. Another variation is to use self-watering bottles, which can help to reduce the frequency of watering.
Leave a Comment