
Grow Mushrooms at Home: A Beginner’s Guide to Fantastic Fungi
Grow mushrooms at home? It sounds complicated, right? Like something only experienced mycologists can achieve. But I’m here to tell you it’s easier than you think! This article is your passport to the fascinating world of home mushroom cultivation, packed with simple DIY tricks and techniques that will have you harvesting your own delicious, nutritious fungi in no time. I’ll guide you through the process, sharing my own experiences and tips to help you avoid common pitfalls.
The practice of cultivating mushrooms boasts a rich history, dating back centuries. From ancient Chinese methods to modern-day innovations, humans have long recognized the culinary and medicinal value of these remarkable organisms. But for many, the idea of growing mushrooms at home remains a mystery, shrouded in an aura of complexity. This is where my guide comes in!
Why Grow Your Own Mushrooms?
There are so many reasons to embark on this rewarding journey! Firstly, homegrown mushrooms are incredibly fresh and flavorful, far surpassing anything you’ll find in the supermarket. Secondly, you’ll have complete control over the growing process, ensuring your mushrooms are grown without harmful pesticides or chemicals. And finally, the sheer satisfaction of nurturing these fascinating organisms from spawn to harvest is incredibly rewarding. It’s a truly unique and fulfilling experience.
So, whether you’re a seasoned gardener or a complete beginner, get ready to discover the secrets of growing mushrooms at home. Let’s dive into the practical tips and tricks that will transform your kitchen or backyard into a thriving fungal paradise!
Growing Your Own Mushrooms at Home: A Comprehensive Guide
Growing your own mushrooms is a rewarding experience, connecting you with nature and providing delicious, fresh fungi for your culinary creations. This guide will walk you through the process, from choosing your mushroom type to harvesting your bounty.
Phase 1: Choosing Your Mushroom and Gathering Supplies
- Select your mushroom variety: Oyster mushrooms are a great beginner’s choice, known for their fast growth and ease of cultivation. Other options include shiitake, lion’s mane, or even more challenging varieties like morels (though these are significantly harder to cultivate at home). Research the specific needs of your chosen mushroom before starting.
- Acquire your mushroom spawn: You can purchase mushroom spawn (the mycelium, or vegetative part of the fungus) online or from specialty gardening stores. Make sure it’s from a reputable source to avoid contamination. The type of spawn will depend on your chosen mushroom and the growing method you’ll use.
- Gather your substrate: The substrate is the material the mushrooms will grow on. For oyster mushrooms, a straw substrate is common. Other mushrooms may require different substrates, such as hardwood sawdust or coffee grounds. Ensure your substrate is clean and free of pesticides or herbicides.
- Prepare your growing container: You’ll need a container to hold your substrate and spawn. This could be a large plastic tub, a grow bag, or even a repurposed bucket. Ensure it has adequate drainage holes if using a solid container.
- Gather additional supplies: You’ll need a spray bottle for misting, a thermometer to monitor temperature, and possibly a humidity dome or plastic wrap to maintain humidity.
Phase 2: Preparing the Substrate and Inoculating the Spawn
- Prepare the straw (or chosen substrate): If using straw, soak it in water for 24-48 hours to rehydrate it. Then, drain the excess water and allow the straw to cool slightly before proceeding. For other substrates, follow the specific preparation instructions provided with your spawn.
- Pasteurize the substrate (optional but recommended): Pasteurization helps eliminate competing bacteria and molds that could harm your mushroom growth. You can do this by simmering the substrate in water for an hour, ensuring it reaches a temperature of around 160°F (71°C). Allow it to cool completely before proceeding.
- Inoculate the substrate with spawn: This is where you introduce the mushroom spawn to the substrate. Carefully mix the spawn evenly throughout the substrate, ensuring that every part of the substrate comes into contact with the spawn. Work in a clean environment to minimize the risk of contamination.
- Fill your growing container: Pack the inoculated substrate firmly into your chosen container, leaving some space at the top for air circulation. If using a bag, fill it about ¾ full.
- Seal the container (if necessary): If using a tub, you may want to cover it with plastic wrap or a lid with holes for ventilation. Grow bags usually have pre-existing ventilation holes. The goal is to maintain high humidity while allowing for some air exchange.
Phase 3: Incubation and Monitoring
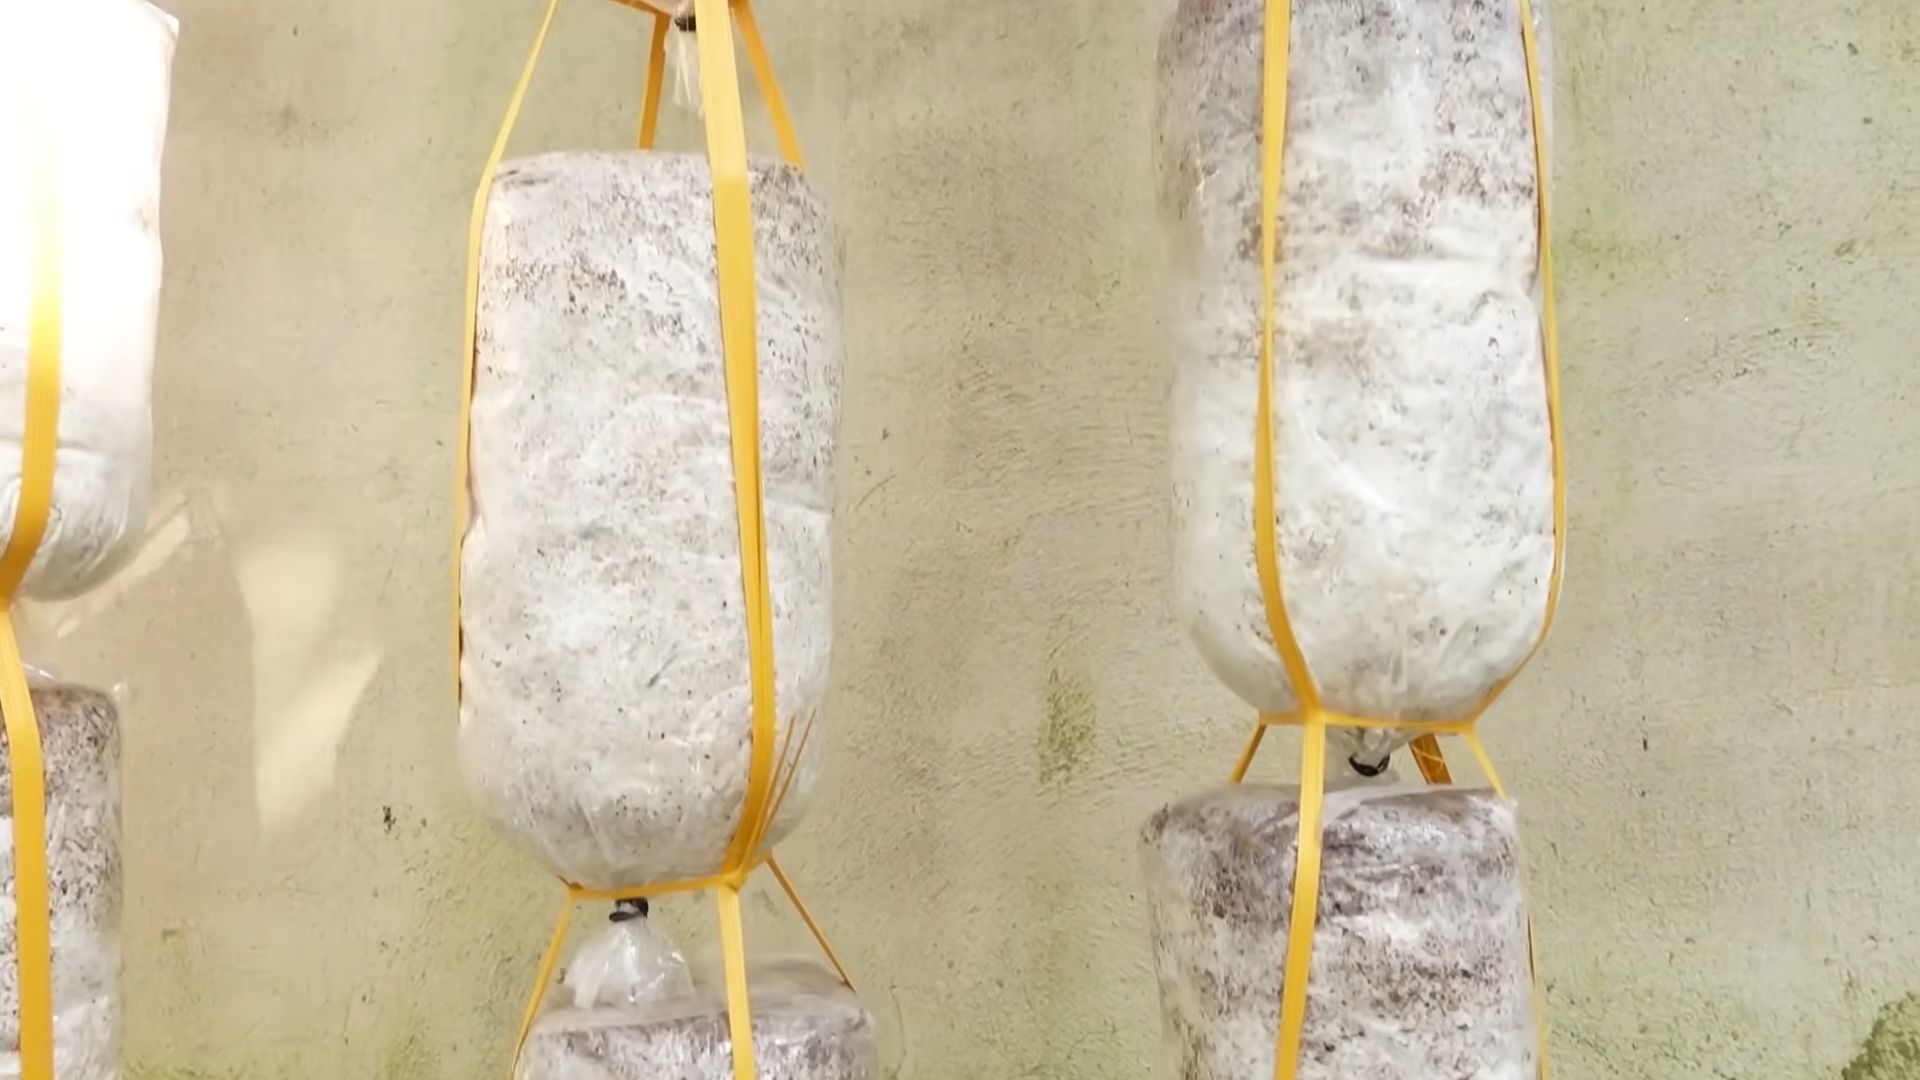
- Incubation period: This is the time it takes for the mycelium to colonize the substrate. This can take anywhere from a few weeks to several months, depending on the mushroom species and growing conditions. Keep the container in a dark, warm place (around 70-75°F or 21-24°C) with consistent humidity.
- Monitor for signs of colonization: You should see the mycelium spreading through the substrate, turning it white or a similar color depending on the mushroom type. This is a good sign that your mushrooms are growing. If you notice any mold or discoloration, it’s crucial to address it immediately to prevent contamination.
- Maintain humidity: Regularly mist the substrate with water to maintain high humidity. Avoid overwatering, as this can lead to rot. A humidity dome or plastic wrap can help maintain humidity levels.
- Monitor temperature: Maintain a consistent temperature throughout the incubation period. Fluctuations in temperature can negatively impact mushroom growth.
- Ventilation: Once colonization is complete, increase ventilation gradually to introduce more fresh air. This will help stimulate fruiting.
Phase 4: Fruiting and Harvesting
- Fruiting conditions: Once the substrate is fully colonized, you’ll need to change the growing conditions to stimulate fruiting. This usually involves introducing more light and fresh air. You may need to move your container to a location with indirect sunlight.
- Misting: Continue misting the substrate regularly to maintain high humidity. The exact frequency will depend on your environment and the type of mushroom.
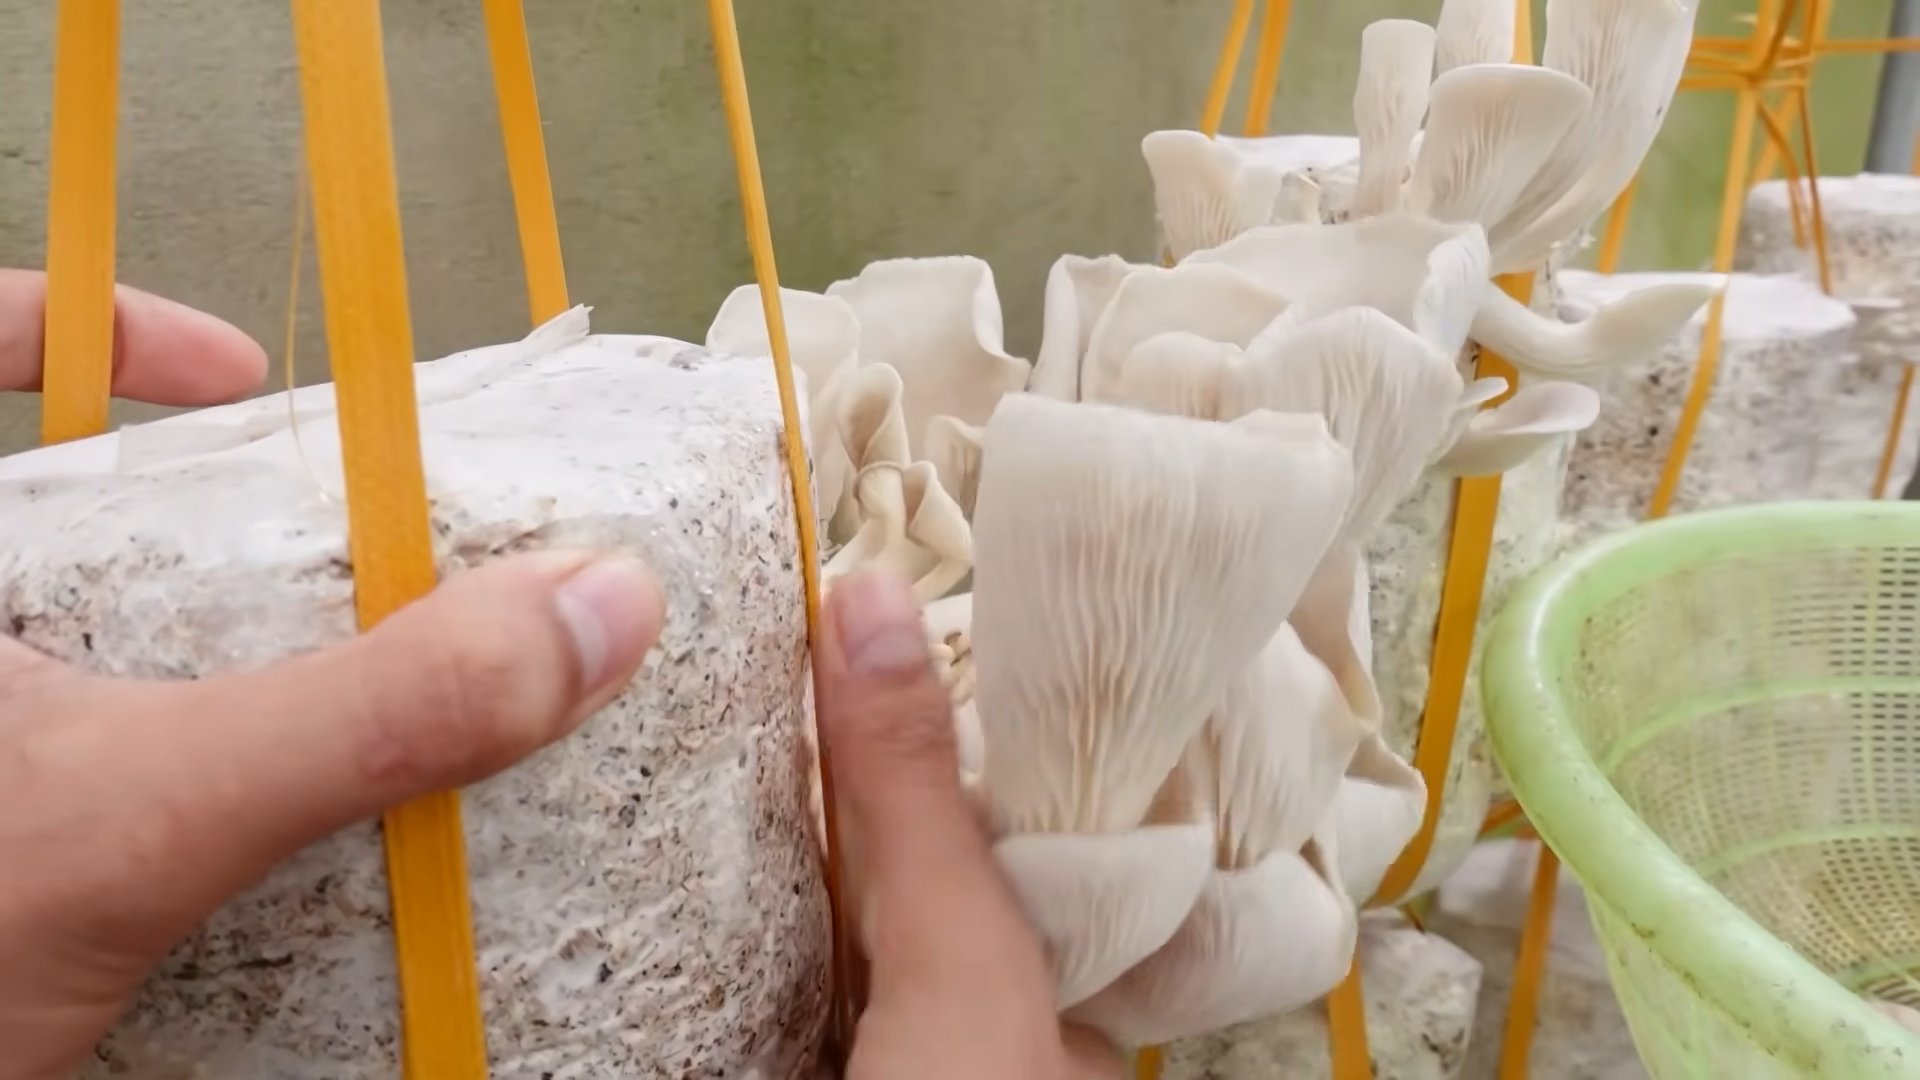
- Harvesting: Once the mushrooms reach maturity, gently twist or cut them at the base. Don’t pull them out, as this could damage the mycelium and reduce future yields. Harvesting times vary depending on the mushroom species.
- Flushing: After harvesting, you may get multiple flushes (waves of mushroom growth) from the same substrate. Continue to maintain the appropriate growing conditions to encourage further flushes.
- Substrate disposal: Once the substrate has yielded all its mushrooms, dispose of it responsibly. You can compost it or add it to your garden.
Troubleshooting Common Problems
Contamination:
If you notice mold or other unwanted organisms, it’s crucial to act quickly. Discard the contaminated substrate to prevent it from spreading. Sterilize your equipment thoroughly before starting again.
Slow Growth:
Slow growth can be caused by low temperatures, insufficient humidity, or poor quality spawn. Check your growing conditions and ensure they are optimal for your chosen mushroom species.
No Fruiting:
If your mushrooms aren’t fruiting, you may need to adjust the light, humidity, or ventilation. Ensure you’re providing the right conditions to stimulate fruiting.
Remember:
Patience is key when growing mushrooms. It takes time and attention to detail, but the reward of fresh, homegrown mushrooms is well worth the effort.
Conclusion
So there you have it! Growing your own mushrooms at home isn’t just a fun hobby; it’s a rewarding experience that connects you to the natural world and provides you with incredibly fresh, flavorful fungi. This DIY trick offers a surprisingly simple path to gourmet delights, transforming your kitchen into a miniature mushroom farm. The ease of the process, coupled with the incredible taste and satisfaction of harvesting your own mushrooms, makes this a must-try for anyone, regardless of their gardening experience. You’ll be amazed at how quickly you can go from spore to sauté! The cost savings alone are significant, but the real reward lies in the unique flavor and unparalleled freshness of homegrown mushrooms. You’ll never look at store-bought mushrooms the same way again.
Beyond the basic techniques outlined, there’s a world of possibilities for experimentation. Consider trying different mushroom varieties. Oyster mushrooms are known for their ease of cultivation and delicious, slightly sweet flavor. Shiitake mushrooms offer a more robust, earthy taste and are prized in many cuisines. Lion’s mane mushrooms, with their unique appearance and purported health benefits, are another exciting option. Each variety presents its own unique challenges and rewards, encouraging you to explore the fascinating world of mycology.
You can also experiment with different substrates. While straw is a readily available and effective option, you can also explore using coffee grounds (a wonderfully sustainable choice!), hardwood sawdust, or even repurposed cardboard. Remember to sterilize your chosen substrate thoroughly to prevent mold contamination. The key is to maintain a clean and consistent environment to encourage healthy mushroom growth. Furthermore, consider adjusting the humidity and temperature within your growing space to optimize conditions for your chosen mushroom species. A simple humidifier or a thermostatically controlled environment can make a significant difference.
Don’t be afraid to get creative! This DIY project is all about experimentation and learning. Each attempt will teach you something new, refining your technique and leading to even more bountiful harvests. The journey of growing your own mushrooms is as rewarding as the delicious results. So, gather your supplies, choose your favorite mushroom variety, and embark on this exciting culinary adventure.
We strongly encourage you to try this Grow Mushrooms at Home method and share your experience with us! Post your photos and results on social media using #HomegrownMushrooms and #DIYMushroomFarm. We’d love to see your thriving mushroom gardens and hear about your successes (and even your learning experiences!). Let’s build a community of home mushroom growers, sharing tips, tricks, and delicious recipes. Happy growing!
Frequently Asked Questions
What kind of equipment do I need to grow mushrooms at home?
The equipment needed is surprisingly minimal. You’ll primarily need a suitable container (a plastic bin or even a large glass jar works well), your chosen substrate (straw, coffee grounds, etc.), mushroom spawn (the “seeds” of your mushrooms), a misting bottle for maintaining humidity, and a dark, cool place for your mushrooms to fruit. More advanced setups might include a humidifier or a temperature-controlled environment, but these are not essential for beginners.
How long does it take to grow mushrooms at home?
The time it takes varies depending on the mushroom species and growing conditions. However, you can generally expect to see mushrooms fruiting anywhere from a few weeks to several months after you’ve inoculated your substrate. Patience is key! Regular monitoring and maintenance will help ensure a successful harvest.
What are the best mushroom varieties for beginners?
Oyster mushrooms are often recommended for beginners due to their relatively easy cultivation and fast growth. They are also quite forgiving if conditions aren’t perfectly ideal. Shiitake mushrooms are another good option, offering a more robust flavor and a slightly more challenging, but still manageable, growing process.
What if my mushrooms don’t grow?
Several factors can affect mushroom growth. Ensure your substrate is properly sterilized to prevent mold contamination. Maintain appropriate humidity levels (typically around 90-95%) and temperature (depending on the mushroom species). Make sure your growing area has adequate ventilation but is also protected from direct sunlight. If you’re still having trouble, research the specific needs of your chosen mushroom variety and troubleshoot accordingly. Don’t be discouraged – even experienced growers encounter setbacks sometimes!
Can I use any type of container?
While plastic bins and glass jars are common choices, you can adapt various containers to suit your needs. The key is to ensure the container is clean, allows for adequate ventilation (with holes for airflow), and is large enough to accommodate your chosen substrate and the growing mushrooms. Avoid using materials that might leach harmful chemicals into your substrate.
Where can I buy mushroom spawn?
Mushroom spawn can be purchased online from various reputable suppliers or at some garden centers and nurseries. Always choose a reputable source to ensure the quality and viability of your spawn. Be sure to select spawn that is appropriate for your chosen mushroom variety and growing method.
Are homegrown mushrooms safe to eat?
Yes, provided you follow proper hygiene practices throughout the growing process and use clean, sterilized equipment. Always ensure your substrate is free from contaminants and that your growing environment is clean and well-ventilated. If you have any doubts about the safety of your homegrown mushrooms, it’s best to err on the side of caution and discard them. Never consume mushrooms you are unsure about.
Leave a Comment