
Grow Asparagus at Home and unlock the secrets to a thriving, delicious garden right outside your door! Imagine stepping into your backyard and harvesting fresh, tender asparagus spears, knowing you nurtured them from tiny crowns to culinary delights. Forget those bland, overpriced stalks from the grocery store; with a little know-how, you can enjoy the unparalleled flavor of homegrown asparagus.
Asparagus has a rich history, dating back to ancient Greece and Rome, where it was prized for its medicinal properties and delicate taste. Emperors and commoners alike relished this springtime delicacy. Today, the tradition continues, and you can easily participate in this culinary legacy.
Why should you learn to grow asparagus at home? Well, for starters, it’s incredibly rewarding! Plus, asparagus is a perennial, meaning once established, it will produce for 15-20 years! Think of it as an investment in your future meals and a sustainable way to enjoy fresh produce. This DIY guide will provide you with simple, effective tricks and hacks to ensure your asparagus patch flourishes, even if you’re a complete beginner. I’m excited to share my tips and tricks with you, so let’s get started!
Spargel selbst anbauen: Dein umfassender DIY-Leitfaden
Hallo Gartenfreunde! Ich freue mich riesig, euch heute zu zeigen, wie ihr euren eigenen Spargel anbauen könnt. Es mag anfangs etwas einschüchternd wirken, aber glaubt mir, mit ein wenig Geduld und den richtigen Schritten werdet ihr bald köstlichen, frischen Spargel direkt aus eurem Garten ernten können. Los geht’s!
Warum Spargel selbst anbauen?
Bevor wir ins Detail gehen, lasst mich kurz erklären, warum ich so begeistert vom Spargelanbau bin. Erstens ist der Geschmack von frisch geerntetem Spargel unschlagbar. Er ist viel süßer und zarter als der, den man im Supermarkt findet. Zweitens ist es eine nachhaltige Möglichkeit, an frisches Gemüse zu kommen. Und drittens, und das ist vielleicht das Wichtigste, ist es unglaublich befriedigend, etwas selbst anzubauen und zu ernten.
Was du für den Spargelanbau brauchst
Bevor wir loslegen, hier eine Liste der Dinge, die du benötigst:
* Spargelpflanzen (auch Spargelspitzen oder Spargelwurzeln genannt): Am besten sind einjährige Pflanzen.
* Einen sonnigen Standort: Spargel liebt die Sonne!
* Gut durchlässigen Boden: Spargel mag keine Staunässe.
* Kompost oder gut verrotteten Mist: Für die Bodenverbesserung.
* Schaufel oder Spaten: Zum Graben der Pflanzgräben.
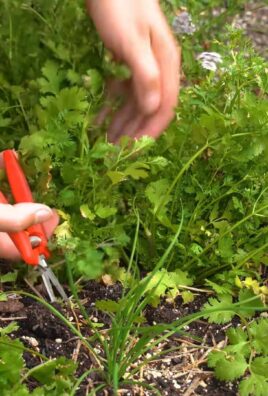
* Gartenschere: Zum Zurückschneiden der Pflanzen.
* Mulchmaterial (z.B. Stroh oder Holzhackschnitzel): Um den Boden feucht zu halten und Unkraut zu unterdrücken.
* Geduld: Spargel braucht Zeit, um zu wachsen!
Die Vorbereitung: Der richtige Standort und Boden
Der Erfolg deines Spargelprojekts hängt stark von der richtigen Vorbereitung ab. Hier sind die wichtigsten Punkte:
* Standortwahl: Wähle einen sonnigen Standort, der mindestens sechs Stunden Sonne pro Tag bekommt. Spargel braucht viel Licht, um gut zu wachsen.
* Bodenanalyse: Spargel bevorzugt einen gut durchlässigen, sandigen Lehmboden mit einem pH-Wert zwischen 6,5 und 7,5. Wenn dein Boden sehr lehmig ist, solltest du ihn mit Kompost, Sand und organischem Material verbessern.
* Bodenverbesserung: Grabe den Boden großzügig um und mische reichlich Kompost oder gut verrotteten Mist ein. Das verbessert die Bodenstruktur und versorgt die Pflanzen mit Nährstoffen. Entferne alle Steine und Wurzeln, die du findest.
* Unkrautbekämpfung: Entferne gründlich alle Unkräuter, bevor du mit dem Pflanzen beginnst. Spargel konkurriert nicht gut mit Unkraut, besonders in den ersten Jahren.
Spargel pflanzen: Schritt für Schritt
Jetzt kommt der spannende Teil: das Pflanzen der Spargelwurzeln!
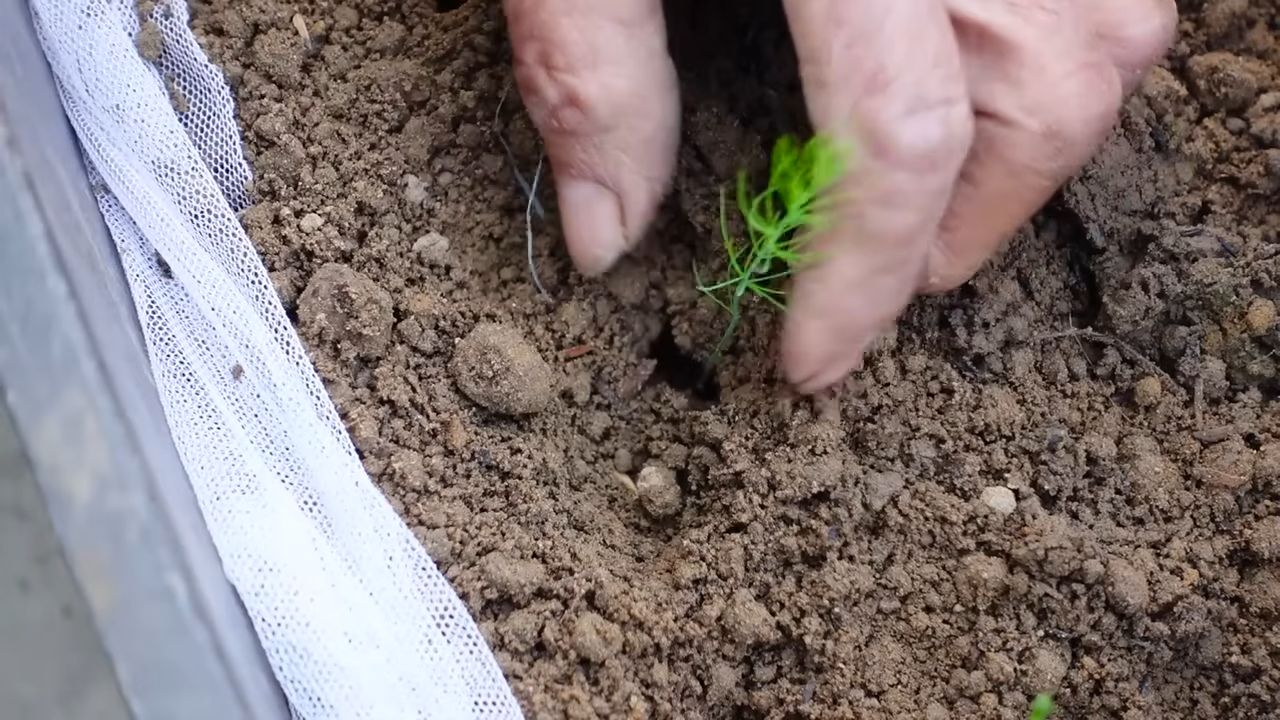
1. Gräben ausheben: Grabe Gräben, die etwa 20-25 cm tief und 30 cm breit sind. Der Abstand zwischen den Gräben sollte etwa 120-150 cm betragen. Das gibt den Pflanzen genügend Platz zum Wachsen.
2. Hügel formen: Forme in der Mitte jedes Grabens einen kleinen Hügel aus Erde. Dieser Hügel dient als Basis für die Spargelwurzeln.
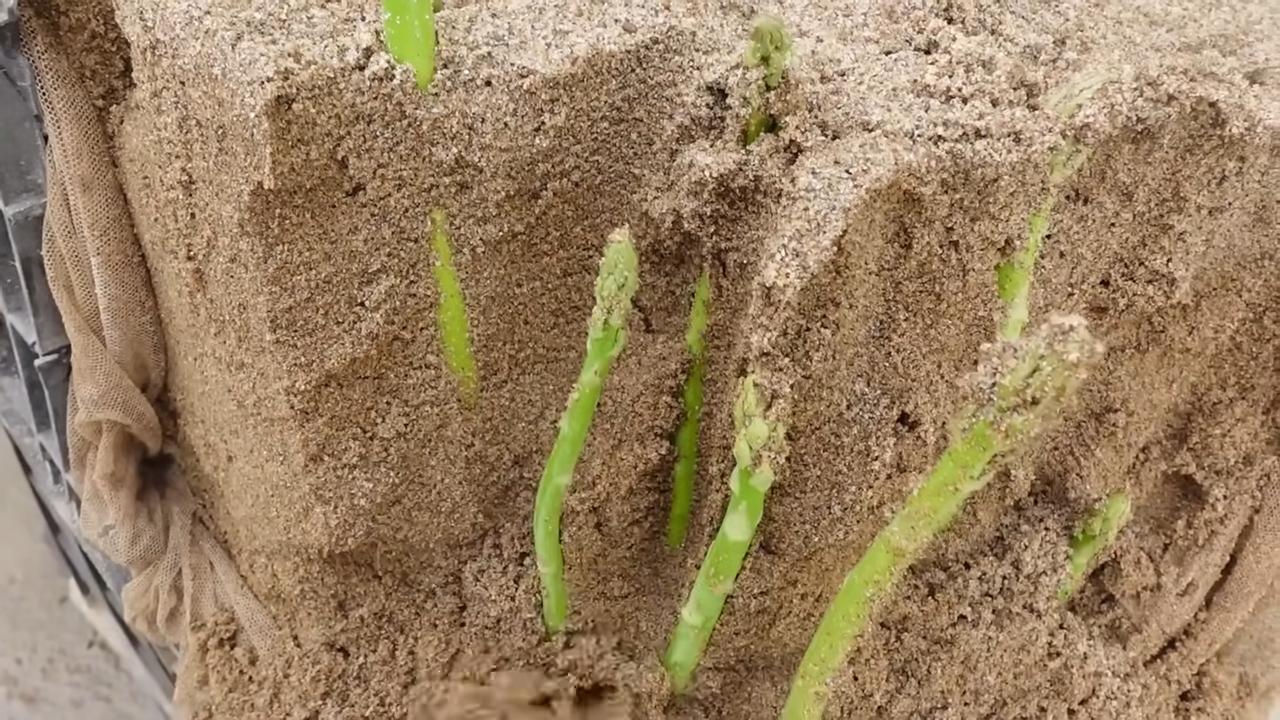
3. Spargelwurzeln platzieren: Lege die Spargelwurzeln auf die Hügel und verteile die Wurzeln gleichmäßig. Achte darauf, dass die Knospen (die kleinen “Augen”, aus denen die Spargeltriebe wachsen) nach oben zeigen.
4. Mit Erde bedecken: Bedecke die Wurzeln mit etwa 5-8 cm Erde. Gieße die Pflanzen anschließend gründlich.
5. Nach und nach auffüllen: Fülle die Gräben im Laufe der Saison nach und nach mit Erde auf, während die Spargelpflanzen wachsen. Das fördert die Bildung neuer Triebe.
6. Mulchen: Bedecke den Boden um die Pflanzen mit Mulchmaterial wie Stroh oder Holzhackschnitzeln. Das hilft, den Boden feucht zu halten, Unkraut zu unterdrücken und den Boden vor Temperaturschwankungen zu schützen.
Die Pflege: Gießen, Düngen und Unkrautbekämpfung
Die richtige Pflege ist entscheidend für eine erfolgreiche Spargelernte.
* Gießen: Gieße die Pflanzen regelmäßig, besonders in trockenen Perioden. Spargel braucht ausreichend Feuchtigkeit, um gut zu wachsen. Achte aber darauf, Staunässe zu vermeiden.
* Düngen: Dünge die Pflanzen im Frühjahr und im Herbst mit einem organischen Dünger oder Kompost. Spargel ist ein Starkzehrer und benötigt ausreichend Nährstoffe.
* Unkrautbekämpfung: Halte den Bereich um die Pflanzen unkrautfrei. Unkraut konkurriert mit dem Spargel um Nährstoffe und Wasser.
* Pflanzenschutz: Achte auf Schädlinge wie Spargelkäfer. Sammle sie ab oder verwende bei Bedarf ein biologisches Insektizid.
Die Ernte: Geduld zahlt sich aus!
Hier kommt der wichtigste Punkt: Geduld! Im ersten Jahr nach dem Pflanzen solltest du keinen Spargel ernten. Lass die Pflanzen wachsen und sich entwickeln. Im zweiten Jahr kannst du vorsichtig einige wenige Triebe ernten. Ab dem dritten Jahr kannst du dann richtig loslegen.
* Erntezeitpunkt: Ernte den Spargel, wenn die Triebe etwa 15-20 cm lang sind und einen Durchmesser von etwa 1-2 cm haben.
* Erntemethode: Schneide die Triebe knapp unter der Erdoberfläche mit einem scharfen Messer ab. Achte darauf, die umliegenden Triebe nicht zu beschädigen.
* Erntedauer: Ernte den Spargel etwa 6-8 Wochen lang. Danach solltest du die Pflanzen ruhen lassen, damit sie sich für das nächste Jahr erholen können.
Nach der Ernte: Die richtige Pflege für das nächste Jahr
Auch nach der Ernte ist die richtige Pflege wichtig, um eine reiche Ernte im nächsten Jahr zu gewährleisten.
* Pflanzen stehen lassen: Lass die Spargelpflanzen nach der Ernte wachsen und sich entwickeln. Sie bilden dann das Laub, das für die Photosynthese und die Speicherung von Nährstoffen wichtig ist.
* Düngen: Dünge die Pflanzen im Herbst noch einmal mit Kompost oder einem organischen Dünger.
* Zurückschneiden: Schneide das Laub im Spätherbst oder im frühen Frühjahr zurück, wenn es gelb und trocken geworden ist.
* Mulchen: Bedecke den Boden um die Pflanzen mit einer dicken Schicht Mulchmaterial. Das schützt die Pflanzen vor Frost und hält den Boden feucht.
Häufige Probleme und Lösungen
Auch beim Spargelanbau können Probleme auftreten. Hier sind einige der häufigsten Probleme und wie du sie lösen kannst:
* Spargelkäfer: Sammle die Käfer und ihre Larven ab oder verwende ein biologisches Insektizid.
* Rostpilz: Sorge für eine gute Belüftung und vermeide Staunässe. Entferne befallene Pflanzenteile.
* Unkraut: Halte den Bereich um die Pflanzen unkrautfrei.
Zusätzliche Tipps für den erfolgreichen Spargelanbau
Hier sind noch ein paar zusätzliche Tipps, die dir helfen können, deinen Spargel erfolgreich anzubauen:
* Wähle die richtige Sorte: Es gibt verschiedene Spargelsorten, die sich in Geschmack, Ertrag und Krankheitsresistenz unterscheiden. Informiere dich, welche Sorte für deine Region am besten geeignet ist.
* Kaufe hochwertige Pflanzen: Kaufe deine Spargelpflanzen bei einem vertrauenswürdigen Händler. Achte darauf, dass die Pflanzen gesund und kräftig sind.
* Sei geduldig: Spargel braucht Zeit, um zu wachsen. Sei geduldig und gib nicht auf, wenn es nicht sofort klappt.
* Genieße die Ernte: Wenn du endlich deinen eigenen Spargel ernten kannst, genieße ihn in vollen Zügen!
Ich hoffe, dieser Leitfaden hat dir geholfen,
Conclusion
So, there you have it! Growing asparagus at home isn’t just a gardening project; it’s an investment in years of delicious, fresh harvests right from your backyard. We’ve walked you through the process, from selecting the right crowns to nurturing your asparagus bed for optimal growth. The initial patience required is undoubtedly worth the reward of snapping off those tender spears each spring.
Why is this DIY trick a must-try? Because store-bought asparagus simply can’t compare to the flavor and freshness of homegrown. You control the growing conditions, ensuring organic practices and avoiding the pesticides often used in commercial farming. Plus, there’s an undeniable satisfaction in harvesting something you’ve nurtured from the ground up. It’s a connection to nature and a sustainable way to enjoy one of spring’s most prized vegetables.
But the benefits extend beyond just taste and sustainability. Growing your own asparagus can be a surprisingly cost-effective way to enjoy this delicacy. While asparagus crowns might seem like an initial investment, remember that a well-maintained asparagus bed can produce for 15 to 20 years or even longer! Think of all the money you’ll save on grocery store asparagus over the years.
Looking for variations? Consider companion planting to enhance your asparagus bed. Herbs like basil, parsley, and marigolds can deter pests and attract beneficial insects. You can also experiment with different asparagus varieties to find your favorite flavor profile. ‘Jersey Knight’ is a popular choice for its high yield and disease resistance, while ‘Purple Passion’ offers a sweeter, milder flavor and a beautiful color. For warmer climates, ‘UC 157’ is a heat-tolerant option.
Don’t have a large garden? Asparagus can even be grown in raised beds or large containers, making it accessible to those with limited space. Just ensure the container is deep enough to accommodate the extensive root system.
We wholeheartedly encourage you to give this DIY trick a try. It’s a rewarding experience that will bring you years of fresh, delicious asparagus. Imagine the spring meals you’ll create, featuring your very own homegrown spears! From simple steamed asparagus with butter to elegant asparagus tarts and vibrant spring salads, the possibilities are endless.
And most importantly, we want to hear about your experience! Share your tips, successes, and even your challenges in the comments below. Let’s create a community of asparagus growers, sharing our knowledge and inspiring others to embark on this rewarding gardening adventure. Did you try a particular variety? Did you find a unique way to deter pests? Did you create a particularly delicious asparagus recipe? We want to know! Your insights can help others succeed in their own asparagus-growing endeavors. So, grab your gardening gloves, order your asparagus crowns, and get ready to enjoy the fruits (or rather, vegetables) of your labor! Growing asparagus at home is a journey worth taking.
Frequently Asked Questions (FAQ)
How long does it take to grow asparagus from crowns?
It typically takes two to three years to harvest asparagus spears after planting crowns. The first year is crucial for the plants to establish a strong root system. You should refrain from harvesting any spears during the first year and only harvest lightly in the second year. By the third year, you can enjoy a more substantial harvest. Patience is key!
What is the best time of year to plant asparagus crowns?
The best time to plant asparagus crowns is in early spring, as soon as the ground can be worked. This allows the plants to establish themselves before the heat of summer. In warmer climates, you can also plant in the fall.
What kind of soil is best for growing asparagus?
Asparagus prefers well-drained, sandy loam soil with a pH between 6.5 and 7.5. Amend heavy clay soil with compost and other organic matter to improve drainage. Good drainage is essential to prevent root rot.
How deep should I plant asparagus crowns?
Plant asparagus crowns in trenches that are 6-8 inches deep. Space the crowns about 12-18 inches apart. Cover the crowns with about 2 inches of soil initially, and gradually fill in the trench as the plants grow.
How often should I water asparagus plants?
Water asparagus plants regularly, especially during dry periods. Aim to keep the soil consistently moist but not waterlogged. A good rule of thumb is to water deeply once or twice a week, depending on the weather.
How do I fertilize asparagus plants?
Fertilize asparagus plants in early spring before the spears emerge and again after the harvest season. Use a balanced fertilizer or compost. Avoid over-fertilizing, as this can lead to excessive foliage growth at the expense of spear production.
What are common asparagus pests and diseases?
Common asparagus pests include asparagus beetles, aphids, and cutworms. Diseases include asparagus rust and Fusarium crown and root rot. Monitor your plants regularly and take action to control pests and diseases as needed. Organic pest control methods, such as introducing beneficial insects or using insecticidal soap, are often effective.
How do I harvest asparagus spears?
Harvest asparagus spears when they are 6-8 inches tall and about as thick as your finger. Snap or cut the spears off at ground level. Avoid harvesting all the spears at once, as this can weaken the plants. Leave some spears to fern out and replenish the plant’s energy reserves.
How long does an asparagus bed last?
A well-maintained asparagus bed can last for 15-20 years or even longer. Proper care, including regular watering, fertilizing, and pest control, is essential for long-term productivity.
Can I grow asparagus in containers?
Yes, you can grow asparagus in containers, but you’ll need a large, deep container to accommodate the extensive root system. Choose a container that is at least 18 inches deep and wide. Use a well-draining potting mix and water regularly. Container-grown asparagus may require more frequent fertilization than asparagus grown in the ground.
What are some good companion plants for asparagus?
Good companion plants for asparagus include basil, parsley, marigolds, tomatoes, and peppers. These plants can help deter pests and attract beneficial insects. Avoid planting asparagus near onions, garlic, or potatoes, as these plants can inhibit asparagus growth.
How do I overwinter asparagus plants?
In the fall, after the ferns have turned brown, cut them back to ground level. Apply a layer of mulch to protect the crowns from freezing temperatures. In colder climates, you may need to provide additional protection, such as covering the bed with a tarp or blanket.
Is it possible to grow asparagus from seed?
Yes, it is possible to grow asparagus from seed, but it takes longer to establish a productive bed compared to planting crowns. Start seeds indoors in early spring and transplant the seedlings to the garden after the last frost. Be prepared to wait at least three years before harvesting any spears.
What if my asparagus spears are thin and spindly?
Thin and spindly asparagus spears can be a sign of several issues, including insufficient watering, poor soil fertility, or overcrowding. Ensure that your plants are receiving adequate water and fertilizer. If the plants are overcrowded, thin them out by removing some of the older crowns.
How do I prevent asparagus beetles from damaging my plants?
Asparagus beetles can be a nuisance, but there are several ways to control them. Handpicking the beetles and their larvae is an effective method for small gardens. You can also use insecticidal soap or neem oil to control infestations. Encourage beneficial insects, such as ladybugs and lacewings, which prey on asparagus beetles.
Leave a Comment