
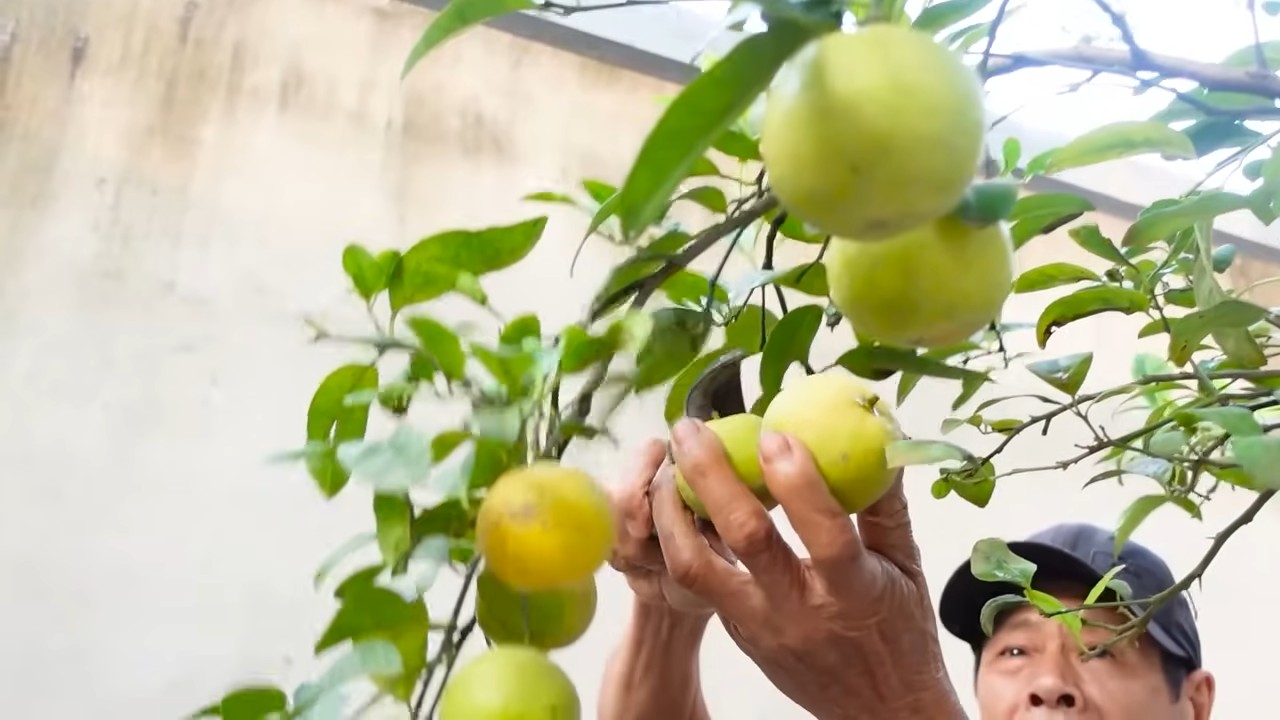
Juicy lemons all year – imagine plucking a sun-kissed, perfectly ripe lemon straight from your own tree, even in the dead of winter! Sounds like a dream, right? Well, it doesn’t have to be! For centuries, cultivating citrus has been a symbol of prosperity and sunshine, bringing a touch of the Mediterranean to homes around the world. From ancient Roman gardens to modern-day balconies, the allure of fresh, homegrown lemons has never faded.
But let’s be honest, getting your lemon tree to produce those juicy, flavorful fruits consistently can feel like a real challenge. That’s where our DIY tricks and hacks come in! We’re diving deep into simple, effective methods that will help you maximize your lemon yield, no matter where you live or what your gardening experience is.
Why do you need these tricks? Because store-bought lemons just don’t compare to the vibrant taste and satisfaction of harvesting your own. Plus, knowing you’ve nurtured your tree to produce an abundance of juicy lemons all year round is incredibly rewarding. So, get ready to roll up your sleeves, grab your gardening gloves, and let’s unlock the secrets to a bountiful lemon harvest!
Zitronenfreude das ganze Jahr: So konservierst du Zitronen wie ein Profi!
Hey Leute, wer liebt nicht den frischen, spritzigen Geschmack von Zitronen? Ich bin total verrückt danach! Aber Zitronen können manchmal ganz schön schnell schlecht werden, und es ist super ärgerlich, wenn man eine braucht und sie dann schon hart und ausgetrocknet im Kühlschrank liegt. Deshalb zeige ich euch heute meine Lieblingsmethoden, um Zitronen haltbar zu machen – damit ihr das ganze Jahr über Zitronenfreude habt!
Warum Zitronen konservieren?
Bevor wir loslegen, kurz ein paar Gründe, warum es sich lohnt, Zitronen zu konservieren:
* Verlängerte Haltbarkeit: Klar, das ist der Hauptgrund! Mit den richtigen Methoden könnt ihr Zitronen wochen-, sogar monatelang frisch halten.
* Weniger Lebensmittelverschwendung: Wir alle kennen das: Eine halbe Zitrone liegt im Kühlschrank und wird vergessen. Durch Konservierung vermeidet ihr das.
* Immer griffbereit: Egal ob für Limonade, Kuchen oder zum Verfeinern von Gerichten – Zitronen sind immer zur Hand.
* Saisonale Vorteile nutzen: Wenn Zitronen gerade besonders günstig sind, könnt ihr euch einen Vorrat anlegen und ihn konservieren.
Methode 1: Zitronen im Kühlschrank lagern (der einfache Trick)
Diese Methode ist super simpel und verlängert die Haltbarkeit von Zitronen im Kühlschrank deutlich.
Was ihr braucht:
* Zitronen
* Luftdichte Behälter (z.B. Frischhaltedosen oder Gefrierbeutel)
* Wasser
Schritt-für-Schritt-Anleitung:
1. Zitronen vorbereiten: Wascht die Zitronen gründlich unter kaltem Wasser ab. Achtet darauf, eventuelle Verschmutzungen zu entfernen. Trocknet sie anschließend gut ab.
2. Behälter vorbereiten: Füllt den luftdichten Behälter mit kaltem Wasser. Das Wasser sollte die Zitronen später vollständig bedecken.
3. Zitronen einlegen: Legt die Zitronen in den Behälter mit Wasser. Achtet darauf, dass sie vollständig mit Wasser bedeckt sind. Wenn nötig, beschwert sie mit einem kleinen Teller oder einem sauberen Stein, damit sie untergetaucht bleiben.
4. Verschließen und lagern: Verschließt den Behälter luftdicht und stellt ihn in den Kühlschrank.
5. Wasser wechseln: Wechselt das Wasser alle paar Tage (am besten alle 2-3 Tage). Das verhindert, dass sich Schimmel bildet und hält die Zitronen frisch.
Wichtige Tipps:
* Verwendet nur unbeschädigte Zitronen.
* Achtet darauf, dass der Behälter wirklich luftdicht ist.
* Das Wasser sollte immer kalt sein.
Methode 2: Zitronensaft einfrieren (für den schnellen Gebrauch)
Wenn ihr Zitronen hauptsächlich für den Saft verwendet, ist das Einfrieren eine tolle Option.
Was ihr braucht:
* Zitronen
* Zitronenpresse
* Eiswürfelbehälter oder Gefrierbeutel
* Trichter (optional)
Schritt-für-Schritt-Anleitung:
1. Zitronen auspressen: Presst die Zitronen mit einer Zitronenpresse aus. Achtet darauf, so viel Saft wie möglich zu gewinnen.
2. Saft filtern (optional): Wenn ihr keine Kerne oder Fruchtfleisch im Saft haben möchtet, könnt ihr ihn durch ein feines Sieb filtern.
3. Eiswürfelbehälter befüllen: Füllt den Zitronensaft in einen Eiswürfelbehälter. Ein Trichter kann dabei helfen, nichts zu verschütten.
4. Einfrieren: Stellt den Eiswürfelbehälter in den Gefrierschrank und lasst den Saft gefrieren. Das dauert in der Regel ein paar Stunden.
5. Eiswürfel entnehmen und lagern: Sobald die Zitronensaftwürfel gefroren sind, könnt ihr sie aus dem Eiswürfelbehälter nehmen und in einen Gefrierbeutel umfüllen. Beschriftet den Beutel mit dem Datum, damit ihr wisst, wann ihr den Saft eingefroren habt.
Wichtige Tipps:
* Verwendet am besten Bio-Zitronen, da ihr so sicherstellt, dass keine Pestizide in den Saft gelangen.
* Die Zitronensaftwürfel sind im Gefrierschrank mehrere Monate haltbar.
* Ihr könnt die Zitronensaftwürfel direkt in Getränke oder zum Kochen verwenden.
Methode 3: Zitronenschale abreiben und einfrieren (für den intensiven Geschmack)
Die Zitronenschale enthält viele ätherische Öle und sorgt für einen intensiven Zitronengeschmack. Das Einfrieren der abgeriebenen Schale ist eine super Möglichkeit, diesen Geschmack zu konservieren.
Was ihr braucht:
* Zitronen
* Zitronenreibe
* Backpapier
* Gefrierbeutel oder luftdichte Behälter
Schritt-für-Schritt-Anleitung:
1. Zitronen waschen und abtrocknen: Wascht die Zitronen gründlich unter warmem Wasser ab und trocknet sie gut ab.
2. Zitronenschale abreiben: Reibt die Zitronenschale mit einer feinen Zitronenreibe ab. Achtet darauf, nur die äußere, gelbe Schicht abzureiben und nicht die weiße, bittere Haut darunter.
3. Schale vorbereiten: Verteilt die abgeriebene Zitronenschale in einer dünnen Schicht auf einem mit Backpapier ausgelegten Teller oder Brett.
4. Vorfrieren: Stellt den Teller oder das Brett für ca. 30 Minuten in den Gefrierschrank. Dadurch verhindert ihr, dass die Schale zusammenklebt.
5. Lagern: Füllt die vorgefrorene Zitronenschale in einen Gefrierbeutel oder einen luftdichten Behälter um. Beschriftet den Behälter mit dem Datum.
Wichtige Tipps:
* Verwendet am besten Bio-Zitronen, da die Schale direkt verwendet wird.
* Die abgeriebene Zitronenschale ist im Gefrierschrank mehrere Monate haltbar.
* Ihr könnt die gefrorene Zitronenschale direkt in Teige, Soßen oder andere Gerichte geben.
Methode 4: Eingelegte Zitronen (für den besonderen Kick)
Eingelegte Zitronen sind eine Spezialität, die besonders in der nordafrikanischen Küche verwendet wird. Sie verleihen Gerichten einen einzigartigen, intensiven Zitronengeschmack.
Was ihr braucht:
* 6-8 Bio-Zitronen
* Grobes Meersalz
* Saft von 2-3 Zitronen
* Einmachglas (sterilisiert)
* Gewürze nach Geschmack (z.B. Lorbeerblätter, Pfefferkörner, Zimtstange)
Schritt-für-Schritt-Anleitung:
1. Zitronen vorbereiten: Wascht die Zitronen gründlich ab und trocknet sie ab.
2. Zitronen einschneiden: Schneidet jede Zitrone kreuzweise ein, aber nicht ganz durch. Die Zitrone sollte am unteren Ende noch zusammenhalten.
3. Zitronen füllen: Füllt jede Zitrone großzügig mit grobem Meersalz. Drückt das Salz gut in die Einschnitte.
4. Zitronen schichten: Legt eine Schicht Salz auf den Boden des Einmachglases. Schichtet die Zitronen dicht an dicht in das Glas. Drückt sie dabei fest zusammen, damit Saft austritt.
5. Saft hinzufügen: Gießt den Saft von 2-3 Zitronen über die Zitronen im Glas.
6. Gewürze hinzufügen (optional): Fügt nach Geschmack Lorbeerblätter, Pfefferkörner oder eine Zimtstange hinzu.
7. Beschweren: Beschwert die Zitronen im Glas mit einem kleinen Teller oder einem sauberen Stein, damit sie vollständig mit Flüssigkeit bedeckt sind.
8. Verschließen und ziehen lassen: Verschließt das Einmachglas und lasst die Zitronen mindestens 4 Wochen an einem kühlen, dunklen Ort
Conclusion
So, there you have it! This simple yet incredibly effective DIY trick for preserving juicy lemons all year round is a game-changer for any home cook, baker, or cocktail enthusiast. Forget about those sad, shriveled lemons lurking in the back of your refrigerator. With minimal effort, you can ensure a constant supply of bright, flavorful lemon juice and zest, ready to elevate your dishes and drinks whenever inspiration strikes.
Why is this a must-try? Because it’s economical, reduces food waste, and guarantees the freshest lemon flavor possible. Think about it: no more impulse buys of lemons that end up forgotten and unusable. No more settling for the subpar taste of bottled lemon juice. This method empowers you to control the quality and availability of your lemons, ensuring that every squeeze is bursting with sunshine.
But the beauty of this DIY trick doesn’t stop there. Feel free to experiment with variations to suit your specific needs and preferences. For instance, if you primarily use lemon zest, consider freezing the zest separately in small portions. This allows you to grab just what you need without thawing an entire lemon. Another option is to freeze lemon slices for adding a refreshing touch to water or iced tea. You could even infuse the lemon juice with herbs like rosemary or thyme before freezing for a unique flavor boost.
Don’t be afraid to get creative and tailor this method to your own culinary style. The possibilities are endless!
We wholeheartedly encourage you to try this DIY trick for preserving juicy lemons all year. It’s a small investment of time that yields significant rewards in terms of flavor, convenience, and cost savings. Once you experience the joy of having perfectly preserved lemons at your fingertips, you’ll wonder how you ever lived without it.
And most importantly, we want to hear about your experience! Did you try any variations? Did you find this method particularly helpful for a specific recipe? Share your thoughts, tips, and photos in the comments below. Let’s create a community of lemon-loving enthusiasts who are passionate about maximizing flavor and minimizing waste. Your feedback will not only help other readers but also inspire us to continue sharing valuable DIY tips and tricks. So go ahead, give it a try, and let us know what you think! We’re confident that you’ll be delighted with the results.
Frequently Asked Questions (FAQ)
1. What kind of lemons work best for this preservation method?
Any variety of lemon will work, but Meyer lemons are particularly well-suited due to their thin skin and abundant juice. Eureka and Lisbon lemons are also excellent choices. The key is to select lemons that are firm, heavy for their size, and have smooth, unblemished skin. Avoid lemons that are soft, wrinkled, or have any signs of mold or decay. Organic lemons are always a good option, especially if you plan on using the zest.
2. How long can I store lemons using this method?
When properly frozen, lemons can be stored for up to 3-4 months without significant loss of flavor or quality. However, it’s best to use them within the first 2-3 months for optimal results. Be sure to label your freezer bags or containers with the date of freezing so you can keep track of their freshness.
3. Will freezing affect the texture of the lemons?
Yes, freezing will slightly alter the texture of the lemons. When thawed, they will be softer than fresh lemons. This is perfectly normal and doesn’t affect the flavor or juiciness. The softer texture actually makes them easier to juice. However, if you plan on using the lemon slices for garnishing, keep in mind that they may not hold their shape as well as fresh slices.
4. Can I freeze lemon zest?
Absolutely! Freezing lemon zest is a fantastic way to preserve its vibrant flavor. Simply zest the lemons before freezing them whole or juicing them. Spread the zest in a thin layer on a baking sheet lined with parchment paper and freeze for about 30 minutes to prevent clumping. Then, transfer the frozen zest to an airtight container or freezer bag. It will keep for several months in the freezer.
5. What’s the best way to thaw frozen lemons?
There are several ways to thaw frozen lemons, depending on your needs. For juicing, you can simply place the frozen lemon in a bowl of warm water for a few minutes to soften it slightly. Alternatively, you can thaw it in the refrigerator for a few hours or overnight. If you’re in a hurry, you can microwave the lemon for a few seconds, but be careful not to overheat it. For lemon slices, thawing in the refrigerator is the best option to minimize texture changes.
6. Can I refreeze lemons after thawing?
It’s generally not recommended to refreeze lemons after thawing, as this can further degrade their texture and flavor. It’s best to thaw only the amount of lemon you need at a time. If you have leftover thawed lemon juice, you can store it in the refrigerator for a few days or freeze it in ice cube trays for later use.
7. What are some creative ways to use preserved lemons?
The possibilities are endless! Use the juice in salad dressings, marinades, sauces, and cocktails. Add the zest to baked goods, such as cakes, cookies, and muffins. Use the frozen slices to infuse water or iced tea. You can also use preserved lemons to make homemade lemonade, lemon curd, or lemon vinaigrette. Get creative and experiment with different flavor combinations!
8. Is it necessary to wash the lemons before freezing?
Yes, it’s always a good idea to wash the lemons thoroughly before freezing them. This will remove any dirt, debris, or pesticides that may be present on the skin. Use a vegetable brush and warm, soapy water to scrub the lemons gently. Rinse them well and pat them dry with a clean towel before proceeding with the freezing process.
9. Can I use this method to preserve other citrus fruits, like limes or oranges?
Yes, this method works equally well for preserving other citrus fruits, such as limes, oranges, and grapefruits. Simply follow the same steps as outlined for lemons. Keep in mind that different citrus fruits may have slightly different textures and flavors, so adjust your recipes accordingly.
10. What if my lemons develop freezer burn?
Freezer burn can occur if the lemons are not properly sealed or if they are stored in the freezer for an extended period. While freezer burn doesn’t make the lemons unsafe to eat, it can affect their flavor and texture. To prevent freezer burn, make sure to use airtight containers or freezer bags and remove as much air as possible before sealing. If you notice freezer burn on your lemons, you can try cutting away the affected areas before using them.


Leave a Comment