
Grow Purple Corn Rooftop gardens are becoming increasingly popular, and for good reason! Imagine harvesting vibrant, antioxidant-rich purple corn right from your own urban oasis. It’s not just a visually stunning addition to your rooftop; it’s a connection to ancient agricultural practices and a step towards sustainable living.
For centuries, indigenous cultures in the Andes Mountains have cultivated purple corn, known for its nutritional power and striking color. Now, you can bring a piece of that history to your own home! But let’s be honest, rooftop gardening can seem daunting, especially when you’re aiming for something as unique as purple corn. That’s where this DIY guide comes in.
I’m here to share my tried-and-true tricks and hacks that will make grow purple corn rooftop gardening a breeze. Whether you’re a seasoned gardener or just starting out, this article will equip you with the knowledge and confidence to successfully cultivate this amazing crop. From choosing the right containers and soil to mastering pollination techniques, we’ll cover everything you need to know. Get ready to transform your rooftop into a thriving purple corn paradise and enjoy the satisfaction of growing your own healthy, delicious food!

Lila Pracht auf dem Dach: Dein eigener Purple Corn Anbau!
Hey Leute, habt ihr Lust auf ein außergewöhnliches Gartenprojekt? Ich zeige euch, wie ihr auf eurem Dach (oder Balkon!) wunderschönen, lila Mais anbauen könnt. Ja, richtig gelesen, lila! Das ist nicht nur ein Hingucker, sondern auch super gesund und lecker. Los geht’s!
Was du brauchst: Die Einkaufsliste
Bevor wir loslegen, schnappen wir uns alles, was wir brauchen. Keine Sorge, das meiste ist leicht zu bekommen:
* Purple Corn Samen: Das Herzstück! Achtet auf eine gute Qualität. Online oder in gut sortierten Gärtnereien werdet ihr fündig.
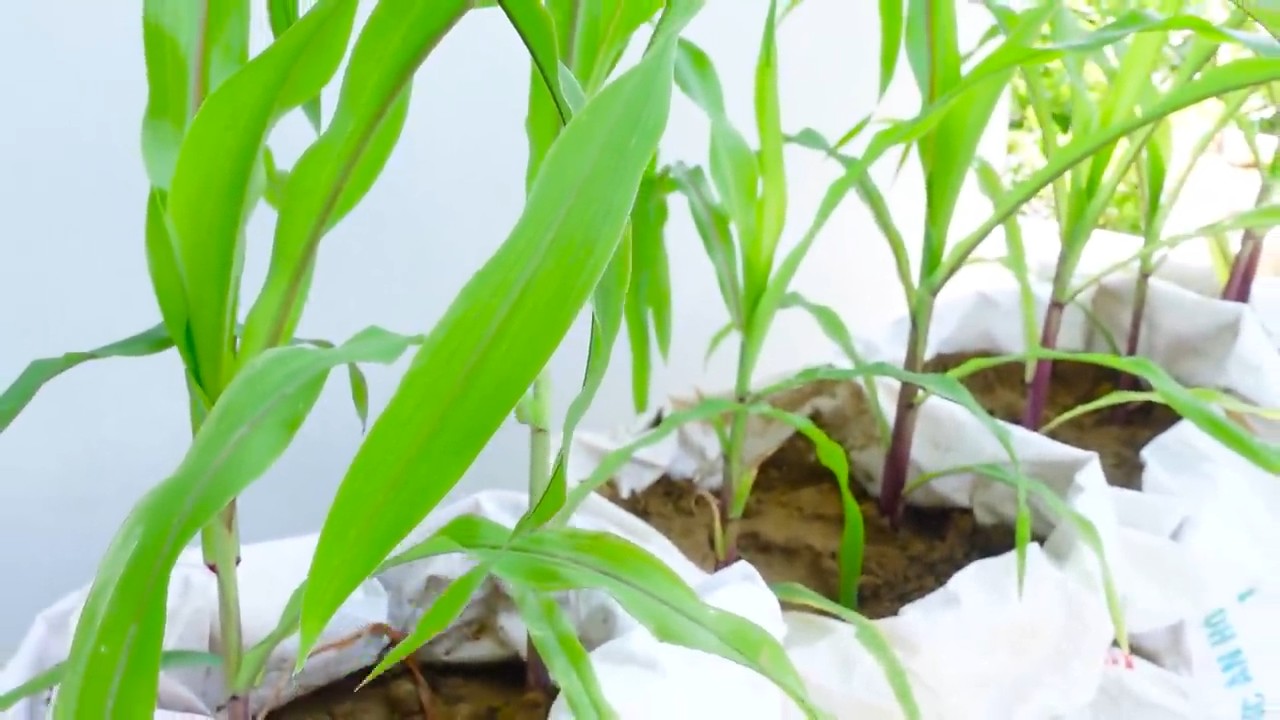
* Große Pflanzgefäße: Mais braucht Platz! Wählt Gefäße mit mindestens 30 Litern Volumen pro Pflanze. Je größer, desto besser.
* Hochwertige Blumenerde: Eine gute Basis ist wichtig. Achtet auf eine lockere, nährstoffreiche Erde.
* Drainagematerial: Blähton, Kies oder Tonscherben. Das verhindert Staunässe.
* Organischer Dünger: Mais ist ein Starkzehrer. Hornspäne, Kompost oder ein spezieller Maisdünger sind ideal.
* Gießkanne oder Schlauch: Zum Bewässern, logisch!
* Pflanzschaufel: Zum Umtopfen und Einpflanzen.
* Stützpfähle (optional): Bei starkem Wind können die Maispflanzen umknicken.
* Geduld und Liebe: Das Wichtigste!
Vorbereitung ist alles: Der perfekte Start
Bevor wir die Samen in die Erde bringen, bereiten wir alles vor. Das ist wie beim Kochen: Die richtige Vorbereitung ist die halbe Miete!
1. Die Pflanzgefäße vorbereiten: Zuerst legen wir eine Schicht Drainagematerial auf den Boden der Gefäße. Das sorgt für eine gute Drainage und verhindert Staunässe. Darüber kommt dann die Blumenerde. Füllt die Gefäße aber nicht ganz voll, lasst noch ein paar Zentimeter Platz bis zum Rand.
2. Die Samen vorbereiten (optional): Ihr könnt die Samen über Nacht in lauwarmem Wasser einweichen. Das beschleunigt die Keimung. Aber keine Sorge, es funktioniert auch ohne!
3. Den Standort wählen: Mais liebt die Sonne! Sucht euch einen sonnigen Platz auf eurem Dach oder Balkon aus. Mindestens 6 Stunden Sonne pro Tag sollten es sein. Achtet auch darauf, dass der Standort windgeschützt ist, oder plant die Verwendung von Stützpfählen ein.
Aussaat und Anzucht: Der Grundstein für eine reiche Ernte
Jetzt geht’s ans Eingemachte! Wir säen die Samen aus und legen den Grundstein für unsere lila Maisernte.
1. Die Samen aussäen: Macht mit dem Finger oder einem kleinen Stock kleine Löcher in die Erde, etwa 2-3 cm tief. Legt in jedes Loch 2-3 Samen. Das erhöht die Wahrscheinlichkeit, dass mindestens einer keimt. Bedeckt die Samen dann mit Erde und drückt sie leicht an.
2. Angießen: Gießt die Erde vorsichtig an, sodass sie gut durchfeuchtet ist. Achtet darauf, dass die Erde nicht zu nass wird, sonst können die Samen faulen.
3. Warmhalten: Mais keimt am besten bei warmen Temperaturen. Stellt die Gefäße an einen warmen Ort, zum Beispiel in der Nähe einer Hauswand.
4. Geduld haben: Jetzt heißt es warten! Nach etwa einer Woche sollten die ersten Keimlinge zu sehen sein.
Pflege und Wachstum: Damit der Mais prächtig gedeiht
Die kleinen Pflänzchen sind da! Jetzt ist es wichtig, sie gut zu pflegen, damit sie zu kräftigen Maispflanzen heranwachsen.
1. Vereinzeln: Wenn mehrere Samen in einem Loch gekeimt sind, müsst ihr die schwächsten Pflänzchen entfernen. Lasst nur die kräftigste Pflanze pro Loch stehen.
2. Gießen: Mais braucht regelmäßig Wasser, besonders während der Wachstumsphase. Gießt die Pflanzen am besten morgens oder abends, wenn die Sonne nicht so stark scheint. Achtet darauf, dass die Erde immer leicht feucht ist, aber nicht nass.
3. Düngen: Mais ist ein Starkzehrer und braucht viele Nährstoffe. Düngt die Pflanzen regelmäßig mit organischem Dünger. Beginnt damit etwa 2-3 Wochen nach der Keimung.
4. Unkraut entfernen: Entfernt regelmäßig Unkraut aus den Gefäßen. Unkraut konkurriert mit dem Mais um Nährstoffe und Wasser.
5. Stützen: Wenn die Maispflanzen größer werden, können sie bei starkem Wind umknicken. Stützt sie mit Stützpfählen. Steckt die Pfähle einfach in die Erde und bindet die Pflanzen locker daran fest.
6. Auf Schädlinge achten: Achtet auf Schädlinge wie Blattläuse oder Maiszünsler. Bei Bedarf könnt ihr biologische Schädlingsbekämpfungsmittel einsetzen.
Die Blütezeit: Wenn der Mais seine Pracht entfaltet
Nach einigen Wochen beginnt der Mais zu blühen. Das ist ein wunderschöner Anblick!
1. Die männlichen Blüten: Die männlichen Blüten erscheinen an der Spitze der Pflanze. Sie sehen aus wie kleine Federn und produzieren Pollen.
2. Die weiblichen Blüten: Die weiblichen Blüten erscheinen an den Seiten der Pflanze. Sie sind von Hüllblättern umgeben und haben lange, seidige Fäden, die sogenannten “Maisbart”.
3. Die Bestäubung: Die Bestäubung erfolgt durch den Wind. Der Wind trägt den Pollen von den männlichen Blüten zu den weiblichen Blüten. Ihr könnt die Bestäubung auch selbst unterstützen, indem ihr die männlichen Blüten vorsichtig schüttelt oder den Pollen mit einem Pinsel auf die weiblichen Blüten übertragt.
Die Ernte: Der Lohn für deine Mühe
Nach der Blütezeit bilden sich die Maiskolben. Wenn die Maisbart braun und trocken sind und die Kolben sich prall anfühlen, ist es Zeit für die Ernte!
1. Den Reifegrad prüfen: Drückt mit dem Fingernagel auf ein Maiskorn. Wenn Milch austritt, ist der Mais reif.
2. Die Kolben ernten: Brecht die Kolben vorsichtig von der Pflanze ab.
3. Die Kolben trocknen (optional): Wenn ihr den Mais nicht sofort essen wollt, könnt ihr die Kolben trocknen. Hängt sie dazu an einem luftigen Ort auf.
4. Genießen: Jetzt könnt ihr euren selbst angebauten lila Mais genießen! Er schmeckt gekocht, gegrillt oder als Popcorn. Ihr könnt ihn auch zu Mehl verarbeiten oder als Dekoration verwenden.
Extra Tipps für den lila Daumen:
* Sortenwahl: Es gibt verschiedene Sorten von Purple Corn. Informiert euch, welche Sorte am besten für eure Region geeignet ist.
* Fruchtfolge: Baut Mais nicht jedes Jahr am selben Standort an. Das beugt Krankheiten und Schädlingen vor.
* Mulchen: Mulcht die Erde um die Maispflanzen herum mit Stroh oder Rasenschnitt. Das hält die Erde feucht und unterdrückt Unkraut.
* Experimentieren: Probiert verschiedene Dünger und Anbaumethoden aus. So findet ihr heraus, was für euren Mais am besten funktioniert.
* Dokumentieren: Macht Fotos von eurem Maisgarten und notiert euch eure Erfahrungen. So könnt ihr im nächsten Jahr noch besser planen.
Ich hoffe, diese Anleitung hilft euch dabei, euren eigenen lila Mais auf dem Dach anzubauen. Es ist ein tolles Projekt, das nicht nur Spaß macht, sondern auch eine reiche Ernte bringt. Viel Erfolg und lasst es euch schmecken!
Conclusion
So, there you have it! Growing purple corn on your rooftop isn’t just a quirky gardening experiment; it’s a rewarding journey that connects you to ancient agricultural traditions while providing you with a unique and nutritious food source. From the vibrant stalks swaying in the breeze to the deep, jewel-toned kernels bursting with flavor, every stage of the process is a testament to the power of nature and the satisfaction of DIY.
Why is this a must-try? Because it’s more than just growing corn. It’s about reclaiming a piece of your food system, understanding where your food comes from, and enjoying the unparalleled taste of homegrown goodness. Store-bought corn simply can’t compare to the freshness and flavor intensity of corn you’ve nurtured from seed to harvest, especially when it’s a variety as special as purple corn. Plus, you’re contributing to biodiversity by cultivating a less common crop.
Beyond the basic method outlined, there’s plenty of room for experimentation. Try different companion planting strategies. Basil, beans, and squash are all excellent companions for corn, each offering unique benefits to the growing environment. You could also explore different soil amendments to optimize nutrient availability. Consider adding compost tea or worm castings to boost growth and yield.
For those with limited rooftop space, consider growing purple corn in large containers. Ensure the containers are at least 20 gallons in size to accommodate the root system. Dwarf varieties of corn might also be a good option for container gardening.
Don’t be afraid to experiment with different ways to use your homegrown purple corn. Beyond traditional corn on the cob, try grinding the dried kernels into flour for making vibrant purple tortillas, polenta, or cornbread. The kernels can also be used to make a delicious and nutritious purple corn drink, a staple in some South American cultures. You can even use the colorful husks for crafting or dyeing projects.
Growing purple corn is a fantastic way to add beauty, nutrition, and a touch of the extraordinary to your urban garden. It’s a conversation starter, a learning experience, and a delicious addition to your table.
We wholeheartedly encourage you to give this DIY project a try. It may seem daunting at first, but with a little planning and effort, you’ll be amazed at what you can achieve. And most importantly, don’t forget to share your experiences with us! We’d love to hear about your successes, your challenges, and any unique variations you discover along the way. Share your photos, tips, and stories in the comments below. Let’s build a community of purple corn enthusiasts and inspire others to embrace the joy of homegrown food.
Frequently Asked Questions (FAQ)
1. Is it really possible to grow corn on a rooftop?
Absolutely! With proper planning and care, growing corn on a rooftop is entirely feasible. The key is to provide the corn with adequate sunlight, water, and nutrients. Choose a location that receives at least 6-8 hours of direct sunlight per day. Use large containers or raised beds filled with well-draining soil. And be sure to provide adequate support for the stalks, especially in windy conditions.
2. What are the specific benefits of growing purple corn compared to regular corn?
Purple corn boasts several advantages over regular corn. First and foremost, it’s packed with antioxidants, particularly anthocyanins, which give it its vibrant color and offer numerous health benefits. These antioxidants can help protect against cell damage, reduce inflammation, and boost the immune system. Purple corn also tends to have a slightly sweeter and nuttier flavor than regular corn. Furthermore, growing purple corn helps preserve biodiversity and supports the cultivation of heirloom varieties.
3. What kind of soil is best for growing purple corn on a rooftop?
Purple corn thrives in well-draining, fertile soil with a slightly acidic to neutral pH (around 6.0 to 7.0). A good soil mix would include a combination of topsoil, compost, and perlite or vermiculite. The topsoil provides structure and nutrients, the compost adds organic matter and improves drainage, and the perlite or vermiculite enhances aeration and prevents compaction. You can also amend the soil with slow-release fertilizer to provide a steady supply of nutrients throughout the growing season.
4. How often should I water my rooftop purple corn?
Watering frequency will depend on the weather conditions and the type of container you’re using. Generally, you should water your purple corn deeply whenever the top inch of soil feels dry to the touch. During hot, dry weather, you may need to water daily. Be careful not to overwater, as this can lead to root rot. Ensure that your containers have adequate drainage holes to prevent waterlogging.
5. What are some common pests and diseases that affect purple corn, and how can I prevent them?
Common pests that can affect purple corn include corn earworms, aphids, and spider mites. Diseases include corn smut and various fungal infections. To prevent these problems, practice good garden hygiene. Remove any weeds or debris that can harbor pests or diseases. Inspect your plants regularly for signs of infestation or infection. Use organic pest control methods, such as insecticidal soap or neem oil, to control pests. Ensure good air circulation to prevent fungal diseases. Consider companion planting with herbs like basil or marigolds, which can repel certain pests.
6. How long does it take to grow purple corn from seed to harvest?
The time it takes to grow purple corn from seed to harvest typically ranges from 90 to 120 days, depending on the variety and growing conditions. Start seeds indoors 2-3 weeks before the last expected frost. Transplant seedlings outdoors once the soil has warmed up and the risk of frost has passed. Provide adequate water, nutrients, and support throughout the growing season. Harvest the corn when the silks have turned brown and dry and the kernels are plump and milky.
7. Can I grow purple corn in containers, and if so, what size containers should I use?
Yes, you can successfully grow purple corn in containers. Choose containers that are at least 20 gallons in size to accommodate the root system. Ensure that the containers have adequate drainage holes. Use a well-draining potting mix. Provide adequate support for the stalks, as they can become quite tall and heavy. Water and fertilize regularly.
8. How do I know when my purple corn is ready to harvest?
The best way to determine if your purple corn is ready to harvest is to check the silks. When the silks have turned brown and dry, and the kernels are plump and milky when pierced with a fingernail, the corn is ready to harvest. You can also gently peel back a portion of the husk to inspect the kernels. The kernels should be fully formed and have a deep purple color.
9. What are some creative ways to use my homegrown purple corn?
The possibilities are endless! You can enjoy it fresh off the cob, grilled, or steamed. You can also grind the dried kernels into flour for making tortillas, polenta, or cornbread. Use the kernels to make a delicious and nutritious purple corn drink. The colorful husks can be used for crafting or dyeing projects. You can even use the corn stalks as decorative elements in your garden.
10. What if I don’t have a rooftop? Can I still grow purple corn?
Absolutely! While this article focuses on rooftop gardening, purple corn can be grown in any sunny location with well-draining soil. You can grow it in a traditional garden plot, in raised beds, or even in large containers on a balcony or patio. The key is to provide the corn with adequate sunlight, water, and nutrients, regardless of the growing environment.

Leave a Comment