
Growing garlic from bulb is easier than you might think, and trust me, the satisfaction of harvesting your own pungent cloves is absolutely worth it! Forget those bland, store-bought bulbs – imagine infusing your dishes with the robust, homegrown flavor of garlic you nurtured yourself. This isn’t just about saving a few bucks; it’s about connecting with the earth and experiencing the magic of watching something grow from a single clove into a bountiful harvest.
Garlic has a rich history, dating back thousands of years. Ancient Egyptians revered it, feeding it to the pyramid builders for strength and stamina. In many cultures, garlic is believed to ward off evil spirits and promote good health. Today, we know it’s packed with antioxidants and boasts numerous health benefits. But beyond its practical uses, growing your own garlic is a deeply rewarding experience.
Why should you learn this DIY trick? Because growing garlic from bulb allows you to control the quality and variety of your garlic. You can choose heirloom varieties with unique flavors and characteristics that you simply won’t find in supermarkets. Plus, it’s a sustainable way to add a staple ingredient to your kitchen. In this article, I’ll guide you through the simple steps to successfully grow your own garlic, even if you’re a complete beginner. Get ready to unleash your inner gardener and enjoy the delicious rewards!
Knoblauch aus der Knolle ziehen: Dein DIY-Guide für eine reiche Ernte
Hallo Gartenfreunde! Habt ihr euch jemals gefragt, wie ihr euren eigenen Knoblauch anbauen könnt, ohne ständig neuen im Supermarkt zu kaufen? Ich zeige euch, wie ihr ganz einfach Knoblauch aus einer einzelnen Knolle ziehen könnt. Es ist einfacher als ihr denkt und das Ergebnis ist unglaublich befriedigend. Lasst uns loslegen!
Was du brauchst:
* Eine Knoblauchknolle (am besten Bio-Knoblauch, da dieser oft nicht mit Wachstumsinhibitoren behandelt wurde)
* Einen Topf oder ein Beet mit guter Erde (lockere, gut durchlässige Erde ist ideal)
* Gießkanne
* Optional: Kompost oder organischer Dünger
* Optional: Mulch (Stroh, Laub oder Grasschnitt)
Die richtige Knoblauchsorte wählen
Bevor wir loslegen, ist es wichtig, die richtige Knoblauchsorte auszuwählen. Es gibt zwei Haupttypen:
* Hartnackiger Knoblauch: Dieser Typ ist robuster und besser für kältere Klimazonen geeignet. Er bildet einen Blütenstängel (Scape) aus, den man ernten und essen kann.
* Weichnackiger Knoblauch: Dieser Typ ist besser für mildere Klimazonen geeignet und bildet keinen Blütenstängel. Er hat in der Regel mehr Zehen pro Knolle und ist besser lagerfähig.
Wenn du dir unsicher bist, welche Sorte in deiner Region am besten wächst, frage am besten in einer lokalen Gärtnerei nach.
Schritt-für-Schritt-Anleitung: Knoblauch pflanzen
Hier ist eine detaillierte Anleitung, wie du deinen eigenen Knoblauch anbauen kannst:
1. Die Knoblauchknolle vorbereiten:
* Nimm deine Knoblauchknolle und trenne die einzelnen Zehen vorsichtig voneinander. Achte darauf, die äußere Haut der Zehen nicht zu beschädigen.
* Wähle die größten und gesündesten Zehen aus. Diese haben die besten Chancen, zu gesunden Pflanzen heranzuwachsen.
* Du kannst die restlichen Zehen zum Kochen verwenden oder sie später pflanzen.
2. Den Pflanzort vorbereiten:
* Im Topf: Fülle einen Topf mit guter Erde. Der Topf sollte mindestens 20 cm tief sein, damit die Wurzeln genügend Platz haben.
* Im Beet: Lockere die Erde im Beet auf und entferne Unkraut. Arbeite Kompost oder organischen Dünger ein, um die Erde mit Nährstoffen anzureichern.
* Achte darauf, dass der Pflanzort sonnig ist. Knoblauch braucht mindestens 6 Stunden Sonnenlicht pro Tag.
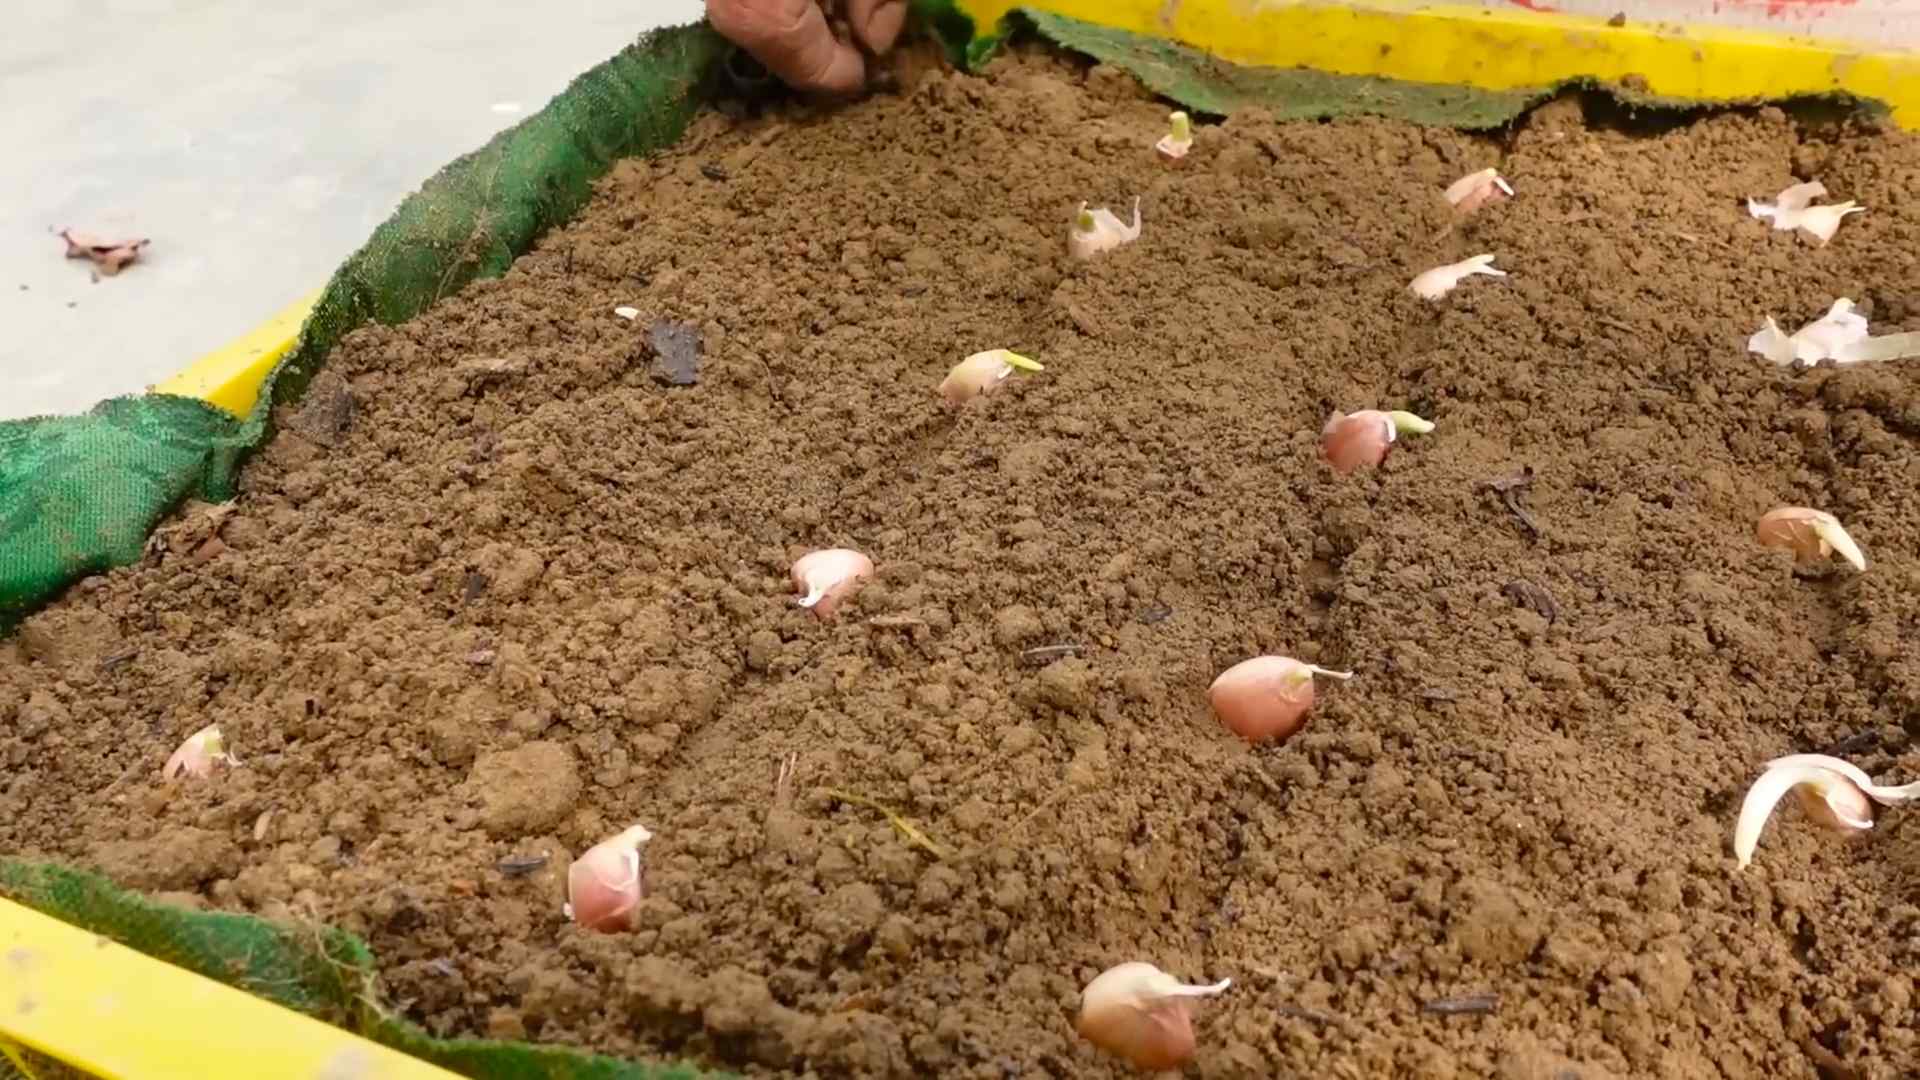
3. Die Knoblauchzehen pflanzen:
* Mache mit dem Finger oder einem kleinen Werkzeug Löcher in die Erde. Die Löcher sollten etwa 5-8 cm tief sein und einen Abstand von 10-15 cm zueinander haben.
* Setze die Knoblauchzehen mit der spitzen Seite nach oben in die Löcher. Die flache Seite, wo die Wurzeln wachsen werden, sollte nach unten zeigen.
* Bedecke die Zehen mit Erde und drücke die Erde leicht an.
4. Gießen:
* Gieße die Erde nach dem Pflanzen gründlich an. Die Erde sollte feucht, aber nicht nass sein.
5. Mulchen (optional):
* Bedecke die Erde mit einer Schicht Mulch. Mulch hilft, die Feuchtigkeit im Boden zu halten, Unkraut zu unterdrücken und die Bodentemperatur zu regulieren.
* Du kannst Stroh, Laub oder Grasschnitt als Mulch verwenden.
Pflege des Knoblauchs
Nach dem Pflanzen ist es wichtig, den Knoblauch richtig zu pflegen, damit er gut wächst.
1. Gießen:
* Gieße den Knoblauch regelmäßig, besonders während trockener Perioden. Die Erde sollte immer leicht feucht sein. Vermeide Staunässe, da dies zu Fäulnis führen kann.
2. Düngen (optional):
* Wenn du möchtest, kannst du den Knoblauch während der Wachstumsphase düngen. Verwende einen organischen Dünger oder Kompost.
* Dünge den Knoblauch nicht zu viel, da dies zu übermäßigem Blattwachstum und kleineren Knollen führen kann.
3. Unkraut entfernen:
* Entferne regelmäßig Unkraut, das um den Knoblauch herum wächst. Unkraut konkurriert mit dem Knoblauch um Nährstoffe und Wasser.
4. Blütenstängel (Scapes) entfernen (bei hartnackigem Knoblauch):
* Wenn dein Knoblauch hartnackig ist, wird er einen Blütenstängel (Scape) bilden. Entferne den Blütenstängel, sobald er sich kringelt.
* Das Entfernen des Blütenstängels fördert das Wachstum der Knolle.
* Die Blütenstängel sind essbar und können in Salaten, Suppen oder als Pesto verwendet werden.
Erntezeit: Wann ist der Knoblauch reif?
Die Erntezeit hängt von der Sorte und dem Klima ab. In der Regel ist der Knoblauch im Sommer (Juni-August) reif.
Hier sind einige Anzeichen dafür, dass der Knoblauch reif ist:
* Die Blätter beginnen, gelb zu werden und umzufallen.
* Die Knollen sind groß und gut ausgebildet.
* Wenn du eine Knolle ausgräbst, sollten die Zehen gut voneinander getrennt sein.
Knoblauch ernten: So geht’s richtig
1. Vorbereitung:
* Wähle einen trockenen Tag für die Ernte.
* Lockere die Erde um die Knoblauchpflanzen herum mit einer Grabegabel oder einem Spaten.
2. Ernten:
* Ziehe die Knoblauchpflanzen vorsichtig aus der Erde.
* Schüttle die Erde von den Knollen ab.
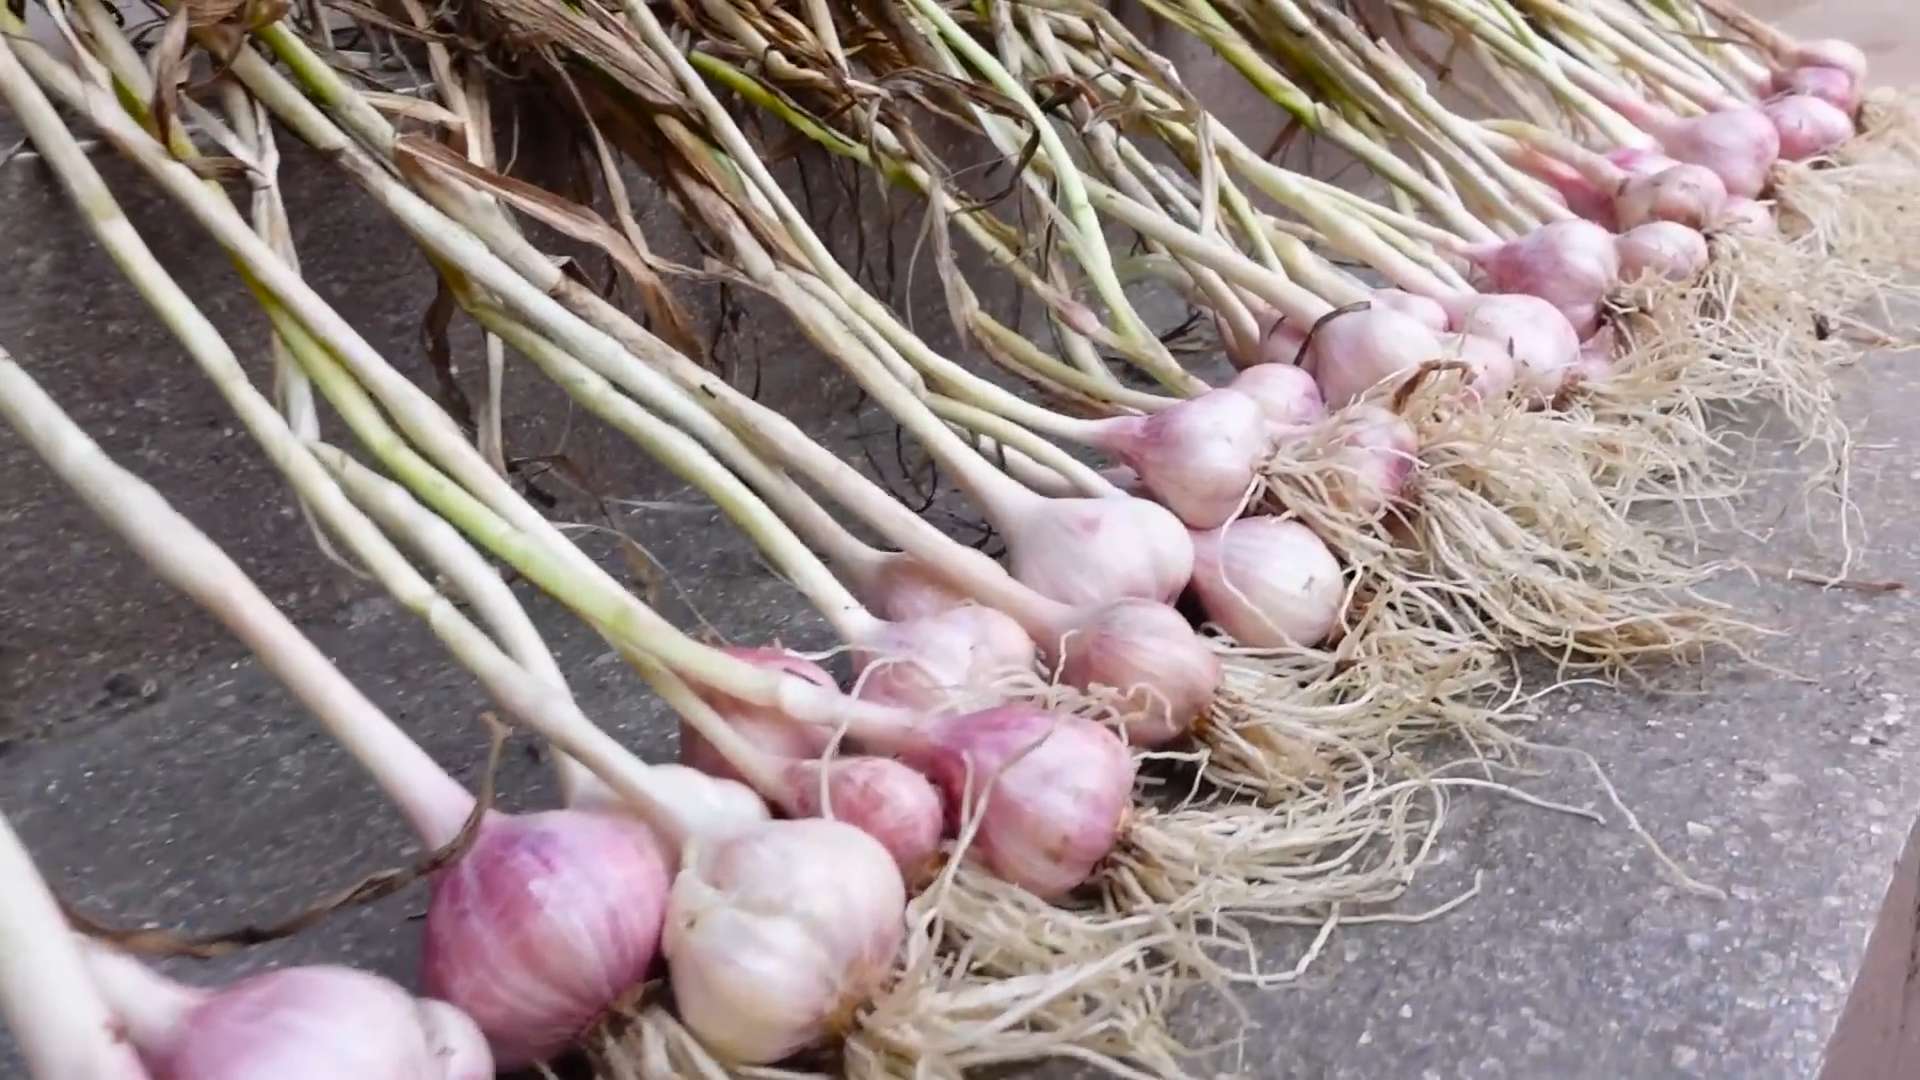
3. Trocknen:
* Binde die Knoblauchpflanzen zu Bündeln zusammen und hänge sie an einem trockenen, luftigen Ort auf.
* Lasse den Knoblauch 2-3 Wochen trocknen. Die Blätter und Stängel sollten vollständig trocken sein.
4. Lagern:
* Schneide die getrockneten Blätter und Stängel ab, lasse aber etwa 5 cm am Knoblauch.
* Lagere den Knoblauch an einem kühlen, trockenen und dunklen Ort.
* Gut getrockneter und gelagerter Knoblauch kann mehrere Monate haltbar sein.
Häufige Probleme und Lösungen
Auch beim Knoblauchanbau können Probleme auftreten. Hier sind einige häufige Probleme und wie du sie lösen kannst:
* Fäulnis: Fäulnis kann durch Staunässe oder Pilzbefall verursacht werden. Achte darauf, dass die Erde gut durchlässig ist und vermeide Staunässe. Wenn du Anzeichen von Fäulnis entdeckst, entferne die betroffenen Pflanzen sofort.
* Schädlinge: Knoblauch kann von verschiedenen Schädlingen befallen werden, wie z.B. Zwiebelfliegen oder Nematoden. Verwende natürliche Schädlingsbekämpfungsmittel oder pflanze Knoblauch in der Nähe von Pflanzen, die Schädlinge abwehren.
* Kleine Knollen: Kleine Knollen können durch Nährstoffmangel, Wassermangel oder zu dichte Bepflanzung verursacht werden. Sorge für ausreichend Nährstoffe und Wasser und pflanze die Knoblauchzehen in ausreichendem Abstand zueinander.
Zusätzliche Tipps für eine reiche Ernte
* Fruchtfolge: Pflanze Knoblauch nicht jedes Jahr am selben Ort. Wechsle den Standort, um Krankheiten und Schädlingen vorzubeugen.
* Begleitpflanzen: Pflanze Knoblauch in der Nähe von Pflanzen, die ihn vor Schädlingen schützen, wie z.B. Ringelblumen oder Kamille.
* Winterhärte: Knoblauch ist winterhart und kann im Herbst gepflanzt werden. Die Zehen überwintern im Boden und treiben im Frühjahr aus.
Fazit
Knoblauch aus der Knolle zu ziehen ist ein lohnendes Projekt, das dir frischen, aromatischen Knoblauch direkt aus deinem eigenen Garten liefert. Mit ein wenig
Conclusion
So, there you have it! Growing garlic from bulb is not only surprisingly simple, but it’s also incredibly rewarding. Imagine the satisfaction of harvesting plump, flavorful garlic cloves that you nurtured from a single bulb. Forget those bland, imported garlic heads from the supermarket; with this DIY trick, you’ll be enjoying the robust, pungent taste of homegrown garlic in all your favorite dishes.
This isn’t just about saving a few dollars; it’s about connecting with the earth, understanding the growing process, and enjoying the unparalleled flavor of fresh, locally grown produce. Plus, it’s a fantastic way to reduce your environmental footprint by minimizing your reliance on commercially grown and transported garlic.
But the benefits don’t stop there. Growing your own garlic allows you to experiment with different varieties. Try planting softneck garlic for braiding and long-term storage, or opt for hardneck varieties known for their intense flavor and delicious scapes (those curly flower stalks that are a culinary delight in themselves!). You can even explore elephant garlic, which, despite its name, is technically a type of leek but produces massive, mild-flavored cloves.
Don’t have a large garden? No problem! Garlic thrives in containers, making it perfect for balconies, patios, or even a sunny windowsill. Just ensure you use a pot that’s at least 8 inches deep and filled with well-draining potting mix.
Consider companion planting your garlic with other vegetables and herbs. Garlic is known to deter pests like aphids and Japanese beetles, making it a valuable addition to any garden. Plant it near tomatoes, peppers, eggplant, or even roses to help protect them from unwanted visitors.
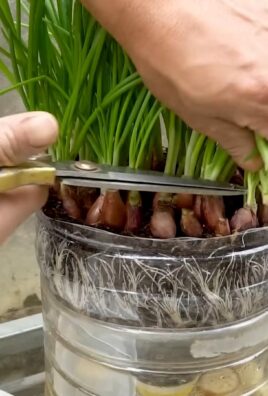
And speaking of variations, why not try forcing garlic greens indoors during the winter months? Simply plant a few cloves in a pot of soil and keep them watered. Within a few weeks, you’ll have a supply of fresh, garlicky greens to add to salads, soups, and stir-fries.
Growing garlic from bulb is a gateway to a more sustainable and flavorful lifestyle. It’s a project that’s accessible to everyone, regardless of their gardening experience. So, grab a bulb of garlic, follow these simple steps, and get ready to experience the joy of homegrown goodness.
We’re confident that you’ll be amazed by the results. But don’t just take our word for it – try it yourself! And once you’ve harvested your first crop of homegrown garlic, we’d love to hear about your experience. Share your tips, tricks, and photos in the comments below. Let’s build a community of garlic growers and spread the love of this amazing plant! We encourage you to share your experience of growing garlic from bulb.
Frequently Asked Questions (FAQ)
What is the best time of year to plant garlic?
The ideal time to plant garlic is in the fall, typically 4-6 weeks before the ground freezes. This allows the cloves to establish roots before winter sets in. In colder climates, this is usually around October or November. In milder climates, you can plant as late as December. Spring planting is possible, but the bulbs may not be as large. If you plant in the spring, choose the largest cloves you can find and refrigerate them for a few weeks before planting to simulate winter chilling.
What kind of soil is best for growing garlic?
Garlic prefers well-drained, fertile soil that is rich in organic matter. Amend your soil with compost or well-rotted manure before planting to improve drainage and fertility. A slightly acidic to neutral soil pH (around 6.0 to 7.0) is ideal. Avoid heavy clay soils, as they can become waterlogged and cause the garlic cloves to rot. If you have clay soil, consider growing garlic in raised beds or containers.
How deep and how far apart should I plant the garlic cloves?
Plant garlic cloves about 2 inches deep, with the pointed end facing up. Space the cloves about 6-8 inches apart in rows that are 12-18 inches apart. This spacing allows the garlic plants enough room to grow and develop large bulbs. If you’re planting in containers, you can space the cloves closer together, but make sure they still have enough room to grow.
How much water does garlic need?
Garlic needs consistent moisture, especially during the spring when the bulbs are actively growing. Water deeply whenever the top inch of soil feels dry to the touch. Avoid overwatering, as this can lead to bulb rot. During the winter months, reduce watering, especially if you live in an area with heavy rainfall.
How do I know when the garlic is ready to harvest?
Garlic is typically ready to harvest in mid-summer, about 8-9 months after planting. The leaves will start to turn yellow and brown, and the stalks may begin to fall over. A good rule of thumb is to harvest when about half of the leaves have turned brown. To harvest, carefully loosen the soil around the bulbs with a garden fork and gently lift them out of the ground.
What are garlic scapes, and what do I do with them?
Garlic scapes are the curly flower stalks that grow from hardneck garlic varieties. They are a delicious culinary treat and should be removed to encourage the plant to put more energy into bulb development. Harvest the scapes when they are still young and tender, before they start to straighten out. You can use them in pesto, stir-fries, soups, or any dish where you would use garlic.
How do I cure garlic after harvesting?
Curing garlic is essential for long-term storage. After harvesting, gently brush off any excess soil and lay the bulbs out in a single layer in a well-ventilated, dry place away from direct sunlight. You can also braid the garlic stalks together and hang them to dry. Cure the garlic for about 2-3 weeks, or until the necks are dry and the outer skins are papery.
How do I store garlic after it’s cured?
Store cured garlic in a cool, dry, and dark place with good air circulation. A temperature between 60-70°F (15-21°C) is ideal. You can store garlic in a mesh bag, a basket, or a cardboard box. Avoid storing garlic in the refrigerator, as this can cause it to sprout or become moldy. Properly cured and stored garlic can last for several months.
Can I use garlic from the grocery store to plant?
While you can technically plant garlic from the grocery store, it’s not always the best idea. Grocery store garlic may have been treated with chemicals to prevent sprouting, which can hinder its growth. It may also be a variety that is not well-suited to your climate. For best results, purchase garlic seed from a reputable nursery or seed supplier. This will ensure that you are planting a healthy, disease-free variety that is adapted to your growing conditions.
My garlic bulbs are small. What can I do to get bigger bulbs next year?
Several factors can contribute to small garlic bulbs. Make sure you are planting in well-drained, fertile soil and providing adequate water and sunlight. Fertilize your garlic plants with a balanced fertilizer in the spring to promote bulb growth. Remove garlic scapes to encourage the plant to put more energy into bulb development. Also, ensure that you are planting the largest cloves you can find, as larger cloves tend to produce larger bulbs. Finally, consider the variety of garlic you are growing. Some varieties naturally produce smaller bulbs than others.
Leave a Comment