
Growing tomatoes beginner hack: Ever dreamt of biting into a juicy, sun-ripened tomato, bursting with flavor, straight from your own backyard? I know I have! For centuries, tomatoes have been a symbol of summer abundance, gracing tables from the Mediterranean to the Americas. But let’s be honest, for many beginners, the path to homegrown tomato glory can feel like navigating a jungle.
That’s where this DIY article comes in! Forget complicated gardening jargon and endless troubleshooting. I’m here to share a simple, game-changing growing tomatoes beginner hack that will transform your tomato-growing experience. We’ll bypass common pitfalls and set you up for success, even if you’ve never held a trowel before.
Why do you need this hack? Because store-bought tomatoes simply can’t compare to the taste of homegrown. Plus, gardening is a fantastic way to de-stress, connect with nature, and enjoy the satisfaction of nurturing something from seed to fruit. So, ditch the store-bought blandness and get ready to unlock the secrets to a bountiful tomato harvest with this easy-to-follow DIY guide!
Tomatenanbau-Hack für Anfänger: So erntest du eine reiche Ernte!
Hallo liebe Gartenfreunde! Ich bin so aufgeregt, euch heute einen super einfachen und effektiven Tomatenanbau-Hack vorzustellen, der selbst absolute Anfänger zu stolzen Tomatenzüchtern macht. Keine komplizierten Anleitungen, keine mysteriösen Düngemittel – nur pure, unkomplizierte Tomatenliebe!
Was du brauchst:
* Tomatensamen (am besten eine robuste Sorte für Anfänger wie ‘Roma’, ‘San Marzano’ oder ‘Cherry’)
* Anzuchterde
* Kleine Anzuchttöpfe oder Eierkartons
* Größere Töpfe (mindestens 10 Liter Volumen pro Pflanze) oder ein sonniges Beet
* Tomatenerde
* Pflanzstäbe oder Tomatenkäfige
* Gießkanne
* Mulch (Stroh, Holzhackschnitzel oder Grasschnitt)
* Optional: Flüssigdünger für Tomaten
Phase 1: Die Anzucht
Die Anzucht ist der erste und wichtigste Schritt. Hier legst du den Grundstein für eine erfolgreiche Tomatenernte. Ich mache das immer so:
1. Vorbereitung der Anzuchttöpfe: Fülle deine Anzuchttöpfe oder Eierkartons mit Anzuchterde. Drücke die Erde leicht an, aber nicht zu fest. Sie sollte locker und luftig bleiben.
2. Aussaat der Samen: Lege in jeden Topf oder jedes Fach des Eierkartons 2-3 Tomatensamen. Bedecke die Samen mit einer dünnen Schicht Erde (ca. 0,5 cm).
3. Bewässerung: Befeuchte die Erde vorsichtig mit einer Sprühflasche oder einer Gießkanne mit Brauseaufsatz. Die Erde sollte feucht, aber nicht nass sein.
4. Der Standort: Stelle die Anzuchttöpfe an einen warmen und hellen Ort. Ein sonniges Fensterbrett ist ideal. Die Temperatur sollte idealerweise zwischen 20 und 25 Grad Celsius liegen.
5. Geduld ist gefragt: Halte die Erde feucht, aber vermeide Staunässe. Nach etwa 7-14 Tagen sollten die ersten Keimlinge erscheinen.
6. Pikieren: Sobald die Keimlinge ihre ersten richtigen Blätter (neben den Keimblättern) entwickelt haben, ist es Zeit zum Pikieren. Das bedeutet, dass du die kleinen Pflänzchen in größere Töpfe umpflanzt, damit sie mehr Platz zum Wachsen haben. Wähle die kräftigsten Pflänzchen aus und setze sie vorsichtig in einzelne Töpfe mit Anzuchterde.
Phase 2: Auspflanzen und Pflege
Sobald die Tomatenpflanzen kräftig genug sind und das Wetter mitspielt, können sie ins Freie umziehen. Ich warte damit immer, bis keine Frostgefahr mehr besteht (Mitte Mai nach den Eisheiligen).
1. Vorbereitung des Standorts: Wähle einen sonnigen Standort für deine Tomaten. Tomaten lieben die Sonne und brauchen mindestens 6-8 Stunden Sonnenlicht pro Tag. Bereite den Boden vor, indem du ihn lockerst und mit Kompost oder Tomatenerde anreicherst.
2. Das Auspflanzen: Grabe Löcher, die etwas größer sind als die Wurzelballen der Tomatenpflanzen. Setze die Pflanzen vorsichtig in die Löcher und fülle sie mit Erde auf. Drücke die Erde leicht an.
3. Stütze geben: Setze direkt beim Auspflanzen Pflanzstäbe oder Tomatenkäfige neben die Pflanzen. Tomatenpflanzen werden schwer, wenn sie Früchte tragen, und brauchen Unterstützung, um nicht umzuknicken.
4. Bewässerung: Gieße die Tomatenpflanzen nach dem Auspflanzen gründlich. Achte darauf, dass die Erde immer feucht ist, aber vermeide Staunässe. Gieße am besten morgens, damit die Blätter über den Tag abtrocknen können.
5. Mulchen: Bringe eine Schicht Mulch (Stroh, Holzhackschnitzel oder Grasschnitt) um die Tomatenpflanzen auf. Mulch hilft, die Feuchtigkeit im Boden zu halten, Unkraut zu unterdrücken und den Boden zu düngen.
6. Ausgeizen: Das Ausgeizen ist ein wichtiger Schritt, um eine reiche Tomatenernte zu erzielen. Dabei werden die Seitentriebe (Geiztriebe) entfernt, die sich in den Blattachseln bilden. Diese Triebe nehmen der Pflanze unnötig Kraft und Energie, die sie besser in die Fruchtbildung stecken kann. Entferne die Geiztriebe regelmäßig mit den Fingern oder einer Schere.
7. Düngung: Tomaten sind Starkzehrer und brauchen regelmäßig Dünger. Ich verwende am liebsten einen Flüssigdünger für Tomaten, den ich alle 2-3 Wochen dem Gießwasser beifüge. Achte darauf, die Dosierungsanleitung auf der Verpackung zu beachten.
8. Beobachtung: Beobachte deine Tomatenpflanzen regelmäßig auf Schädlinge und Krankheiten. Bei Bedarf kannst du biologische Schädlingsbekämpfungsmittel oder Fungizide einsetzen.
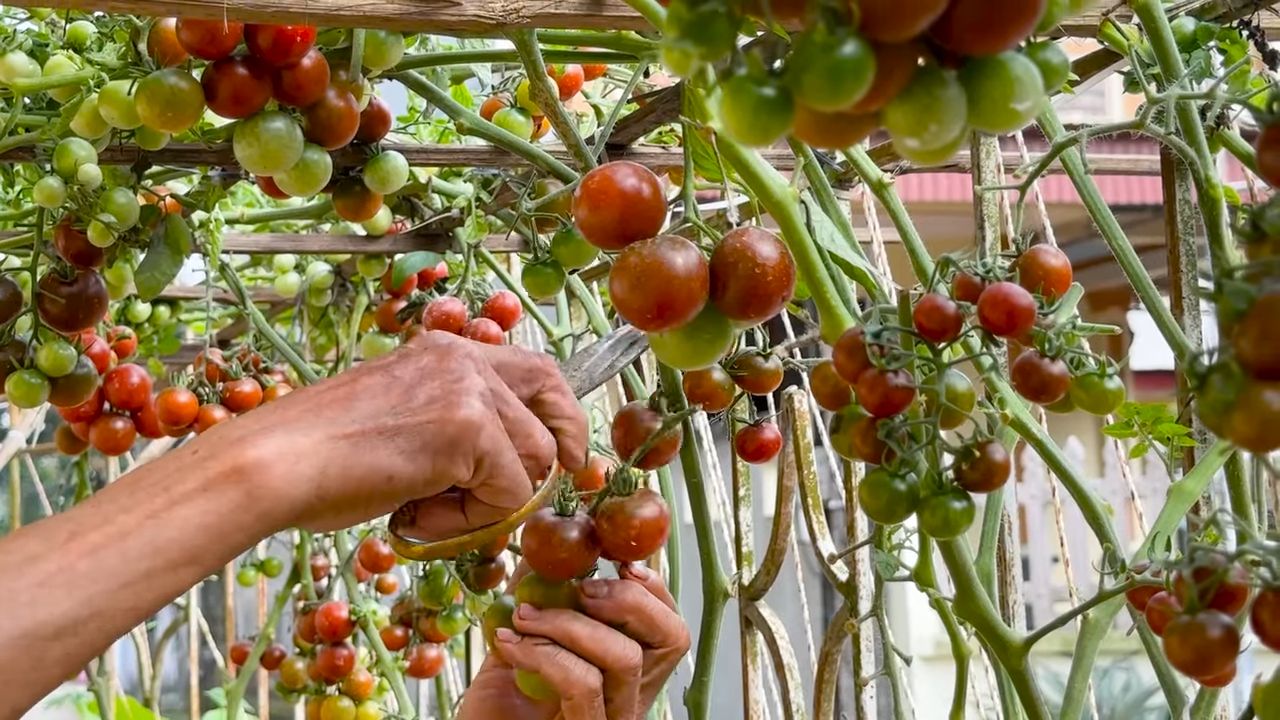
Phase 3: Die Ernte
Die Ernte ist der schönste Teil des Tomatenanbaus!
1. Der richtige Zeitpunkt: Tomaten sind reif, wenn sie ihre typische Farbe erreicht haben (rot, gelb, orange, je nach Sorte) und sich leicht vom Stiel lösen lassen.
2. Die Ernte: Pflücke die reifen Tomaten vorsichtig ab. Lasse die Tomaten nicht zu lange an der Pflanze hängen, da sie sonst platzen können.
3. Lagerung: Lagere die geernteten Tomaten an einem kühlen und trockenen Ort. Vermeide es, sie im Kühlschrank aufzubewahren, da sie sonst an Aroma verlieren.
Zusätzliche Tipps für eine erfolgreiche Tomatenernte:
* Wähle die richtige Sorte: Es gibt unzählige Tomatensorten. Wähle eine Sorte, die für dein Klima und deine Bedürfnisse geeignet ist. Für Anfänger eignen sich robuste Sorten wie ‘Roma’, ‘San Marzano’ oder ‘Cherry’.
* Sorge für ausreichend Belüftung: Tomatenpflanzen brauchen ausreichend Belüftung, um Krankheiten vorzubeugen. Achte darauf, dass die Pflanzen nicht zu dicht stehen und entferne regelmäßig die unteren Blätter.
* Gieße richtig: Gieße Tomatenpflanzen immer von unten, damit die Blätter trocken bleiben. Vermeide Staunässe.
* Schütze vor Regen: Wenn möglich, schütze deine Tomatenpflanzen vor Regen, da dies das Risiko von Pilzkrankheiten erhöht. Du kannst sie zum Beispiel unter ein Dach oder in ein Gewächshaus stellen.
* Sei geduldig: Tomatenanbau braucht Zeit und Geduld. Lass dich nicht entmutigen, wenn nicht alles sofort perfekt klappt. Mit etwas Übung wirst du bald eine reiche Tomatenernte erzielen.
Noch ein paar Tricks, die ich liebe:
* Kaffeesatz als Dünger: Kaffeesatz ist ein hervorragender Dünger für Tomaten. Er enthält Stickstoff, Phosphor und Kalium, die für das Wachstum der Pflanzen wichtig sind. Verteile einfach den Kaffeesatz um die Tomatenpflanzen herum.
* Eierschalen für Calcium: Eierschalen sind reich an Calcium, das Tomatenpflanzen für die Fruchtbildung benötigen. Sammle Eierschalen, zerkleinere sie und mische sie unter die Erde.
* Basilikum als Begleitpflanze: Basilikum ist eine tolle Begleitpflanze für Tomaten. Es hält Schädlinge fern und verbessert den Geschmack der Tomaten. Pflanze einfach Basilikum neben deine Tomatenpflanzen.
* Kupferdraht gegen Krautfäule: Ein alter Gärtnertrick ist es, einen Kupferdraht durch den Stiel der Tomatenpflanze zu ziehen. Das soll die Pflanze widerstandsfähiger gegen Krautfäule machen. Ob es wirklich hilft, ist umstritten, aber schaden kann es nicht.
Ich hoffe, dieser Tomatenanbau-Hack hilft dir dabei, eine reiche Ernte zu erzielen. Viel Spaß beim Gärtnern! Und denk daran: Auch wenn mal etwas schiefgeht, lerne daraus und versuche es im nächsten Jahr einfach wieder. Der Weg ist das Ziel!

Conclusion
So, there you have it! This simple, yet incredibly effective, growing tomatoes beginner hack is more than just a gardening tip; it’s a game-changer for anyone looking to cultivate a thriving tomato patch, regardless of their experience level. We’ve walked you through the process, highlighting the ease and affordability of this method. But why is this DIY trick a must-try?
Firstly, it significantly boosts your chances of a bountiful harvest. By providing your tomato plants with a nutrient-rich foundation right from the start, you’re setting them up for success. This translates to stronger, healthier plants that are more resistant to disease and produce more delicious tomatoes. Imagine biting into a juicy, sun-ripened tomato that you grew yourself – that’s the reward waiting for you!
Secondly, this hack is incredibly accessible. You don’t need to be a seasoned gardener with specialized equipment or expensive fertilizers. The materials are readily available, often already in your kitchen or easily sourced from your local grocery store. This makes it a perfect project for beginners who might feel intimidated by more complex gardening techniques.
But the beauty of this growing tomatoes beginner hack lies in its adaptability. Feel free to experiment with variations to suit your specific needs and preferences. For instance, if you’re concerned about attracting pests, consider adding a sprinkle of diatomaceous earth to the planting hole. Or, if you’re looking to boost the potassium levels in your soil, incorporate some banana peels into the mix. The possibilities are endless!
Don’t be afraid to get your hands dirty and try this method out. Gardening should be an enjoyable and rewarding experience, and this hack is designed to make it just that. We’re confident that you’ll be amazed by the results.
We encourage you to take the plunge and give this growing tomatoes beginner hack a try. Once you’ve experienced the difference it makes, we’d love to hear about your results! Share your photos, tips, and experiences in the comments below. Let’s build a community of thriving tomato growers, one simple hack at a time. Happy gardening!
Frequently Asked Questions (FAQ)
What exactly is this “growing tomatoes beginner hack” and why is it so effective?
This hack involves enriching the soil at the time of planting with readily available ingredients to give your tomato plants a significant head start. It’s effective because it provides essential nutrients directly to the roots, promoting strong growth, disease resistance, and ultimately, a larger and more flavorful tomato harvest. It addresses the common challenges faced by beginner gardeners, such as nutrient deficiencies and weak plant development.
What ingredients are typically used in this hack?
While the specific ingredients can vary based on personal preference and soil conditions, some common and effective additions include:
* **Epsom salts:** Provide magnesium, which is crucial for chlorophyll production and overall plant health.
* **Bone meal:** A slow-release source of phosphorus, essential for root development and flowering.
* **Crushed eggshells:** Add calcium to the soil, preventing blossom-end rot, a common problem in tomatoes.
* **Compost or well-rotted manure:** Provides a balanced mix of nutrients and improves soil structure.
* **Banana peels:** Rich in potassium, which promotes fruit development and ripening.
How do I incorporate these ingredients into the soil when planting my tomato seedlings?
The process is simple:
1. Dig a hole that is slightly larger than the root ball of your tomato seedling.
2. Mix the chosen ingredients (e.g., a tablespoon of Epsom salts, a handful of bone meal, a handful of crushed eggshells, and a scoop of compost) into the bottom of the hole.
3. Cover the mixture with a thin layer of soil to prevent direct contact with the roots.
4. Carefully place the tomato seedling into the hole and fill with soil, ensuring the lowest set of leaves is just above the soil line.
5. Water thoroughly.
Can I use this hack for other plants besides tomatoes?
While this hack is particularly beneficial for tomatoes, it can also be adapted for other fruiting vegetables like peppers, eggplants, and cucumbers. The specific nutrient needs of each plant may vary, so it’s a good idea to research the optimal soil composition for the plants you’re growing.
How often should I apply this hack? Is it a one-time thing at planting, or should I reapply it later in the season?
This hack is primarily intended as a one-time application at the time of planting. The slow-release nature of ingredients like bone meal and compost ensures that nutrients are gradually released to the plant over time. However, you can supplement with liquid fertilizers throughout the growing season if you notice any signs of nutrient deficiencies.
What if I don’t have all the recommended ingredients? Can I still use this hack?
Absolutely! The beauty of this hack is its flexibility. Even using just one or two of the recommended ingredients will provide a benefit to your tomato plants. Focus on the ingredients that are most readily available to you and that address the specific needs of your soil. For example, if your soil is already rich in phosphorus, you might skip the bone meal.
Is there a risk of over-fertilizing my tomato plants with this hack?
While it’s generally safe to use the recommended amounts of the ingredients, it’s always a good idea to err on the side of caution. Over-fertilizing can lead to excessive foliage growth at the expense of fruit production. If you’re unsure about the nutrient content of your soil, consider getting a soil test before applying any amendments.
What are some signs that my tomato plants are lacking essential nutrients?
Common signs of nutrient deficiencies in tomato plants include:
* **Yellowing leaves:** Can indicate a nitrogen deficiency.
* **Purple leaves:** Can indicate a phosphorus deficiency.
* **Blossom-end rot:** A calcium deficiency that causes the bottom of the tomato to turn black and leathery.
* **Stunted growth:** Can indicate a deficiency in various nutrients.
How can I prevent blossom-end rot in my tomatoes?
Blossom-end rot is primarily caused by a calcium deficiency, but it can also be exacerbated by inconsistent watering. In addition to adding crushed eggshells to the planting hole, ensure that your tomato plants receive consistent and adequate watering throughout the growing season. Mulching around the plants can help retain moisture in the soil.
What kind of soil is best for growing tomatoes?
Tomatoes thrive in well-draining soil that is rich in organic matter. A slightly acidic soil pH (around 6.0 to 6.8) is ideal. If your soil is heavy clay or sandy, amend it with compost or other organic matter to improve its structure and drainage.
How important is sunlight for growing tomatoes?
Tomatoes require at least 6-8 hours of direct sunlight per day to produce a good harvest. Choose a planting location that receives plenty of sunlight throughout the day.
What are some common pests and diseases that affect tomato plants, and how can I prevent them?
Common pests include aphids, tomato hornworms, and whiteflies. Common diseases include early blight, late blight, and fusarium wilt. To prevent these problems, choose disease-resistant varieties, practice good sanitation in your garden, and monitor your plants regularly for signs of pests or diseases. Organic pest control methods, such as insecticidal soap or neem oil, can be effective for managing pests.
Where can I find more information about growing tomatoes?
Your local agricultural extension office is a great resource for information about growing tomatoes in your specific region. You can also find a wealth of information online from reputable gardening websites and organizations. Remember to always verify the information you find online with reliable sources.
Leave a Comment