
Balcony Cabbage Growing Tips: Dreaming of fresh, homegrown cabbage but short on space? You’re not alone! Many urban dwellers crave the satisfaction of cultivating their own food, and thankfully, you don’t need acres of land to make it happen. This DIY guide unlocks the secrets to successfully growing delicious, crisp cabbage right on your balcony.
For centuries, cabbage has been a staple in diets around the world, from the hearty stews of Eastern Europe to the vibrant slaws of North America. Its resilience and nutritional value have made it a beloved crop. But what if I told you that you could bring this historical veggie right to your doorstep, even if your “garden” is a small balcony?
Let’s face it, store-bought cabbage can sometimes be bland and lacking in that fresh, vibrant flavor. Plus, knowing exactly where your food comes from and how it’s grown is incredibly rewarding. That’s where these balcony cabbage growing tips come in! I’m going to share simple, effective techniques that will help you overcome common challenges like limited sunlight, small spaces, and pest control. Get ready to transform your balcony into a mini-cabbage patch and enjoy the taste of homegrown goodness!
Balkonkohl: Dein eigener kleiner Gemüsegarten auf dem Balkon
Hey Gartenfreunde! Träumst du auch davon, frisches, knackiges Gemüse direkt vor deiner Haustür zu ernten? Dann bist du hier genau richtig! Ich zeige dir, wie du auf deinem Balkon ganz einfach Kohl anbauen kannst. Keine Angst, es ist einfacher als du denkst und macht richtig Spaß!
Warum Kohl auf dem Balkon?
Kohl ist nicht nur super gesund, sondern auch überraschend anspruchslos. Er verträgt auch mal einen kühleren Tag und ist somit perfekt für unser wechselhaftes Klima. Außerdem gibt es viele verschiedene Kohlsorten, die sich hervorragend für den Anbau im Topf eignen. Denk an Grünkohl, Palmkohl, Rosenkohl oder sogar Spitzkohl – die Auswahl ist riesig!
Was du brauchst: Die Materialliste
Bevor wir loslegen, solltest du sicherstellen, dass du alles griffbereit hast. Hier ist eine Liste mit den wichtigsten Dingen:
* **Kohlpflanzen:** Am besten Jungpflanzen aus dem Gartencenter oder vom Wochenmarkt. Achte darauf, dass sie gesund und kräftig aussehen.
* **Pflanzgefäße:** Große Töpfe oder Kübel mit ausreichend Volumen (mindestens 20 Liter pro Pflanze, je nach Sorte).
* **Pflanzerde:** Hochwertige Gemüseerde ist wichtig für eine gute Nährstoffversorgung.
* **Drainagematerial:** Blähton, Kies oder Tonscherben für eine gute Drainage im Topf.
* **Dünger:** Organischer Dünger (z.B. Hornspäne oder Kompost) oder ein spezieller Gemüsedünger.
* **Gießkanne:** Zum regelmäßigen Gießen.
* **Schere oder Messer:** Zum Ernten.
* **Eventuell:** Schneckenzaun oder -korn, falls du Probleme mit Schnecken hast.
* **Eventuell:** Rankhilfe für hochwachsende Kohlsorten wie Palmkohl.
Die Vorbereitung: Der richtige Standort und das Pflanzgefäß
Der Standort ist entscheidend für den Erfolg deines Balkonkohl-Projekts. Kohl braucht viel Sonne, mindestens 6 Stunden täglich. Achte also darauf, dass dein Balkon ausreichend Sonnenlicht bekommt.
1. **Wähle den richtigen Standort:** Suche einen sonnigen Platz auf deinem Balkon aus.
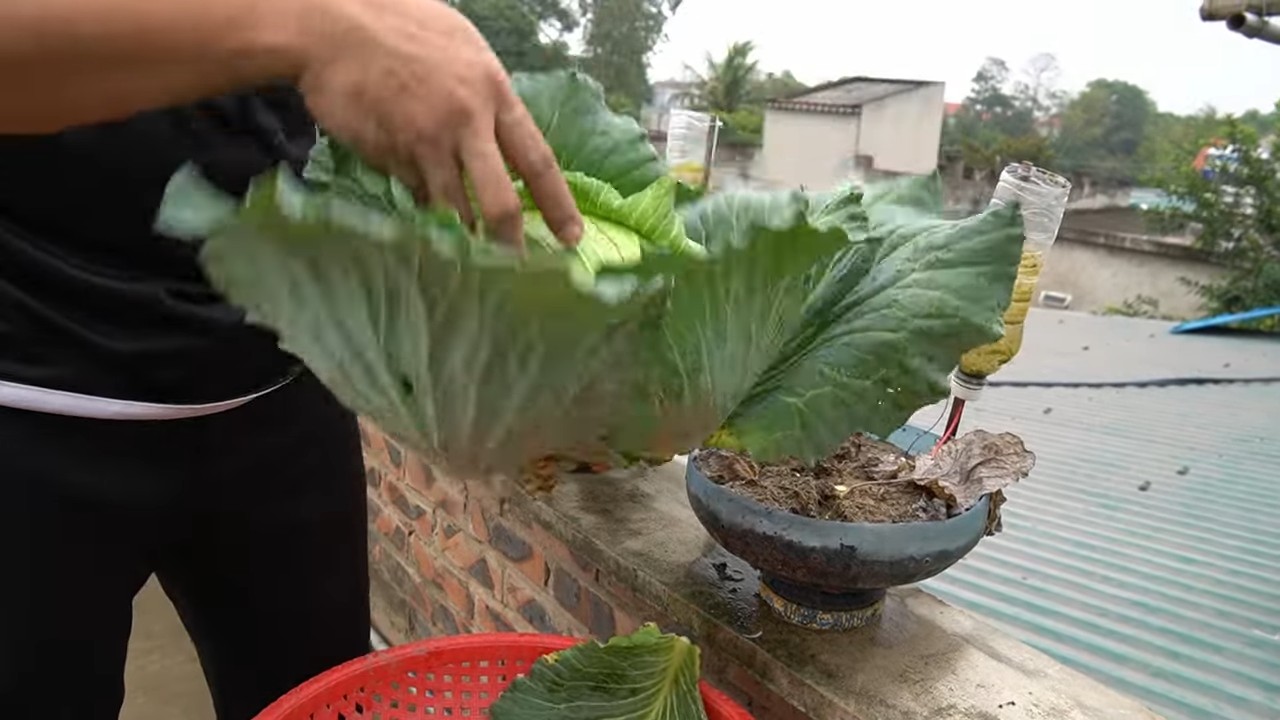
2. **Bereite die Pflanzgefäße vor:** Reinige die Töpfe gründlich und lege eine Schicht Drainagematerial auf den Boden. Das verhindert Staunässe.
3. **Fülle die Töpfe mit Erde:** Fülle die Töpfe mit Gemüseerde, lasse aber noch etwas Platz bis zum Rand.
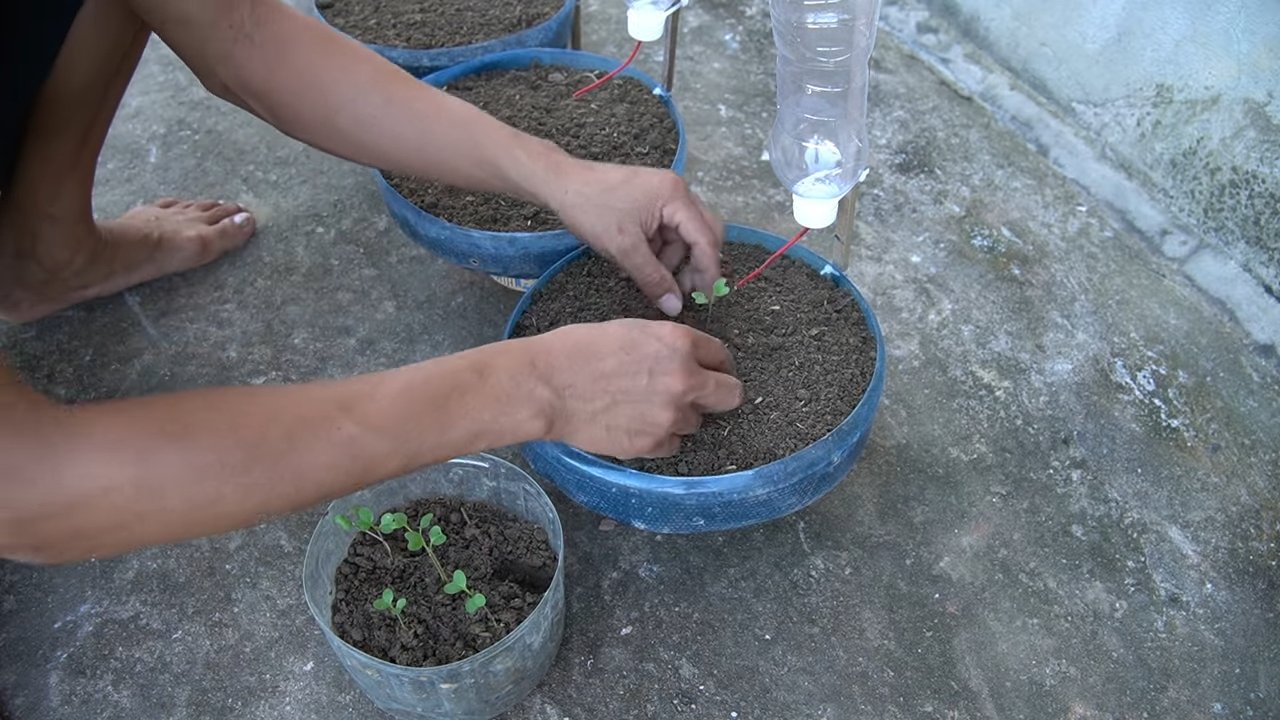
Das Einpflanzen: Schritt für Schritt zum eigenen Kohl
Jetzt kommt der spannende Teil: das Einpflanzen der Kohlpflanzen!
1. **Lockere die Wurzelballen auf:** Nimm die Kohlpflanzen vorsichtig aus ihren Anzuchttöpfen und lockere die Wurzelballen etwas auf. Das fördert das Anwachsen.
2. **Setze die Pflanzen ein:** Grabe kleine Löcher in die Erde und setze die Kohlpflanzen hinein. Achte darauf, dass der Wurzelhals (der Übergang zwischen Wurzel und Stängel) knapp unter der Erde liegt.
3. **Fülle die Löcher mit Erde auf:** Fülle die Löcher mit Erde auf und drücke sie leicht an.
4. **Gieße die Pflanzen an:** Gieße die Pflanzen gründlich an, damit die Erde sich setzt und die Wurzeln gut Kontakt zur Erde bekommen.
Die Pflege: Gießen, Düngen und Schützen
Kohl ist zwar anspruchslos, aber ein bisschen Pflege braucht er trotzdem.
Gießen
* **Regelmäßig gießen:** Kohl braucht regelmäßig Wasser, besonders während der Wachstumsphase. Achte darauf, dass die Erde immer leicht feucht ist, aber nicht nass. Vermeide Staunässe, da dies zu Wurzelfäule führen kann.
* **Gieße am besten morgens oder abends:** So verdunstet das Wasser nicht so schnell und die Pflanzen können es besser aufnehmen.
* **Gieße direkt an die Wurzeln:** Vermeide es, die Blätter zu gießen, da dies Pilzkrankheiten fördern kann.
Düngen
* **Regelmäßig düngen:** Kohl ist ein Starkzehrer und braucht viele Nährstoffe. Dünge die Pflanzen regelmäßig mit organischem Dünger oder einem speziellen Gemüsedünger.
* **Beginne mit dem Düngen etwa 2-3 Wochen nach dem Einpflanzen:** Dann haben sich die Pflanzen gut eingewurzelt und können die Nährstoffe besser aufnehmen.
* **Beachte die Dosierungsanleitung auf der Verpackung:** Überdüngung kann schädlich sein.
Schützen
* **Schutz vor Schädlingen:** Kohl kann von verschiedenen Schädlingen befallen werden, wie z.B. Kohlweißlingen, Blattläusen oder Schnecken. Kontrolliere die Pflanzen regelmäßig und entferne Schädlinge gegebenenfalls von Hand.
* **Schutz vor Schnecken:** Schnecken können Kohlpflanzen über Nacht kahl fressen. Schütze deine Pflanzen mit einem Schneckenzaun oder Schneckenkorn.
* **Schutz vor Kohlweißlingen:** Kohlweißlinge legen ihre Eier auf die Blätter des Kohls. Die Raupen fressen dann die Blätter. Du kannst die Pflanzen mit einem Netz schützen oder die Raupen von Hand absammeln.
* **Schutz vor Krankheiten:** Kohl kann von verschiedenen Krankheiten befallen werden, wie z.B. Kohlhernie oder Falscher Mehltau. Achte auf Anzeichen von Krankheiten und entferne befallene Blätter oder Pflanzen. Sorge für eine gute Belüftung und vermeide Staunässe, um Krankheiten vorzubeugen.
Die Ernte: Endlich frischer Kohl vom Balkon!
Je nach Kohlsorte kannst du nach einigen Wochen oder Monaten deinen eigenen Kohl ernten.
* **Erntezeitpunkt:** Der Erntezeitpunkt hängt von der Kohlsorte ab. Grünkohl kann z.B. schon nach wenigen Wochen geerntet werden, während Rosenkohl etwas länger braucht.
* **Erntemethode:** Schneide die Kohlköpfe oder Blätter mit einem scharfen Messer oder einer Schere ab.
* **Lagerung:** Frischer Kohl hält sich im Kühlschrank einige Tage. Du kannst ihn auch einfrieren oder fermentieren, um ihn länger haltbar zu machen.
Spezielle Tipps für verschiedene Kohlsorten
Jede Kohlsorte hat ihre eigenen Besonderheiten. Hier sind ein paar Tipps für beliebte Sorten:
* **Grünkohl:** Grünkohl ist sehr robust und verträgt auch Frost. Er kann mehrmals geerntet werden, indem man die äußeren Blätter abzupft.
* **Palmkohl:** Palmkohl ist eine dekorative Kohlsorte, die hoch wächst. Er braucht eine Rankhilfe.
* **Rosenkohl:** Rosenkohl braucht etwas länger, um zu reifen. Die Röschen werden von unten nach oben geerntet.
* **Spitzkohl:** Spitzkohl ist eine frühe Kohlsorte, die schnell wächst. Er ist besonders zart und aromatisch.
Häufige Fehler vermeiden
Auch beim Kohlanbau auf dem Balkon können Fehler passieren. Hier sind ein paar typische Fehler, die du vermeiden solltest:
* **Zu kleine Töpfe:** Kohl braucht ausreichend Platz für seine Wurzeln. Wähle ausreichend große Töpfe.
* **Falsche Erde:** Verwende hochwertige Gemüseerde, die ausreichend Nährstoffe enthält.
* **Zu wenig Sonne:** Kohl braucht viel Sonne. Achte auf einen sonnigen Standort.
* **Staunässe:** Vermeide Staunässe, da dies zu Wurzelfäule führen kann.
* **Vernachlässigung der Pflege:** Gieße und dünge die Pflanzen regelmäßig und schütze sie vor Schädlingen und Krankheiten.
Fazit: Dein eigener Balkonkohl ist möglich!
Mit ein bisschen Planung und Pflege kannst du auch auf deinem Balkon erfolgreich Kohl anbauen. Es ist eine tolle Möglichkeit, frisches, gesundes Gemüse zu ernten und deinen Balkon in einen kleinen Gemüsegarten zu verwandeln. Also, worauf wartest du noch? Leg los und ernte bald deinen eigenen Balkonkohl! Viel Spaß dabei!
Conclusion
So, there you have it! Growing cabbage on your balcony isn’t just a whimsical gardening dream; it’s a surprisingly achievable reality. We’ve walked through the key steps, from selecting the right varieties to warding off common pests, all tailored for the unique environment of a balcony garden. But why should you actually *do* this? Why dedicate precious balcony space to cabbage when you could have petunias or patio tomatoes?
The answer is multifaceted. First, there’s the sheer satisfaction of nurturing something from seed to harvest, especially in a limited space. It’s a tangible connection to nature, a reminder of the cycles of growth and renewal, right outside your door. Second, and perhaps more practically, home-grown cabbage tastes *amazing*. It’s fresher, crisper, and often sweeter than anything you’ll find in the supermarket. You control the growing conditions, ensuring it’s free from unwanted chemicals and harvested at peak ripeness.
But the real magic lies in the customization. Feel free to experiment! Try different varieties of cabbage. Red cabbage adds a vibrant splash of color to your balcony and a slightly peppery flavor to your dishes. Savoy cabbage, with its crinkled leaves, offers a milder, sweeter taste. Consider companion planting. Marigolds can deter pests, while dill can attract beneficial insects. You could even interplant your cabbage with herbs like thyme or rosemary, creating a fragrant and functional balcony garden.
Don’t be afraid to get creative with your containers, either. While we’ve recommended specific sizes, you can adapt them to fit your available space. Just remember to ensure adequate drainage and provide sufficient support for the growing cabbage heads. Vertical gardening techniques, such as using stacked planters or hanging baskets (for smaller varieties), can also maximize your yield in a limited area.
And speaking of yield, remember that **balcony cabbage growing** is a learning process. Don’t be discouraged if your first attempt isn’t perfect. Every season brings new challenges and opportunities to refine your techniques. Keep a gardening journal to track your progress, noting what worked well and what didn’t. This will help you become a more skilled and confident balcony gardener over time.
Ultimately, growing cabbage on your balcony is about more than just producing food. It’s about connecting with nature, fostering creativity, and enjoying the simple pleasures of gardening. It’s about transforming a small outdoor space into a thriving ecosystem, a source of fresh produce, and a haven for relaxation.
So, what are you waiting for? Grab some seeds, prepare your containers, and get ready to embark on your own balcony cabbage growing adventure. We’re confident that you’ll be amazed by what you can achieve. And when you do, we want to hear about it! Share your experiences, your tips, and your photos with us. Let’s build a community of balcony cabbage growers, sharing our knowledge and inspiring others to embrace the joys of urban gardening. Happy growing!
Frequently Asked Questions (FAQ)
1. What is the best time of year to start growing cabbage on my balcony?
The ideal time to start growing cabbage depends on your climate and the specific variety you choose. Generally, cabbage is a cool-season crop, meaning it thrives in temperatures between 60°F and 70°F (15°C and 21°C). For spring harvests, start seeds indoors 6-8 weeks before the last expected frost. For fall harvests, start seeds outdoors in mid-summer. Check the seed packet for specific recommendations for your chosen variety and region. Consider your balcony’s microclimate as well; a sheltered balcony may allow you to start earlier or extend the growing season.
2. How much sunlight does cabbage need when grown on a balcony?
Cabbage requires at least 6 hours of direct sunlight per day to thrive. If your balcony doesn’t receive that much sunlight, you can supplement with grow lights. Position the lights about 6-12 inches above the plants and keep them on for 12-14 hours per day. Rotate the plants regularly to ensure even light exposure. Observe your plants closely for signs of insufficient light, such as leggy growth or pale leaves.
3. What kind of soil is best for growing cabbage in containers?
Cabbage needs well-draining, nutrient-rich soil. A good potting mix for container gardening is essential. Avoid using garden soil, as it can become compacted in containers and hinder drainage. Amend your potting mix with compost or other organic matter to improve fertility and water retention. A slightly acidic soil pH (around 6.0 to 6.5) is ideal for cabbage. You can test your soil pH with a home testing kit and adjust it accordingly.
4. How often should I water my balcony cabbage plants?
Water cabbage plants regularly, especially during hot, dry weather. The soil should be consistently moist but not waterlogged. Check the soil moisture by sticking your finger about an inch deep. If the soil feels dry, it’s time to water. Water deeply, allowing the water to drain out of the bottom of the container. Avoid overhead watering, as this can promote fungal diseases. Consider using a self-watering container or adding a layer of mulch to help retain moisture.
5. What are some common pests and diseases that affect cabbage, and how can I prevent them on my balcony?
Common cabbage pests include cabbage worms, aphids, and flea beetles. Diseases include clubroot, black rot, and downy mildew. To prevent these problems, inspect your plants regularly for signs of pests or diseases. Handpick pests or use insecticidal soap or neem oil. Ensure good air circulation to prevent fungal diseases. Rotate your crops each year to prevent soilborne diseases from building up. Choose disease-resistant varieties whenever possible. Companion planting with herbs like rosemary and thyme can also help deter pests.
6. How do I know when my cabbage is ready to harvest?
Cabbage is ready to harvest when the head is firm and feels solid when squeezed gently. The size of the head will vary depending on the variety. Check the seed packet for the expected maturity date. To harvest, cut the head off at the base with a sharp knife, leaving a few outer leaves intact. These leaves can protect the cut surface and prevent it from drying out.
7. Can I grow cabbage in a small container on my balcony?
While larger containers are generally recommended, you can grow smaller varieties of cabbage in smaller containers. Choose dwarf or miniature varieties that are specifically bred for container gardening. Ensure that the container has adequate drainage and provide regular watering and fertilization. You may need to harvest the cabbage heads earlier than you would with larger varieties.
8. What kind of fertilizer should I use for my balcony cabbage plants?
Cabbage is a heavy feeder and requires regular fertilization. Use a balanced fertilizer with a higher nitrogen content during the early stages of growth to promote leafy growth. Once the head begins to form, switch to a fertilizer with a higher phosphorus and potassium content to encourage head development. Follow the instructions on the fertilizer label carefully. You can also supplement with compost tea or other organic fertilizers.
9. Can I grow cabbage indoors if I don’t have a balcony?
While it’s possible to grow cabbage indoors, it can be challenging to provide the necessary light and temperature conditions. Cabbage requires a lot of sunlight, so you’ll need to supplement with strong grow lights. You’ll also need to maintain a cool temperature, which can be difficult in a heated home. If you’re determined to grow cabbage indoors, choose a dwarf variety and provide optimal growing conditions.
10. How can I maximize my yield when growing cabbage on my balcony?
To maximize your yield, choose the right varieties, provide optimal growing conditions, and practice good gardening techniques. Select varieties that are well-suited for container gardening and your local climate. Ensure that your plants receive adequate sunlight, water, and nutrients. Practice crop rotation, companion planting, and pest and disease control. Harvest your cabbage heads at the peak of ripeness. Consider succession planting, starting new seeds every few weeks to ensure a continuous harvest throughout the growing season.


Leave a Comment