
Harvesting Malabar Spinach, also known as Ceylon Spinach or vine spinach, might seem daunting at first, but trust me, it’s easier than you think! Have you ever dreamt of a lush, vibrant garden overflowing with fresh, homegrown greens, ready to be plucked and tossed into your favorite dishes? I know I have! For centuries, cultures across Asia and Africa have cherished Malabar Spinach, not only for its delicious, slightly citrusy flavor but also for its impressive nutritional benefits. It’s a powerhouse of vitamins and minerals, making it a fantastic addition to any healthy diet.
But here’s the thing: many gardeners, especially beginners, struggle with knowing *when* and *how* to properly harvest this leafy green. They end up with either tough, overgrown leaves or, worse, damage the plant, hindering future growth. That’s where this DIY guide comes in! I’m going to share my tried-and-true tricks and hacks for harvesting Malabar Spinach like a pro, ensuring you get the most out of your plant and enjoy a continuous supply of fresh, delicious greens all season long. Get ready to unlock the secrets to a bountiful harvest and elevate your home gardening game!
Harvesting Malabar Spinach Like a Pro: A DIY Guide
Okay, so you’ve nurtured your Malabar spinach, watched it climb and thrive, and now it’s time for the best part: harvesting! Don’t worry, it’s easier than you think. I’m going to walk you through everything you need to know to harvest your Malabar spinach properly, ensuring you get the most delicious and abundant yield possible.
Understanding Malabar Spinach Growth
Before we dive into the harvesting process, let’s quickly touch on how Malabar spinach grows. This will help you understand *when* and *how* to harvest for optimal results.
* Vine Growth: Malabar spinach is a vine, meaning it grows upwards and outwards. It can get quite long, so regular harvesting encourages bushier growth.
* Leaf Development: You’ll notice leaves growing along the vine. These are the edible parts we’re after.
* Flowering: Eventually, your plant will start to flower. While the flowers are technically edible, harvesting before flowering encourages more leaf production. Once it starts heavily flowering, the leaves can become a bit bitter.
When to Harvest Your Malabar Spinach
Knowing when to harvest is key to getting the best flavor and encouraging continued growth.
* Timing is Everything: You can start harvesting Malabar spinach about 45-60 days after planting, or when the vines are at least 6-8 inches long.
* Leaf Size: Look for leaves that are about 4-6 inches long. These are generally the most tender and flavorful.
* Regular Harvesting: The more you harvest, the more the plant will produce! Aim to harvest every week or two during the growing season. This encourages new growth and prevents the plant from becoming leggy.
* Avoid Over-Harvesting: Don’t strip the entire plant bare. Leave at least a few leaves on each vine to allow it to continue growing.
Tools You’ll Need
Luckily, you don’t need a ton of fancy equipment for this. Here’s what I usually use:
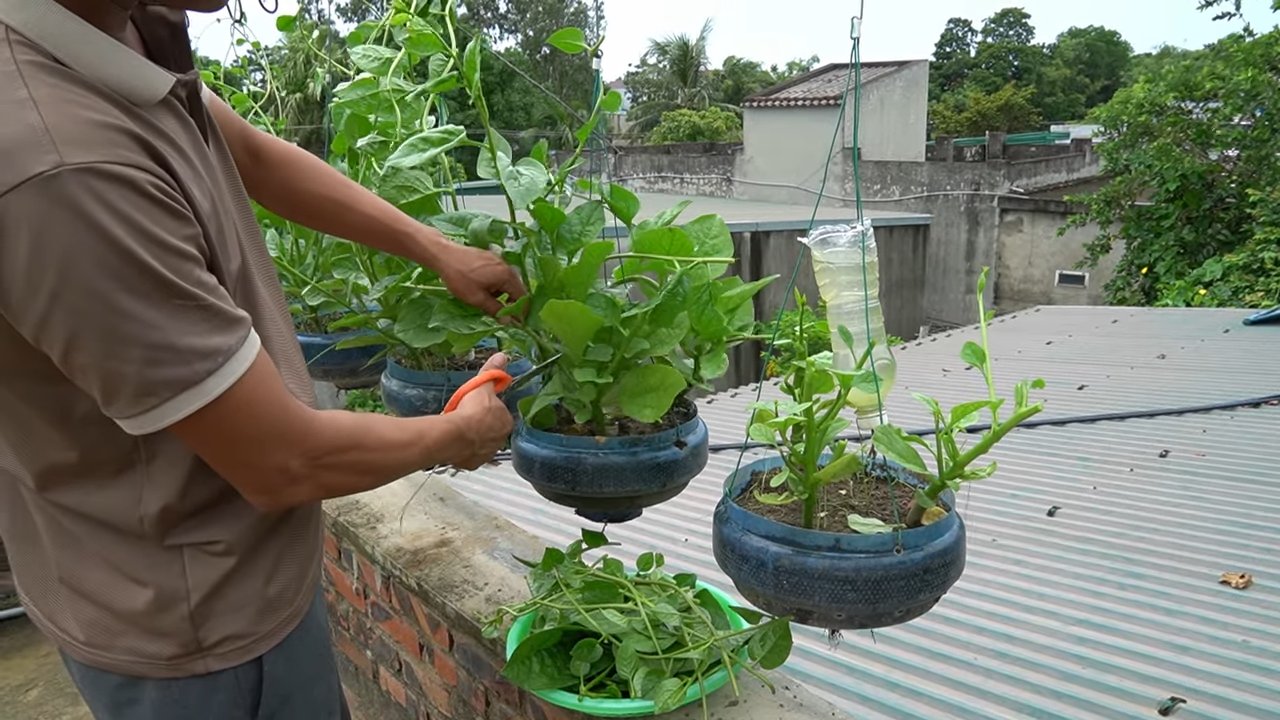
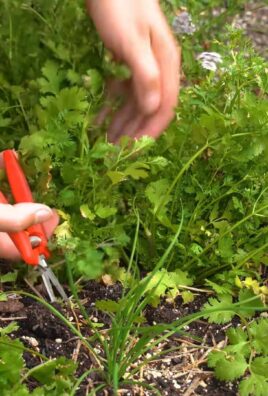
* Sharp Scissors or Pruning Shears: This is essential for making clean cuts and preventing damage to the plant.
* Basket or Bag: To collect your harvested spinach.
* Gloves (Optional): Some people find the sap from Malabar spinach a bit sticky, so gloves can be helpful. I usually don’t bother, but it’s up to you.
Step-by-Step Harvesting Guide
Alright, let’s get down to the nitty-gritty. Here’s how I harvest my Malabar spinach:
1. Inspect the Plant: Take a good look at your Malabar spinach plant. Identify the vines with leaves that are the right size (4-6 inches). Look for healthy, vibrant green leaves. Avoid any leaves that are yellowing or damaged.
2. Choose Your Harvesting Method: There are two main ways to harvest Malabar spinach:
* Individual Leaf Harvesting: This involves picking individual leaves from the vine. This is great for smaller harvests or when you only need a few leaves.
* Vine Tip Harvesting: This involves cutting off the tips of the vines. This is a more efficient method for larger harvests and encourages bushier growth.
3. Harvesting Individual Leaves:
* Locate the Leaf Stem: Find the point where the leaf stem (the small stalk connecting the leaf to the vine) attaches to the main vine.
* Make a Clean Cut: Using your sharp scissors or pruning shears, make a clean cut through the leaf stem, close to the main vine. Be careful not to damage the main vine.
* Gently Remove the Leaf: Gently pull the leaf away from the vine.
4. Harvesting Vine Tips:
* Identify the Vine Tip: Look for the end of a vine with several healthy leaves.
* Make the Cut: Cut the vine about 4-6 inches from the tip, just above a leaf node (the point where a leaf or branch grows from the vine). This encourages new growth to sprout from that node.
* Collect the Vine Tip: Carefully collect the harvested vine tip.
5. Repeat the Process: Continue harvesting leaves or vine tips from different parts of the plant, being mindful not to over-harvest. Remember to leave plenty of leaves on the plant to allow it to continue growing.
6. Post-Harvest Care:
* Wash the Spinach: Gently wash the harvested spinach leaves or vine tips under cool water to remove any dirt or debris.
* Dry the Spinach: Pat the spinach dry with a clean towel or spin it in a salad spinner.
* Store the Spinach: Store the spinach in a plastic bag or container in the refrigerator. It’s best to use it within a few days for optimal freshness.
Tips for Maximizing Your Harvest
Here are a few extra tips I’ve learned over the years to help you get the most out of your Malabar spinach:
* Water Regularly: Malabar spinach needs consistent moisture, especially during hot weather. Water deeply and regularly, especially after harvesting.
* Fertilize Occasionally: Feed your Malabar spinach with a balanced fertilizer every few weeks to encourage healthy growth. I like to use a liquid seaweed fertilizer.
* Provide Support: Since Malabar spinach is a vine, it needs something to climb on. A trellis, fence, or even a sturdy stake will work well.
* Pest Control: Keep an eye out for pests like aphids or spider mites. Treat any infestations promptly with insecticidal soap or neem oil.
* Succession Planting: To ensure a continuous harvest throughout the growing season, consider succession planting. Plant new seeds or seedlings every few weeks.
* Don’t Be Afraid to Experiment: Every garden is different, so don’t be afraid to experiment with different harvesting techniques and growing methods to see what works best for you.
Using Your Harvested Malabar Spinach
Now that you’ve got a basket full of fresh Malabar spinach, what do you do with it? The possibilities are endless!
* Salads: Use the young, tender leaves in salads for a slightly peppery flavor.
* Stir-fries: Add Malabar spinach to stir-fries for a healthy and delicious boost.
* Soups and Stews: Use Malabar spinach as a leafy green in soups and stews. It thickens the broth slightly.
* Smoothies: Blend Malabar spinach into smoothies for a nutritious and vibrant green drink.
* Sauteed: Sauté Malabar spinach with garlic and olive oil for a simple and flavorful side dish.
* Indian Cuisine: Malabar spinach is commonly used in Indian dishes like saag.
Troubleshooting Common Issues
Sometimes, things don’t go exactly as planned. Here are a few common issues you might encounter and how to address them:
* Yellowing Leaves: This could be a sign of overwatering, underwatering, or nutrient deficiency. Adjust your watering schedule and fertilize the plant if necessary.
* Slow Growth: This could be due to lack of sunlight, poor soil, or cool temperatures. Make sure your plant is getting at least 6 hours of sunlight per day and amend the soil with compost.
* Pest Infestations: Treat any pest infestations promptly with insecticidal soap or neem oil.
* Bitter Taste: This can happen if the plant is allowed to flower heavily. Harvest regularly to prevent flowering and maintain a sweeter flavor.
Enjoying the Fruits (or Leaves!) of Your Labor
Harvesting Malabar spinach is a rewarding experience. Not only do you get to enjoy fresh, delicious greens, but you also get to connect with nature and nurture your own food. With a little care and attention, you can enjoy a bountiful harvest of Malabar spinach all season long. Happy gardening!
Conclusion
So, there you have it! Mastering the art of harvesting Malabar spinach isn’t just about gathering leaves; it’s about unlocking a continuous supply of fresh, nutritious greens right from your own garden. This simple DIY trick transforms your Malabar spinach plant from a one-time harvest into a veritable leafy green factory, providing you with a steady stream of deliciousness for salads, stir-fries, soups, and so much more.
Why is this a must-try? Because it’s efficient, sustainable, and ultimately, more rewarding. Instead of letting your Malabar spinach bolt and go to seed prematurely, strategic harvesting encourages bushier growth and prolonged productivity. You’re essentially training your plant to keep producing those tender, flavorful leaves that you crave. Plus, think of the money you’ll save by reducing your reliance on store-bought greens!
But the beauty of this DIY trick lies in its adaptability. Feel free to experiment with different harvesting techniques to find what works best for your plant and your preferences. For example, if you prefer smaller, more tender leaves, focus on harvesting the tips of the vines more frequently. If you want larger leaves for cooking, allow them to mature a bit longer before snipping them off.
Consider these variations to elevate your Malabar spinach experience:
* Vertical Gardening: If space is limited, grow your Malabar spinach vertically on a trellis or fence. This not only saves space but also makes harvesting even easier.
* Companion Planting: Plant Malabar spinach alongside other beneficial plants like basil or marigolds to deter pests and attract pollinators.
* Seed Saving: Once your plant does eventually flower and produce seeds, collect them to propagate new plants and expand your Malabar spinach empire.
* Culinary Creations: Don’t limit yourself to just salads! Explore the diverse culinary possibilities of Malabar spinach. Try it in smoothies, omelets, or even as a substitute for spinach in your favorite recipes.
Ultimately, the key to successful harvesting Malabar spinach is observation and experimentation. Pay attention to your plant’s growth patterns, adjust your harvesting techniques accordingly, and don’t be afraid to try new things.
We wholeheartedly encourage you to give this DIY trick a try. It’s a simple yet powerful way to maximize the yield and enjoyment of your Malabar spinach plant. And most importantly, we want to hear about your experience! Share your tips, tricks, and culinary creations in the comments below. Let’s build a community of Malabar spinach enthusiasts and learn from each other’s successes (and even failures!). Happy harvesting!
Frequently Asked Questions (FAQ)
What is the best time of day to harvest Malabar spinach?
The best time to harvest Malabar spinach is generally in the morning, after the dew has dried but before the heat of the day sets in. This is when the leaves are at their most turgid and flavorful. Harvesting in the heat of the day can cause the leaves to wilt more quickly. However, if you need to harvest at a different time, don’t worry too much; just make sure to keep the harvested leaves cool and hydrated.
How often should I harvest my Malabar spinach?
The frequency of harvesting depends on the growth rate of your plant and your consumption needs. Generally, you can start harvesting leaves about 6-8 weeks after planting. After that, you can harvest every week or two, depending on how quickly the plant is growing. The more you harvest, the more the plant will be encouraged to produce new growth. A good rule of thumb is to harvest about one-third of the plant’s leaves at a time to avoid stressing it too much.
What part of the Malabar spinach plant should I harvest?
You can harvest both the leaves and the tender stems of Malabar spinach. For the leaves, focus on harvesting the younger, more tender leaves at the tips of the vines. These leaves are generally more flavorful and less bitter than the older leaves. You can also harvest the tender stems along with the leaves. Simply snip off the stems a few inches below the leaves. Avoid harvesting the thick, woody stems, as they can be tough and less palatable.
How do I store harvested Malabar spinach?
To store harvested Malabar spinach, gently wash the leaves and stems to remove any dirt or debris. Pat them dry with a clean towel or spin them in a salad spinner. Then, wrap the leaves in a damp paper towel and place them in a plastic bag or container in the refrigerator. Stored this way, Malabar spinach should stay fresh for about 3-5 days. Avoid storing the leaves in a sealed container, as this can cause them to rot more quickly.
My Malabar spinach leaves are turning yellow. What’s wrong?
Yellowing leaves on Malabar spinach can be caused by several factors, including overwatering, underwatering, nutrient deficiencies, or pests. Check the soil moisture to ensure that the plant is not sitting in soggy soil or drying out completely. If the soil is consistently too wet or too dry, adjust your watering schedule accordingly. You can also try fertilizing the plant with a balanced fertilizer to address any nutrient deficiencies. Inspect the leaves for any signs of pests, such as aphids or spider mites, and treat them accordingly.
Can I eat Malabar spinach raw?
Yes, you can eat Malabar spinach raw, especially the younger, more tender leaves. However, some people find the raw leaves to have a slightly slimy texture, similar to okra. If you don’t enjoy the raw texture, you can cook the leaves to reduce the sliminess. Malabar spinach can be steamed, sautéed, or added to soups and stews.
How do I encourage my Malabar spinach plant to produce more leaves?
Regular harvesting is the key to encouraging your Malabar spinach plant to produce more leaves. By consistently removing the leaves and stems, you are signaling to the plant to produce new growth. You can also fertilize the plant regularly with a balanced fertilizer to provide it with the nutrients it needs to support new growth. Make sure the plant is getting plenty of sunlight and water, as these are also essential for healthy growth.
Is Malabar spinach the same as regular spinach?
No, Malabar spinach is not the same as regular spinach. While both are leafy green vegetables, they belong to different plant families and have different characteristics. Regular spinach (Spinacia oleracea) is a cool-season crop that is typically grown in the spring and fall. Malabar spinach (Basella alba or Basella rubra) is a warm-season crop that thrives in hot, humid weather. Malabar spinach also has a thicker, more succulent texture than regular spinach and a slightly different flavor.
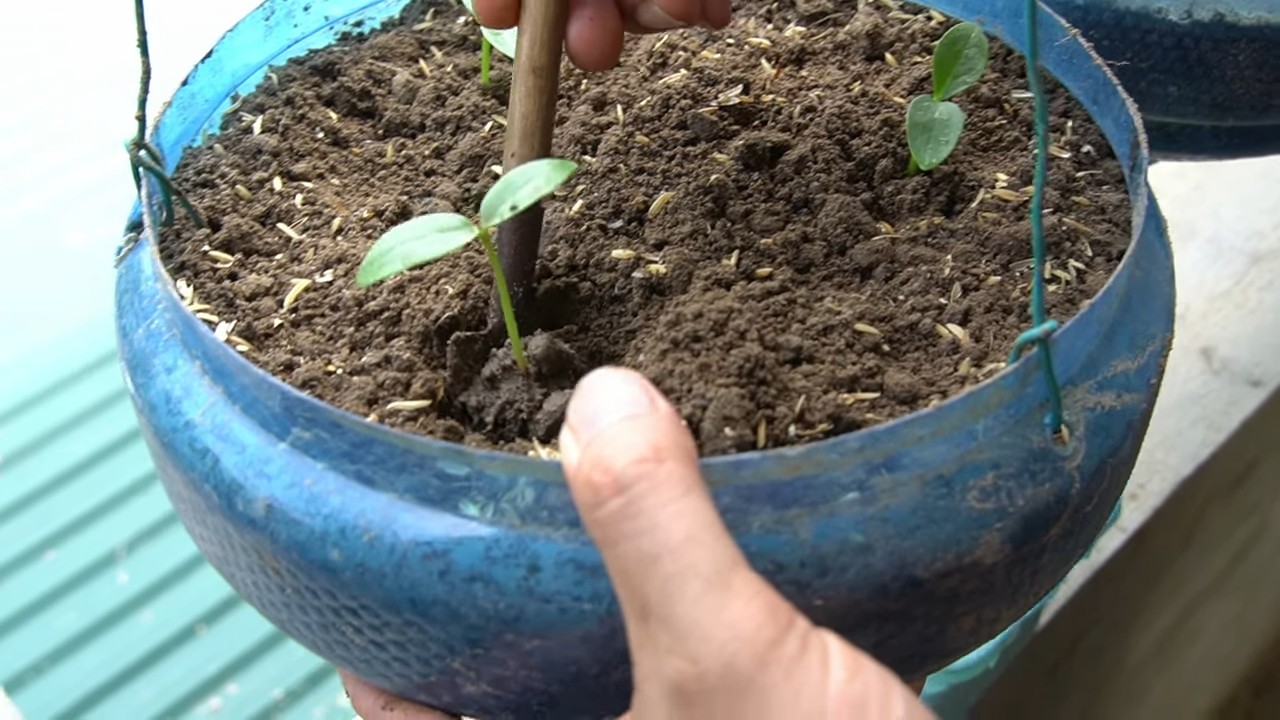
Can I grow Malabar spinach in a container?
Yes, you can grow Malabar spinach in a container. Choose a large container that is at least 12 inches in diameter and depth to provide the plant with enough room to grow. Use a well-draining potting mix and make sure the container has drainage holes. Place the container in a sunny location and water regularly. You may also need to provide the plant with a trellis or other support structure to climb on.
How do I save seeds from my Malabar spinach plant?
To save seeds from your Malabar spinach plant, allow the plant to flower and produce berries. Once the berries turn dark purple or black and become slightly soft, they are ready to harvest. Gently squeeze the seeds out of the berries and rinse them with water to remove any pulp. Spread the seeds out on a paper towel to dry completely. Once the seeds are dry, store them in an airtight container in a cool, dark place.
Leave a Comment