
Self Watering Hanging Lettuce: Imagine fresh, crisp lettuce, bursting with flavor, hanging right outside your kitchen window, ready to be snipped and added to your salad. Sounds idyllic, right? Well, it doesn’t have to be just a dream! I’m excited to share some simple and effective DIY tricks to create your own self-watering hanging lettuce garden.
Hanging gardens, in general, have a rich history, evoking images of the legendary Hanging Gardens of Babylon, one of the Seven Wonders of the Ancient World. While we might not be building anything quite so grand, the principle of vertical gardening has been around for centuries, adapting to various cultures and climates. Today, with space at a premium, especially in urban environments, the need for innovative gardening solutions is greater than ever.
That’s where this DIY project comes in. Let’s face it, keeping lettuce consistently watered can be a challenge. Too much, and you risk root rot; too little, and your leaves will wilt. This self-watering system takes the guesswork out of the equation, providing a steady supply of moisture to your lettuce plants, ensuring a bountiful harvest with minimal effort. Plus, it’s a fantastic way to add a touch of green to your balcony, patio, or even indoors! So, if you’re ready to ditch the store-bought lettuce and embrace the joy of growing your own, let’s dive into these easy-to-follow steps for creating your very own self watering hanging lettuce garden!

DIY Self-Watering Hanging Lettuce Planter: A Bountiful Salad at Eye Level!
Okay, lettuce lovers, get ready to elevate your salad game – literally! I’m going to walk you through creating your very own self-watering hanging lettuce planter. This project is perfect for small spaces, balconies, or anyone who wants a fresh, readily available salad right outside their door. Plus, it’s a fun and rewarding DIY project. Let’s get started!
What You’ll Need: The Shopping List
Before we dive in, let’s gather our supplies. Don’t worry, most of these are readily available at your local hardware or garden store.
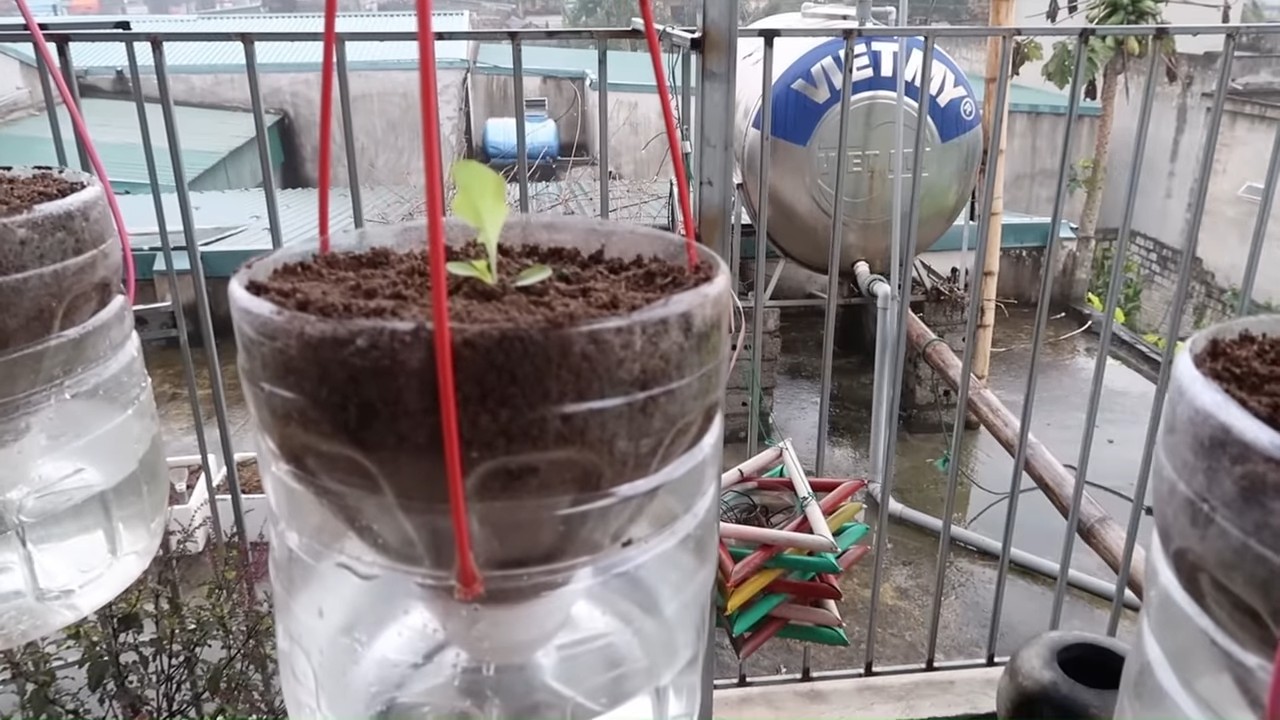
* Two plastic planters: One larger (outer) planter and one smaller (inner) planter that fits comfortably inside the larger one, leaving a few inches of space around the sides and at the bottom. Think of it like a pot-in-pot system.
* Drill with various sized drill bits.
* Landscape fabric or burlap.
* Potting mix (specifically for vegetables).
* Lettuce seedlings (your favorite varieties!).
* PVC pipe (about 1-2 inches in diameter and long enough to reach from the bottom of the outer planter to a few inches above the top of the inner planter). This will be our watering reservoir access.
* Hanging chain or sturdy rope.
* Measuring tape or ruler.
* Scissors or utility knife.
* Gravel or small rocks.
* Water.
* Gloves (optional, but recommended).
Phase 1: Preparing the Planters
This is where we transform our ordinary planters into a self-watering oasis for our lettuce.
1. Drilling Drainage Holes in the Inner Planter: Grab your inner planter. We need to create drainage holes, but not too many! Too many holes will defeat the purpose of the self-watering system. I recommend drilling about 4-6 holes, roughly ¼ inch in diameter, evenly spaced around the bottom of the inner planter. These holes will allow water to wick up into the soil.
2. Drilling Overflow Holes in the Outer Planter: Now, take your outer planter. This is where we need to be a bit more precise. We’re going to drill overflow holes about 2-3 inches from the bottom of the planter. These holes will prevent the planter from becoming waterlogged. I usually drill 3-4 holes, about ¼ inch in diameter, evenly spaced around the planter. Make sure these holes are lower than the bottom of the inner planter when it’s sitting inside the outer planter. This is crucial for creating the water reservoir.
3. Creating Hanging Points: This step depends on the type of planters you’ve chosen. Some planters come with pre-made holes for hanging. If yours don’t, you’ll need to drill them. I usually drill 3-4 holes evenly spaced around the rim of the outer planter. Make sure the holes are large enough to accommodate your hanging chain or rope. Reinforce the holes with washers if you’re using a heavier planter or plan on growing a lot of lettuce.
4. Preparing the PVC Watering Tube: Take your PVC pipe. This will be our access point for refilling the water reservoir. I like to cut the top of the pipe at an angle for easier pouring. You can also add a small cap to the top to prevent debris from falling in.
Phase 2: Assembling the Self-Watering System
Now for the fun part – putting everything together!
1. Lining the Inner Planter: Cut a piece of landscape fabric or burlap large enough to line the inside of the inner planter. This will help prevent soil from washing out through the drainage holes. Place the fabric inside the planter, making sure it covers the bottom and sides.
2. Creating the Water Reservoir: Place a layer of gravel or small rocks at the bottom of the outer planter. This will create a space for the water reservoir and prevent the inner planter from sitting directly in the water. The gravel layer should be about 2-3 inches deep.
3. Positioning the PVC Watering Tube: Place the PVC pipe vertically in the center of the outer planter, resting on the gravel layer. This pipe will allow you to easily refill the water reservoir without disturbing the plants.
4. Placing the Inner Planter: Carefully place the inner planter inside the outer planter, making sure it sits securely on top of the gravel layer. The PVC pipe should be positioned so that it extends a few inches above the top of the inner planter.
5. Testing the System: Before adding soil, it’s a good idea to test the system. Pour water into the PVC pipe until it reaches the level of the overflow holes. This will ensure that the overflow holes are working correctly and that the water reservoir is functioning as intended.
Phase 3: Planting Your Lettuce
Time to get our hands dirty and plant those lettuce seedlings!
1. Filling the Inner Planter with Potting Mix: Fill the inner planter with your chosen potting mix, leaving about an inch of space at the top. Gently pat down the soil to remove any air pockets.
2. Planting the Lettuce Seedlings: Carefully remove the lettuce seedlings from their containers. Gently loosen the roots and plant them in the potting mix, spacing them according to the instructions on the seed packet or plant label. I usually plant my lettuce seedlings about 4-6 inches apart.
3. Watering the Seedlings: After planting, water the seedlings thoroughly from the top. This will help them settle into their new home.
4. Adding Hanging Chains or Ropes: Attach your hanging chains or ropes to the holes you drilled in the outer planter. Make sure the chains or ropes are securely attached and can support the weight of the planter.
Phase 4: Maintenance and Care
Now that your self-watering hanging lettuce planter is complete, here are a few tips for keeping your lettuce happy and healthy.
1. Watering: The beauty of this system is that it’s self-watering! However, you’ll still need to check the water level in the reservoir regularly. Simply pour water into the PVC pipe until it reaches the level of the overflow holes. How often you need to refill the reservoir will depend on the weather and the size of your planter. I usually check mine every few days.
2. Sunlight: Lettuce needs at least 4-6 hours of sunlight per day. Choose a location for your hanging planter that receives plenty of sunlight.
3. Fertilizing: Lettuce is a heavy feeder, so you’ll need to fertilize it regularly. I recommend using a liquid fertilizer specifically formulated for vegetables. Follow the instructions on the fertilizer label.
4. Pest Control: Keep an eye out for pests, such as aphids and slugs. If you notice any pests, treat them with an appropriate insecticide or organic pest control method.
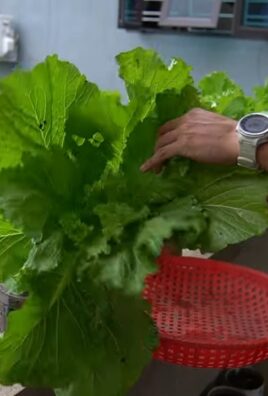
5. Harvesting: You can start harvesting your lettuce as soon as the leaves are large enough to eat. Simply snip off the outer leaves, leaving the inner leaves to continue growing. This will allow you to harvest lettuce continuously throughout the growing season.
6. Rotating Crops: After you’ve harvested all of your lettuce, it’s a good idea to rotate your crops. This will help prevent soilborne diseases and pests. You can plant other vegetables, such as herbs or flowers, in your hanging planter.
And there you have it! Your very own self-watering hanging lettuce planter. Enjoy your fresh, homegrown salads! I hope you found this guide helpful and that you have a bountiful harvest. Happy gardening!
Conclusion
So, there you have it! Creating your own self-watering hanging lettuce planter is not just a fun DIY project; it’s a game-changer for anyone who loves fresh, homegrown greens but struggles with space or time. Imagine stepping onto your balcony or into your garden and snipping off crisp, vibrant lettuce leaves for your salad, sandwich, or wrap, all thanks to your ingenious creation. This method truly revolutionizes how you can enjoy fresh produce.
The beauty of this project lies in its simplicity and adaptability. You don’t need to be a master gardener to succeed. The materials are readily available, and the construction is straightforward. But beyond the ease of execution, the self-watering aspect is what truly sets this apart. It takes the guesswork out of watering, ensuring your lettuce receives consistent hydration, leading to healthier, more productive plants. No more wilted leaves or parched soil!
Why is this a must-try? Because it empowers you to grow your own food, even in the smallest of spaces. It reduces water waste, promotes sustainable gardening practices, and provides you with a constant supply of fresh, delicious lettuce. Plus, it’s incredibly rewarding to see your efforts blossom into a thriving, edible garden.
But don’t stop there! Feel free to experiment and personalize your self-watering hanging lettuce planter. Consider using different types of containers, such as repurposed buckets or even old tires (cleaned thoroughly, of course!). You could also try growing other leafy greens alongside your lettuce, like spinach, kale, or arugula, creating a diverse and colorful hanging salad garden. For added visual appeal, incorporate flowering plants like pansies or petunias around the base of the planter.
Another variation to consider is adding a slow-release fertilizer to the soil mix. This will provide your lettuce with a steady stream of nutrients, promoting even more robust growth. Just be sure to choose a fertilizer that is specifically formulated for leafy greens.
We encourage you to embrace your inner gardener and give this DIY self-watering hanging lettuce planter a try. It’s a project that’s both practical and enjoyable, and the results are undeniably delicious. Once you’ve built your planter and harvested your first batch of lettuce, we’d love to hear about your experience! Share your photos, tips, and variations in the comments below. Let’s create a community of self-watering lettuce enthusiasts!
Don’t forget to consider the placement of your hanging planter. Lettuce thrives in partial shade, especially during the hottest part of the day. So, choose a location that receives morning sun and afternoon shade for optimal growth. Also, be mindful of wind exposure, as strong winds can dry out the soil quickly.
Finally, remember that regular harvesting is key to keeping your lettuce plants productive. As you harvest the outer leaves, the plant will continue to produce new growth from the center. This ensures a continuous supply of fresh lettuce throughout the growing season.
So, what are you waiting for? Gather your materials, roll up your sleeves, and get ready to create your own self-watering hanging lettuce oasis. Happy gardening!
Frequently Asked Questions (FAQ)
What type of lettuce grows best in a hanging planter?
Loose-leaf varieties of lettuce, such as Black Seeded Simpson, Salad Bowl, and Red Sails, are particularly well-suited for hanging planters. These types of lettuce are easy to harvest, as you can simply snip off the outer leaves as needed, allowing the plant to continue producing new growth. Romaine lettuce can also be grown, but may require a larger container due to its size. Avoid head lettuce varieties like iceberg, as they tend to be too large and heavy for hanging planters.
How often do I need to water my self-watering hanging lettuce planter?
The beauty of a self-watering planter is that it significantly reduces the frequency of watering. However, you’ll still need to monitor the water reservoir and refill it as needed. The frequency will depend on factors such as the weather, the size of the planter, and the type of lettuce you’re growing. As a general rule, check the reservoir every few days, especially during hot or dry weather. If the reservoir is empty, refill it until it reaches the appropriate level. Avoid overwatering, as this can lead to root rot.
What type of soil should I use for my self-watering hanging lettuce planter?
A well-draining potting mix is essential for growing healthy lettuce in a hanging planter. Avoid using garden soil, as it tends to be too heavy and can compact easily, hindering drainage. A good potting mix should be lightweight, airy, and rich in organic matter. You can also amend the potting mix with compost or other organic materials to improve its fertility and water-holding capacity. Consider adding perlite or vermiculite to further enhance drainage.
How much sunlight does my self-watering hanging lettuce planter need?
Lettuce thrives in partial shade, especially during the hottest part of the day. Ideally, your hanging planter should receive at least four to six hours of sunlight per day, but avoid direct sunlight during the afternoon, as this can scorch the leaves. A location that receives morning sun and afternoon shade is ideal. If you live in a particularly hot climate, you may need to provide additional shade during the peak of summer.
How do I harvest lettuce from my hanging planter?
Harvesting lettuce from a hanging planter is easy. Simply snip off the outer leaves as needed, using scissors or a sharp knife. Avoid pulling the entire plant out of the soil, as this will prevent it from producing new growth. Harvest the leaves when they are young and tender for the best flavor. Regular harvesting will also encourage the plant to produce more leaves, ensuring a continuous supply of fresh lettuce.
How do I fertilize my self-watering hanging lettuce planter?
Lettuce is a relatively light feeder, but it will still benefit from regular fertilization. You can use a liquid fertilizer specifically formulated for leafy greens, following the instructions on the label. Alternatively, you can add a slow-release fertilizer to the soil mix at the time of planting. This will provide the lettuce with a steady stream of nutrients throughout the growing season. Avoid over-fertilizing, as this can lead to leggy growth and bitter-tasting leaves.
How do I prevent pests and diseases in my self-watering hanging lettuce planter?
Hanging planters are generally less susceptible to pests and diseases than ground-level gardens. However, it’s still important to take precautions to protect your lettuce plants. Regularly inspect the leaves for signs of pests, such as aphids, slugs, or snails. If you find any pests, remove them by hand or spray the plants with an insecticidal soap. To prevent fungal diseases, ensure good air circulation around the plants and avoid overwatering. You can also use a fungicide if necessary.
Can I grow other vegetables in my self-watering hanging planter?
While this article focuses on lettuce, you can certainly grow other vegetables in your self-watering hanging planter. Herbs like parsley, chives, and basil are excellent choices, as they have similar growing requirements to lettuce. You can also try growing smaller vegetables like radishes or spinach. Just be sure to choose varieties that are well-suited for container gardening and provide them with adequate space to grow.
What do I do with my self-watering hanging lettuce planter in the winter?
Depending on your climate, you may be able to overwinter your lettuce plants in your hanging planter. If you live in a mild climate, you can simply move the planter to a sheltered location and continue to water it as needed. In colder climates, you may need to bring the planter indoors or provide additional protection, such as a cold frame or greenhouse. Alternatively, you can start new lettuce plants indoors in late winter and transplant them into your hanging planter in the spring.
How long will my self-watering hanging lettuce planter last?
The lifespan of your self-watering hanging lettuce planter will depend on the materials you use and how well you maintain it. With proper care, a well-constructed planter can last for several years. However, you may need to replace the soil every year or two to replenish its nutrients. Regularly inspect the planter for signs of wear and tear, such as cracks or leaks, and repair them as needed.


Leave a Comment