
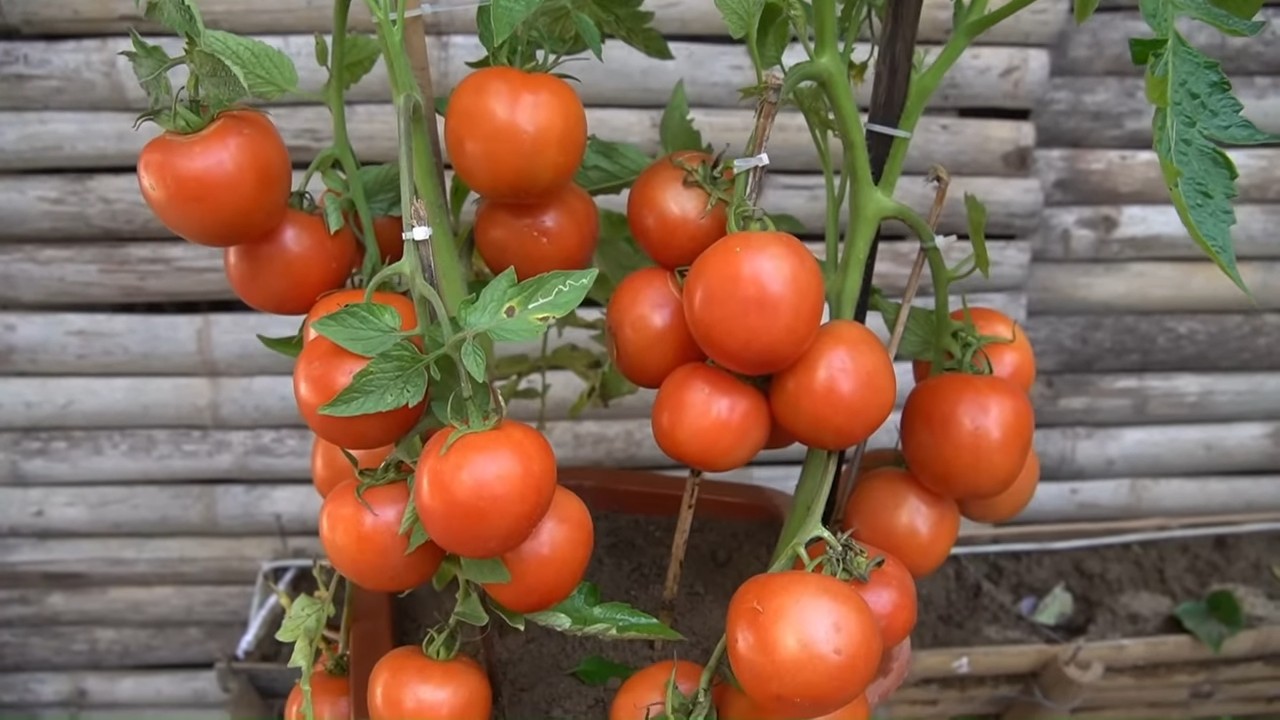
Vertical tomato garden DIY projects are taking the gardening world by storm, and for good reason! Imagine plucking juicy, sun-ripened tomatoes right from your patio, even if you only have a tiny balcony or a small urban space. Forget sprawling vines taking over your yard; we’re talking about maximizing your yield in a stylish and space-saving way.
The concept of vertical gardening isn’t new. In fact, think back to the Hanging Gardens of Babylon, one of the Seven Wonders of the Ancient World! While we might not be building elaborate tiered structures, the spirit of maximizing space and bringing greenery into our lives remains the same. For centuries, cultures around the globe have found innovative ways to cultivate plants in limited areas, and now it’s our turn to embrace this resourceful approach.
Why do you need a vertical tomato garden DIY project in your life? Well, let’s be honest, store-bought tomatoes often lack that incredible flavor we crave. Plus, gardening is incredibly therapeutic! But more importantly, many of us are short on space. This DIY project solves that problem beautifully. It allows you to grow your own delicious tomatoes, even if you live in an apartment or have a postage-stamp-sized yard. I’m excited to share some easy and affordable ways to create your own vertical tomato oasis, bringing fresh, homegrown goodness right to your table. Let’s get started!
DIY Vertical Tomato Garden: Grow Up, Not Out!
Hey there, fellow gardening enthusiasts! Are you dreaming of juicy, sun-ripened tomatoes but short on space? Well, fret no more! I’m going to walk you through creating your very own vertical tomato garden. This project is perfect for balconies, patios, or even small backyards. It’s a fantastic way to maximize your growing potential and add a touch of green to any space. Plus, it’s a lot of fun!
What You’ll Need: The Supply List
Before we dive in, let’s gather our supplies. I’ve tried to keep this list as budget-friendly as possible, using materials you might already have lying around.
* **5-Gallon Buckets (or similar sized containers):** You’ll need at least one bucket per tomato plant. I recommend using food-grade buckets if possible. You can often find these for free or cheap at bakeries or restaurants.
* Potting Mix: Don’t skimp on the potting mix! A high-quality mix is crucial for healthy tomato growth. Look for a mix specifically formulated for vegetables.
* Tomato Seedlings: Choose your favorite tomato varieties! Determinate (bush) varieties are generally better suited for container gardening, but you can grow indeterminate (vining) varieties with proper support.
* Drill with Drill Bits: We’ll need this to create drainage holes and hanging points.
* Measuring Tape or Ruler: For accurate measurements.
* Utility Knife or Scissors: For cutting landscape fabric (optional).
* Landscape Fabric (optional): This helps prevent soil from washing out of the drainage holes.
* Heavy-Duty Chain or Rope: For hanging the buckets. Make sure it’s strong enough to support the weight of the buckets filled with soil and plants.
* S-Hooks or Carabiners: For attaching the buckets to the chain or rope.
* Watering Can or Hose: For watering your tomato plants.
* Fertilizer: A balanced fertilizer formulated for tomatoes will help them thrive.
* Gloves: To protect your hands.
* Safety Glasses: To protect your eyes when drilling.
* Optional: Tomato Cages or Stakes: For added support, especially for indeterminate varieties.
* Optional: Decorative Paint or Stencils: To personalize your buckets!
Step-by-Step Instructions: Building Your Vertical Garden
Alright, let’s get our hands dirty! Follow these steps to create your own amazing vertical tomato garden.
1. Prepare the Buckets: Drainage is Key!
* First, grab your buckets and drill. We need to create drainage holes in the bottom of each bucket.
* I usually drill about 5-7 holes, each about 1/2 inch in diameter. Space them evenly across the bottom of the bucket.
* If you’re using landscape fabric, cut out a circle slightly larger than the bottom of the bucket. Place it inside the bucket to cover the drainage holes. This will prevent soil from washing out when you water.
2. Adding the Hanging Mechanism: Strength and Stability
* Now, we need to create a way to hang the buckets. This is where the drill comes in handy again.
* Drill two holes near the top of each bucket, on opposite sides. Make sure the holes are large enough to accommodate your chain or rope.
* If you’re using chain, thread the chain through the holes and secure it with S-hooks or carabiners. If you’re using rope, tie a secure knot on each side of the bucket.
* Important: Double-check that the hanging mechanism is strong enough to support the weight of the bucket when it’s filled with soil and a tomato plant. I always give it a good tug to make sure it’s secure.
3. Filling the Buckets: The Right Soil Matters
* Time to fill the buckets with potting mix!
* I like to add a layer of slow-release fertilizer to the bottom of the bucket before adding the potting mix. This provides a steady supply of nutrients to the tomato plants.
* Fill the bucket almost to the top with potting mix, leaving a few inches of space at the top.
* Gently pat down the soil to remove any air pockets.
4. Planting the Tomato Seedlings: Give Them Room to Grow
* Carefully remove the tomato seedlings from their containers. Gently loosen the roots with your fingers. Before we dive in, let’s gather our supplies. I’ve tried to keep this list as budget-friendly as possible, using materials you might already have lying around. * **5-Gallon Buckets (or similar sized containers):** You’ll need at least one bucket per tomato plant. I recommend using food-grade buckets if possible. You can often find these for free or cheap at bakeries or restaurants. Alright, let’s get our hands dirty! Follow these steps to create your own amazing vertical tomato garden. 1. Prepare the Buckets: Drainage is Key! * First, grab your buckets and drill. We need to create drainage holes in the bottom of each bucket. * Now, we need to create a way to hang the buckets. This is where the drill comes in handy again. * Time to fill the buckets with potting mix! * Carefully remove the tomato seedlings from their containers. Gently loosen the roots with your fingers. * Now for the fun part: hanging your vertical garden! * Water your tomato plants regularly, especially during hot weather. Check the soil moisture by sticking your finger into the soil. If the top inch of soil is dry, it’s time to water. * As your tomato plants grow, they may need additional support. * Prune your tomato plants regularly to remove suckers (small shoots that grow in the crotch between the stem and a branch). Suckers can drain energy from the plant and reduce fruit production. * The best part of growing your own tomatoes is harvesting them! Even with the best care, you might encounter some problems along the way. Here are a few common issues and how to address them: * Yellowing Leaves: This could be a sign of overwatering, underwatering, nutrient deficiency, or disease. Check the soil moisture and adjust your watering schedule accordingly. Fertilize your plants with a balanced fertilizer. If you suspect a disease, consult a gardening expert or your local nursery. Now that you have the basics down, feel free to get creative and personalize your vertical tomato garden! * Paint the Buckets: Add a splash of color to your garden by painting the buckets. Use outdoor paint to protect them from the elements. So, there you have it! Creating your own vertical tomato garden DIY project isn’t just a fun weekend activity; it’s a game-changer for anyone looking to maximize their gardening space, enjoy fresh, homegrown tomatoes, and add a touch of rustic charm to their balcony, patio, or even a small backyard. We’ve walked you through the process, highlighting the simplicity and cost-effectiveness of this method. Think about it: no more back-breaking weeding in a sprawling garden, no more battling slugs and other ground-dwelling pests, and no more sacrificing precious square footage for a bountiful tomato harvest. A vertical garden allows you to grow upwards, making the most of vertical space that would otherwise go unused. But the benefits extend beyond mere practicality. Imagine the satisfaction of plucking ripe, juicy tomatoes straight from your own vertical oasis. Picture the vibrant green foliage and the pops of red fruit adding a splash of color to your outdoor living area. Envision the delicious meals you’ll create with your homegrown bounty, knowing exactly where your food came from and how it was grown. Don’t be afraid to experiment with variations! While we’ve focused on a simple and effective design, the possibilities are endless. Consider using different materials for your containers, such as repurposed plastic bottles, old tires, or even fabric grow bags. You could also incorporate a self-watering system to minimize maintenance and ensure consistent moisture levels. Try different tomato varieties suited for container gardening, like determinate or bush varieties, which tend to stay more compact. Cherry tomatoes, Roma tomatoes, and even some smaller beefsteak varieties thrive in vertical gardens. For an added touch of personalization, paint your containers with vibrant colors or decorate them with stencils. You can even add companion plants like basil, marigolds, or nasturtiums to attract pollinators and deter pests. These companion plants not only enhance the aesthetic appeal of your vertical garden but also contribute to the overall health and productivity of your tomato plants. The key is to have fun and let your creativity shine. Gardening should be an enjoyable and rewarding experience, and a vertical tomato garden DIY project is the perfect way to embrace the joys of growing your own food. We are confident that you’ll find this DIY project to be both rewarding and delicious. We highly encourage you to give it a try. Once you’ve built your own vertical tomato garden, we’d love to hear about your experience! Share your photos, tips, and any variations you’ve tried in the comments below. Let’s create a community of vertical gardening enthusiasts and inspire others to embrace this innovative and sustainable way of growing tomatoes. Happy gardening! Choosing the right tomato variety is crucial for success in a vertical garden. Determinate or bush varieties are generally preferred because they have a more compact growth habit and don’t require as much staking or pruning as indeterminate varieties. Some excellent choices include: * **Cherry Tomatoes:** These are prolific producers and their small size makes them ideal for containers. ‘Sungold’, ‘Sweet Million’, and ‘Black Cherry’ are popular options. Consider the size of your containers and the amount of sunlight your garden receives when selecting your tomato varieties. Tomatoes are sun-loving plants and require at least 6-8 hours of direct sunlight per day to thrive. Choose a location for your vertical garden that receives ample sunlight throughout the day. If you don’t have a sunny spot, you may need to supplement with grow lights. Rotate your plants regularly to ensure that all sides receive equal exposure to sunlight. Use a high-quality potting mix that is well-draining and rich in organic matter. Avoid using garden soil, as it can become compacted in containers and doesn’t provide adequate drainage. Look for a potting mix that contains ingredients like peat moss, perlite, vermiculite, and compost. You can also amend your potting mix with slow-release fertilizer to provide your tomato plants with a steady supply of nutrients. Water your vertical tomato garden regularly, especially during hot, dry weather. The frequency of watering will depend on the size of your containers, the type of potting mix you use, and the weather conditions. Check the soil moisture regularly by sticking your finger into the soil. If the top inch of soil feels dry, it’s time to water. Water deeply, until water drains out of the bottom of the container. Avoid overwatering, as this can lead to root rot. Tomatoes are heavy feeders and require regular fertilization to produce a bountiful harvest. Start fertilizing your plants a few weeks after transplanting them into your vertical garden. Use a balanced fertilizer that is specifically formulated for tomatoes. Follow the instructions on the fertilizer package for application rates and frequency. You can also supplement with organic fertilizers like compost tea or fish emulsion. Vertical gardens are less susceptible to soil-borne pests and diseases than traditional gardens. However, it’s still important to take precautions to prevent problems. Inspect your plants regularly for signs of pests or diseases. Remove any affected leaves or plants immediately. Use organic pest control methods like insecticidal soap or neem oil to control pests. Provide good air circulation to prevent fungal diseases. Yes, you can grow companion plants alongside your tomatoes in your vertical garden. Companion plants can help to attract pollinators, deter pests, and improve the overall health of your tomato plants. Some good companion plants for tomatoes include basil, marigolds, nasturtiums, and onions. Be sure to choose companion plants that have similar growing requirements as tomatoes. Pruning is important for maintaining the health and productivity of your tomato plants in a vertical garden. Remove suckers (the small shoots that grow between the main stem and the branches) to encourage the plant to focus its energy on producing fruit. Prune away any yellowing or diseased leaves. Support your tomato plants with stakes or cages to prevent them from falling over. At the end of the growing season, remove the tomato plants from your vertical garden and dispose of them properly. Clean out the containers and disinfect them with a bleach solution. You can reuse the potting mix for other plants, but it’s best to amend it with fresh compost or fertilizer. Store your vertical garden containers in a dry place over the winter. Depending on the size and weight of your vertical garden, it may be possible to move it. However, it’s best to avoid moving it once the tomato plants are established, as this can stress the plants. If you need to move your vertical garden, do so carefully and gradually. Water the plants thoroughly before moving them.
* Dig a hole in the center of the potting mix, large enough to accommodate the root ball of the seedling.
* Place the seedling in the hole and gently backfill with potting mix.
* Water the seedling thoroughly.
* Tip: If you’re planting indeterminate tomato varieties, you can bury the stem deeper than you would with determinate varieties. This encourages the plant to develop more roots along the buried stem, resulting in a stronger and healthier plant.
5. Hanging the Buckets: Find the Perfect SpotWhat You’ll Need: The Supply List
* Potting Mix: Don’t skimp on the potting mix! A high-quality mix is crucial for healthy tomato growth. Look for a mix specifically formulated for vegetables.
* Tomato Seedlings: Choose your favorite tomato varieties! Determinate (bush) varieties are generally better suited for container gardening, but you can grow indeterminate (vining) varieties with proper support.
* Drill with Drill Bits: We’ll need this to create drainage holes and hanging points.
* Measuring Tape or Ruler: For accurate measurements.
* Utility Knife or Scissors: For cutting landscape fabric (optional).
* Landscape Fabric (optional): This helps prevent soil from washing out of the drainage holes.
* Heavy-Duty Chain or Rope: For hanging the buckets. Make sure it’s strong enough to support the weight of the buckets filled with soil and plants.
* S-Hooks or Carabiners: For attaching the buckets to the chain or rope.
* Watering Can or Hose: For watering your tomato plants.
* Fertilizer: A balanced fertilizer formulated for tomatoes will help them thrive.
* Gloves: To protect your hands.
* Safety Glasses: To protect your eyes when drilling.
* Optional: Tomato Cages or Stakes: For added support, especially for indeterminate varieties.
* Optional: Decorative Paint or Stencils: To personalize your buckets!Step-by-Step Instructions: Building Your Vertical Garden
* I usually drill about 5-7 holes, each about 1/2 inch in diameter. Space them evenly across the bottom of the bucket.
* If you’re using landscape fabric, cut out a circle slightly larger than the bottom of the bucket. Place it inside the bucket to cover the drainage holes. This will prevent soil from washing out when you water.
2. Adding the Hanging Mechanism: Strength and Stability
* Drill two holes near the top of each bucket, on opposite sides. Make sure the holes are large enough to accommodate your chain or rope.
* If you’re using chain, thread the chain through the holes and secure it with S-hooks or carabiners. If you’re using rope, tie a secure knot on each side of the bucket.
* Important: Double-check that the hanging mechanism is strong enough to support the weight of the bucket when it’s filled with soil and a tomato plant. I always give it a good tug to make sure it’s secure.
3. Filling the Buckets: The Right Soil Matters
* I like to add a layer of slow-release fertilizer to the bottom of the bucket before adding the potting mix. This provides a steady supply of nutrients to the tomato plants.
* Fill the bucket almost to the top with potting mix, leaving a few inches of space at the top.
* Gently pat down the soil to remove any air pockets.
4. Planting the Tomato Seedlings: Give Them Room to Grow
* Dig a hole in the center of the potting mix, large enough to accommodate the root ball of the seedling.
* Place the seedling in the hole and gently backfill with potting mix.
* Water the seedling thoroughly.
* Tip: If you’re planting indeterminate tomato varieties, you can bury the stem deeper than you would with determinate varieties. This encourages the plant to develop more roots along the buried stem, resulting in a stronger and healthier plant.
5. Hanging the Buckets: Find the Perfect Spot
* Choose a location that receives at least 6-8 hours of sunlight per day. Tomatoes need plenty of sun to thrive.
* Make sure the location is also protected from strong winds.
* Hang the buckets from a sturdy structure, such as a balcony railing, a fence, or a specially built frame.
* Use S-hooks or carabiners to attach the buckets to the chain or rope.
* Adjust the height of the buckets as needed. I like to stagger the heights to create a visually appealing display.
6. Watering and Fertilizing: Keep Them Happy and Healthy
* Water deeply, until the water drains out of the drainage holes.
* Fertilize your tomato plants every 2-3 weeks with a balanced fertilizer formulated for tomatoes. Follow the instructions on the fertilizer package.
7. Providing Support: Help Them Stand Tall
* If you’re growing determinate varieties, you can use tomato cages to support the plants.
* If you’re growing indeterminate varieties, you’ll need to provide a more substantial support system, such as stakes or a trellis.
* Tie the tomato stems to the support structure with soft twine or plant ties.
8. Pruning and Maintenance: Keep Them Tidy and Productive
* Remove any yellow or brown leaves.
* Check your plants regularly for pests and diseases. Treat any problems promptly.
9. Harvesting: The Sweet Reward
* Tomatoes are ripe when they are fully colored and slightly soft to the touch.
* Gently twist the tomato from the vine.
* Enjoy your homegrown tomatoes in salads, sandwiches, sauces, or just eat them straight off the vine!Troubleshooting: Common Problems and Solutions
* Blossom End Rot: This is a condition where the bottom of the tomato turns black and leathery. It’s usually caused by a calcium deficiency. Add calcium to the soil by mixing in bone meal or crushed eggshells. Water your plants consistently to prevent fluctuations in soil moisture.
* Pests: Common tomato pests include aphids, whiteflies, and tomato hornworms. Inspect your plants regularly for pests. Treat infestations with insecticidal soap or neem oil. You can also hand-pick tomato hornworms off the plants.
* Lack of Fruit: This could be due to a lack of pollination, insufficient sunlight, or extreme temperatures. Make sure your plants are getting at least 6-8 hours of sunlight per day. If you’re growing tomatoes indoors, you may need to hand-pollinate the flowers.Personalizing Your Vertical Garden: Make It Your Own!
* Add St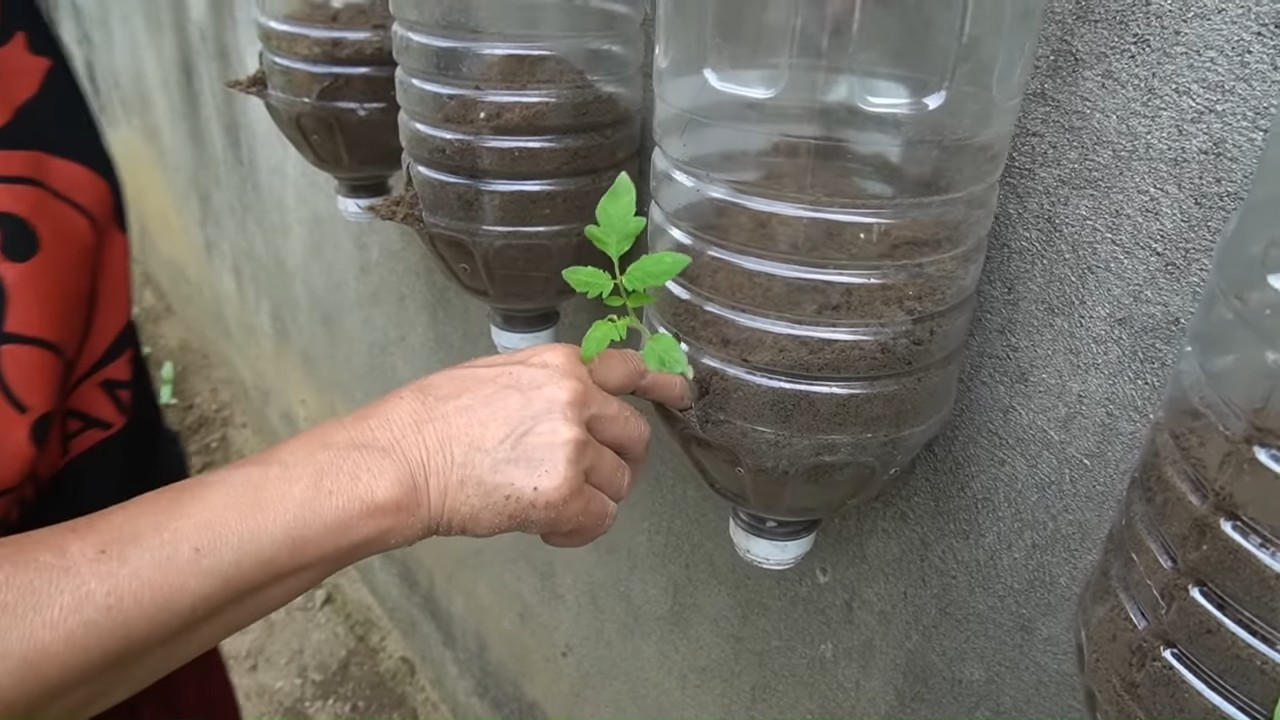
Conclusion
Frequently Asked Questions (FAQ)
What are the best tomato varieties for a vertical garden?
* **Roma Tomatoes:** These are paste tomatoes that are perfect for making sauces and canning. They are relatively compact and easy to manage in a vertical garden.
* **Patio Tomatoes:** As the name suggests, these are specifically bred for container gardening and have a compact, bushy growth habit.
* **Bush Beefsteak:** These offer the flavor of a beefsteak tomato in a smaller, more manageable size.How much sunlight do vertical tomato gardens need?
What type of soil should I use for my vertical tomato garden?
How often should I water my vertical tomato garden?
How do I fertilize my vertical tomato garden?
How do I prevent pests and diseases in my vertical tomato garden?
Can I grow other plants in my vertical tomato garden?
How do I prune my tomato plants in a vertical garden?
What do I do with my vertical tomato garden at the end of the season?
Can I move my vertical tomato garden?

Leave a Comment