
DIY Drip Irrigation for Pumpkins: Tired of lugging heavy watering cans to your pumpkin patch, only to see your precious gourds wither under the summer sun? I know the feeling! There’s nothing quite as disheartening as watching your hard work go to waste, especially when you’ve envisioned those prize-winning pumpkins gracing your porch come autumn. But fear not, fellow pumpkin enthusiasts, because I’m about to share a game-changing DIY trick that will not only save you time and energy but also ensure your pumpkins thrive like never before.
The concept of drip irrigation has been around for centuries, with evidence suggesting its use in ancient China and other early agricultural societies. These ingenious systems delivered water directly to plant roots, minimizing water waste and maximizing efficiency. Today, we can adapt these time-tested principles to our own gardens with simple, affordable materials.
Why is DIY drip irrigation for pumpkins so essential? Pumpkins are thirsty plants, requiring consistent moisture to develop those impressive sizes we all admire. Traditional watering methods often lead to uneven hydration, fungal diseases, and wasted water. By implementing a DIY drip irrigation system, you’ll provide a steady, targeted supply of water directly to the roots, promoting healthy growth, preventing common pumpkin ailments, and conserving precious water resources. Plus, let’s be honest, who wouldn’t want to spend less time watering and more time admiring their growing pumpkin patch? Let’s dive in and create a system that will make your pumpkin dreams a reality!

DIY Drip Irrigation for Pumpkins: A Bountiful Harvest Awaits!
Hey fellow pumpkin enthusiasts! Are you dreaming of giant, prize-winning pumpkins but dread the thought of constantly watering them? Well, fret no more! I’m going to walk you through building your own DIY drip irrigation system, specifically tailored for those thirsty pumpkin vines. This system will save you time, water, and energy, all while ensuring your pumpkins get the consistent hydration they need to thrive. Let’s get started!
What You’ll Need: The Supply List
Before we dive in, let’s gather our supplies. Don’t worry, you probably have some of these lying around already!
* Water Source: This could be a garden hose, a rain barrel, or even a well pump.
* Backflow Preventer: This is crucial to protect your water source from contamination.
* Pressure Regulator: Drip irrigation works best at low pressure (around 25 PSI), so a regulator is essential.
* Filter: To prevent clogging, a filter is a must-have.
* Main Supply Line: This is the thick tubing that will carry water from your source to the pumpkin patch (1/2 inch or 3/4 inch polyethylene tubing is a good choice).
* Drip Tubing: This is the thinner tubing with emitters that will deliver water directly to the plants (1/4 inch tubing is common).
* Emitters: These are the small devices that control the flow of water from the drip tubing. Choose emitters with a flow rate appropriate for your soil type and pumpkin needs (1-2 gallons per hour is a good starting point).
* Connectors and Fittings: You’ll need various connectors like tees, elbows, couplings, and end caps to connect the tubing and emitters.
* Hole Punch: This is used to create holes in the main supply line for inserting the drip tubing.
* Timer (Optional but Recommended): An automatic timer will automate the watering process, saving you even more time and effort.
* Stakes or Anchors: To secure the tubing in place and prevent it from moving around.
* Measuring Tape: For accurate measurements.
* Scissors or Tubing Cutter: For cutting the tubing.
* Gloves: To protect your hands.
Planning Your System: The Blueprint for Success
Before you start cutting and connecting, it’s important to plan your system. This will ensure that you have enough materials and that the system is efficient and effective.
* Map Out Your Pumpkin Patch: Draw a simple diagram of your pumpkin patch, showing the location of each plant.
* Determine Water Needs: Research the water requirements of your specific pumpkin variety. Generally, pumpkins need about 1-2 inches of water per week, especially during fruit development.
* Calculate Tubing Lengths: Measure the distance from your water source to the pumpkin patch and the distance between each plant. This will help you determine the length of the main supply line and the drip tubing.
* Choose Emitter Placement: Decide where to place the emitters. I like to place two emitters per plant, about 6-12 inches away from the base of the stem. This ensures that the roots receive adequate moisture.
* Consider Soil Type: Sandy soil drains quickly, so you’ll need to water more frequently with lower flow rate emitters. Clay soil retains water longer, so you can water less frequently with higher flow rate emitters.
Building Your Drip Irrigation System: Step-by-Step Instructions
Okay, now for the fun part! Let’s build this drip irrigation system.
1. Connect the Backflow Preventer, Pressure Regulator, and Filter: Attach the backflow preventer to your water source, followed by the pressure regulator and then the filter. Make sure to follow the manufacturer’s instructions for proper installation. This is a critical step to protect your water source and ensure the system operates correctly.
2. Lay Out the Main Supply Line: Unroll the main supply line and lay it out along the edge of your pumpkin patch. Use stakes or anchors to secure it in place. Make sure the line is positioned so that it’s easy to connect the drip tubing to each plant.
3. Punch Holes in the Main Supply Line: Using the hole punch, create holes in the main supply line at the locations where you want to connect the drip tubing. Space the holes according to your plant spacing. Be careful not to punch the holes too close together, as this can weaken the tubing.
4. Connect the Drip Tubing: Cut the drip tubing into lengths that will reach from the main supply line to each plant. Insert one end of the drip tubing into the holes you punched in the main supply line. You may need to use a small connector to ensure a secure fit.
5. Install the Emitters: Insert the emitters into the other end of the drip tubing, near the base of each plant. Make sure the emitters are securely attached and that they are positioned correctly to deliver water to the root zone. I usually bury the emitters slightly under a thin layer of mulch to protect them from the sun and prevent them from clogging.
6. Cap the End of the Main Supply Line: Use an end cap to seal the end of the main supply line. This will prevent water from leaking out.
7. Test the System: Turn on the water and check for leaks. If you find any leaks, tighten the connections or replace the faulty parts. Adjust the pressure regulator to the desired pressure (around 25 PSI). Observe the emitters to make sure they are delivering water at the correct flow rate.
8. Set the Timer (Optional): If you’re using a timer, program it to water your pumpkins according to their water needs. I usually set mine to water for 30-60 minutes every other day, depending on the weather and soil conditions.
Fine-Tuning and Maintenance: Keeping Your System Running Smoothly
Once your system is up and running, it’s important to monitor it regularly and make any necessary adjustments.
* Check for Clogs: Periodically check the emitters for clogs. If you find any clogs, clean them with a small brush or needle. You can also flush the system by removing the end cap and letting the water run for a few minutes.
* Adjust Emitter Flow: As your pumpkins grow, they may need more water. You can adjust the flow rate of the emitters or add more emitters per plant.
* Inspect Tubing: Regularly inspect the tubing for damage. Replace any damaged sections of tubing.
* Winterize the System: In cold climates, it’s important to winterize the system to prevent damage from freezing. Disconnect the system from the water source, drain the tubing, and store it in a dry place.
Troubleshooting: Common Issues and Solutions
Even with careful planning and installation, you may encounter some problems with your drip irrigation system. Here are some common issues and their solutions:
* Low Water Pressure: Check the pressure regulator and make sure it’s set to the correct pressure. Also, check for leaks in the system.
* Clogged Emitters: Clean the emitters with a small brush or needle. You can also flush the system.
* Leaks: Tighten the connections or replace the faulty parts.
* Uneven Watering: Make sure the emitters are evenly spaced and that they are all delivering water at the same flow rate.
* Algae Growth: Algae can grow in the tubing and emitters, especially in sunny areas. To prevent algae growth, use opaque tubing and bury the emitters slightly under a thin layer of mulch.
Benefits of Drip Irrigation for Pumpkins: Why It’s Worth the Effort
Building a DIY drip irrigation system for your pumpkins may seem like a lot of work, but the benefits are well worth the effort.
* Water Conservation: Drip irrigation delivers water directly to the roots of the plants, minimizing water waste from evaporation and runoff.
* Improved Plant Health: Consistent watering promotes healthy plant growth and reduces the risk of disease.
* Increased Yields: Healthy, well-watered pumpkins produce larger and more abundant fruit.
* Reduced Weed Growth: Drip irrigation waters only the plants, reducing weed growth in the surrounding area.
* Time Savings: An automatic timer automates the watering process, saving you time and effort.
So there you have it! Your very own DIY drip irrigation system for pumpkins. I hope this guide has been helpful. Now go forth and grow some giant pumpkins! Remember to monitor your system regularly and make any necessary adjustments. Happy gardening!
Conclusion
So, there you have it! Creating your own DIY drip irrigation for pumpkins isn’t just a cost-effective alternative to expensive store-bought systems; it’s a game-changer for your pumpkin patch. Imagine healthier, more robust pumpkin plants, bursting with vibrant color and producing larger, more impressive fruits. This simple trick allows you to deliver water directly to the roots, minimizing water waste, reducing the risk of fungal diseases, and ultimately, maximizing your pumpkin yield.
Think about the satisfaction of knowing you’ve nurtured your pumpkins with a system you built yourself, tailored specifically to their needs. No more guessing about watering schedules or worrying about uneven moisture distribution. With this DIY drip irrigation system, you’re in complete control, providing your pumpkins with the consistent hydration they crave.
Beyond the basic setup, there’s plenty of room for customization. Consider adding a timer to automate the watering process, freeing up your time and ensuring consistent hydration even when you’re away. You could also experiment with different types of containers for your water reservoir, from repurposed buckets to large storage bins, depending on the size of your pumpkin patch and your water needs. For larger gardens, consider connecting multiple drip lines to a single reservoir for efficient watering across a wider area. You can even add a fertilizer injector to the system to deliver nutrients directly to the roots, boosting growth and fruit production.
Don’t be afraid to get creative and adapt the system to your specific environment and pumpkin varieties. Observe your plants closely and adjust the watering frequency and duration as needed. Remember, the key is to provide consistent moisture without overwatering, which can lead to root rot.
We wholeheartedly encourage you to give this DIY drip irrigation system a try. It’s a rewarding project that will not only improve the health and yield of your pumpkin patch but also give you a deeper connection to your garden. The benefits are undeniable: water conservation, healthier plants, bigger pumpkins, and the satisfaction of a job well done.
Once you’ve built your system and seen the results, we’d love to hear about your experience! Share your photos, tips, and variations in the comments below. Let’s build a community of pumpkin enthusiasts who are passionate about sustainable gardening practices. Your insights could inspire others to take the plunge and experience the magic of DIY drip irrigation for themselves. Let’s grow some amazing pumpkins together!
Frequently Asked Questions (FAQ)
What materials do I need for this DIY drip irrigation system?
The basic materials include a large container (bucket, bin, or barrel) for your water reservoir, drip tubing or soaker hoses, connectors to attach the tubing to the reservoir, and a drill with a small drill bit to create the drip holes. You may also want to consider a timer for automated watering and a filter to prevent clogging. The specific materials and quantities will depend on the size of your pumpkin patch.
How do I determine the spacing between the drip lines?
The spacing between drip lines depends on the size and spacing of your pumpkin plants. Generally, you’ll want to place the drip lines close enough to ensure that the roots of each plant receive adequate moisture. A good starting point is to space the drip lines about 12-18 inches apart, but you may need to adjust this based on your soil type and the specific needs of your pumpkin variety. Observe your plants closely and adjust the spacing as needed.
How often should I water my pumpkins with this drip irrigation system?
The frequency of watering depends on several factors, including the weather, soil type, and the age of your pumpkin plants. Young plants need less water than mature plants. As a general rule, pumpkins need about 1 inch of water per week. Check the soil moisture regularly by sticking your finger a few inches into the soil. If the soil feels dry, it’s time to water. With a drip irrigation system, you can water slowly and deeply, allowing the water to soak into the soil and reach the roots. A timer can be helpful for automating the watering process and ensuring consistent hydration.
Can I use this system for other plants besides pumpkins?
Yes, absolutely! This DIY drip irrigation system is versatile and can be used for a wide variety of plants, including vegetables, fruits, and flowers. The key is to adjust the spacing and watering frequency to meet the specific needs of each plant. For example, plants that prefer drier conditions will need less frequent watering than plants that prefer consistently moist soil.
How do I prevent clogging in the drip lines?
Clogging is a common problem with drip irrigation systems, but there are several things you can do to prevent it. First, use clean water in your reservoir. If you’re using well water, consider installing a filter to remove sediment and debris. Second, flush the drip lines periodically to remove any accumulated buildup. You can do this by simply disconnecting the lines from the reservoir and running water through them. Finally, consider using a commercial drip irrigation cleaner to dissolve mineral deposits and algae.
What if my pumpkin leaves are turning yellow?
Yellowing leaves can be a sign of several problems, including overwatering, underwatering, nutrient deficiencies, or disease. Check the soil moisture to ensure that you’re not overwatering or underwatering. If the soil moisture is adequate, consider testing your soil to determine if there are any nutrient deficiencies. Pumpkins need plenty of nitrogen, phosphorus, and potassium. You can also try adding compost or other organic matter to the soil to improve its fertility. If you suspect disease, consult with a local gardening expert or extension office for advice on treatment options.
How do I winterize my DIY drip irrigation system?
Winterizing your drip irrigation system is essential to prevent damage from freezing temperatures. Start by draining all the water from the system. Disconnect the drip lines from the reservoir and allow them to drain completely. You can also use an air compressor to blow out any remaining water. Store the drip lines and connectors in a dry, protected location, such as a garage or shed. If you live in an area with extremely cold winters, you may also want to insulate the reservoir to prevent it from freezing.
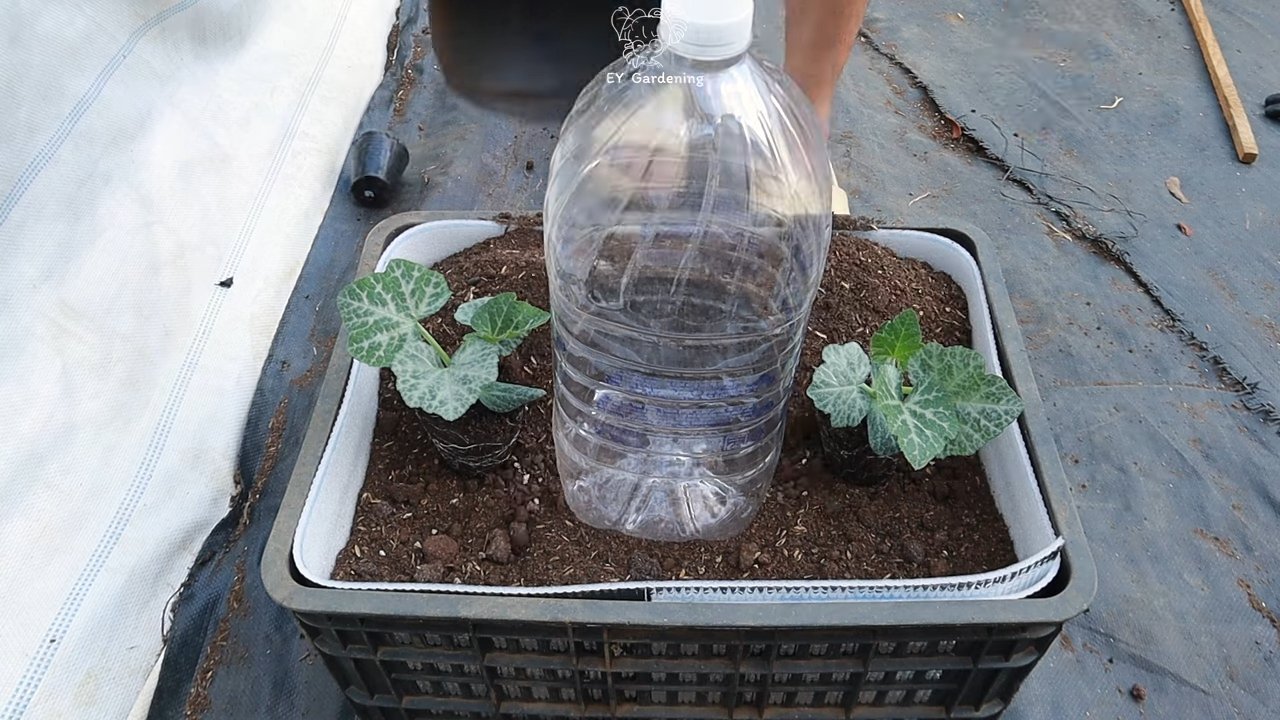
Can I use recycled materials for this project?
Absolutely! Using recycled materials is a great way to reduce waste and save money. You can use repurposed buckets, bins, or barrels for your water reservoir. Old garden hoses can be cut and used as drip lines. Plastic bottles can be used to create individual drip emitters. Get creative and see what you can find around your home or community.
How much does it cost to build this DIY drip irrigation system?
The cost of building this DIY drip irrigation system will vary depending on the materials you use and the size of your pumpkin patch. However, it’s generally much cheaper than buying a pre-made system. You can often find many of the materials you need for free or at a low cost. Even if you have to purchase some of the materials, the total cost is likely to be significantly less than a commercial system.
What are the benefits of using drip irrigation for pumpkins compared to other watering methods?
Drip irrigation offers several advantages over other watering methods, such as overhead sprinklers or hand watering. Drip irrigation delivers water directly to the roots of the plants, minimizing water waste and reducing the risk of fungal diseases. It also helps to prevent soil erosion and compaction. Additionally, drip irrigation allows you to deliver nutrients directly to the roots, boosting growth and fruit production. Overall, drip irrigation is a more efficient and effective way to water pumpkins than other methods.
Leave a Comment