
Onion growing tips are the secret weapon every home gardener needs! Imagine stepping outside your back door and harvesting plump, flavorful onions, ready to elevate your culinary creations. Forget those bland, store-bought onions – with a few simple tricks, you can cultivate a thriving onion patch right in your own backyard.
Onions have a rich history, dating back thousands of years. Ancient Egyptians revered them, even using them as offerings to the gods! Their cultivation spread across the globe, becoming a staple in countless cuisines. But you don’t need to be an ancient civilization to enjoy the benefits of homegrown onions.
Why should you bother with these onion growing tips? Well, for starters, the taste is unparalleled. Freshly harvested onions have a sweetness and depth of flavor you simply can’t find in commercially grown varieties. Plus, you’ll know exactly what went into growing them – no harmful pesticides or chemicals. More importantly, growing your own onions is incredibly rewarding and surprisingly easy, even for beginners. I’m excited to share some simple DIY hacks that will help you achieve a bountiful harvest, regardless of your gardening experience. Let’s get started and transform your garden into an onion-lover’s paradise!
Growing Onions From Scraps: A Beginner’s Guide
Hey there, fellow gardening enthusiasts! Ever thought about turning those onion scraps you usually toss in the compost into fresh, usable onions? It’s easier than you think, and it’s a fantastic way to reduce waste and enjoy homegrown goodness. I’m going to walk you through the whole process, step-by-step, so you can start your own onion-growing adventure.
What You’ll Need
Before we dive in, let’s gather our supplies. This is a pretty low-cost project, which is always a win!
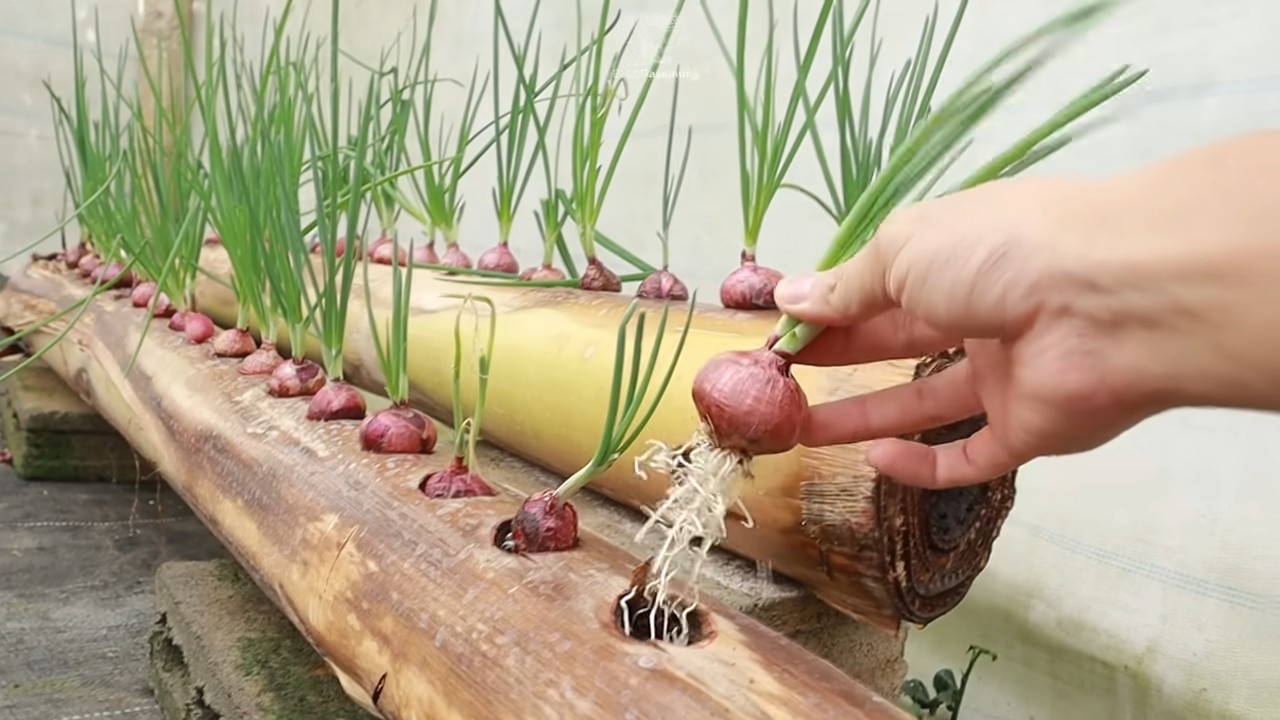
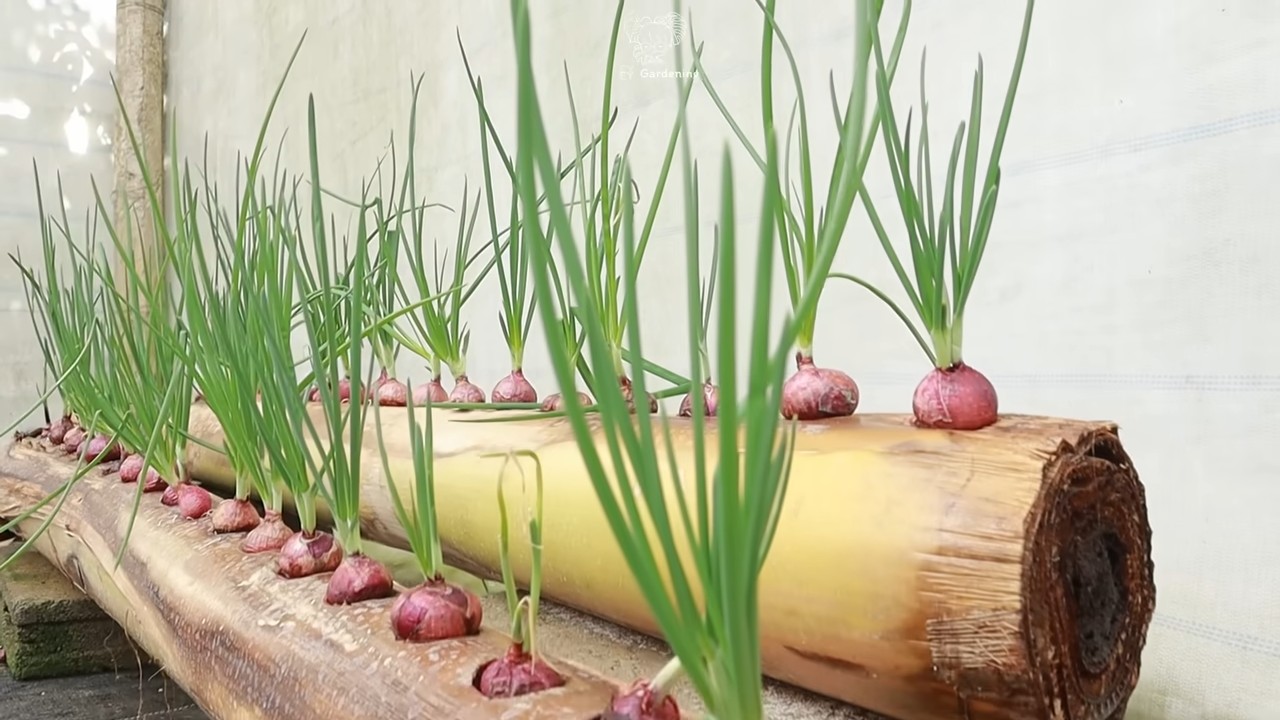
* **Onion Scraps:** The bottom part of an onion, about an inch or two from the root end. Make sure it has some roots still attached. Yellow, white, or red onions all work.
* **Small Containers:** Yogurt cups, small pots, or even egg cartons will do.
* **Potting Soil:** A well-draining potting mix is essential.
* **Water:** Tap water is fine.
* **Larger Pots or Garden Bed:** For transplanting later on.
* **Gardening Gloves (Optional):** To keep your hands clean.
* **Trowel or Small Shovel:** For transplanting.
Phase 1: Rooting Your Onion Scraps
This is where the magic begins! We need to encourage those onion scraps to sprout new roots.
1. **Prepare the Onion Scraps:** Take your onion scraps and gently remove any loose or decaying outer layers. You want to expose the fresh, healthy part of the onion base.
2. **Planting in Small Containers:** Fill your small containers with potting soil, leaving about half an inch of space at the top.
3. **Positioning the Onion:** Place the onion scrap root-side down in the soil. Gently press it in so that the top of the onion scrap is just barely covered with soil. You don’t want to bury it completely.
4. **Watering:** Water the soil thoroughly until it’s moist but not soggy. You want the soil to be consistently damp, but avoid overwatering, which can lead to rot.
5. **Finding the Right Spot:** Place the containers in a bright, sunny location. A windowsill that gets at least 6 hours of sunlight per day is ideal. If you don’t have enough natural light, you can supplement with a grow light.
6. **Maintaining Moisture:** Check the soil moisture daily. If the top inch of soil feels dry, water lightly. Remember, consistency is key!
7. **Observing Growth:** Within a week or two, you should start to see new green shoots emerging from the top of the onion scrap. This is a sign that your onion is successfully rooting!
Phase 2: Transplanting to Larger Pots or Garden Bed
Once your onion scraps have developed a good root system and have several inches of green growth, it’s time to move them to a more permanent home.
1. **Preparing the Larger Pots or Garden Bed:** If you’re using pots, choose ones that are at least 6 inches in diameter. If you’re planting in a garden bed, make sure the soil is well-drained and amended with compost or other organic matter. Onions prefer soil that is slightly acidic to neutral (pH 6.0-7.0).
2. **Spacing:** When planting in a garden bed, space the onion plants about 4-6 inches apart in rows that are 12-18 inches apart. This gives them enough room to grow and prevents overcrowding.
3. **Carefully Removing the Onion:** Gently loosen the soil around the onion scrap in its small container. Carefully lift the onion out, being careful not to damage the roots.
4. **Planting Depth:** Dig a hole in the larger pot or garden bed that is deep enough to accommodate the onion’s root ball. Place the onion in the hole, making sure that the top of the root ball is level with the surrounding soil.
5. **Filling the Hole:** Fill the hole with soil, gently pressing it around the onion to secure it in place.
6. **Watering After Transplanting:** Water the newly transplanted onion thoroughly to help it settle in.
7. **Mulching (Optional):** Add a layer of mulch around the onion plants to help retain moisture, suppress weeds, and regulate soil temperature. Straw, wood chips, or shredded leaves are all good options.
Phase 3: Ongoing Care and Maintenance
Now that your onions are transplanted, it’s important to provide them with the care they need to thrive.
1. **Watering:** Onions need consistent moisture, especially during dry periods. Water deeply whenever the top inch of soil feels dry. Avoid overhead watering, which can promote fungal diseases. Instead, water at the base of the plants.
2. **Fertilizing:** Onions are heavy feeders, so they benefit from regular fertilization. Use a balanced fertilizer (e.g., 10-10-10) every 2-3 weeks. You can also side-dress with compost or aged manure.
3. **Weeding:** Keep the area around your onion plants free of weeds. Weeds compete with onions for water and nutrients, and they can also harbor pests and diseases. Hand-pull weeds carefully to avoid disturbing the onion roots.
4. **Pest and Disease Control:** Onions are susceptible to a few common pests and diseases, such as onion maggots, thrips, and fungal diseases. Inspect your plants regularly for signs of infestation or disease. If you spot any problems, take action promptly. You can use organic pest control methods, such as insecticidal soap or neem oil, to control pests. For fungal diseases, ensure good air circulation and avoid overhead watering.
5. **Sunlight:** Onions need at least 6 hours of sunlight per day to grow properly. Make sure your plants are in a sunny location.
6. **Soil pH:** Monitor the soil pH and adjust as needed. Onions prefer a slightly acidic to neutral soil pH (6.0-7.0). You can use a soil testing kit to check the pH and amend the soil with lime to raise the pH or sulfur to lower it.
Phase 4: Harvesting Your Onions
The moment you’ve been waiting for! Knowing when to harvest is key to getting the best flavor and storage life from your onions.
1. **When to Harvest:** Onions are typically ready to harvest when the tops start to fall over and turn yellow or brown. This usually happens about 3-4 months after planting.
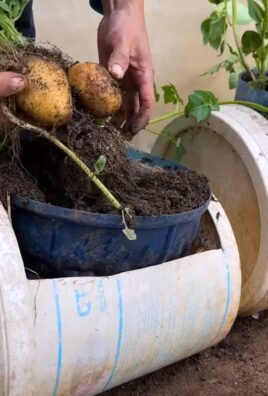
2. **Harvesting Technique:** Gently loosen the soil around the onion bulb with a trowel or garden fork. Carefully lift the onion out of the ground, being careful not to damage it.
3. **Curing:** After harvesting, you need to cure the onions to help them dry out and develop a protective outer layer. This process helps prevent rot and extends their storage life.
* **Lay the onions out in a single layer in a warm, dry, well-ventilated place.** A garage, shed, or covered porch is ideal.
* **Allow the onions to cure for 2-3 weeks, or until the necks are completely dry and the outer skins are papery.**
* **Turn the onions occasionally to ensure even drying.**
4. **Storing:** Once the onions are cured, you can store them in a cool, dry, dark place.
* **Cut off the dried tops, leaving about an inch or two attached to the bulb.**
* **Gently remove any loose outer skins.**
* **Store the onions in mesh bags, crates, or baskets.**
* **Avoid storing onions near potatoes, as they can cause each other to spoil more quickly.**
* **Check the onions periodically for signs of rot or spoilage and remove any affected onions immediately.**
Troubleshooting Tips
Even with the best planning, things don’t always go perfectly. Here are a few common issues you might encounter and how to address them:
* **Onion Scraps Not Rooting:** Make sure the onion scraps have some roots attached and are kept consistently moist but not soggy. Also, ensure they are getting enough sunlight.
* **Yellowing Leaves:** Yellowing leaves can be a sign of overwatering, underwatering, or nutrient deficiency. Adjust your watering schedule and fertilize regularly.
* **Pest Infestations:** Inspect your plants regularly for pests and take action promptly. Use organic pest control methods, such as insecticidal soap or neem oil.
* **Fungal Diseases:** Ensure good air circulation and avoid overhead watering. If you spot any signs of fungal disease, treat with a fungicide.
Extra Tips for Success
* Choose the Right Onion Variety: Different onion varieties are better suited for different climates and growing conditions. Do some research to find varieties that are well-suited for your area.
* Start with Healthy Onion Scraps: Choose onion scraps that are firm, free of blemishes, and have healthy roots.
* Be Patient: Growing onions from scraps takes time and patience. Don’t get discouraged if you don’t see results immediately.
*
Conclusion
So, there you have it! Mastering these simple yet effective onion growing tips can truly transform your gardening experience. Forget relying solely on store-bought onions; imagine the satisfaction of harvesting plump, flavorful bulbs grown with your own two hands. This isn’t just about saving money; it’s about connecting with nature, understanding the growing process, and enjoying the unparalleled taste of homegrown produce.
Why is this DIY approach a must-try? Because it empowers you to control the quality of your food. You know exactly what went into growing your onions – no harmful pesticides, no questionable fertilizers, just good old-fashioned care and attention. Plus, it’s incredibly rewarding to witness the entire life cycle of a plant, from tiny seed to mature bulb.
But the benefits don’t stop there. Growing your own onions allows for incredible customization. Want sweeter onions for salads? Choose a variety like Walla Walla or Vidalia. Prefer a pungent onion for cooking? Opt for a red or yellow variety. The possibilities are endless!
Here are a few suggestions and variations to get you started:
* Experiment with different onion varieties: Don’t limit yourself to just one type. Try growing a mix of red, yellow, and white onions to discover your favorites.
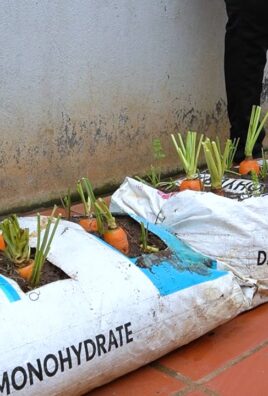
* Consider companion planting: Onions are known to deter certain pests, so plant them alongside carrots, tomatoes, or lettuce to create a mutually beneficial garden ecosystem.
* Try growing onions from sets: Onion sets are small, immature bulbs that are easier to plant than seeds, making them a great option for beginners.
* Explore different growing methods: While these tips focus on traditional soil gardening, you can also grow onions in raised beds, containers, or even hydroponically.
* Don’t forget the greens! Onion greens are delicious and can be used in salads, soups, and other dishes. Harvest them regularly to encourage bulb growth.
We wholeheartedly encourage you to give these onion growing tips a try. It’s a fun, educational, and ultimately delicious endeavor. And once you’ve harvested your first crop of homegrown onions, be sure to share your experience with us! Tell us about your successes, your challenges, and any unique tips you’ve discovered along the way. Let’s build a community of passionate onion growers! Share your photos and stories on our social media pages using #HomegrownOnions or leave a comment below. We can’t wait to hear from you!
Frequently Asked Questions (FAQ)
Q: What is the best time of year to plant onions?
A: The best time to plant onions depends on your climate and the type of onion you’re growing. In general, long-day onions (which require 14-16 hours of daylight) are best suited for northern climates and should be planted in early spring. Short-day onions (which require 10-12 hours of daylight) are better for southern climates and should be planted in the fall or early winter. Day-neutral onions can be grown in most climates and can be planted in either spring or fall. Check your local extension office for specific planting dates in your area.
Q: How much sunlight do onions need?
A: Onions need at least 6-8 hours of direct sunlight per day to thrive. Choose a planting location that receives plenty of sunlight throughout the day. If you’re growing onions in containers, make sure to place them in a sunny spot. Insufficient sunlight can lead to small, underdeveloped bulbs.
Q: What kind of soil is best for growing onions?
A: Onions prefer well-drained, fertile soil that is rich in organic matter. Amend your soil with compost or aged manure before planting to improve its fertility and drainage. The ideal soil pH for onions is between 6.0 and 7.0. Avoid planting onions in heavy clay soil, as this can lead to root rot.
Q: How often should I water my onions?
A: Onions need consistent moisture, especially during bulb formation. Water deeply whenever the top inch of soil feels dry to the touch. Avoid overwatering, as this can lead to root rot. During hot, dry weather, you may need to water your onions more frequently. Mulching around your onion plants can help to retain moisture in the soil.
Q: What are some common pests and diseases that affect onions?
A: Some common pests that affect onions include onion maggots, thrips, and aphids. Diseases that can affect onions include onion smut, downy mildew, and botrytis blight. To prevent pest and disease problems, practice good garden hygiene, such as removing plant debris and rotating crops. You can also use organic pest control methods, such as insecticidal soap or neem oil, to control pests. If you suspect your onions have a disease, consult your local extension office for diagnosis and treatment recommendations.
Q: How do I know when my onions are ready to harvest?
A: Onions are typically ready to harvest when the tops begin to fall over and turn yellow or brown. This usually happens about 100-120 days after planting. Once the tops have fallen over, stop watering the onions and allow them to dry out in the ground for a few days. Then, carefully dig up the bulbs and cure them in a warm, dry place for 2-3 weeks before storing them.
Q: How do I store my harvested onions?
A: To store your harvested onions properly, cure them in a warm, dry place with good air circulation for 2-3 weeks. This allows the outer layers of the bulbs to dry out and form a protective barrier. Once the onions are cured, store them in a cool, dry, and dark place, such as a basement or pantry. Avoid storing onions near potatoes, as they can cause each other to spoil more quickly. Properly stored onions can last for several months.
Q: Can I grow onions in containers?
A: Yes, you can definitely grow onions in containers! Choose a container that is at least 8-10 inches deep and has drainage holes. Fill the container with a well-draining potting mix and plant your onion sets or seedlings. Water regularly and fertilize every few weeks with a balanced fertilizer. Place the container in a sunny location that receives at least 6-8 hours of direct sunlight per day.
Q: What are onion sets and how do I use them?
A: Onion sets are small, immature onion bulbs that are grown from seed the previous year. They are a convenient and easy way to grow onions, especially for beginners. To plant onion sets, simply push them into the soil about 1-2 inches deep, with the pointed end facing up. Space the sets about 4-6 inches apart. Water regularly and fertilize as needed. Onion sets will quickly grow into mature onion bulbs.
Q: Can I grow onions from scraps?
A: While you can’t regrow a full onion bulb from scraps, you can regrow onion greens from the base of a green onion. Simply place the base of the green onion in a glass of water, with the roots submerged. Place the glass in a sunny location and change the water every few days. The green onion will start to regrow new green shoots, which you can harvest and use in your cooking. This is a great way to reduce food waste and enjoy fresh onion greens.
Leave a Comment