
Grow Mint Indoors and transform your home into a fragrant oasis, even without a sprawling garden! Have you ever craved a refreshing mojito or a soothing cup of mint tea, only to realize you’re fresh mint supply is non-existent? I know I have! That’s where the magic of indoor mint cultivation comes in. For centuries, mint has been cherished not only for its culinary uses but also for its medicinal properties and delightful aroma. From ancient Roman banquets where mint adorned tables to traditional herbal remedies across various cultures, this herb boasts a rich and fascinating history.
But let’s be honest, sometimes life gets in the way, and maintaining an outdoor garden feels like a Herculean task. That’s precisely why I’m so excited to share these simple yet effective DIY tricks and hacks that will empower you to grow mint indoors successfully. Imagine having a readily available source of fresh, vibrant mint right at your fingertips, ready to elevate your culinary creations, freshen your home, and even boost your well-being. This guide will walk you through everything you need to know, from choosing the right container to providing optimal light and watering conditions. Say goodbye to store-bought mint and hello to a thriving indoor mint garden!
Grow Your Own Mint Indoors: A Beginner’s Guide
Hey there, fellow plant enthusiasts! Ever dreamt of having fresh, fragrant mint readily available for your mojitos, teas, or culinary creations? Well, dream no more! Growing mint indoors is surprisingly easy, and I’m here to guide you through every step of the process. Get ready to unleash your inner gardener!
Choosing Your Mint Variety
First things first, let’s talk mint varieties. There’s a whole world of mint out there, from the classic peppermint and spearmint to more exotic options like chocolate mint and apple mint. Each has its unique flavor profile, so choose one (or several!) that appeals to your taste buds.
* Peppermint: A strong, refreshing flavor, perfect for teas and desserts.
* Spearmint: A milder, sweeter flavor, ideal for mojitos and savory dishes.
* Chocolate Mint: A delightful blend of mint and chocolate, great for desserts and drinks.
* Apple Mint: A fruity, slightly sweet flavor, delicious in salads and teas.
You can usually find mint plants at your local garden center or nursery. Alternatively, you can propagate mint from cuttings (more on that later!).
Gathering Your Supplies
Before we dive into the planting process, let’s make sure you have everything you need. Here’s a checklist:
* Mint Plant or Cuttings: The star of the show!
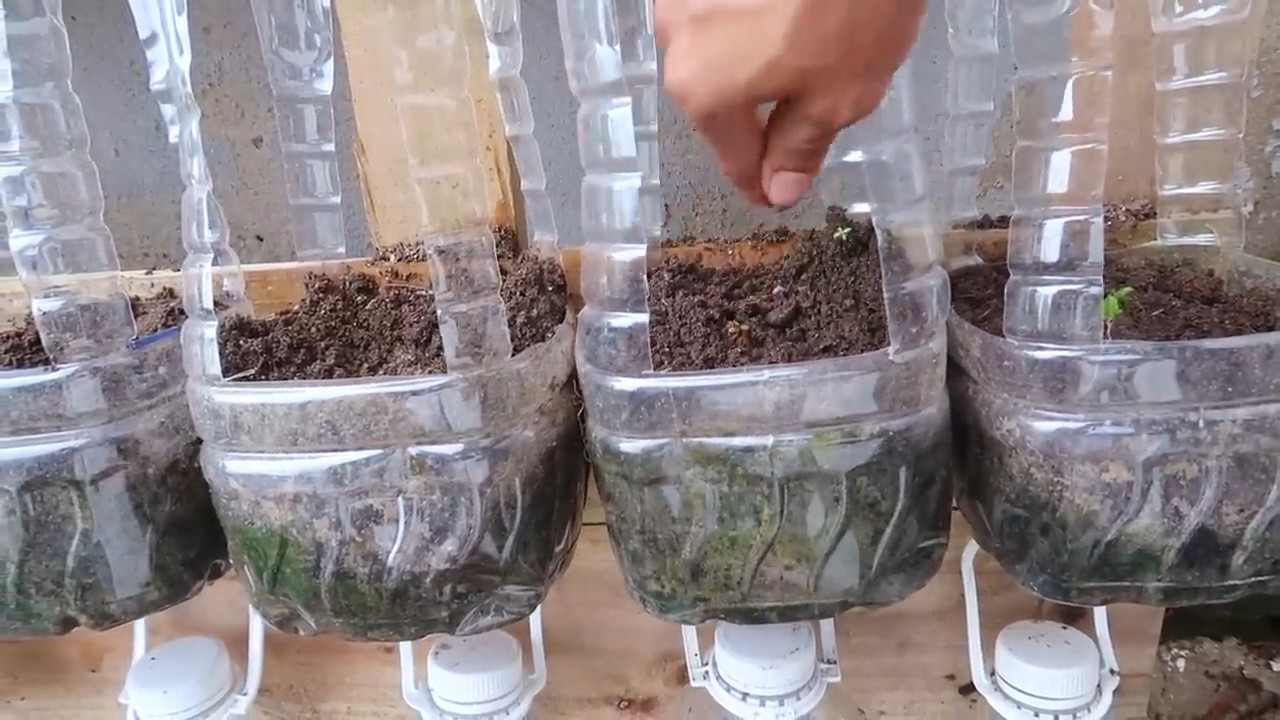
* Pot: Choose a pot that’s at least 6 inches in diameter with drainage holes. Mint can be quite invasive, so it’s best to keep it contained in a pot.
* Potting Mix: Use a well-draining potting mix specifically formulated for containers. Avoid using garden soil, as it can become compacted and hinder drainage.
* Watering Can or Spray Bottle: For keeping your mint plant hydrated.
* Grow Light (Optional): If you don’t have a sunny windowsill, a grow light can provide supplemental light.
* Scissors or Pruning Shears: For harvesting and pruning your mint.
* Fertilizer (Optional): A balanced liquid fertilizer can help boost growth.
Planting Your Mint
Alright, let’s get our hands dirty! Here’s how to plant your mint:
1. Prepare the Pot: Fill your pot with potting mix, leaving about an inch of space at the top.
2. Plant the Mint: Gently remove the mint plant from its nursery container and loosen the roots slightly. Place the plant in the center of the pot and cover the roots with potting mix.
3. Water Thoroughly: Water the plant until the water drains out of the bottom of the pot. This will help settle the soil and ensure the roots are properly hydrated.
4. Find a Sunny Spot: Place your mint plant in a location that receives at least 4-6 hours of sunlight per day. A south-facing windowsill is ideal. If you don’t have enough natural light, use a grow light.
Propagating Mint from Cuttings
Want to expand your mint collection without buying more plants? Propagating from cuttings is a fantastic way to do it! Here’s how:
1. Take a Cutting: Using clean scissors or pruning shears, cut a 4-6 inch stem from a healthy mint plant. Make sure the cutting has several leaves.
2. Remove Lower Leaves: Remove the leaves from the bottom 2 inches of the cutting. This will expose the nodes where roots will develop.
3. Rooting in Water: Place the cutting in a glass or jar filled with water, ensuring that the nodes are submerged.
4. Wait for Roots: Place the glass in a bright, indirect light location. Change the water every few days. You should see roots developing within a week or two.
5. Plant the Cutting: Once the roots are about an inch long, you can plant the cutting in a pot filled with potting mix, following the planting instructions above.
Caring for Your Indoor Mint
Now that your mint is planted, it’s time to learn how to keep it happy and healthy. Here are some essential care tips:
* Watering: Mint likes to be kept consistently moist, but not soggy. Water when the top inch of soil feels dry to the touch. Avoid overwatering, as this can lead to root rot.
* Light: As mentioned earlier, mint needs at least 4-6 hours of sunlight per day. If you’re using a grow light, keep it on for 12-14 hours per day.
* Fertilizing: Feed your mint plant with a balanced liquid fertilizer every 2-4 weeks during the growing season (spring and summer). Follow the instructions on the fertilizer label.
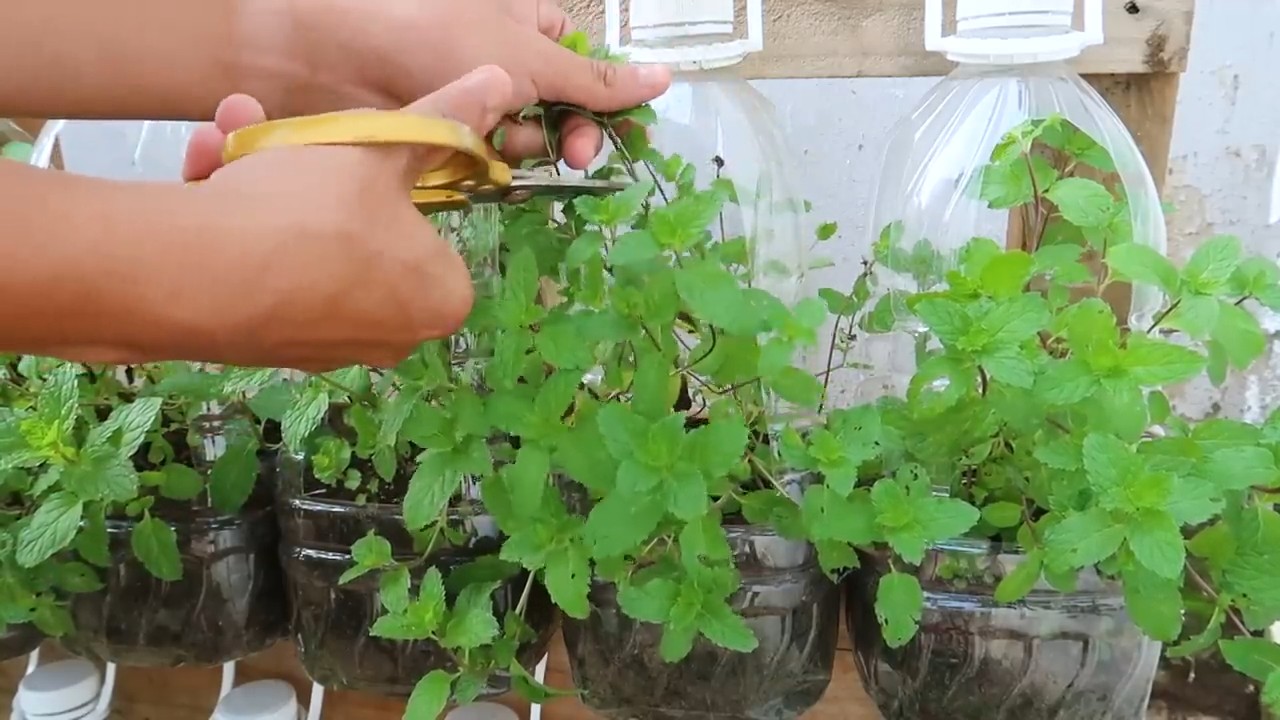
* Pruning: Regular pruning is essential for keeping your mint plant bushy and productive. Pinch off the top leaves of the stems to encourage branching. You can also harvest leaves as needed for cooking or teas.
* Pest Control: Keep an eye out for common pests like aphids and spider mites. If you spot any pests, you can try spraying the plant with insecticidal soap or neem oil.
* Repotting: Mint can become root-bound over time, so it’s a good idea to repot it every year or two. Choose a pot that’s slightly larger than the previous one.
Harvesting Your Mint
The best part of growing your own mint is, of course, harvesting it! Here’s how to harvest your mint:
1. Choose the Right Time: Harvest mint in the morning, after the dew has dried. This is when the leaves are most flavorful.
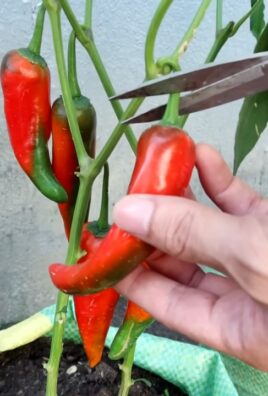
2. Cut the Stems: Using scissors or pruning shears, cut the stems just above a leaf node. This will encourage new growth.
3. Use Fresh or Dried: You can use the mint leaves fresh or dry them for later use. To dry mint, hang the stems upside down in a cool, dry place until the leaves are brittle. You can also dry mint in a dehydrator.
Troubleshooting Common Problems
Even with the best care, you might encounter some problems while growing mint indoors. Here are some common issues and how to address them:
* Yellowing Leaves: This could be a sign of overwatering, underwatering, or nutrient deficiency. Check the soil moisture and adjust your watering accordingly. If the soil is dry, water thoroughly. If the soil is soggy, allow it to dry out before watering again. You can also try fertilizing the plant with a balanced liquid fertilizer.
* Leggy Growth: This is usually caused by insufficient light. Move the plant to a sunnier location or use a grow light.
* Pests: As mentioned earlier, aphids and spider mites are common pests of mint. Treat the plant with insecticidal soap or neem oil.
* Root Rot: This is caused by overwatering and poor drainage. Make sure your pot has drainage holes and avoid overwatering. If you suspect root rot, repot the plant in fresh potting mix.
Mint’s Invasive Nature: A Word of Caution
I mentioned this earlier, but it’s worth repeating: mint is an incredibly vigorous grower and can be quite invasive if planted directly in the ground. That’s why growing it in a pot is highly recommended. Even in a pot, it can sometimes try to spread, so keep an eye on it and prune it regularly.
Enjoying Your Homegrown Mint
Congratulations! You’ve successfully grown your own mint indoors. Now it’s time to enjoy the fruits (or rather, leaves) of your labor. Here are some ideas for using your homegrown mint:
* Teas: Add fresh mint leaves to hot or iced tea for a refreshing flavor.
* Mojitos: Muddle mint leaves with lime juice, sugar, and rum for a classic mojito.
* Salads: Add chopped mint leaves to salads for a burst of flavor.
* Desserts: Use mint to flavor desserts like ice cream, chocolate mousse, and fruit salads.
* Savory Dishes: Add mint to savory dishes like lamb, chicken, and vegetables.
* Garnish: Use mint sprigs as a garnish for cocktails, desserts, and other dishes.
Growing mint indoors is a rewarding experience that allows you to enjoy fresh, flavorful mint year-round. With a little care and attention, you can have a thriving mint plant that will provide you with an abundance of leaves for all your culinary and beverage needs. Happy gardening!
Conclusion
So, there you have it! Growing mint indoors is not only achievable, but it’s also incredibly rewarding. Imagine having fresh, vibrant mint leaves at your fingertips, ready to elevate your culinary creations, infuse your beverages with refreshing flavor, or simply add a touch of aromatic greenery to your home. This simple DIY project transforms your kitchen into a miniature herb garden, offering a constant supply of this versatile herb, regardless of the season or your outdoor space limitations.
Why is this a must-try? Because it’s more than just growing a plant; it’s about enhancing your lifestyle. Store-bought mint, while convenient, often lacks the intense flavor and freshness of homegrown varieties. Plus, think of the satisfaction of nurturing something from a small cutting or seedling to a thriving plant. It’s a therapeutic activity that connects you with nature, even within the confines of your home.
But the benefits don’t stop there. Growing your own mint is also a sustainable choice. You’re reducing your reliance on commercially grown herbs, which often involve transportation and packaging that contribute to environmental waste. You’re also controlling the growing environment, ensuring that your mint is free from harmful pesticides and chemicals.
Ready to take your indoor mint garden to the next level? Consider these variations:
* Experiment with different varieties: From spearmint and peppermint to chocolate mint and orange mint, each variety offers a unique flavor profile. Try growing a few different types to create a diverse and exciting herb collection.
* Vertical gardening: If you’re short on space, explore vertical gardening options. Hanging planters or tiered shelves can maximize your growing area and add a visually appealing element to your home.
* Mint-infused creations: Once your mint is thriving, get creative with your recipes. Add it to smoothies, cocktails, salads, desserts, and even savory dishes. The possibilities are endless!
* Propagation: Once you have a healthy mint plant, you can easily propagate it to create even more plants. Simply take stem cuttings and root them in water or soil.
Don’t be intimidated if you’re new to gardening. Growing mint indoors is a forgiving and beginner-friendly project. With a little attention to light, water, and soil, you’ll be enjoying fresh mint in no time.
We wholeheartedly encourage you to give this DIY trick a try. It’s a simple, affordable, and incredibly rewarding way to bring the freshness of nature into your home. And most importantly, we want to hear about your experience! Share your tips, tricks, and photos with us in the comments below. Let’s create a community of indoor mint growers and inspire others to discover the joys of homegrown herbs. Embrace the opportunity to cultivate your own little piece of green paradise and experience the unparalleled flavor of fresh, homegrown mint. This is your chance to master the art of growing mint indoors and transform your culinary experiences.
Frequently Asked Questions (FAQ)
Q: What kind of pot and soil should I use for growing mint indoors?
A: For optimal growth, choose a pot that is at least 6 inches in diameter and has drainage holes. Mint prefers well-draining soil that is rich in organic matter. A good potting mix specifically formulated for herbs is ideal. You can also amend regular potting soil with compost or perlite to improve drainage and aeration. Avoid using garden soil, as it can be too heavy and may contain pests or diseases. The size of the pot is important because mint spreads quickly, and a larger pot gives it room to grow without becoming root-bound too quickly.
Q: How much sunlight does indoor mint need?
A: Mint thrives in bright, indirect sunlight. Aim for at least 6 hours of sunlight per day. If you don’t have a sunny windowsill, you can supplement with a grow light. Place the light a few inches above the plant and keep it on for 12-14 hours per day. Insufficient light can lead to leggy growth and pale leaves. Rotate the pot regularly to ensure that all sides of the plant receive adequate light.
Q: How often should I water my indoor mint plant?
A: Water your mint plant when the top inch of soil feels dry to the touch. Avoid overwatering, as this can lead to root rot. Water thoroughly until water drains out of the drainage holes. During the growing season (spring and summer), you may need to water more frequently than during the dormant season (fall and winter). Check the soil moisture regularly and adjust your watering schedule accordingly.
Q: How do I fertilize my indoor mint plant?
A: Feed your mint plant with a balanced liquid fertilizer every 2-4 weeks during the growing season. Dilute the fertilizer to half strength to avoid burning the roots. You can also use a slow-release fertilizer at the beginning of the growing season. Avoid over-fertilizing, as this can lead to excessive foliage growth at the expense of flavor.
Q: How do I harvest mint leaves?
A: You can harvest mint leaves as needed once the plant is established. Simply pinch off the leaves or cut stems just above a leaf node. Regular harvesting encourages bushier growth. Avoid removing more than one-third of the plant at a time. The best time to harvest mint is in the morning, after the dew has dried but before the sun gets too hot.
Q: How do I prevent pests and diseases on my indoor mint plant?
A: Regularly inspect your mint plant for pests such as aphids, spider mites, and whiteflies. If you find any pests, you can try washing them off with a strong stream of water or using insecticidal soap. To prevent diseases, ensure good air circulation around the plant and avoid overwatering. If you notice any signs of disease, such as yellowing leaves or spots, remove the affected leaves immediately.
Q: Can I grow mint from cuttings?
A: Yes, growing mint from cuttings is a very easy and effective method. Take a 4-6 inch stem cutting from a healthy mint plant. Remove the lower leaves and place the cutting in a glass of water. Change the water every few days. Roots should start to develop within a week or two. Once the roots are about an inch long, you can plant the cutting in a pot with well-draining soil.
Q: Why are my mint leaves turning yellow?
A: Yellowing mint leaves can be caused by several factors, including overwatering, underwatering, nutrient deficiencies, or pest infestations. Check the soil moisture and adjust your watering schedule accordingly. If the soil is dry, water thoroughly. If the soil is soggy, allow it to dry out before watering again. Fertilize the plant with a balanced liquid fertilizer to address any nutrient deficiencies. Inspect the plant for pests and treat accordingly.
Q: My mint plant is leggy and not producing many leaves. What should I do?
A: Leggy growth is often caused by insufficient light. Move your mint plant to a sunnier location or supplement with a grow light. You can also prune the plant back to encourage bushier growth. Cut back the stems by about one-third, just above a leaf node. This will stimulate new growth and result in a fuller, more productive plant.
Q: Can I grow different varieties of mint together in the same pot?
A: While it’s possible to grow different varieties of mint together, it’s generally not recommended. Mint is a vigorous grower and can quickly spread and take over the pot. Different varieties may compete for resources, and one variety may eventually dominate the others. If you want to grow multiple varieties of mint, it’s best to plant them in separate pots.
Leave a Comment