
Balcony chili growing tips are your passport to adding a fiery kick to your cooking, right from the comfort of your own home! Imagine plucking fresh, vibrant chilies just steps from your kitchen, ready to spice up your next meal. Forget those bland, store-bought peppers – we’re talking about homegrown flavor explosions!
For centuries, chilies have been cherished across cultures, not just for their culinary uses, but also for their medicinal properties and even as symbols of good luck. From the ancient Aztecs to modern-day foodies, the love for chilies is a global phenomenon. But you don’t need a sprawling farm to participate in this flavorful tradition.
That’s where these DIY balcony chili growing tips come in. Many people think you need a huge garden to grow your own food, but that’s simply not true! Balcony gardening is becoming increasingly popular, especially for apartment dwellers and those with limited outdoor space. And chilies are surprisingly well-suited to container gardening. With the right techniques, you can transform your balcony into a thriving chili pepper paradise. I’m going to show you how to maximize your yield, avoid common pitfalls, and enjoy a bountiful harvest of delicious chilies, all without breaking the bank. So, let’s get started and turn your balcony into a hot spot for flavor!
Chili Anbauen auf dem Balkon: Dein Leitfaden für eine feurige Ernte!
Hey Chili-Liebhaber! Träumst du auch davon, deinen eigenen Balkon in eine kleine Chili-Plantage zu verwandeln? Ich zeige dir, wie du das ganz einfach schaffst! Chili Anbauen auf dem Balkon ist gar nicht so schwer, wie du vielleicht denkst. Mit ein paar Tricks und Kniffen kannst du schon bald deine eigenen, feurigen Schoten ernten. Lass uns loslegen!
Die Vorbereitung: Was du brauchst
Bevor wir mit dem eigentlichen Anbau beginnen, müssen wir sicherstellen, dass wir alles Notwendige zur Hand haben. Hier ist eine Liste der Dinge, die du brauchst:
* Chilisamen oder Jungpflanzen: Wähle Sorten, die dir schmecken und die für den Anbau im Topf geeignet sind. Es gibt unzählige Sorten, von mild bis extrem scharf.
* Töpfe: Wähle Töpfe mit ausreichend Volumen (mindestens 10 Liter pro Pflanze) und guter Drainage. Terrakotta-Töpfe sind ideal, da sie atmungsaktiv sind.
* Hochwertige Erde: Verwende spezielle Chili- oder Gemüseerde. Diese ist nährstoffreich und sorgt für ein gutes Wachstum.
* Dünger: Flüssigdünger für Chili-Pflanzen ist ideal. Achte auf einen hohen Kaliumgehalt für eine gute Fruchtausbildung.
* Gießkanne oder Schlauch: Zum regelmäßigen Gießen deiner Pflanzen.
* Pflanzstäbe: Um die Pflanzen bei Bedarf zu stützen, besonders wenn sie viele Früchte tragen.
* Sprühflasche: Um die Blätter zu befeuchten und Schädlinge abzuwehren.
* Geduld: Chili-Pflanzen brauchen Zeit und Pflege, um zu wachsen und Früchte zu tragen.
Die Aussaat: Der Start in dein Chili-Abenteuer
Die Aussaat ist der erste Schritt zu deiner eigenen Chili-Ernte. Du kannst entweder Chilisamen kaufen oder Samen aus getrockneten Chilis gewinnen. Ich empfehle, mit gekauften Samen zu beginnen, da diese oft eine höhere Keimrate haben.
1. Vorbereitung der Anzuchtgefäße: Fülle kleine Anzuchttöpfe oder eine Anzuchtschale mit Anzuchterde. Diese ist besonders fein und nährstoffarm, was die Keimung der Samen fördert.
2. Aussaat der Samen: Lege die Samen etwa 0,5 bis 1 cm tief in die Erde. Bedecke sie leicht mit Erde und drücke sie vorsichtig an.
3. Bewässerung: Befeuchte die Erde vorsichtig mit einer Sprühflasche. Die Erde sollte feucht, aber nicht nass sein.
4. Standort: Stelle die Anzuchtgefäße an einen warmen und hellen Ort. Eine Temperatur von 22-28°C ist ideal für die Keimung. Ein Mini-Gewächshaus oder eine durchsichtige Plastikhaube kann helfen, die Luftfeuchtigkeit hoch zu halten.
5. Geduld: Die Keimung kann je nach Chilisorte und Temperatur 1-3 Wochen dauern. Halte die Erde feucht und lüfte das Mini-Gewächshaus regelmäßig, um Schimmelbildung zu vermeiden.
Das Pikieren: Den kleinen Pflanzen mehr Raum geben
Sobald die kleinen Chili-Pflanzen ihre ersten richtigen Blätter (neben den Keimblättern) entwickelt haben, ist es Zeit zum Pikieren. Das bedeutet, dass du die Pflanzen in größere Töpfe umpflanzt, damit sie mehr Platz zum Wachsen haben.
1. Vorbereitung der Töpfe: Fülle kleine Töpfe (ca. 8-10 cm Durchmesser) mit Chili- oder Gemüseerde.
2. Ausheben der Pflanzen: Löse die kleinen Chili-Pflanzen vorsichtig aus der Anzuchtschale. Verwende dazu am besten einen Pikierstab oder einen Löffel. Achte darauf, die Wurzeln nicht zu beschädigen.
3. Einpflanzen: Setze die Chili-Pflanzen in die vorbereiteten Töpfe. Die Wurzeln sollten gut mit Erde bedeckt sein. Drücke die Erde leicht an.
4. Bewässerung: Gieße die Pflanzen vorsichtig an.
5. Standort: Stelle die pikierten Pflanzen an einen hellen, aber nicht vollsonnigen Ort.
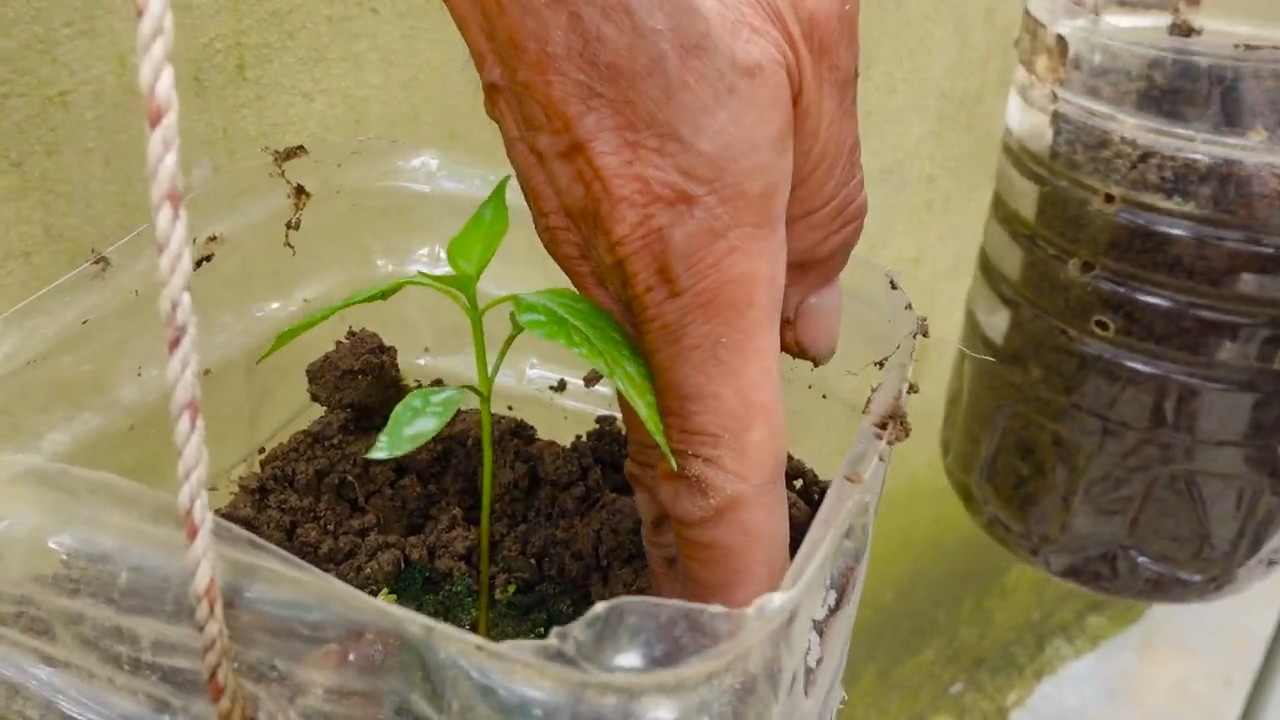
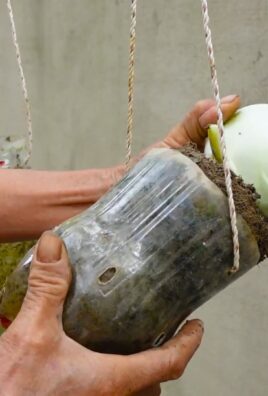
Der Umzug auf den Balkon: Chili-Paradies unter freiem Himmel
Nachdem die Chili-Pflanzen in ihren kleinen Töpfen gut angewachsen sind und die Temperaturen draußen steigen (nach den Eisheiligen Mitte Mai), können sie auf den Balkon umziehen.
1. Vorbereitung der Töpfe: Wähle Töpfe mit ausreichend Volumen (mindestens 10 Liter pro Pflanze). Fülle die Töpfe mit Chili- oder Gemüseerde.
2. Umpflanzen: Löse die Chili-Pflanzen vorsichtig aus ihren kleinen Töpfen. Achte darauf, die Wurzeln nicht zu beschädigen.
3. Einpflanzen: Setze die Chili-Pflanzen in die vorbereiteten Töpfe. Die Wurzeln sollten gut mit Erde bedeckt sein. Drücke die Erde leicht an.
4. Bewässerung: Gieße die Pflanzen gründlich an.
5. Standort: Stelle die Töpfe an einen sonnigen und windgeschützten Ort auf dem Balkon. Chili-Pflanzen lieben die Sonne!
Die Pflege: Damit deine Chilis prächtig gedeihen
Die richtige Pflege ist entscheidend für eine reiche Chili-Ernte. Hier sind ein paar Tipps, die du beachten solltest:
* Gießen: Gieße deine Chili-Pflanzen regelmäßig, besonders an heißen Tagen. Die Erde sollte immer leicht feucht sein, aber nicht nass. Vermeide Staunässe, da dies zu Wurzelfäule führen kann.
* Düngen: Dünge deine Chili-Pflanzen regelmäßig mit einem speziellen Chili- oder Gemüseflüssigdünger. Beginne etwa 2-3 Wochen nach dem Umpflanzen und dünge dann alle 1-2 Wochen. Achte auf die Dosierungsanleitung auf der Verpackung.
* Ausgeizen: Entferne regelmäßig die Seitentriebe, die zwischen dem Hauptstamm und den Blättern wachsen. Dies fördert das Wachstum der Haupttriebe und die Fruchtausbildung.
* Stützen: Wenn deine Chili-Pflanzen viele Früchte tragen, kann es notwendig sein, sie mit Pflanzstäben zu stützen. So verhinderst du, dass die Äste unter dem Gewicht der Früchte brechen.
* Schädlinge und Krankheiten: Kontrolliere deine Chili-Pflanzen regelmäßig auf Schädlinge wie Blattläuse oder Spinnmilben. Bei Befall kannst du natürliche Schädlingsbekämpfungsmittel wie Neemöl oder Schmierseifenlösung verwenden. Achte auch auf Anzeichen von Krankheiten wie Mehltau oder Grauschimmel. Entferne befallene Blätter oder Früchte sofort.
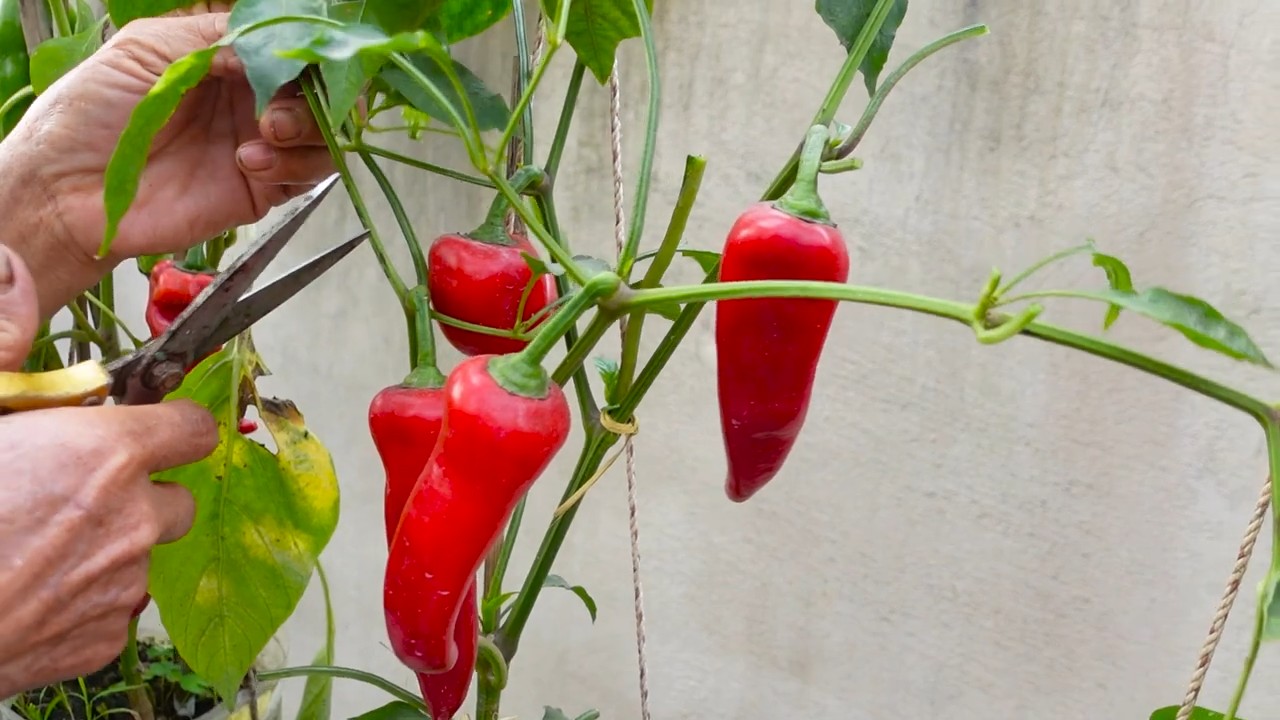
Die Ernte: Der Lohn deiner Mühe
Endlich ist es soweit: Die Chili-Früchte sind reif und können geerntet werden! Die Reifezeit hängt von der Chilisorte ab. In der Regel sind die Früchte reif, wenn sie ihre endgültige Farbe erreicht haben (rot, gelb, orange, braun oder lila) und sich leicht vom Stiel lösen lassen.
1. Ernte: Schneide die Chili-Früchte mit einer Schere oder einem Messer vom Stiel ab.
2. Verwendung: Verwende die frischen Chilis sofort zum Kochen oder trockne sie für die spätere Verwendung. Du kannst sie auch einfrieren oder zu Chiliöl oder -soße verarbeiten.
Zusätzliche Tipps für eine erfolgreiche Chili-Ernte auf dem Balkon
* Wähle den richtigen Standort: Chili-Pflanzen brauchen mindestens 6 Stunden Sonne pro Tag. Achte darauf, dass dein Balkon ausreichend Sonnenlicht bekommt.
* Schütze deine Pflanzen vor Wind: Ein windgeschützter Standort ist ideal, da starker Wind die Pflanzen beschädigen kann.
* Verwende hochwertige Erde: Eine gute Erde ist die Grundlage für ein gesundes Wachstum. Verwende spezielle Chili- oder Gemüseerde.
* Gieße und dünge regelmäßig: Chili-Pflanzen brauchen ausreichend Wasser und Nährstoffe, um gut zu wachsen und Früchte zu tragen.
* Kontrolliere deine Pflanzen regelmäßig auf Schädlinge und Krankheiten
Conclusion
So, there you have it! Transforming your balcony into a vibrant chili pepper paradise is not only achievable, but incredibly rewarding. We’ve explored the key steps, from selecting the right varieties and containers to mastering watering and pest control. But why is this DIY balcony chili growing adventure a must-try?
Firstly, the sheer convenience of having fresh, fiery chilies right outside your door is unparalleled. Imagine adding a pinch of homegrown heat to your dishes whenever the mood strikes, without a trip to the grocery store. The flavor of freshly picked chilies is also noticeably superior to store-bought varieties, boasting a brighter, more intense taste that will elevate your culinary creations.
Secondly, growing your own chilies is a fantastic way to connect with nature, even in a limited space. The process of nurturing a plant from seed to harvest is incredibly satisfying, and watching your chilies ripen in the sun is a visual treat. Plus, it’s a great conversation starter!
Thirdly, and perhaps most importantly, mastering the art of **balcony chili growing** allows you to customize your chili experience. You’re not limited to the varieties available at the supermarket. You can explore a world of flavors and heat levels, from the mild poblano to the scorching habanero, tailoring your chili garden to your specific preferences.
Variations and Suggestions:
* Vertical Gardening: Maximize your space by using vertical planters or hanging baskets. This is especially useful for smaller balconies.
* Companion Planting: Plant basil or marigolds alongside your chilies to deter pests and attract beneficial insects.
* Experiment with Varieties: Don’t be afraid to try different chili varieties each season. Discover your favorites and expand your chili horizons.
* DIY Fertilizer: Compost tea or diluted seaweed extract can provide your chilies with essential nutrients.
* Seed Saving: Save seeds from your best-performing plants to ensure a continuous supply of your favorite chilies.
* Hydroponics: Consider a small hydroponic setup for even faster growth and higher yields, especially if you have limited sunlight.
Don’t be intimidated by the process. Start small, with just a few plants, and learn as you go. The rewards of fresh, homegrown chilies are well worth the effort.
We encourage you to embark on your own balcony chili growing journey. Share your experiences, successes, and challenges with us in the comments below. We’d love to see photos of your chili gardens and hear about your favorite chili recipes. Let’s create a community of balcony chili enthusiasts! So grab your seeds, pots, and soil, and get ready to spice up your life with the joy of homegrown chilies. Happy growing!
Frequently Asked Questions (FAQ)
Q: What are the best chili varieties to grow on a balcony?
A: The best chili varieties for balcony growing are generally compact and productive. Some excellent choices include:
* Jalapeño: A classic choice, known for its moderate heat and versatility.
* Serrano: A bit hotter than jalapeño, perfect for adding a kick to salsas and sauces.
* Thai Chili: Small but mighty, these chilies pack a serious punch and are ideal for Asian cuisine.
* Poblano: Mild and flavorful, great for stuffing or roasting.
* Cayenne: A popular choice for making chili powder and hot sauces.
* Habanero: For those who like extreme heat, habaneros are a must-try (but handle with care!).
* ‘Patio Fire’ Hybrid: Bred specifically for container growing, this variety offers good yields and manageable size.
* ‘Basket of Fire’ Hybrid: Another compact variety that produces a profusion of colorful chilies.
Consider the amount of space you have and your preferred level of heat when selecting your chili varieties.
Q: What size containers should I use for growing chilies on my balcony?
A: The ideal container size depends on the chili variety. Generally, a container that is at least 5 gallons in size is recommended for most chili plants. Larger varieties, such as poblano, may benefit from even larger containers (7-10 gallons). Ensure the containers have drainage holes to prevent waterlogging. Fabric pots are also a great option as they allow for better aeration and drainage.
Q: How much sunlight do chili plants need?
A: Chili plants thrive in full sun, requiring at least 6-8 hours of direct sunlight per day. If your balcony doesn’t receive enough sunlight, you may need to supplement with grow lights. Position your chili plants in the sunniest spot on your balcony. Rotate the pots regularly to ensure even sunlight exposure.
Q: How often should I water my chili plants?
A: Water your chili plants regularly, especially during hot and dry weather. The soil should be kept consistently moist, but not waterlogged. Check the soil moisture by sticking your finger about an inch into the soil. If it feels dry, it’s time to water. Water deeply, allowing the water to drain out of the drainage holes. Avoid overhead watering, as this can lead to fungal diseases.
Q: What kind of soil should I use for growing chilies in containers?
A: Use a well-draining potting mix specifically formulated for containers. Avoid using garden soil, as it can become compacted in containers and hinder drainage. A good potting mix will contain a blend of peat moss, perlite, and vermiculite. You can also add compost to the potting mix to provide extra nutrients.
Q: How do I fertilize my chili plants?
A: Chili plants are heavy feeders and require regular fertilization. Use a balanced fertilizer (e.g., 10-10-10) or a fertilizer specifically formulated for tomatoes and peppers. Fertilize every 2-3 weeks during the growing season. You can also use organic fertilizers, such as compost tea or fish emulsion.
Q: How do I protect my chili plants from pests and diseases?
A: Regularly inspect your chili plants for pests, such as aphids, spider mites, and whiteflies. If you find any pests, treat them with insecticidal soap or neem oil. To prevent fungal diseases, ensure good air circulation around your plants and avoid overhead watering. Remove any diseased leaves promptly. Companion planting with basil or marigolds can also help deter pests.
Q: When can I harvest my chilies?
A: The time to harvest chilies depends on the variety and your personal preference. Most chilies will change color as they ripen, from green to red, yellow, or orange. You can harvest them at any stage of ripeness, but the flavor and heat will intensify as they ripen. Use scissors or pruning shears to cut the chilies from the plant, leaving a small stem attached.
Q: Can I grow chilies indoors?
A: Yes, you can grow chilies indoors, but you will need to provide them with adequate light. Place them near a sunny window or use grow lights. Indoor chili plants may also require hand-pollination to ensure fruit set.
Q: How do I overwinter my chili plants?
A: If you live in a cold climate, you can overwinter your chili plants indoors. Before the first frost, prune the plants back and repot them into smaller containers. Place them in a cool, bright location and water sparingly. They may lose some leaves during the winter, but they should start to grow again in the spring.
Q: Can I save seeds from my homegrown chilies?
A: Yes, you can save seeds from your homegrown chilies. Allow the chilies to fully ripen on the plant. Then, carefully remove the seeds and dry them thoroughly. Store the dried seeds in an airtight container in a cool, dark place. Be aware that hybrid varieties may not produce true-to-type seeds.
Leave a Comment