
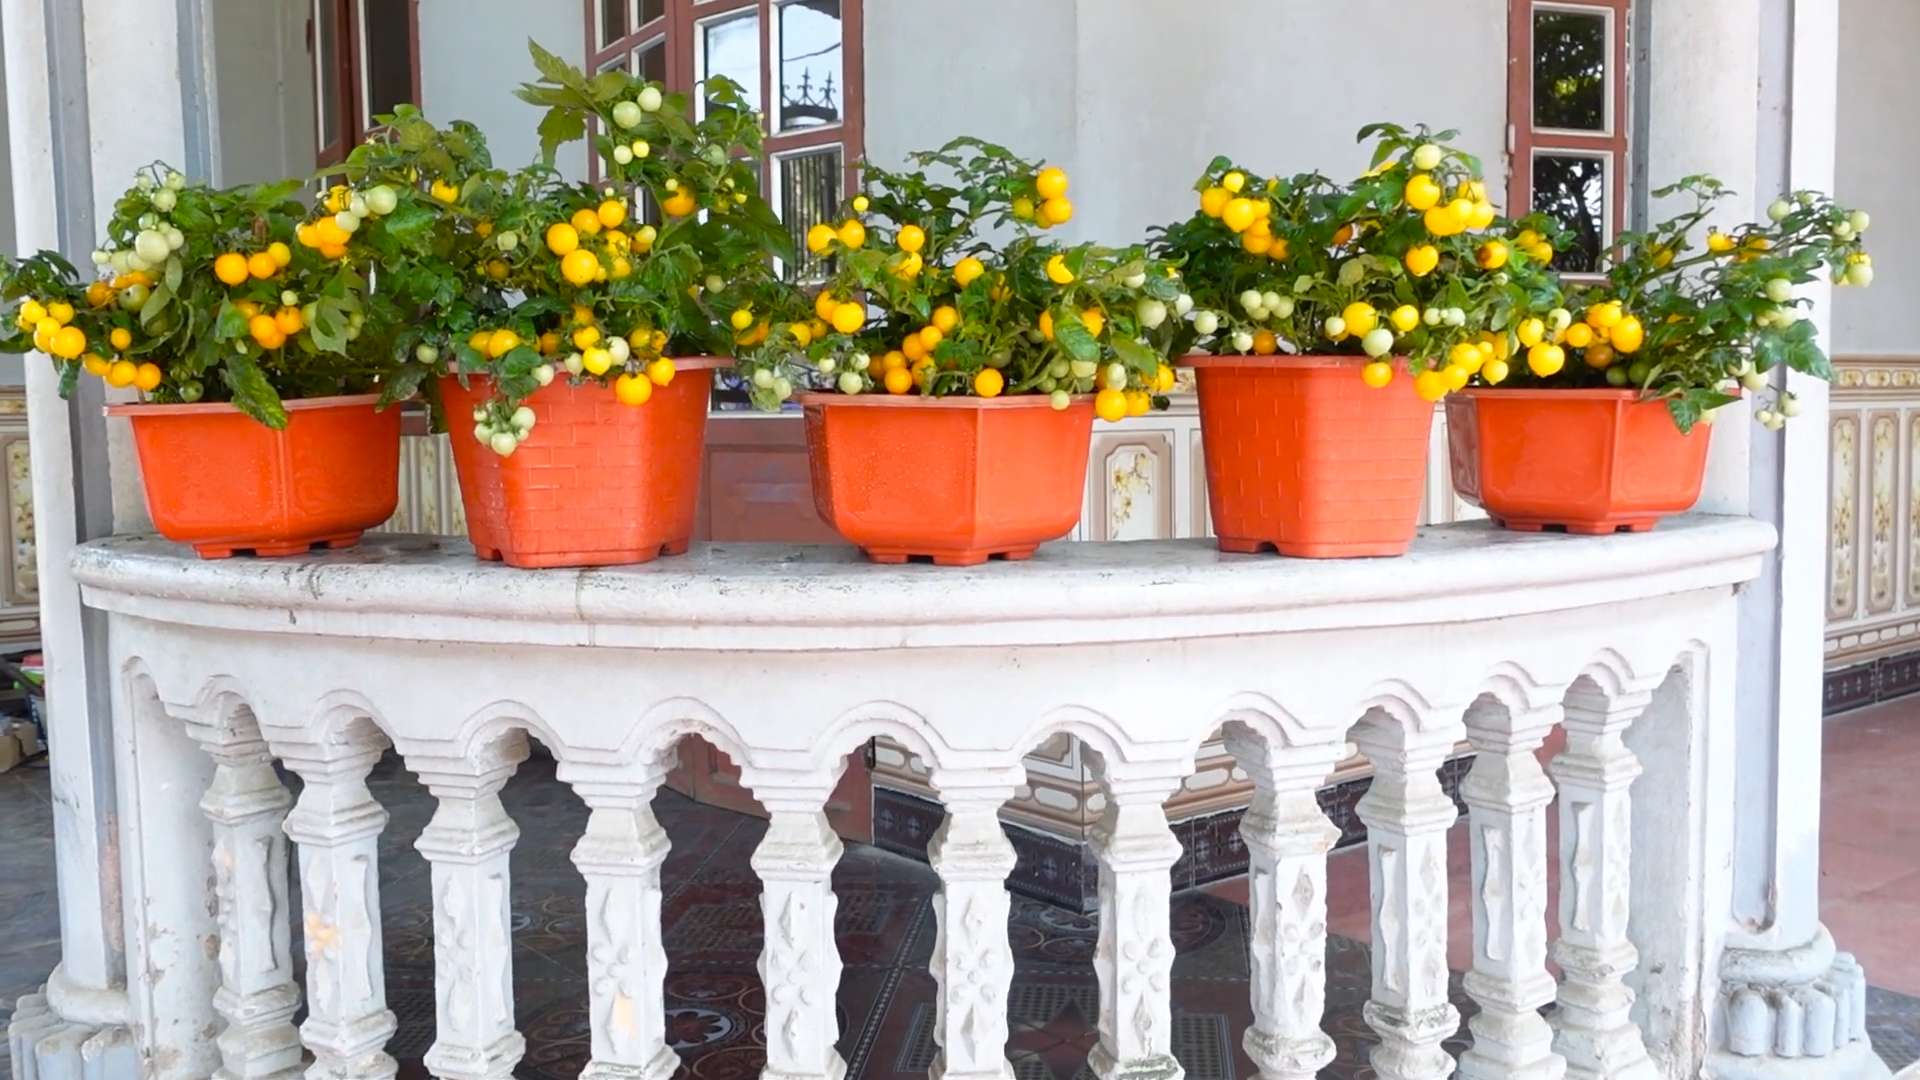
Balcony Cherry Tomato Growing – ever dreamt of plucking juicy, sun-ripened cherry tomatoes right from your own balcony? I know I have! There’s something incredibly satisfying about nurturing your own food, even in a small space. For centuries, urban dwellers have found creative ways to bring nature closer, and growing tomatoes in containers is a modern twist on that age-old tradition.
But let’s be honest, getting those vibrant red gems to thrive on a balcony can feel like a daunting task. You might be thinking, “I don’t have a green thumb!” or “My balcony is too small!” That’s where these DIY tricks and hacks come in. I’m here to share my tried-and-true secrets for successful balcony cherry tomato growing, even if you’re a complete beginner.
Imagine the taste of a freshly picked cherry tomato, bursting with flavor, knowing you grew it yourself. No more bland, store-bought tomatoes! This article is your guide to transforming your balcony into a mini-garden, providing you with delicious, healthy snacks and a rewarding connection to nature. So, let’s dive in and unlock the secrets to a bountiful balcony harvest!
Growing Cherry Tomatoes on Your Balcony: A DIY Guide
Hey there, fellow balcony gardeners! I’m so excited to share my tried-and-true method for growing delicious, juicy cherry tomatoes right on your balcony. Forget those bland supermarket tomatoes – nothing beats the taste of homegrown goodness, especially when you’ve nurtured them yourself. This guide will walk you through every step, from choosing the right variety to harvesting your bounty. Let’s get started!
Choosing the Right Cherry Tomato Variety
Before we dive into the nitty-gritty, let’s talk about tomato varieties. Not all cherry tomatoes are created equal, and some are definitely better suited for balcony life than others. Here’s what I’ve learned:
* Consider Determinate vs. Indeterminate: This is crucial! Determinate varieties grow to a certain size and then stop, producing most of their fruit at once. They’re bushier and more compact, making them ideal for containers. Indeterminate varieties, on the other hand, keep growing and producing fruit throughout the season. They need staking or caging and can get quite large. For balconies, determinate varieties are generally easier to manage.
* My Top Picks for Balconies:
* ‘Tiny Tim’: As the name suggests, these are super compact and perfect for small spaces. They produce loads of tiny, sweet tomatoes.
* ‘Patio’: Another great determinate option, ‘Patio’ tomatoes are known for their disease resistance and reliable yields.
* ‘Bush Early Girl’: A determinate version of the popular ‘Early Girl,’ this variety offers a good balance of flavor and early ripening.
* ‘Tumbling Tom’: This is a trailing variety, perfect for hanging baskets. The tomatoes are sweet and plentiful.
* Think About Taste: Do you prefer sweet, tangy, or something in between? Read descriptions carefully to find a variety that suits your palate.
Gathering Your Supplies
Okay, now that we’ve chosen our tomato variety, let’s gather everything we need. Here’s a checklist:
* Tomato Seeds or Seedlings: You can start from seed or buy seedlings from a local nursery. Seedlings will give you a head start.
* Large Containers: Choose containers that are at least 12 inches in diameter and 12 inches deep. Bigger is better, as it gives the roots more room to grow. Make sure they have drainage holes!
* High-Quality Potting Mix: Don’t use garden soil! It’s too heavy and doesn’t drain well in containers. Opt for a lightweight potting mix specifically formulated for containers.
* Tomato Cage or Stakes: Even determinate varieties can benefit from some support, especially when they’re loaded with fruit.
* Fertilizer: A balanced fertilizer (like 10-10-10) or a tomato-specific fertilizer is essential for healthy growth and abundant fruit production.
* Watering Can or Hose: You’ll need a way to water your plants regularly.
* Gardening Gloves: To keep your hands clean and protected.
* Optional:
* Mulch: Helps retain moisture and suppress weeds.
* Plant Labels: To keep track of your different varieties.
* Pruning Shears: For removing suckers (more on that later).
Planting Your Cherry Tomatoes
Alright, let’s get our hands dirty! Here’s how to plant your cherry tomatoes:
1. Prepare Your Containers: Fill your containers with potting mix, leaving a few inches of space at the top.
2. Planting Seeds (If Starting from Seed): Sow seeds about 1/4 inch deep and water gently. Keep the soil consistently moist until they germinate. This usually takes 7-14 days.
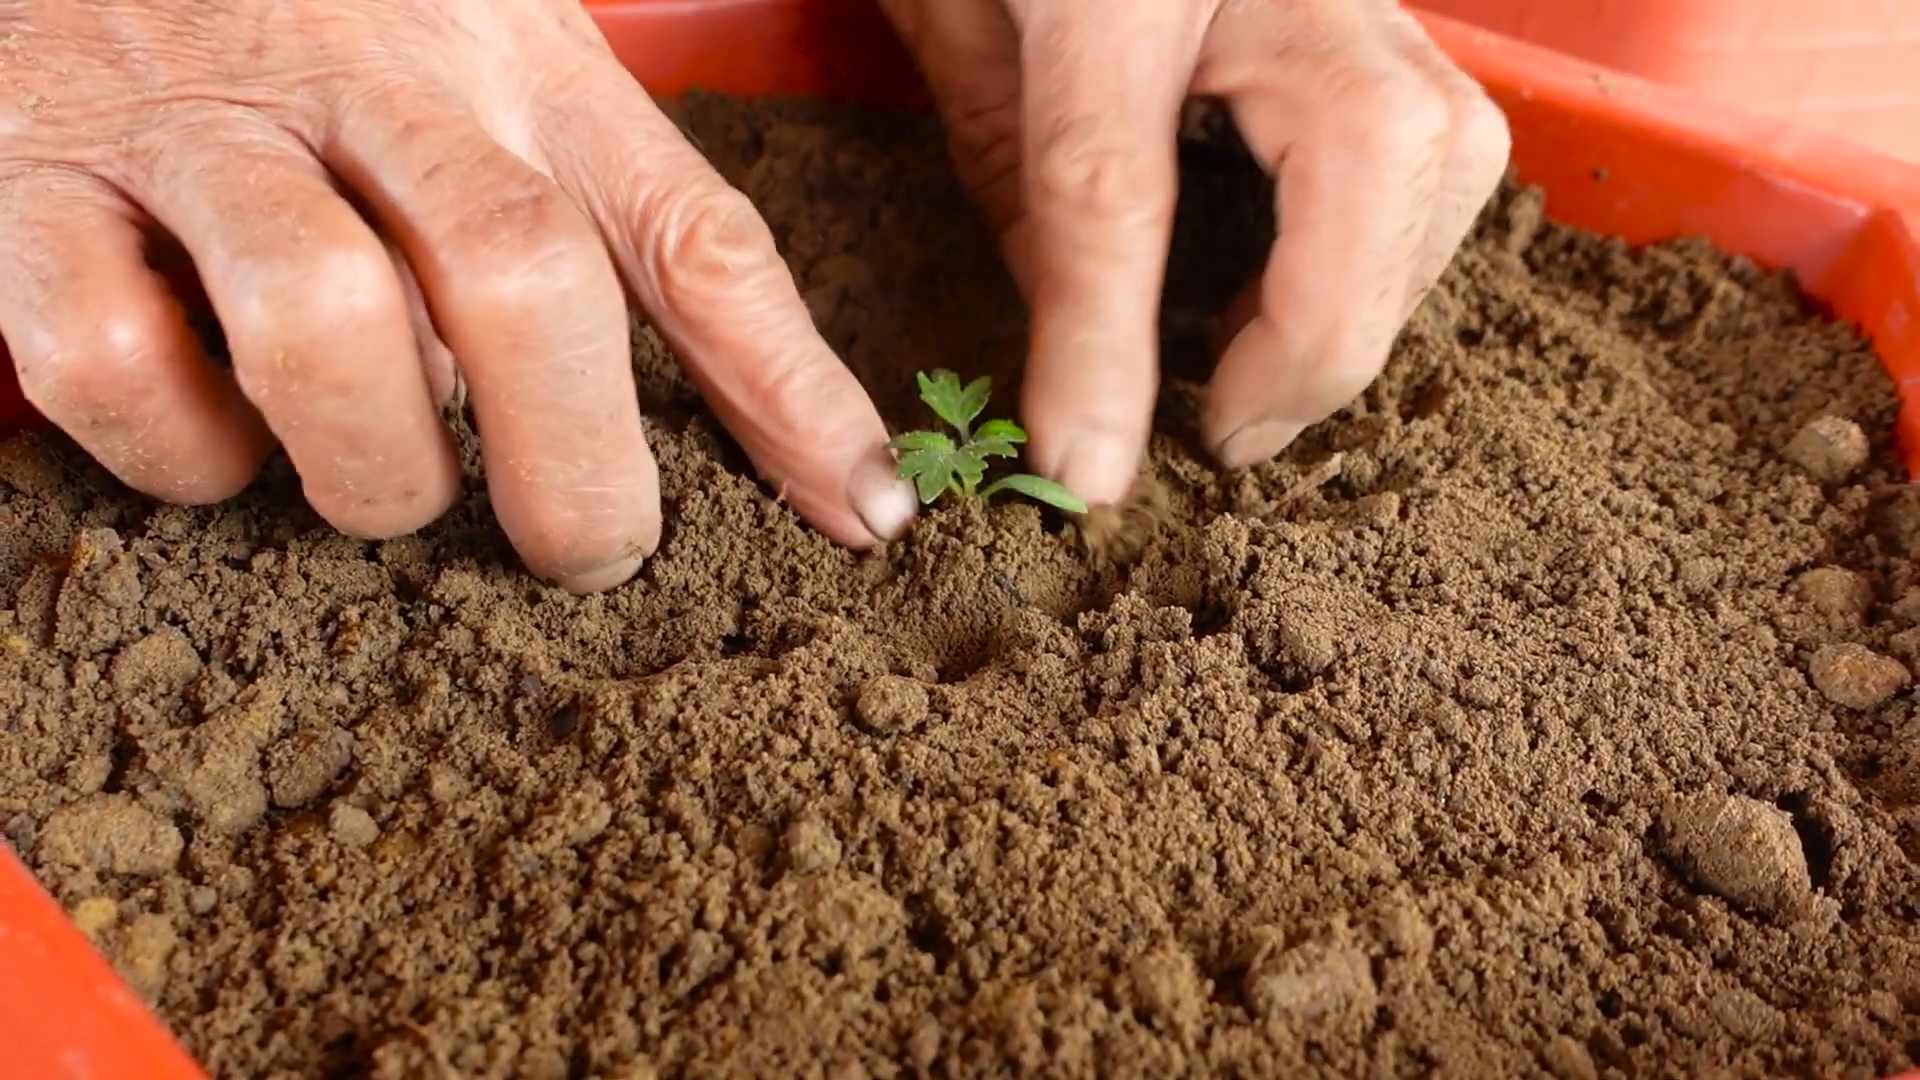
3. Planting Seedlings: Gently remove the seedling from its container. If the roots are tightly packed, gently loosen them with your fingers.
4. Dig a Hole: Dig a hole in the potting mix that’s large enough to accommodate the root ball.
5. Plant the Seedling: Place the seedling in the hole and backfill with potting mix. Gently firm the soil around the base of the plant. You can bury the stem a little deeper than it was in the original container – tomatoes will grow roots from the buried stem, making them stronger.
6. Water Thoroughly: Water the newly planted tomato thoroughly until water drains out of the bottom of the container.
7. Add Support: Install a tomato cage or stakes around the plant to provide support as it grows.
8. Mulch (Optional): Add a layer of mulch around the base of the plant to help retain moisture and suppress weeds.
Caring for Your Cherry Tomato Plants
Now that your tomatoes are planted, it’s time to nurture them and help them thrive. Here’s what you need to do:
1. Watering: Water your tomato plants regularly, especially during hot, dry weather. Aim to keep the soil consistently moist, but not waterlogged. Water deeply and less frequently, rather than shallowly and often. Check the soil moisture by sticking your finger about an inch into the soil. If it feels dry, it’s time to water.
2. Fertilizing: Feed your tomato plants every 2-3 weeks with a balanced fertilizer or a tomato-specific fertilizer. Follow the instructions on the fertilizer package.
3. Sunlight: Cherry tomatoes need at least 6-8 hours of sunlight per day to thrive. Place your containers in a sunny spot on your balcony. If you don’t have enough sunlight, you might consider using grow lights.
4. Pruning (For Indeterminate Varieties): If you’re growing indeterminate varieties, you’ll need to prune them regularly to encourage fruit production. Remove the “suckers” that grow between the main stem and the branches. These suckers will steal energy from the plant and reduce fruit yield.
5. Pest and Disease Control: Keep an eye out for pests and diseases. Common tomato pests include aphids, whiteflies, and tomato hornworms. Common diseases include early blight, late blight, and blossom end rot. If you spot any problems, take action immediately. You can use organic pest control methods like insecticidal soap or neem oil. For diseases, remove affected leaves and improve air circulation around the plants.
6. Pollination: Tomatoes are self-pollinating, but sometimes they need a little help, especially in enclosed spaces like balconies. Gently shake the plants or use a small brush to transfer pollen from one flower to another.
Dealing with Common Problems
Even with the best care, you might encounter some problems along the way. Here are a few common issues and how to address them:
* Blossom End Rot: This is caused by a calcium deficiency and results in a dark, leathery spot on the bottom of the tomato. To prevent blossom end rot, ensure your soil is rich in calcium and water your plants consistently. You can also add calcium to the soil by mixing in crushed eggshells or bone meal.
* Yellowing Leaves: Yellowing leaves can be caused by a variety of factors, including overwatering, underwatering, nutrient deficiencies, and pests. Check the soil moisture and adjust your watering accordingly. Fertilize your plants regularly and inspect them for pests.
* Cracking Tomatoes: Cracking tomatoes are often caused by inconsistent watering. Try to water your plants consistently and avoid letting the soil dry out completely.
* Lack of Fruit: If your tomato plants are not producing fruit, it could be due to a lack of pollination, insufficient sunlight, or extreme temperatures. Try hand-pollinating the flowers, moving the plants to a sunnier location, and protecting them from extreme heat or cold.
Harvesting Your Cherry Tomatoes
The moment you’ve been waiting for! Here’s how to harvest your cherry tomatoes:
1. Wait for Ripeness: Cherry tomatoes are ripe when they are fully colored and slightly soft to the touch.
2. Gently Pick: Gently twist or snip the tomatoes from the vine.
3. Enjoy! Wash your cherry tomatoes and enjoy them fresh from the garden. They’re delicious in salads, snacks, or even just eaten straight off the vine.
Extending Your Tomato Season
Want to keep enjoying fresh cherry tomatoes for as long as possible? Here are a few tips for extending your tomato season:
* Succession Planting: Plant new tomato seedlings every few weeks to ensure a continuous harvest.
* Protect from Frost: If frost is predicted, cover your tomato plants with blankets or tarps to protect them.
* Bring Indoors: If you have space, you can bring your tomato plants indoors before the first frost. Place them in a sunny location and provide supplemental light if needed.
Final Thoughts
Growing cherry tomatoes on your balcony is a rewarding experience. With a little bit of care and attention, you can enjoy a bountiful harvest of delicious, homegrown tomatoes. Don’t be afraid
Conclusion
So, there you have it! Growing your own cherry tomatoes on your balcony isn’t just a gardening project; it’s a gateway to fresh, flavorful produce right outside your door. It’s about transforming a small space into a vibrant, edible oasis. This DIY balcony cherry tomato growing method is a must-try for several compelling reasons.
First and foremost, the taste. Store-bought cherry tomatoes simply can’t compare to the sun-ripened sweetness of homegrown ones. The difference is truly remarkable. Imagine popping a warm, juicy cherry tomato straight from the vine into your mouth – the burst of flavor is an experience in itself.
Secondly, it’s incredibly rewarding. Nurturing a plant from seedling to harvest is a deeply satisfying process. Watching your cherry tomato plants thrive, knowing you played a part in their growth, brings a sense of accomplishment that’s hard to replicate. Plus, it’s a fantastic stress reliever!
Thirdly, it’s surprisingly easy and cost-effective. This method is designed to be accessible to everyone, even those with limited space or gardening experience. You don’t need a sprawling garden or expensive equipment to enjoy the benefits of homegrown cherry tomatoes. With a few simple supplies and a little bit of patience, you can have a thriving balcony garden.
But the benefits don’t stop there. Growing your own cherry tomatoes is also a sustainable choice. You’re reducing your reliance on commercially grown produce, which often travels long distances and contributes to carbon emissions. You’re also in control of the pesticides and fertilizers used, ensuring that your tomatoes are grown in a healthy and environmentally friendly way.
Now, let’s talk about variations. Feel free to experiment with different varieties of cherry tomatoes. There are countless options available, each with its own unique flavor and color. Try growing yellow pear tomatoes for a sweet and tangy taste, or black cherry tomatoes for a rich, earthy flavor. You can also explore different container sizes and materials. While we recommend using pots that are at least 12 inches in diameter, you can also use grow bags or even repurposed containers like buckets or tubs. Just make sure they have adequate drainage.
Consider companion planting to enhance your balcony garden. Basil, marigolds, and nasturtiums are all excellent companions for cherry tomatoes. They can help to deter pests, attract pollinators, and even improve the flavor of your tomatoes.
Don’t be afraid to get creative with your support system. While tomato cages are a popular option, you can also use stakes, trellises, or even repurposed materials like bamboo poles or old ladders. The key is to provide your plants with adequate support as they grow and produce fruit.
Finally, remember that growing cherry tomatoes is a learning process. Don’t be discouraged if you encounter challenges along the way. Every gardener faces setbacks from time to time. The important thing is to learn from your mistakes and keep experimenting.
So, what are you waiting for? Grab your supplies, get your hands dirty, and start growing your own delicious cherry tomatoes on your balcony today! We’re confident that you’ll be amazed by the results. And once you’ve harvested your first batch of homegrown goodness, be sure to share your experience with us. We’d love to hear about your successes, your challenges, and your favorite ways to enjoy your homegrown cherry tomatoes. Share your photos and stories on social media using #BalconyCherryTomatoes and inspire others to join the fun! Happy gardening!
Frequently Asked Questions (FAQ)
What is the best variety of cherry tomato to grow on a balcony?
Choosing the right variety is crucial for successful balcony cherry tomato growing. Determinate varieties, which grow to a compact size and produce all their fruit at once, are generally better suited for containers than indeterminate varieties, which continue to grow and produce fruit throughout the season. Some popular determinate cherry tomato varieties for balconies include ‘Tiny Tim,’ ‘Balcony Cherry,’ and ‘Roma.’ Indeterminate varieties like ‘Sungold’ and ‘Sweet Million’ can also be grown on balconies, but they will require more support and pruning. Consider your taste preferences and the amount of space you have available when making your selection.
How much sunlight do cherry tomatoes need on a balcony?
Cherry tomatoes need at least 6-8 hours of direct sunlight per day to thrive. If your balcony doesn’t receive that much sunlight, you may need to supplement with artificial lighting. South-facing balconies typically receive the most sunlight, followed by east- and west-facing balconies. North-facing balconies may not be suitable for growing cherry tomatoes unless you use grow lights. Observe your balcony throughout the day to determine how much sunlight it receives and choose a location that provides the most exposure.
What kind of soil is best for growing cherry tomatoes in containers?
Use a high-quality potting mix specifically formulated for containers. Avoid using garden soil, as it can become compacted and doesn’t drain well in containers. A good potting mix will be lightweight, well-draining, and contain essential nutrients for plant growth. You can also amend your potting mix with compost or other organic matter to improve its fertility and water retention.
How often should I water my cherry tomato plants on a balcony?
Water your cherry tomato plants regularly, especially during hot, dry weather. The frequency of watering will depend on the size of your container, the type of potting mix you’re using, and the weather conditions. Check the soil moisture regularly by sticking your finger into the soil. If the top inch of soil feels dry, it’s time to water. Water deeply, until water drains out of the bottom of the container. Avoid overwatering, as this can lead to root rot.
Do I need to fertilize my cherry tomato plants on a balcony?
Yes, cherry tomatoes are heavy feeders and require regular fertilization to produce abundant fruit. Use a balanced fertilizer specifically formulated for tomatoes. Follow the instructions on the fertilizer label for application rates and frequency. You can also use organic fertilizers like compost tea or fish emulsion. Fertilize your plants every 2-3 weeks during the growing season.
How do I prevent pests and diseases on my balcony cherry tomato plants?
Regularly inspect your plants for signs of pests or diseases. Common pests that affect cherry tomatoes include aphids, whiteflies, and spider mites. You can control these pests with insecticidal soap or neem oil. Common diseases include early blight, late blight, and powdery mildew. Prevent these diseases by providing good air circulation, avoiding overhead watering, and using disease-resistant varieties. If you notice any signs of disease, remove the affected leaves or plants immediately.
How do I support my cherry tomato plants on a balcony?
Cherry tomato plants need support to prevent them from toppling over as they grow and produce fruit. Use tomato cages, stakes, or trellises to provide support. Insert the support system into the container when you plant your seedlings. As the plants grow, tie the stems to the support system with soft twine or plant ties.
When should I harvest my cherry tomatoes?
Cherry tomatoes are ready to harvest when they are fully colored and slightly soft to the touch. Gently twist the tomatoes off the vine. Harvest your tomatoes regularly to encourage continued production.
Can I grow cherry tomatoes on a balcony in the winter?
In many climates, growing cherry tomatoes outdoors on a balcony in the winter is not possible due to cold temperatures and lack of sunlight. However, you can grow cherry tomatoes indoors under grow lights during the winter. Choose a sunny location near a window and supplement with artificial lighting as needed.
What are some common problems when growing cherry tomatoes on a balcony and how can I fix them?
Some common problems include blossom end rot (caused by calcium deficiency), yellowing leaves (caused by nutrient deficiency or overwatering), and pests and diseases (as mentioned above). Address blossom end rot by adding calcium to the soil or using a calcium-rich fertilizer. Address yellowing leaves by fertilizing your plants or adjusting your watering schedule. Control pests and diseases with appropriate treatments and preventative measures. Remember to research specific issues to ensure proper diagnosis and treatment.

Leave a Comment