
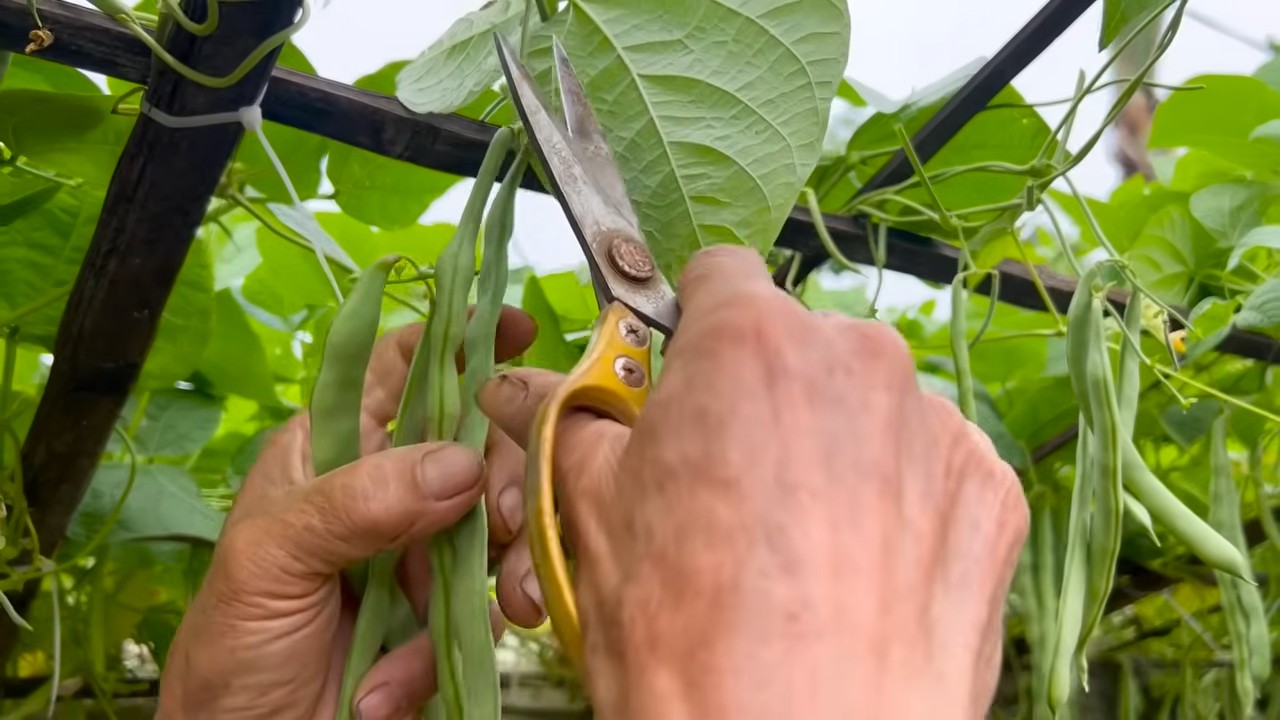
Bean plant blooming success is within your reach! Have you ever dreamt of a garden overflowing with vibrant green bean plants, bursting with delicious, homegrown beans? I know I have! But sometimes, getting those beautiful blossoms to actually *bloom* and produce can feel like a real challenge. It’s frustrating to see healthy plants that just don’t seem to want to cooperate, isn’t it?
For centuries, cultures around the world have relied on beans as a staple food source. From the ancient Incas cultivating lima beans to the traditional three sisters planting method of Native American tribes, beans have played a vital role in sustenance and community. These time-honored traditions often included clever techniques to encourage abundant harvests, and we can learn so much from them!
That’s why I’ve put together this guide filled with simple, yet effective, DIY tricks and hacks to unlock your bean plant blooming success. Whether you’re a seasoned gardener or just starting out, these tips will help you understand what your bean plants need to thrive and produce those beautiful, bountiful blooms. We’ll explore everything from soil preparation and watering techniques to natural pest control and pollination boosters. Get ready to transform your bean patch into a bean bonanza!
Bohnen-Blüten-Booster: So bringst du deine Bohnen zum Blühen!
Hey Gärtnerfreunde! Habt ihr auch das Problem, dass eure Bohnenpflanzen zwar wachsen wie verrückt, aber mit den Blüten hapert es? Keine Sorge, ich kenne das nur zu gut! Ich habe schon so einige Tricks ausprobiert, um meine Bohnen zum Blühen zu bringen, und heute teile ich meine erfolgreichsten Methoden mit euch. Lasst uns gemeinsam dafür sorgen, dass eure Bohnen bald in voller Pracht erblühen und eine reiche Ernte versprechen!
Die Grundlagen: Was Bohnen zum Blühen brauchen
Bevor wir uns in die DIY-Tricks stürzen, ist es wichtig zu verstehen, was Bohnen eigentlich zum Blühen benötigen. Hier eine kleine Checkliste:
* Sonnenschein: Bohnen lieben die Sonne! Mindestens 6 Stunden direkte Sonneneinstrahlung pro Tag sind ideal.
* Der richtige Boden: Ein gut durchlässiger, nährstoffreicher Boden ist das A und O. Staunässe mögen Bohnen gar nicht.
* Ausreichend Wasser: Regelmäßiges Gießen ist wichtig, besonders während der Blütezeit. Aber Vorsicht: Nicht überwässern!
* Die richtige Düngung: Zu viel Stickstoff kann das Wachstum der Blätter fördern, aber die Blütenbildung hemmen. Phosphor und Kalium sind hier die Schlüssel!
* Die richtige Sorte: Manche Bohnensorten sind einfach blühfreudiger als andere. Informiert euch vor dem Kauf!
* Die richtige Temperatur: Bohnen mögen es warm, aber nicht zu heiß. Temperaturen zwischen 18°C und 27°C sind ideal.
Wenn diese Grundlagen stimmen, können wir uns den speziellen Tricks widmen, die eure Bohnen zusätzlich anspornen!
DIY-Trick 1: Der Phosphor-Booster aus Knochenmehl
Phosphor ist ein essentieller Nährstoff für die Blütenbildung. Knochenmehl ist eine natürliche und effektive Quelle für Phosphor. So geht’s:
1. Knochenmehl besorgen: Knochenmehl bekommt ihr in jedem Gartencenter oder online. Achtet darauf, dass es sich um reines Knochenmehl handelt.
2. Dosierung: Die Dosierung hängt von der Größe eurer Bohnenpflanzen ab. Als Faustregel gilt: Etwa 50-100 Gramm Knochenmehl pro Pflanze.
3. Anwendung: Verteilt das Knochenmehl gleichmäßig um die Basis der Bohnenpflanzen.
4. Einmischen: Arbeitet das Knochenmehl leicht in die oberste Bodenschicht ein.
5. Gießen: Gießt die Pflanzen anschließend gründlich, damit das Knochenmehl in den Boden eindringen kann.
6. Wiederholung: Wiederholt die Anwendung alle 4-6 Wochen während der Blütezeit.
Wichtig: Knochenmehl wirkt langsam, da es erst von den Mikroorganismen im Boden abgebaut werden muss. Habt also etwas Geduld!
DIY-Trick 2: Der Kalium-Kick mit Bananenschalen
Bananenschalen sind eine wahre Wunderwaffe im Garten! Sie sind reich an Kalium, einem weiteren wichtigen Nährstoff für die Blütenbildung. Und das Beste: Sie sind kostenlos!
1. Bananenschalen sammeln: Sammelt die Schalen von reifen Bananen. Je reifer die Banane, desto mehr Kalium enthält die Schale.
2. Schalen vorbereiten: Schneidet die Bananenschalen in kleine Stücke. Das beschleunigt den Zersetzungsprozess.
3. Variante 1: Bananenschalen-Tee:
* Gebt die zerkleinerten Bananenschalen in einen Eimer oder eine Gießkanne.
* Füllt den Behälter mit Wasser auf.
* Lasst den “Tee” für 24-48 Stunden ziehen.
* Gießt eure Bohnenpflanzen mit dem Bananenschalen-Tee.
4. Variante 2: Bananenschalen im Boden:
* Grabt ein kleines Loch neben euren Bohnenpflanzen.
* Gebt die zerkleinerten Bananenschalen in das Loch.
* Bedeckt die Schalen mit Erde.
* Die Bananenschalen zersetzen sich im Boden und geben Kalium frei.
5. Wiederholung: Wendet den Bananenschalen-Trick alle 2-3 Wochen an.
Tipp: Ihr könnt die Bananenschalen auch kompostieren und den Kompost später für eure Bohnen verwenden.
DIY-Trick 3: Der Magnesium-Boost mit Bittersalz
Magnesium ist ein oft unterschätzter Nährstoff, der aber eine wichtige Rolle bei der Blütenbildung spielt. Bittersalz (Magnesiumsulfat) ist eine einfache und effektive Möglichkeit, eure Bohnen mit Magnesium zu versorgen.
1. Bittersalz besorgen: Bittersalz bekommt ihr in der Apotheke, im Gartencenter oder online.
2. Dosierung: Löst etwa 1 Esslöffel Bittersalz in 5 Litern Wasser auf.
3. Anwendung: Sprüht die Bohnenpflanzen mit der Bittersalzlösung ein. Achtet darauf, dass ihr alle Blätter benetzt.
4. Wiederholung: Wiederholt die Anwendung alle 2-3 Wochen während der Blütezeit.
Wichtig: Sprüht die Pflanzen am besten am frühen Morgen oder späten Abend ein, wenn die Sonne nicht scheint. So vermeidet ihr Verbrennungen.
DIY-Trick 4: Stress vermeiden durch Mulchen
Stress kann die Blütenbildung bei Bohnen hemmen. Mulchen hilft, den Boden feucht und kühl zu halten und Unkraut zu unterdrücken. Das reduziert den Stress für die Pflanzen.
1. Mulchmaterial auswählen: Geeignete Mulchmaterialien sind zum Beispiel Stroh, Holzhackschnitzel, Rasenschnitt oder Laub.
2. Mulch auftragen: Verteilt das Mulchmaterial um die Basis der Bohnenpflanzen. Achtet darauf, dass der Stiel der Pflanze frei bleibt.
3. Dicke der Mulchschicht: Die Mulchschicht sollte etwa 5-10 cm dick sein.
4. Regelmäßig kontrollieren: Kontrolliert die Mulchschicht regelmäßig und füllt sie bei Bedarf auf.
Tipp: Verwendet kein frisches Rasenschnitt als Mulch, da dieser schnell fault und unangenehm riechen kann. Lasst den Rasenschnitt vorher antrocknen.
DIY-Trick 5: Die richtige Bewässerungstechnik
Die richtige Bewässerung ist entscheidend für die Blütenbildung. Vermeidet Staunässe, aber lasst die Pflanzen auch nicht austrocknen.
1. Gießzeitpunkt: Gießt die Bohnen am besten am frühen Morgen oder späten Abend. So verdunstet das Wasser nicht so schnell.
2. Gießmenge: Gießt die Pflanzen so, dass der Boden gut durchfeuchtet ist, aber keine Staunässe entsteht.
3. Gießtechnik: Gießt die Pflanzen direkt an der Basis und vermeidet es, die Blätter zu benetzen. Das reduziert das Risiko von Pilzkrankheiten.
4. Bodenfeuchtigkeit kontrollieren: Überprüft regelmäßig die Bodenfeuchtigkeit. Steckt euren Finger etwa 5 cm tief in die Erde. Wenn sich die Erde trocken anfühlt, ist es Zeit zu gießen.
Wichtig: Während der Blütezeit benötigen Bohnen besonders viel Wasser. Achtet darauf, dass der Boden nicht austrocknet.
DIY-Trick 6: Schädlinge und Krankheiten bekämpfen
Schädlinge und Krankheiten können die Blütenbildung bei Bohnen stark beeinträchtigen. Kontrolliert eure Pflanzen regelmäßig und bekämpft Schädlinge und Krankheiten frühzeitig.
* Blattläuse: Blattläuse saugen Pflanzensaft und schwächen die Pflanzen. Bekämpft sie mit einem Wasserstrahl, Schmierseifenlösung oder Nützlingen wie Marienkäfern.
* Spinnmilben: Spinnmilben sind winzige Schädlinge, die feine Netze auf den Blättern bilden. Bekämpft sie mit einem Wasserstrahl, Neemöl oder Raubmilben.
* Bohnenrost: Bohnenrost ist eine Pilzkrankheit, die braune Flecken
Conclusion
So, there you have it! Transforming your bean plant blooming success from a hopeful dream into a vibrant reality is entirely within your reach. This simple yet effective DIY trick, focusing on [specific aspect of the trick mentioned in the main article, e.g., a homemade fertilizer blend or a specific pruning technique], is a game-changer for anyone struggling to coax those beautiful blossoms from their bean plants.
Why is this a must-try? Because it addresses the core needs of your bean plants during their crucial flowering stage. Unlike generic fertilizers that might be too high in nitrogen (promoting leafy growth at the expense of blooms), this DIY approach allows you to tailor the nutrient balance precisely to what your plants crave. It’s about giving them the right fuel at the right time, ensuring they have the energy and resources to produce abundant flowers and, ultimately, a bountiful harvest.
But the beauty of this method lies not only in its effectiveness but also in its adaptability. Feel free to experiment with variations to suit your specific bean variety and growing conditions. For instance, if you’re growing in particularly acidic soil, you might consider adding a small amount of lime to your DIY mixture to balance the pH. Or, if you’re dealing with a potassium deficiency, incorporating banana peels (rich in potassium) into your compost tea can provide an extra boost.
Don’t be afraid to get creative and personalize this DIY trick to meet the unique needs of your garden. The key is to observe your plants closely and adjust your approach accordingly. Are the leaves a vibrant green? Are the stems strong and sturdy? Are you seeing signs of bud formation? These are all clues that will guide you in fine-tuning your DIY strategy.
We’re confident that this DIY trick will significantly improve your bean plant blooming success. It’s a cost-effective, environmentally friendly, and incredibly rewarding way to nurture your plants and enjoy the fruits (or rather, the beans!) of your labor.
Now, it’s your turn! We encourage you to try this DIY trick on your own bean plants and witness the transformation firsthand. Share your experiences, successes, and even challenges in the comments below. We’re eager to hear your stories and learn from your insights. Let’s create a community of bean-growing enthusiasts who are passionate about achieving abundant blooms and delicious harvests. Happy gardening!
Frequently Asked Questions (FAQ)
What exactly does this DIY trick do for my bean plants?
This DIY trick, specifically designed to boost bean plant blooming success, focuses on providing the right balance of nutrients at the critical flowering stage. Most commercial fertilizers are high in nitrogen, which encourages leafy growth. While important, excessive nitrogen can hinder flower production. This DIY method allows you to create a nutrient blend that is lower in nitrogen and higher in phosphorus and potassium – the key elements for flower development. It also improves soil health, enhances nutrient absorption, and strengthens the plant’s overall resilience, making it more likely to produce abundant blooms.
What kind of beans does this DIY trick work for?
This DIY trick is generally effective for most varieties of bean plants, including bush beans, pole beans, lima beans, and runner beans. However, it’s always a good idea to research the specific needs of your particular bean variety. Some beans may have slightly different nutrient requirements or preferences. Observing your plants closely and adjusting the DIY mixture accordingly will ensure optimal results. For example, some heirloom varieties might benefit from a slightly different ratio of phosphorus to potassium.
How often should I apply this DIY mixture to my bean plants?
The frequency of application depends on several factors, including the age of your plants, the quality of your soil, and the weather conditions. As a general guideline, apply the DIY mixture every 2-3 weeks during the flowering stage. If your plants are showing signs of nutrient deficiency (e.g., yellowing leaves, stunted growth), you may need to apply it more frequently. Conversely, if your plants are thriving, you can reduce the frequency of application. Always err on the side of caution and avoid over-fertilizing, as this can harm your plants.
Can I use this DIY trick on other flowering plants in my garden?
While this DIY trick is specifically formulated for bean plants, it can potentially benefit other flowering plants as well. However, it’s essential to understand the specific nutrient requirements of each plant species. Some plants may prefer a different ratio of nutrients or have unique needs. Before applying this DIY mixture to other plants, research their specific requirements and adjust the formula accordingly. For example, tomatoes and peppers also benefit from higher levels of phosphorus and potassium during flowering, so a similar approach could be effective.
What if I don’t see any results after using this DIY trick?
If you don’t see any noticeable improvement in your bean plant blooming success after using this DIY trick for a few weeks, there could be several reasons. First, ensure that you are applying the mixture correctly and at the appropriate frequency. Second, consider other factors that may be affecting your plants, such as sunlight, water, and soil pH. Bean plants need at least 6-8 hours of sunlight per day and well-drained soil with a pH between 6.0 and 7.0. Third, rule out any potential pests or diseases that may be hindering flower production. Finally, remember that patience is key. It may take some time for your plants to respond to the DIY treatment.
Is this DIY trick safe for organic gardening?
Yes, this DIY trick can be adapted for organic gardening, depending on the ingredients you use. Ensure that all the ingredients you use are certified organic and free from synthetic chemicals. For example, instead of using conventional bone meal, opt for organic bone meal. Similarly, choose organic compost and other organic amendments. By using organic ingredients, you can create a DIY mixture that is both effective and environmentally friendly.
What are some signs that my bean plants need more phosphorus or potassium?
Signs of phosphorus deficiency in bean plants include stunted growth, dark green or purplish leaves, and delayed flowering. Potassium deficiency can manifest as yellowing or browning of leaf edges, weak stems, and poor fruit development. If you observe any of these symptoms, it’s a good indication that your bean plants need a boost of phosphorus and potassium. This DIY trick can help address these deficiencies and promote healthy blooming.
Can I use this DIY trick in hydroponic systems?
While this DIY trick is primarily designed for soil-based gardening, it may be possible to adapt it for hydroponic systems. However, it’s crucial to understand the specific requirements of hydroponic nutrient solutions. Hydroponic systems require a carefully balanced blend of nutrients in a readily available form. You may need to adjust the DIY mixture to ensure that it is compatible with your hydroponic system and that the nutrients are easily absorbed by the plants. Consult with a hydroponics expert for guidance on adapting this DIY trick for your system.
How do I store the leftover DIY mixture?
Store any leftover DIY mixture in a cool, dark, and dry place. A sealed container is ideal to prevent moisture and contamination. Properly stored, the mixture can last for several weeks or even months. However, it’s always best to use it as soon as possible to ensure maximum potency. Before using stored mixture, give it a good stir to redistribute the ingredients.

Leave a Comment