
Bean sprouts at home – sounds like a culinary adventure, doesn’t it? Forget those limp, flavorless sprouts you find at the grocery store. I’m about to let you in on a little secret: growing your own bean sprouts is incredibly easy, surprisingly fast, and yields a product bursting with freshness and flavor that you simply can’t buy!
Sprouting beans has a rich history, particularly in Asian cultures where they’ve been a staple for centuries. Think of the vibrant stir-fries and fresh spring rolls – bean sprouts are often the unsung heroes, adding a delightful crunch and subtle sweetness. But you don’t need to be a seasoned chef to enjoy these little nutritional powerhouses.
Why should you bother with this DIY project? Well, for starters, it’s incredibly cost-effective. A handful of dried beans can produce a mountain of sprouts! Plus, you control the entire process, ensuring they’re grown organically and free from any unwanted additives. More importantly, in today’s world where healthy eating is a priority, bean sprouts at home offer a readily available source of vitamins, minerals, and enzymes, right at your fingertips. So, ditch the store-bought versions and let’s embark on this simple, rewarding journey together. I promise, you’ll be amazed at how easy it is to cultivate your own crunchy, delicious bean sprouts!
Bohnensprossen selber ziehen: Eine einfache DIY-Anleitung
Hallo liebe DIY-Freunde! Ich liebe frische Sprossen, besonders Bohnensprossen. Sie sind knackig, gesund und eine tolle Ergänzung zu Salaten, Suppen und asiatischen Gerichten. Aber im Supermarkt sind sie oft teuer und nicht immer frisch. Deshalb habe ich angefangen, meine Bohnensprossen einfach selbst zu ziehen. Und wisst ihr was? Es ist super einfach und macht richtig Spaß! Ich zeige euch, wie ihr das auch hinbekommt.
Was du brauchst:
* Bohnen: Am besten eignen sich Mungbohnen (Adzukibohnen gehen auch, aber Mungbohnen sind einfacher). Achte darauf, dass sie unbehandelt und keimfähig sind. Du bekommst sie im Bioladen, Reformhaus oder online.
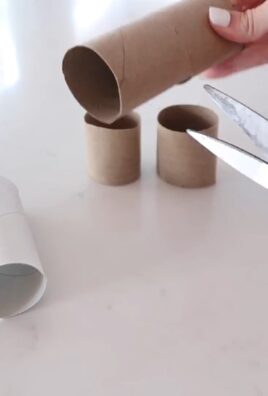
* Ein Keimglas oder ein Sieb: Ein Keimglas ist ideal, weil es speziell dafür gemacht ist. Aber ein normales Sieb mit feinen Maschen tut es auch. Wichtig ist, dass das Wasser gut ablaufen kann.
* Ein dunkler Ort: Bohnensprossen brauchen Dunkelheit zum Keimen. Ein Küchenschrank oder eine dunkle Ecke in der Speisekammer sind perfekt.
* Wasser: Am besten gefiltertes Wasser oder abgekochtes, abgekühltes Wasser.
* Ein Tuch oder Teller: Um das Keimglas abzudecken oder das Sieb abzudecken.
* Geduld: Bohnensprossen brauchen ein paar Tage, um zu wachsen. Aber es lohnt sich!
Schritt-für-Schritt-Anleitung:
Phase 1: Vorbereitung der Bohnen
1. Bohnen einweichen: Gib die Mungbohnen in eine Schüssel und bedecke sie mit reichlich Wasser. Sie quellen auf und nehmen das Wasser auf, das sie zum Keimen brauchen. Lass sie mindestens 8 Stunden, besser noch über Nacht, einweichen. Ich mache das meistens abends, dann kann ich am nächsten Morgen direkt loslegen.
2. Bohnen abspülen: Nach dem Einweichen spülst du die Bohnen gründlich unter fließendem Wasser ab. Entferne dabei alle beschädigten oder schlecht aussehenden Bohnen. Das ist wichtig, damit sich keine Schimmelpilze bilden.
Phase 2: Keimen im Keimglas (oder Sieb)
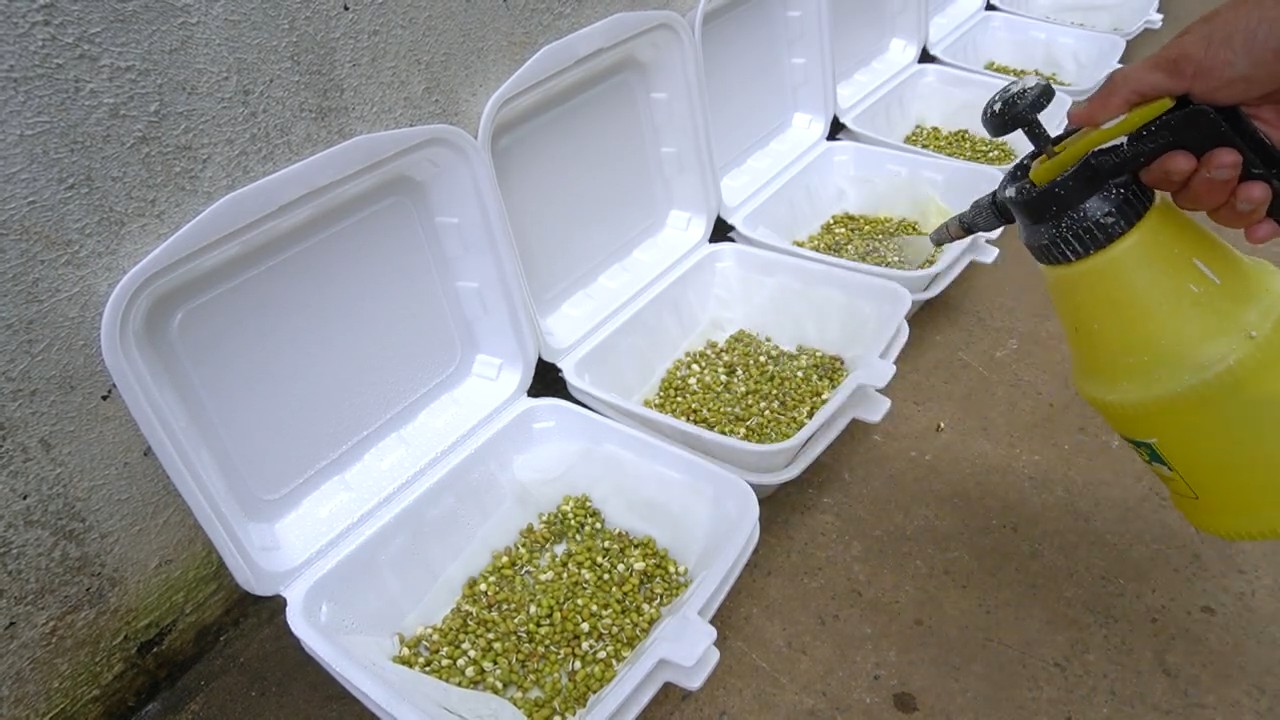
1. Bohnen ins Keimglas füllen: Gib die eingeweichten und abgespülten Bohnen in das Keimglas. Achte darauf, dass sie nicht zu dicht liegen, damit sie genug Platz zum Wachsen haben. Wenn du ein Sieb verwendest, verteile die Bohnen gleichmäßig darin.
2. Keimglas abdecken: Decke das Keimglas mit einem Tuch ab und befestige es mit einem Gummiband. Das Tuch schützt die Bohnen vor Licht und hält sie feucht. Wenn du ein Sieb verwendest, lege ein feuchtes Tuch darüber.
3. Keimglas spülen: Spüle die Bohnen mindestens zweimal täglich mit frischem Wasser. Das ist wichtig, um sie feucht zu halten und Schimmelbildung zu verhindern. Fülle das Keimglas mit Wasser, schwenke es vorsichtig und lasse das Wasser dann vollständig ablaufen. Beim Sieb einfach mit Wasser übergießen und ablaufen lassen.
4. Keimglas dunkel stellen: Stelle das Keimglas an einen dunklen Ort. Wie gesagt, ein Küchenschrank oder eine dunkle Ecke sind ideal. Achte darauf, dass das Keimglas schräg steht, damit das Wasser gut ablaufen kann. Wenn du ein Sieb verwendest, stelle es auf eine Schüssel, damit das ablaufende Wasser aufgefangen wird.
5. Wiederholen: Wiederhole das Spülen und Dunkelstellen für die nächsten Tage. Du wirst sehen, wie die Bohnen langsam keimen und wachsen.
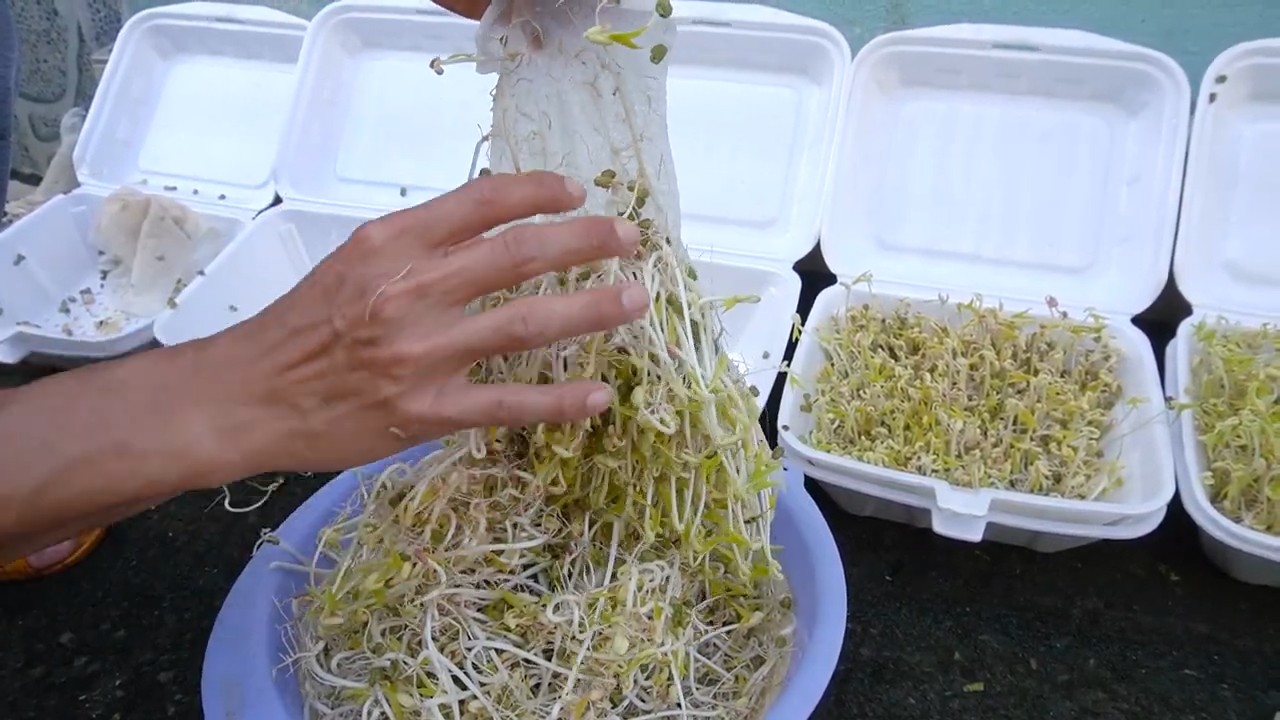
Phase 3: Die Ernte
1. Erntezeit: Nach etwa 3-5 Tagen sind deine Bohnensprossen erntereif. Sie sollten etwa 2-3 cm lang sein und kleine Wurzeln haben. Die genaue Zeit hängt von der Temperatur und der Luftfeuchtigkeit ab.
2. Bohnensprossen waschen: Spüle die Bohnensprossen vor dem Verzehr noch einmal gründlich unter fließendem Wasser ab. Entferne dabei die grünen Schalen, falls du sie nicht magst. Ich lasse sie meistens dran, weil sie viele Nährstoffe enthalten.
3. Genießen: Jetzt kannst du deine selbstgezogenen Bohnensprossen genießen! Sie schmecken pur, im Salat, in der Suppe oder im Wok.
Tipps und Tricks für perfekte Bohnensprossen:
* Hygiene ist wichtig: Achte darauf, dass alle Utensilien sauber sind, um Schimmelbildung zu vermeiden. Spüle das Keimglas oder Sieb regelmäßig mit heißem Wasser aus.
* Nicht zu viele Bohnen: Fülle das Keimglas nicht zu voll, damit die Bohnen genug Platz zum Wachsen haben. Eine dünne Schicht reicht völlig aus.
* Regelmäßiges Spülen: Spüle die Bohnen mindestens zweimal täglich, besser noch dreimal. Das hält sie feucht und verhindert Schimmelbildung.
* Die richtige Temperatur: Die ideale Temperatur zum Keimen liegt zwischen 18 und 22 Grad Celsius.
* Licht am Ende: Wenn die Sprossen fast fertig sind, kannst du sie für ein paar Stunden ans Licht stellen. Dadurch werden sie grüner und entwickeln mehr Chlorophyll. Aber Vorsicht: Nicht zu lange, sonst werden sie bitter.
* Lagerung: Bewahre die geernteten Bohnensprossen im Kühlschrank auf. Sie halten sich dort etwa 2-3 Tage. Am besten in einem luftdichten Behälter.
* Schimmel erkennen: Wenn du Schimmel entdeckst (erkennbar an einem flaumigen, weißen oder grünen Belag), solltest du die betroffenen Sprossen sofort entsorgen.
Warum Bohnensprossen selber ziehen?
* Frische: Selbstgezogene Bohnensprossen sind immer frisch und knackig.
* Geschmack: Sie schmecken viel besser als gekaufte Sprossen.
* Gesundheit: Sie sind reich an Vitaminen, Mineralstoffen und Enzymen.
* Kosten: Es ist viel günstiger, Bohnensprossen selbst zu ziehen, als sie zu kaufen.
* Nachhaltigkeit: Du sparst Verpackungsmüll und unterstützt eine nachhaltige Lebensweise.
* Spaß: Es macht einfach Spaß, zu sehen, wie die kleinen Bohnen wachsen und gedeihen.
Mögliche Probleme und Lösungen:
* Schimmelbildung: Wie bereits erwähnt, ist Hygiene das A und O. Achte darauf, dass alle Utensilien sauber sind und spüle die Bohnen regelmäßig. Wenn du Schimmel entdeckst, entsorge die betroffenen Sprossen sofort.
* Keine Keimung: Wenn die Bohnen nicht keimen, kann das verschiedene Gründe haben. Vielleicht sind sie zu alt oder wurden falsch gelagert. Achte darauf, dass du frische, keimfähige Bohnen verwendest. Auch die Temperatur kann eine Rolle spielen.
* Bitterer Geschmack: Wenn die Sprossen bitter schmecken, kann das daran liegen, dass sie zu lange dem Licht ausgesetzt waren. Stelle sie rechtzeitig wieder in den Schatten.
Ich hoffe, diese Anleitung hilft dir dabei, deine eigenen Bohnensprossen zu ziehen. Es ist wirklich kinderleicht und macht total Spaß! Probiere es einfach aus und lass mich wissen, wie es geklappt hat. Viel Erfolg!
Conclusion
So, there you have it! Cultivating your own bean sprouts at home is not just a fun project; it’s a gateway to fresher, healthier, and more flavorful meals. Forget those limp, often questionable sprouts from the grocery store. With minimal effort and readily available supplies, you can consistently enjoy crisp, vibrant bean sprouts bursting with nutrients, all grown right in your own kitchen.
Why is this DIY trick a must-try? Because it empowers you to control the entire process, ensuring the highest quality and safety. You know exactly where your sprouts are coming from and what they’ve been exposed to. Plus, the taste difference is remarkable. Homegrown bean sprouts possess a delicate sweetness and satisfying crunch that store-bought varieties simply can’t match.
Beyond the basic method outlined, there’s plenty of room for experimentation. Try using different types of beans, such as mung beans (the most common), adzuki beans, or even lentils, to discover your favorite flavor profile. Adjust the sprouting time to achieve your preferred sprout length and texture. Some people prefer shorter, stubbier sprouts, while others prefer longer, more developed ones. You can also experiment with different sprouting containers. While a mason jar works perfectly well, you might find that a sprouting bag or a multi-tiered sprouting system better suits your needs and space.
Consider adding a touch of flavor during the rinsing process. A splash of lemon juice or a pinch of sea salt can subtly enhance the taste of your bean sprouts. Just be sure to rinse them thoroughly afterward to remove any excess.
Don’t be intimidated by the simplicity of this process. It’s incredibly forgiving, and even if your first batch isn’t perfect, you’ll learn valuable lessons that will improve your results next time. The key is to maintain consistent moisture and proper drainage.
We wholeheartedly encourage you to give this DIY bean sprouts at home method a try. It’s a rewarding experience that will not only enhance your culinary creations but also connect you more closely to the food you eat.
Once you’ve mastered the art of growing your own bean sprouts, we’d love to hear about your experience! Share your tips, tricks, and variations in the comments below. Let us know what types of beans you’ve tried, what challenges you’ve encountered, and what delicious dishes you’ve created with your homegrown sprouts. Your insights will help others embark on their own sprouting adventures. So, grab some beans, a jar, and get sprouting! You won’t regret it.
Frequently Asked Questions (FAQ)
What kind of beans can I use to grow bean sprouts?
The most common and readily available bean for sprouting is the mung bean. These produce the classic bean sprouts you find in stir-fries and salads. However, you can also successfully sprout other types of beans, including adzuki beans, lentils, chickpeas, and even some types of peas. Keep in mind that different beans will have different sprouting times and flavor profiles. Experiment to find your favorites! Avoid using kidney beans or other beans that are toxic when raw; these require cooking to be safe for consumption.
How long does it take to grow bean sprouts?
Generally, it takes between 3 to 5 days to grow bean sprouts at home. The exact time will depend on the type of bean, the temperature of your environment, and your personal preference for sprout length. Mung beans typically sprout within 3 to 4 days. Keep an eye on your sprouts and harvest them when they reach your desired size.
What is the best temperature for sprouting beans?
The ideal temperature range for sprouting beans is between 70°F and 80°F (21°C and 27°C). Avoid exposing your sprouts to extreme temperatures, as this can inhibit germination or promote the growth of mold. A warm, dark place is generally best.
How often should I rinse my bean sprouts?
Rinsing your bean sprouts is crucial for preventing mold growth and maintaining freshness. Rinse them thoroughly with cool, clean water at least two to three times per day. This helps to remove any accumulated bacteria or debris and keeps the sprouts hydrated.
How do I prevent mold from growing on my bean sprouts?
Mold growth is a common concern when sprouting beans. To prevent it, ensure proper drainage and ventilation. Use a sprouting container with good drainage holes and avoid overcrowding the beans. Rinse the sprouts thoroughly and frequently, and make sure they are not sitting in standing water. If you notice any signs of mold, discard the entire batch immediately.
How do I store bean sprouts?
Once your bean sprouts have reached your desired size, rinse them thoroughly and drain them well. Store them in an airtight container lined with a paper towel in the refrigerator. The paper towel will help to absorb excess moisture and keep the sprouts fresh. Properly stored bean sprouts can last for up to a week in the refrigerator.
Are bean sprouts safe to eat raw?
While homegrown bean sprouts are generally safe to eat raw, it’s important to take precautions to minimize the risk of bacterial contamination. Always use clean water and equipment, and rinse the sprouts thoroughly before consumption. If you are concerned about food safety, you can lightly cook the bean sprouts before eating them.
Can I use tap water to sprout beans?
Yes, you can use tap water to sprout beans, as long as your tap water is safe to drink. If you are concerned about the quality of your tap water, you can use filtered water instead. Avoid using water that is heavily chlorinated, as this can inhibit germination.
What are the nutritional benefits of bean sprouts?
Bean sprouts are a good source of vitamins, minerals, and antioxidants. They are low in calories and fat and high in fiber. They contain vitamins C and K, as well as folate, manganese, and potassium. Eating bean sprouts can contribute to a healthy diet.
My bean sprouts are not sprouting. What am I doing wrong?
If your bean sprouts are not sprouting, there could be several reasons. First, make sure your beans are viable. Old or damaged beans may not germinate. Second, ensure that the beans are getting enough moisture. They should be kept consistently moist but not waterlogged. Third, check the temperature. If it’s too cold or too hot, the beans may not sprout. Finally, make sure the beans are not exposed to too much light. A dark environment is ideal for sprouting.
Can I sprout beans in direct sunlight?
No, you should not sprout beans in direct sunlight. Direct sunlight can overheat the beans and inhibit germination. It can also promote the growth of algae or mold. A dark or dimly lit environment is best for sprouting.
How do I know when my bean sprouts are ready to harvest?
Your bean sprouts are ready to harvest when they have reached your desired size and texture. This is typically when the sprouts are about 1 to 2 inches long and have a crisp, crunchy texture. You can harvest them at any point during the sprouting process, depending on your personal preference.
Can I re-sprout the same beans?
No, you cannot re-sprout the same beans. Once a bean has sprouted, it has exhausted its energy reserves and will not sprout again. You need to use fresh, unsprouted beans for each batch of bean sprouts.


Leave a Comment