
Best Grout Cleaner Fast: Are you tired of staring at dingy, discolored grout lines that seem to mock your cleaning efforts? I know I was! It felt like no matter how hard I scrubbed, that stubborn grime just wouldn’t budge. But what if I told you there’s a way to achieve sparkling clean grout, and fast? This isn’t just about aesthetics; clean grout also contributes to a healthier home environment by preventing mold and mildew growth.
Grout, that porous material filling the gaps between your tiles, has been around for centuries. From the ancient Roman aqueducts to the intricate mosaics of the Byzantine era, grout has played a crucial role in construction and design. However, its porous nature makes it a magnet for dirt, spills, and bacteria, turning it into a breeding ground for unsightly stains.
That’s why I’m so excited to share these DIY grout cleaning tricks with you! Forget spending a fortune on harsh chemicals that can damage your tiles and irritate your skin. These simple, effective methods use ingredients you probably already have in your pantry. I’ll guide you through the process of creating the best grout cleaner fast, so you can reclaim your sparkling clean surfaces and enjoy a fresher, healthier home. Let’s get started!
DIY Grout Cleaning Power: Restore Your Tiles to Their Former Glory!
Okay, let’s be honest, grout is the bane of every homeowner’s existence. It’s like a magnet for dirt, grime, and mildew, turning your beautiful tiled surfaces into a dull, dingy mess. But fear not! You don’t need to spend a fortune on expensive commercial cleaners. I’m going to share my tried-and-true DIY grout cleaning method that’s not only effective but also uses ingredients you probably already have in your pantry. Get ready to say goodbye to grimy grout and hello to sparkling clean tiles!
What You’ll Need: The Arsenal of Clean
Before we dive in, let’s gather our supplies. This is crucial for a smooth and efficient cleaning process. Trust me, you don’t want to be running around mid-scrub trying to find baking soda!
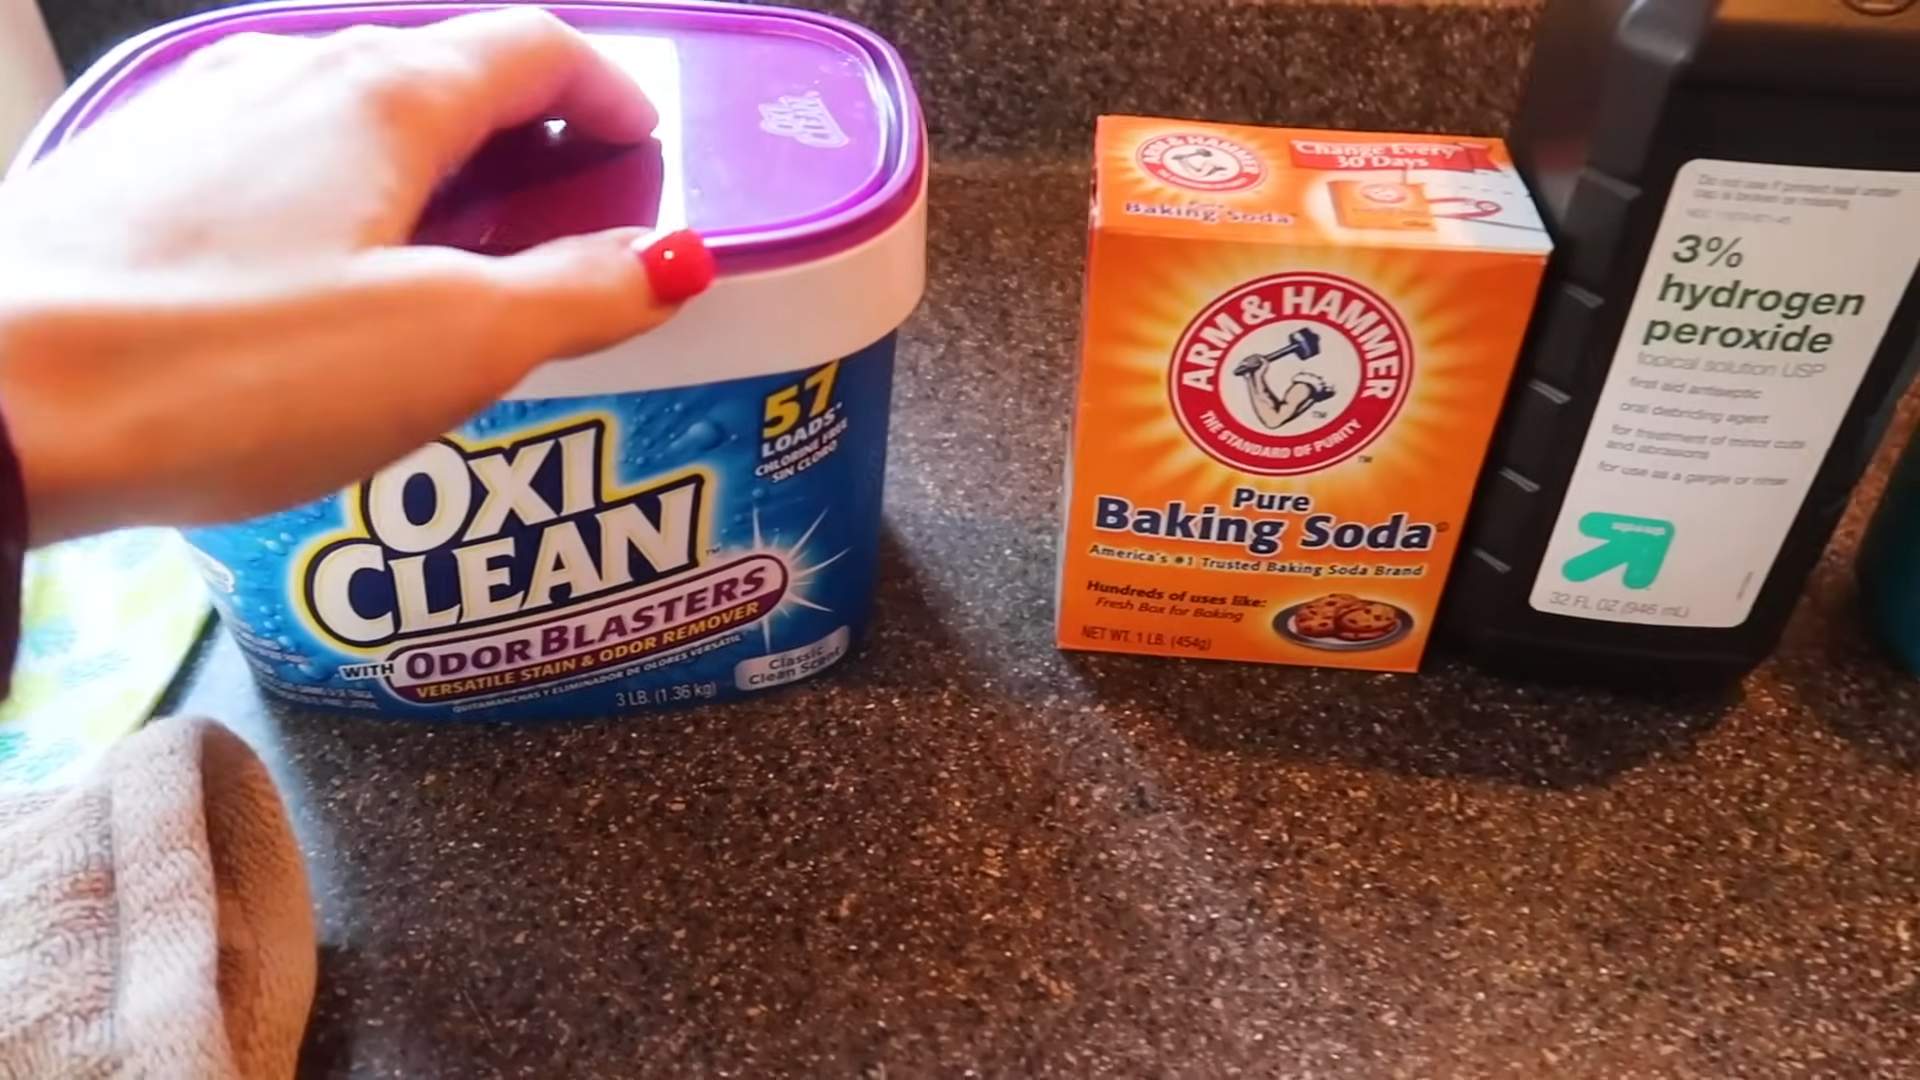
* Baking Soda: This is our main cleaning agent. It’s a mild abrasive that helps lift dirt and grime without damaging your tiles.
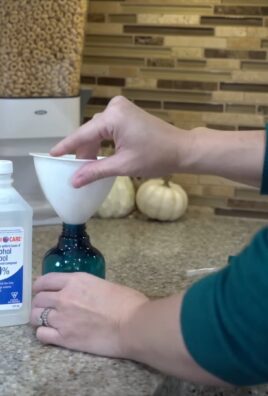
* Hydrogen Peroxide (3%): This acts as a bleaching agent and disinfectant, tackling stubborn stains and killing mold and mildew.
* Dish Soap (Optional): A few drops of dish soap can help cut through grease and grime, especially in kitchen areas. I prefer using a mild, unscented variety.
* White Vinegar (Optional): For really tough stains, vinegar can be a powerful ally. However, be cautious when using it on certain types of tile (like natural stone) as it can etch the surface. Always test in an inconspicuous area first!
* Spray Bottle: To easily apply the cleaning solution.
* Old Toothbrush or Grout Brush: This is your weapon of choice for scrubbing the grout lines. An old toothbrush works great for small areas, but a grout brush with a longer handle will save your back on larger surfaces.
* Sponge or Cloth: For wiping away the cleaning solution and rinsing the tiles.
* Warm Water: For rinsing.
* Gloves: Protect your hands from the cleaning solution and any potential irritants.
* Eye Protection (Optional): Especially if you’re using vinegar or hydrogen peroxide, it’s a good idea to wear eye protection to prevent splashes.
* Small Bowl or Container: For mixing the cleaning paste.
* Paper Towels or Clean Cloths: For drying the tiles.
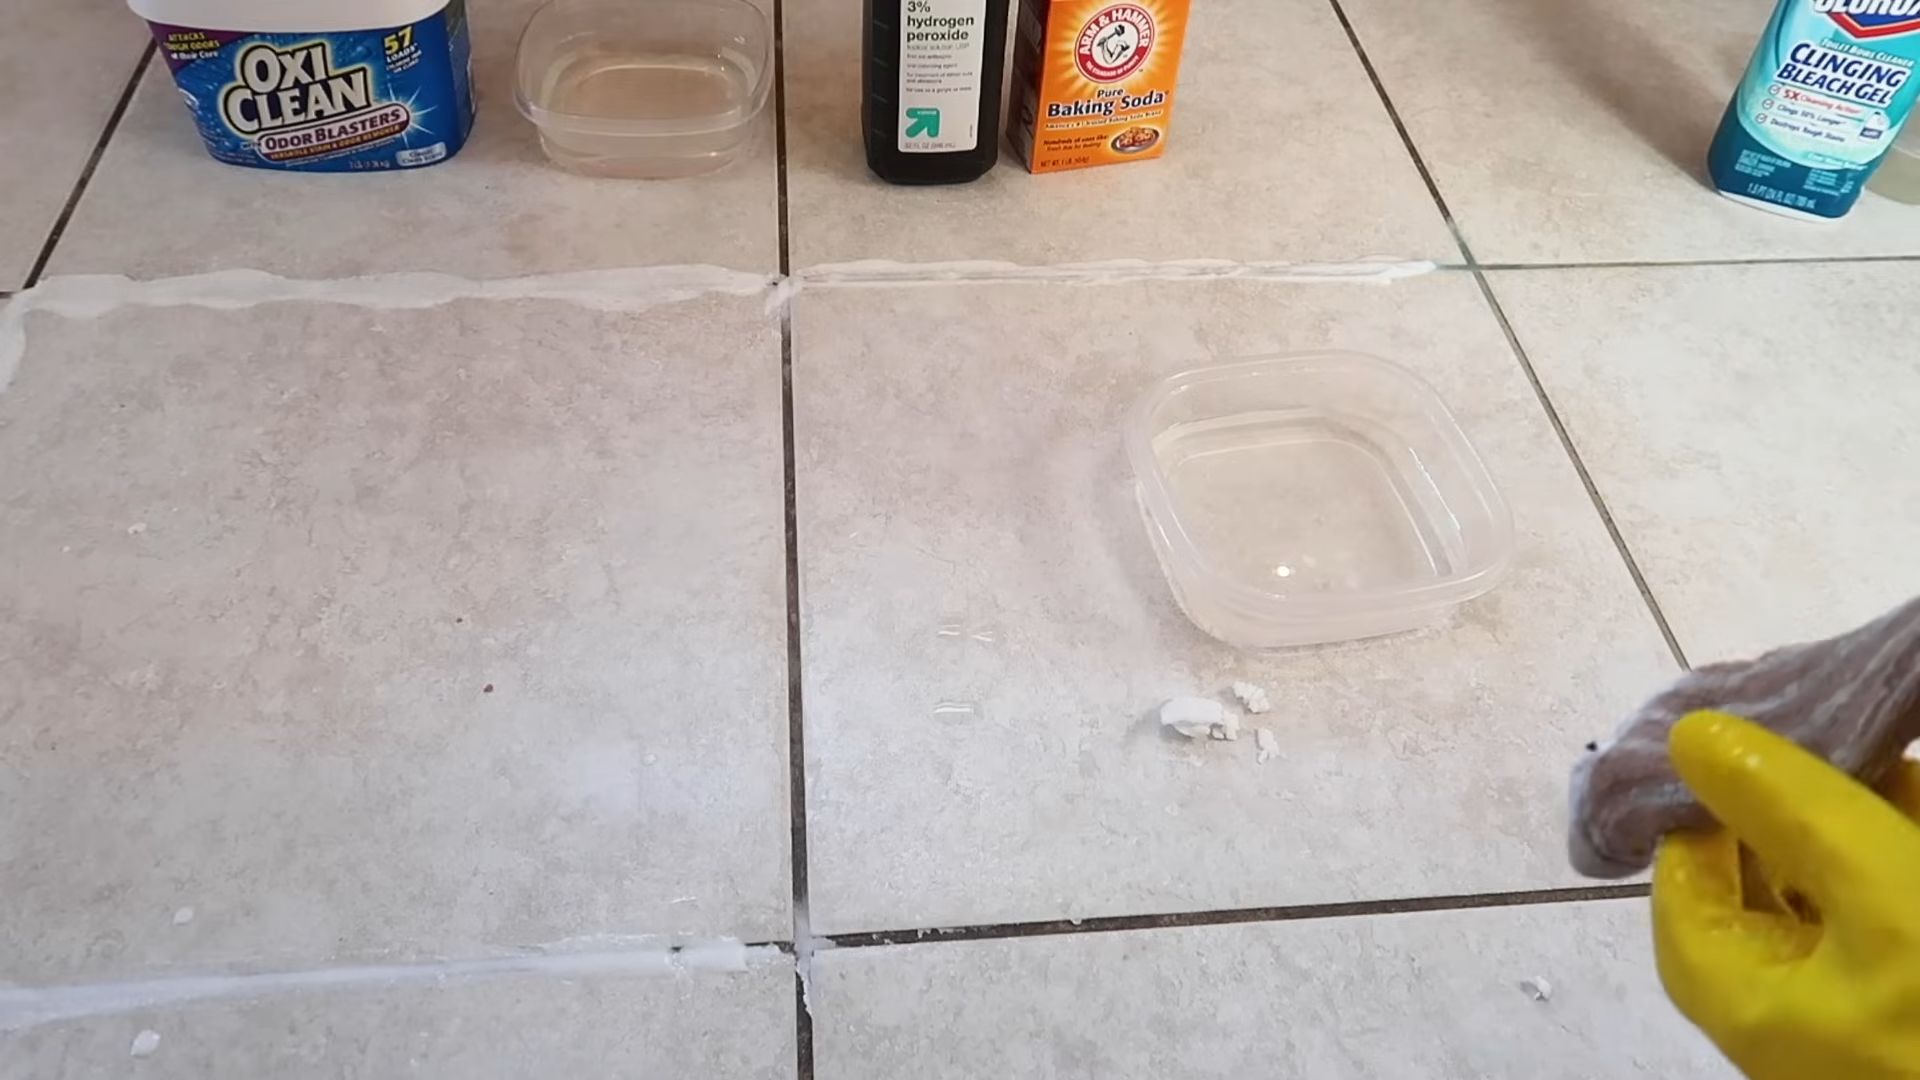
Mixing the Magic Potion: The Cleaning Paste Recipe
Now that we have our supplies, let’s create our grout-cleaning paste. This is where the magic happens!
1. Combine Baking Soda and Hydrogen Peroxide: In your small bowl, mix together baking soda and hydrogen peroxide until you form a thick paste. The ratio is usually about 2 parts baking soda to 1 part hydrogen peroxide, but you can adjust it to get the consistency you like. You want it to be thick enough to stick to the grout lines without being too runny.
2. Add Dish Soap (Optional): If you’re dealing with greasy grout, add a few drops of dish soap to the paste and mix well.
3. Vinegar Boost (Optional and with Caution): For extra cleaning power, you can add a small amount of white vinegar to the paste. However, remember to test it on an inconspicuous area first to make sure it doesn’t damage your tiles. If you do use vinegar, be prepared for some fizzing!
The Grout Cleaning Process: Step-by-Step Instructions
Alright, let’s get down to business! Follow these steps to transform your grimy grout into sparkling clean lines.
1. Prepare the Area: Before you start cleaning, sweep or vacuum the tiled surface to remove any loose dirt or debris. This will prevent you from just pushing the dirt around during the cleaning process.
2. Apply the Cleaning Paste: Using your fingers or a small spatula, apply the baking soda paste generously to the grout lines. Make sure to cover all the grout completely.
3. Let it Sit: This is the key to success! Allow the paste to sit on the grout for at least 5-10 minutes. For heavily soiled grout, you can let it sit for up to 30 minutes. The longer it sits, the more time the baking soda and hydrogen peroxide have to work their magic.
4. Scrub, Scrub, Scrub: Now comes the elbow grease! Using your old toothbrush or grout brush, scrub the grout lines vigorously. Focus on areas with stubborn stains or mildew. Don’t be afraid to put some muscle into it!
5. Rinse Thoroughly: Once you’ve scrubbed all the grout lines, rinse the area thoroughly with warm water. Use a sponge or cloth to wipe away any remaining paste and dirt. Make sure to remove all traces of the cleaning solution.
6. Dry the Tiles: After rinsing, dry the tiles with paper towels or a clean cloth. This will prevent water spots and help the grout dry evenly.
7. Inspect and Repeat (If Necessary): Take a look at your grout lines. If you’re happy with the results, great! If not, repeat the process as needed. For really stubborn stains, you may need to apply the paste and scrub multiple times.
Tackling Tough Stains: Advanced Cleaning Techniques
Sometimes, the basic cleaning method isn’t enough to tackle really tough stains. Here are a few advanced techniques you can try:
* Vinegar Soak: For stubborn stains, try soaking the grout lines with white vinegar for a few minutes before scrubbing. Remember to test in an inconspicuous area first!
* Baking Soda and Bleach Paste (Use with Extreme Caution): For extremely stubborn stains and mildew, you can try a paste of baking soda and bleach. However, bleach is a harsh chemical, so use it with extreme caution. Wear gloves and eye protection, and make sure to ventilate the area well. Apply the paste to the grout lines, let it sit for a few minutes, and then scrub and rinse thoroughly. Never mix bleach with vinegar or ammonia, as this can create toxic fumes.
* Steam Cleaning: A steam cleaner can be a powerful tool for cleaning grout. The hot steam helps to loosen dirt and grime, making it easier to scrub away.
Preventing Future Grout Grime: Tips and Tricks
Now that your grout is sparkling clean, let’s talk about how to keep it that way! Here are a few tips and tricks to prevent future grout grime:
* Seal Your Grout: Sealing your grout creates a barrier that prevents dirt and moisture from penetrating the grout lines. This makes it much easier to clean and helps to prevent stains and mildew. You can purchase grout sealant at most hardware stores.
* Wipe Up Spills Immediately: The sooner you wipe up spills, the less likely they are to stain your grout.
* Ventilate Your Bathroom: Proper ventilation helps to prevent moisture buildup, which can lead to mildew growth. Run the exhaust fan during and after showers.
* Regular Cleaning: Make grout cleaning a part of your regular cleaning routine. A quick scrub with a mild cleaner every week or two can help to prevent dirt and grime from building up.
* Use a Squeegee: After showering, use a squeegee to remove excess water from the tiled surfaces. This will help to prevent water spots and mildew growth.
Important Considerations: Tile Types and Safety
Before you start cleaning, it’s important to consider the type of tile you have and take necessary safety precautions.
* Natural Stone Tiles: Natural stone tiles, such as marble and granite, are porous and can be easily damaged by harsh chemicals. Avoid using vinegar or abrasive cleaners on natural stone tiles. Instead, use a mild, pH-neutral cleaner specifically designed for natural stone.
* Ceramic and Porcelain Tiles: Ceramic and porcelain tiles are more durable than natural stone tiles and can withstand most cleaning solutions. However, it’s still a good idea to test any new cleaner in an inconspicuous area first.
* Safety Precautions: Always wear gloves and eye protection when cleaning with chemicals. Ventilate the area well, especially when using bleach. Never mix bleach with vinegar or ammonia, as this can create toxic fumes. Keep cleaning solutions out of reach of children and pets.
Troubleshooting: Common Grout Cleaning Problems
Even with the best cleaning methods, you may encounter some common grout cleaning problems. Here are a few troubleshooting tips:
* Stubborn Stains: If you’re having trouble removing stubborn stains, try soaking the grout lines with vinegar or a baking soda paste for a longer period of time. You may also need to scrub the grout lines multiple times.
* Mildew Growth: If you’re dealing with mildew growth, use a cleaning solution that contains bleach or a mildewcide. Make sure to ventilate the area well and wear gloves and eye protection.
* Discolored Grout: If your grout is discolored, it may be stained or damaged. In some cases, you may need to replace the grout.
With a little elbow grease and the right cleaning solutions, you can restore your grout to
Conclusion
So, there you have it! This simple, yet incredibly effective DIY grout cleaner is a game-changer for anyone battling dingy, stained grout. We’ve walked you through the easy steps, highlighting the cost-effectiveness and the environmentally friendly nature of this solution compared to harsh chemical alternatives. But why is this DIY trick a must-try? Because it delivers real, visible results without breaking the bank or exposing your family to potentially harmful fumes. It’s a win-win!
This isn’t just about cleaning; it’s about restoring the beauty of your tiled surfaces and creating a healthier home environment. Imagine the satisfaction of seeing your grout lines transform from dull and discolored to bright and clean, all thanks to a few simple ingredients you probably already have in your pantry. The difference is truly remarkable, and the process is surprisingly therapeutic.
But don’t just take our word for it. We encourage you to experiment and find what works best for your specific needs. For instance, if you’re dealing with particularly stubborn stains, consider letting the paste sit for a longer period, perhaps even overnight, before scrubbing. You could also try adding a few drops of your favorite essential oil, like tea tree or eucalyptus, for an extra boost of cleaning power and a refreshing scent. Another variation is to use a steam cleaner after applying the paste for an even deeper clean. The steam helps to loosen the grime and allows the cleaning solution to penetrate further into the grout.
Remember, the key to success with any DIY project is patience and persistence. Don’t be discouraged if you don’t see immediate results. Sometimes, it takes a few applications to fully lift the stains, especially if they’ve been there for a while. And always test the solution in an inconspicuous area first to ensure it doesn’t damage your tiles.
We are confident that this DIY grout cleaner will become your go-to solution for maintaining sparkling clean grout. It’s effective, affordable, and safe – everything you could want in a cleaning product. So, ditch the expensive, chemical-laden cleaners and give this simple recipe a try. You’ll be amazed at the results!
Now, we want to hear from you! Have you tried this DIY grout cleaner? What were your results? Do you have any tips or variations to share? We encourage you to leave a comment below and let us know about your experience. Your feedback will not only help us improve this recipe but also inspire other readers to give it a try. Let’s create a community of clean grout enthusiasts! Share your before and after photos on social media using #DIYGroutCleaner and tag us so we can see your amazing transformations. We can’t wait to see your sparkling clean grout! This is truly the best grout cleaner fast solution you’ll find.
Frequently Asked Questions (FAQ)
What kind of brush should I use for scrubbing the grout?
The best type of brush for scrubbing grout is a stiff-bristled brush with a narrow head. A toothbrush is a great option for small areas and tight corners. You can also find specialized grout brushes at most hardware stores. Look for brushes with ergonomic handles for comfortable use. Avoid using metal brushes, as they can scratch or damage your tiles. Nylon or plastic bristles are ideal. Remember to apply firm, even pressure while scrubbing to effectively remove the dirt and grime.
Can I use this DIY grout cleaner on all types of tiles?
While this DIY grout cleaner is generally safe for most types of tiles, it’s always a good idea to test it in an inconspicuous area first, especially if you have delicate or porous tiles like natural stone (marble, granite, etc.). The acidity of the baking soda and vinegar could potentially etch or damage certain surfaces. If you’re unsure, consult with a tile professional before proceeding. For sensitive tiles, you might want to dilute the solution further or use a gentler alternative like a paste made from baking soda and water.
How often should I clean my grout?
The frequency of grout cleaning depends on several factors, including the location of the tiles, the amount of foot traffic, and the level of exposure to dirt and grime. In general, it’s recommended to clean your grout at least once a month to prevent buildup and maintain its appearance. High-traffic areas like bathrooms and kitchens may require more frequent cleaning, perhaps every two weeks. Regular cleaning not only keeps your grout looking its best but also helps to prevent the growth of mold and mildew.
What if the stains are really stubborn and don’t come out easily?
For stubborn stains, you can try a few different approaches. First, let the DIY grout cleaner paste sit on the grout for a longer period, perhaps several hours or even overnight. This will give the solution more time to penetrate the stains and loosen the grime. You can also try making a stronger paste by using a higher concentration of baking soda or adding a small amount of hydrogen peroxide. Another option is to use a steam cleaner after applying the paste. The steam will help to break down the stains and make them easier to remove. If all else fails, you may need to consider using a commercial grout cleaner specifically designed for tough stains. Always follow the manufacturer’s instructions carefully and wear appropriate safety gear when using commercial cleaners.
Is there a way to prevent grout from getting dirty in the first place?
Yes, there are several things you can do to prevent grout from getting dirty. One of the most effective methods is to seal your grout with a grout sealer. This will create a protective barrier that prevents dirt, grime, and liquids from penetrating the grout. Reapply the sealer every 6-12 months, or as recommended by the manufacturer. You can also wipe up spills immediately to prevent them from soaking into the grout. Use doormats and rugs in high-traffic areas to trap dirt and debris before they reach your tiled surfaces. Regular sweeping and mopping can also help to keep your grout clean and prevent buildup.
Can I use this DIY grout cleaner on colored grout?
While this DIY grout cleaner is generally safe for most types of grout, it’s always a good idea to test it in an inconspicuous area first, especially if you have colored grout. The acidity of the vinegar could potentially lighten or discolor the grout in some cases. If you’re concerned, you might want to dilute the solution further or use a gentler alternative like a paste made from baking soda and water. Observe the test area closely for any signs of discoloration before proceeding with the entire surface.
What safety precautions should I take when using this DIY grout cleaner?
Although this DIY grout cleaner is made from natural ingredients, it’s still important to take some safety precautions. Wear gloves to protect your hands from irritation. Avoid getting the solution in your eyes. If contact occurs, rinse thoroughly with water. Ensure adequate ventilation in the area you’re cleaning. Keep the solution out of reach of children and pets. While the ingredients are generally safe, ingestion could cause discomfort.
Can I use this DIY grout cleaner on vertical surfaces, like shower walls?
Yes, you can use this DIY grout cleaner on vertical surfaces. The key is to make a thicker paste so that it adheres to the surface and doesn’t run down. You can achieve this by using less water or adding more baking soda to the mixture. Apply the paste to the grout lines and let it sit for the recommended amount of time before scrubbing. You may need to use a sponge or cloth to wipe away any excess solution that drips down.
What are some other natural alternatives for cleaning grout?
Besides baking soda and vinegar, there are several other natural alternatives for cleaning grout. Lemon juice is a natural disinfectant and can help to brighten grout. Hydrogen peroxide is another effective stain remover. You can also try using a paste made from cream of tartar and water. For a more abrasive cleaner, you can mix baking soda with salt. Experiment with different combinations to find what works best for your specific needs.
Leave a Comment