
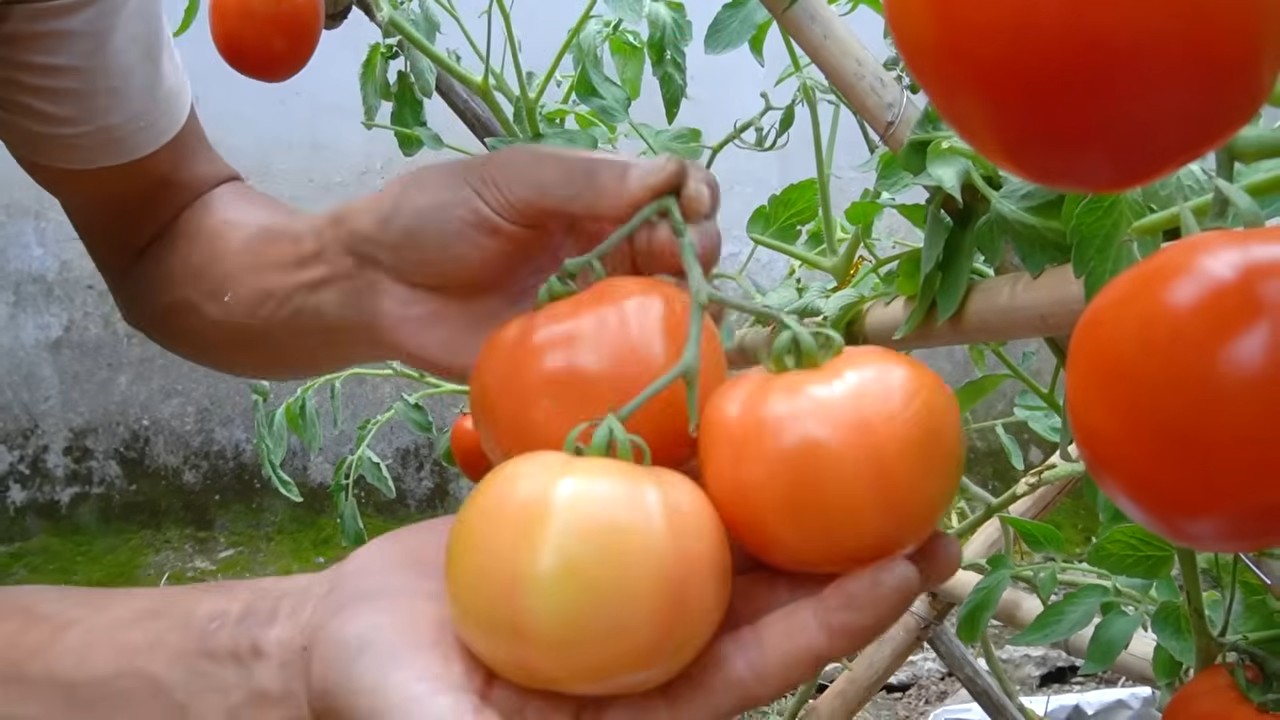
Bigger tomato harvest – isn’t that the dream of every home gardener? I know it’s mine! There’s nothing quite like biting into a sun-ripened, juicy tomato you’ve grown yourself. But let’s be honest, sometimes our tomato plants seem to have other plans, producing a disappointing yield despite our best efforts.
For centuries, cultivating tomatoes has been a cherished tradition, evolving from their origins in South America to becoming a staple in cuisines worldwide. From Italian sauces to refreshing summer salads, the tomato’s versatility is undeniable. But the secret to unlocking a truly bigger tomato harvest often lies in understanding a few simple, yet effective, DIY tricks and hacks.
That’s why I’m so excited to share these tried-and-true methods with you. Whether you’re a seasoned gardener or just starting out, these tips will help you maximize your tomato production. We’ll delve into everything from soil preparation and pruning techniques to natural pest control and watering strategies. Imagine the satisfaction of overflowing baskets filled with vibrant, flavorful tomatoes – enough to share with friends, family, and neighbors! So, let’s get our hands dirty and unlock the secrets to a bountiful tomato harvest this season!
How to Supercharge Your Tomato Harvest: A DIY Guide
Hey fellow gardeners! Are you dreaming of a tomato harvest so bountiful it practically overflows your kitchen? I know I am! And after years of experimenting, I’ve discovered some simple, yet incredibly effective DIY hacks that can seriously boost your tomato yield. Get ready to be amazed!
Understanding the Basics: Setting the Stage for Success
Before we dive into the nitty-gritty of the hacks, let’s quickly cover some fundamental tomato-growing principles. These are the building blocks for a thriving tomato patch, and without them, even the best hacks won’t reach their full potential.
* Sunlight is King: Tomatoes are sun-worshippers. They need at least 6-8 hours of direct sunlight per day to produce abundant fruit. Choose a location in your garden that gets plenty of sunshine.
* Soil Matters: Tomatoes thrive in well-drained, fertile soil. Amend your soil with compost or well-rotted manure before planting to improve its structure and nutrient content. A slightly acidic soil pH (around 6.0-6.8) is ideal.
* Water Wisely: Consistent watering is crucial, especially during fruit development. Water deeply and regularly, aiming for about 1-2 inches of water per week. Avoid overhead watering, as it can promote fungal diseases.
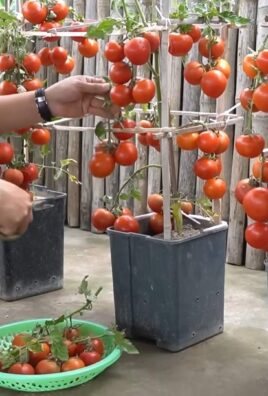
* Support System: Tomato plants, especially indeterminate varieties, need support to keep them off the ground and prevent disease. Use stakes, cages, or trellises to provide support.
* Pruning Power: Pruning suckers (the small shoots that grow between the main stem and branches) can improve airflow and direct the plant’s energy towards fruit production.
Hack #1: Epsom Salt Magic for Blossom End Rot Prevention and Enhanced Growth
Epsom salt (magnesium sulfate) is a gardener’s secret weapon! It provides magnesium, which is essential for chlorophyll production (the green pigment that helps plants photosynthesize) and calcium uptake. Calcium deficiency can lead to blossom end rot, a common problem in tomatoes.
Why this works: Magnesium helps the plant absorb and utilize calcium more efficiently, preventing blossom end rot and promoting overall plant health.
How to use it:
1. At Planting Time: When you plant your tomato seedlings, add a tablespoon of Epsom salt to the bottom of the planting hole. Mix it in with the soil before placing the plant.
2. Foliar Spray: Dissolve 1 tablespoon of Epsom salt in a gallon of water. Use a spray bottle to mist the foliage of your tomato plants every 2-3 weeks. Do this in the early morning or late evening to avoid leaf burn.
3. Soil Drench: You can also drench the soil around your tomato plants with the Epsom salt solution (1 tablespoon per gallon of water) every 4-6 weeks.
Important Note: Don’t overdo it with the Epsom salt! Too much magnesium can interfere with the uptake of other nutrients.
Hack #2: The Aspirin Boost: Salicylic Acid for Disease Resistance and Vigor
Aspirin contains salicylic acid, a plant hormone that triggers the plant’s defense mechanisms. It helps tomatoes become more resistant to diseases and pests, and it can also promote faster growth and increased yields.
Why this works: Salicylic acid acts as a signal molecule, alerting the plant to potential threats and activating its immune system.
How to use it:
1. Aspirin Solution: Dissolve one uncoated aspirin (325mg) in a gallon of water. Let it dissolve completely.
2. Seed Soak (Optional): Before planting your tomato seeds, soak them in the aspirin solution for 12-24 hours. This can improve germination rates and seedling vigor.
3. Foliar Spray: Spray your tomato plants with the aspirin solution every 2-3 weeks. Again, do this in the early morning or late evening to avoid leaf burn.
Important Note: Use uncoated aspirin only. Coated aspirin contains ingredients that can harm your plants.
Hack #3: Coffee Grounds: A Nutrient-Rich Soil Amendment and Pest Deterrent
Don’t throw away those coffee grounds! They’re a fantastic amendment for your tomato plants. Coffee grounds are rich in nitrogen, phosphorus, and potassium, all essential nutrients for healthy growth and fruit production. They also help improve soil drainage and aeration. Plus, the acidity of coffee grounds can deter some pests, like slugs and snails.
Why this works: Coffee grounds provide essential nutrients, improve soil structure, and deter pests.
How to use it:
1. Composting: Add coffee grounds to your compost pile. They’re a great source of nitrogen and will help speed up the composting process.
2. Soil Amendment: Sprinkle coffee grounds around the base of your tomato plants and gently work them into the soil. Be careful not to pile them up directly against the stem, as this can cause rot.
3. Coffee Ground Tea: Brew a “tea” by soaking used coffee grounds in water for a few days. Then, use the tea to water your tomato plants. This provides a slow-release source of nutrients.
Important Note: Coffee grounds are acidic, so use them sparingly, especially if your soil is already acidic.
Hack #4: Banana Peels: Potassium Powerhouse for Bigger, Sweeter Tomatoes
Banana peels are packed with potassium, a crucial nutrient for fruit development. Potassium helps tomatoes ripen evenly, develop a rich flavor, and resist diseases.
Why this works: Potassium is essential for fruit development, ripening, and disease resistance.
How to use it:
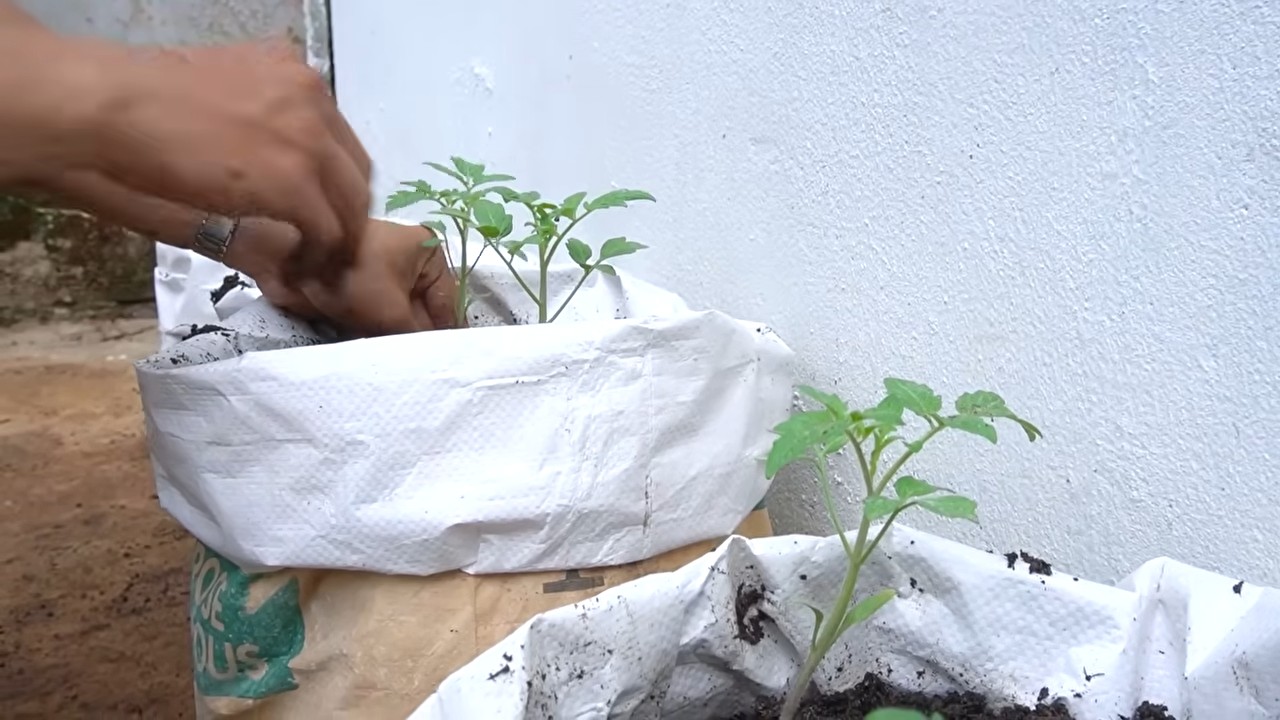
1. Planting Time: When you plant your tomato seedlings, bury a banana peel in the bottom of the planting hole. The peel will decompose and release potassium into the soil.
2. Composting: Add banana peels to your compost pile.
3. Banana Peel Tea: Soak banana peels in water for a few days to create a potassium-rich tea. Use this tea to water your tomato plants.
4. Direct Burial: Chop up banana peels and bury them around the base of your tomato plants.
Important Note: Make sure to remove any stickers from the banana peels before using them.
Hack #5: Eggshells: Calcium Boost and Pest Deterrent
Eggshells are a great source of calcium, which, as we discussed earlier, is essential for preventing blossom end rot. They also have sharp edges that can deter slugs and snails.
Why this works: Eggshells provide calcium and deter pests.
How to use it:
1. Crushed Eggshells: Crush eggshells into small pieces and sprinkle them around the base of your tomato plants. This will provide a slow-release source of calcium and deter pests.
2. Eggshell Tea: Boil crushed eggshells in water for a few minutes, then let the water cool. Use this tea to water your tomato plants.
3. Planting Time: Add crushed eggshells to the bottom of the planting hole when you plant your tomato seedlings.
Important Note: Rinse eggshells thoroughly before using them to remove any remaining egg residue.
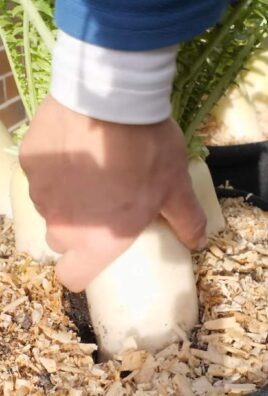
Hack #6: Pruning for Productivity: Mastering the Art of Suckers
Pruning your tomato plants correctly can significantly increase your yield. The key is to remove suckers, which are the small shoots that grow between the main stem and the branches.
Why this works: Removing suckers directs the plant’s energy towards fruit production instead of foliage growth. It also improves airflow, reducing the risk of disease.
How to do it:
1. Identify Suckers: Look for small shoots growing in the “armpit” where a branch meets the main stem.
2. Prune Regularly: Prune suckers when they are small (a few inches long). You can simply pinch them off with your fingers or use pruning shears.
3. Determinate vs. Indeterminate: Determinate tomato varieties (bush tomatoes) generally don’t need as much pruning as indeterminate varieties (vining tomatoes). For determinate varieties, you can remove the suckers below the first flower cluster. For indeterminate varieties, you can prune suckers throughout the growing season.
Important Note: Don’t prune too heavily, as this can stress the plant.
Hack #7: Companion Planting: Friends in the Garden
Companion planting involves growing certain plants together to benefit each other. Some plants can help deter pests, attract beneficial insects, or improve soil health.
Why this works: Companion plants can provide a variety of benefits, including pest control, improved pollination, and enhanced nutrient uptake.
Good Tomato Companions:
* Basil: Repels tomato hornworms and whiteflies.
* Marigolds: Repel nematodes and other pests.
* Garlic: Repels aphids and other pests.
* Carrots: Improve soil aeration.
* Onions: Repel pests.
Important Note: Avoid planting tomatoes near brassicas (cabbage, broccoli, cauliflower),
Conclusion
So, there you have it! This simple, yet incredibly effective, DIY trick for achieving a bigger tomato harvest is a game-changer for any gardener, regardless of experience level. We’ve walked you through the process, highlighting the science behind why it works and offering practical tips to ensure your success. But why is this method a must-try?
Firstly, it’s about maximizing your yield. Imagine plucking basket after basket of juicy, ripe tomatoes from your plants, enough to share with friends, family, and neighbors. This DIY approach isn’t just about getting *some* tomatoes; it’s about getting *more* tomatoes, significantly increasing your return on investment – your time, effort, and resources.
Secondly, it’s about plant health. By encouraging stronger root development, you’re creating a more resilient plant that’s better equipped to withstand environmental stressors like drought, pests, and diseases. A healthy plant is a productive plant, and this trick sets the foundation for long-term success in your tomato garden.
Thirdly, it’s about sustainability. This method relies on readily available materials and simple techniques, minimizing your reliance on expensive fertilizers and potentially harmful chemicals. You’re nurturing your plants in a natural, eco-friendly way, contributing to a healthier environment.
But the beauty of gardening lies in experimentation! Feel free to adapt this method to suit your specific needs and preferences. For example, if you’re using a different type of rooting hormone, adjust the concentration accordingly. If you’re planting in containers, ensure adequate drainage to prevent waterlogging. You could even try this technique with other vining plants like cucumbers or squash to see if you can boost their yields as well.
Consider experimenting with different types of soil amendments when transplanting. Adding compost, bone meal, or even a small amount of Epsom salts can provide your tomato plants with the extra nutrients they need to thrive. Remember to research the specific needs of your tomato variety to tailor your approach for optimal results.
Don’t be afraid to get creative! Perhaps you’ll discover a unique variation that works even better in your specific climate or soil conditions. The key is to observe your plants closely, learn from your experiences, and adapt your techniques accordingly.
Ultimately, this DIY trick for a bigger tomato harvest is about empowering you to take control of your garden and achieve remarkable results. It’s about transforming your backyard into a thriving oasis, filled with the delicious fruits of your labor.
So, what are you waiting for? Grab your gardening gloves, gather your supplies, and give this method a try. We’re confident that you’ll be amazed by the difference it makes. And most importantly, we want to hear about your experience! Share your photos, tips, and stories with us in the comments below. Let’s learn from each other and create a community of thriving tomato gardeners! We can’t wait to see your bountiful harvests!
Frequently Asked Questions
Q: What type of tomato plants does this trick work best on?
A: This technique is generally effective on most varieties of tomato plants, including determinate (bush) and indeterminate (vining) types. However, indeterminate varieties, which tend to produce more fruit over a longer period, may benefit even more from the enhanced root system development. Experiment with different varieties to see what works best in your specific garden. Heirloom tomatoes, known for their unique flavors and often vigorous growth, can also benefit greatly from this method. Remember to research the specific needs of your chosen variety for optimal results.
Q: How often should I water the tomato plants after transplanting them using this method?
A: Water deeply and thoroughly immediately after transplanting. After that, water when the top inch of soil feels dry to the touch. Avoid overwatering, as this can lead to root rot. The frequency of watering will depend on your climate, soil type, and the size of your plants. In hot, dry weather, you may need to water daily, while in cooler, wetter weather, you may only need to water every few days. Monitor your plants closely and adjust your watering schedule accordingly. Using a soaker hose or drip irrigation can help deliver water directly to the roots, minimizing water waste and reducing the risk of fungal diseases.
Q: Can I use a different type of rooting hormone?
A: Yes, you can use different types of rooting hormones. Powdered, liquid, and gel formulations are all available. Follow the instructions on the product label for proper dilution and application. Some gardeners prefer natural rooting hormones like willow water or honey water. While these may be less potent than synthetic hormones, they can still provide some benefit. Experiment to see what works best for you and your plants. Remember to always use rooting hormones sparingly, as excessive amounts can actually inhibit root growth.
Q: What if I don’t have rooting hormone? Can I still use this method?
A: While rooting hormone significantly enhances root development, you can still try this method without it. The process of burying the stem encourages root growth regardless, as the nodes along the stem will naturally attempt to sprout roots when in contact with moist soil. The rooting hormone simply accelerates and amplifies this process. If you’re not using rooting hormone, ensure the soil is consistently moist and provide extra care to the transplanted seedlings. You might not see quite as dramatic results, but you should still experience some improvement in root development and overall plant vigor.
Q: How deep should I bury the stem when transplanting?
A: Aim to bury approximately two-thirds of the stem. Remove any leaves that would be buried below the soil line to prevent them from rotting. The more stem you bury, the more roots will develop, leading to a stronger and more productive plant. However, avoid burying the stem too deep, as this can suffocate the plant. A good rule of thumb is to leave at least a few inches of the stem above the soil surface.
Q: What kind of soil is best for transplanting tomato plants using this method?
A: A well-draining, nutrient-rich soil is ideal. Amend your garden soil with compost, aged manure, or other organic matter to improve its fertility and drainage. Avoid heavy clay soils, as they can become waterlogged and inhibit root growth. A slightly acidic soil pH (around 6.0 to 6.8) is also optimal for tomato plants. Consider adding a slow-release fertilizer to the planting hole to provide your plants with a steady supply of nutrients.
Q: My tomato plants are already established. Can I still use this method?
A: This method is most effective when transplanting young seedlings. While you can’t bury the stem of an already established plant, you can still encourage root growth by side-dressing with compost and applying a rooting hormone solution to the soil around the base of the plant. This will help stimulate the development of new roots and improve the plant’s overall health and vigor. You can also try layering, where you bend a low-lying branch to the ground and cover it with soil. This will encourage the branch to develop roots, creating a new plant that can be separated from the parent plant.
Q: How long does it take to see results from this method?
A: You should start to see noticeable improvements in your tomato plants within a few weeks of transplanting. The plants will appear more vigorous, with thicker stems and darker green leaves. They will also be more resistant to stress and disease. You should also see an increase in fruit production as the plants mature. Keep in mind that results may vary depending on the variety of tomato, the growing conditions, and the overall health of the plants.
Q: Can I use this method for other plants besides tomatoes?
A: Yes, this method can be used for other plants that produce adventitious roots along their stems, such as peppers, eggplants, and even some herbs. The principle is the same: burying the stem encourages root development, leading to a stronger and more productive plant. Experiment with different plants to see what works best in your garden. Always research the specific needs of each plant to ensure optimal results.
Leave a Comment