
Black tomato plant growing can seem like a mysterious art, shrouded in gardening lore. But fear not, fellow plant enthusiasts! I’m here to demystify the process and share some incredible DIY tricks that will have you harvesting those deep, dark beauties in no time. Forget those bland, store-bought tomatoes; imagine sinking your teeth into a juicy, almost smoky-flavored black tomato, grown right in your own backyard!
The allure of the black tomato isn’t just its unique flavor. These intriguing fruits have a rich history, often linked to regions like Crimea and Russia, where they were cultivated for their robust taste and adaptability to cooler climates. For generations, gardeners have treasured these varieties, passing down seeds and secrets for successful black tomato plant growing.
But why should *you* bother with these DIY hacks? Well, let’s face it, gardening can be tricky! From battling pests to ensuring proper soil conditions, there’s a lot to learn. These simple, effective tricks will help you overcome common challenges, maximize your yield, and ultimately, enjoy the satisfaction of growing your own delicious black tomatoes. Plus, who doesn’t love a good DIY project that results in something edible and beautiful? So, grab your gardening gloves, and let’s get started!
Growing Black Tomatoes: A DIY Guide to Delicious Darkness
Okay, so you want to grow black tomatoes? Awesome! They’re not just visually stunning; they pack a flavor punch that’s hard to beat. I’ve been growing these beauties for years, and I’m here to share my secrets to success. This guide will walk you through everything, from choosing the right variety to harvesting your own juicy, dark delights. Let’s get started!
Choosing Your Black Tomato Variety
First things first, you need to pick your poison, or rather, your tomato! There are several fantastic black tomato varieties, each with its own unique characteristics. Here are a few of my favorites:
* Black Krim: This is a classic for a reason. It’s known for its rich, slightly salty flavor and meaty texture. It’s also relatively easy to grow, making it a great choice for beginners.
* Cherokee Purple: Don’t let the name fool you; this one’s definitely a black tomato, with a dusky rose-purple hue. It’s incredibly flavorful, with a sweet and smoky taste.
* Black Prince: This is a smaller, almost plum-shaped black tomato. It’s known for its early maturity and prolific yields, perfect if you’re impatient like me!
* Paul Robeson: Named after the famous singer and actor, this tomato is a Russian heirloom with a complex, slightly acidic flavor. It’s a bit more challenging to grow, but the taste is worth it.
* Japanese Black Trifele: Pear-shaped and beautiful, this variety offers a sweet and tangy flavor. It’s a conversation starter in any garden!
Consider your taste preferences, growing conditions, and experience level when making your choice. I usually grow a couple of different varieties each year to keep things interesting!
Starting Your Seeds (or Buying Seedlings)
You have two options here: start your own seeds indoors or buy seedlings from a nursery. Starting from seed gives you more control over the process and allows you to choose from a wider variety of black tomato types. Buying seedlings is quicker and easier, but you’ll be limited to what’s available.
Starting Seeds Indoors:
This is my preferred method, as it gives me a head start on the growing season.
1. Gather Your Supplies: You’ll need seed starting trays or small pots, seed starting mix (not regular potting soil!), a spray bottle, a heat mat (optional but recommended), and a grow light (also optional but very helpful).
2. Sow the Seeds: Moisten the seed starting mix and fill your trays or pots. Sow the seeds about 录 inch deep, and gently cover them with more mix. I usually plant 2-3 seeds per cell, just in case some don’t germinate.
3. Water and Warmth: Gently mist the soil with water. Place the trays on a heat mat (if using) and cover them with a humidity dome or plastic wrap to create a humid environment.
4. Germination: Keep the soil consistently moist but not soggy. The seeds should germinate in about 5-10 days. Once they sprout, remove the humidity dome and place the trays under a grow light or in a sunny window.
5. Thinning: Once the seedlings have their first true leaves (the second set of leaves after the initial seed leaves), thin them to one plant per cell by snipping off the weaker seedlings at the soil line. Don’t pull them out, as this can disturb the roots of the remaining seedling.
6. Hardening Off: Before transplanting your seedlings outdoors, you need to “harden them off” to acclimate them to the outdoor environment. This involves gradually exposing them to sunlight, wind, and cooler temperatures over a period of 7-10 days. Start by placing them outdoors for an hour or two each day, gradually increasing the time each day.
Buying Seedlings:
If you’re buying seedlings, choose healthy-looking plants with sturdy stems and no signs of disease or pests. Avoid plants that are root-bound (roots circling the bottom of the pot).
Preparing Your Garden Bed
Black tomatoes, like all tomatoes, need plenty of sunshine and well-drained soil.
1. Choose a Sunny Location: Tomatoes need at least 6-8 hours of direct sunlight per day.
2. Prepare the Soil: Amend the soil with plenty of compost or other organic matter. This will improve drainage, fertility, and water retention. I like to add a handful of bone meal to each planting hole to provide phosphorus, which promotes strong root growth.
3. Test Your Soil (Optional): A soil test can tell you the pH and nutrient levels of your soil. Tomatoes prefer a slightly acidic soil pH of around 6.0-6.8. You can adjust the pH by adding lime (to raise it) or sulfur (to lower it).
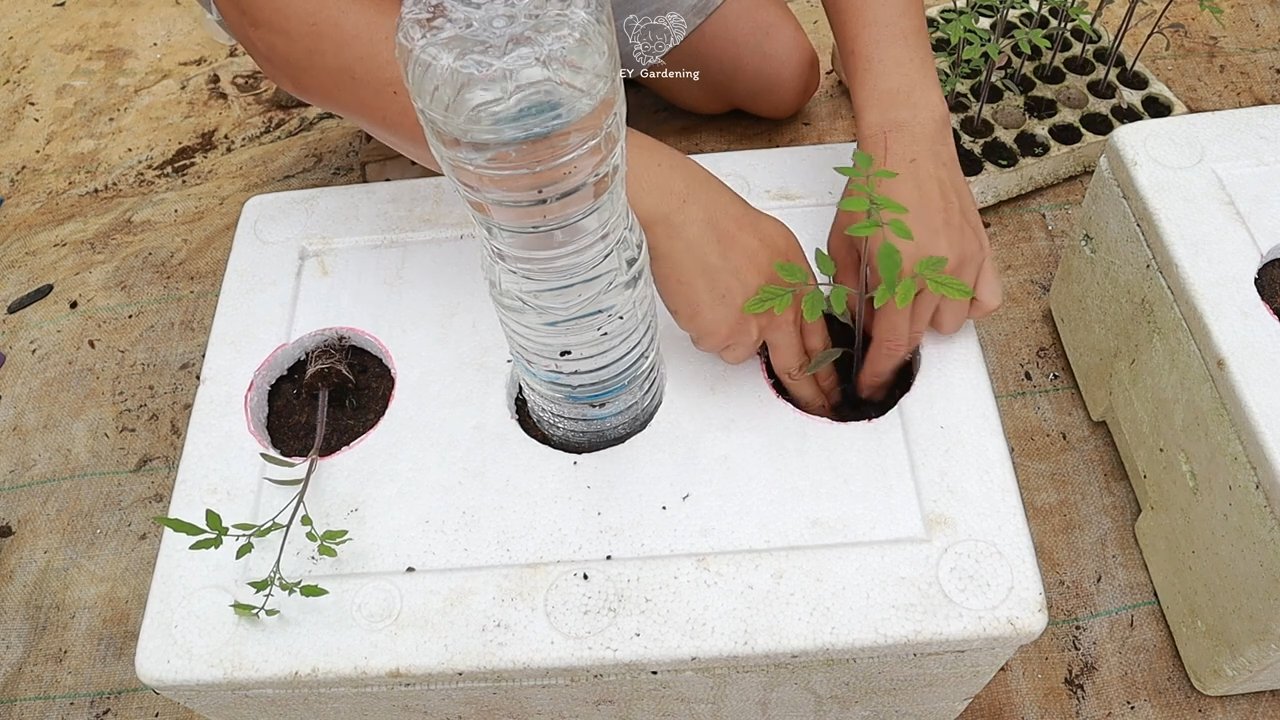
Transplanting Your Seedlings
Once your seedlings are hardened off (or you’ve purchased healthy seedlings), it’s time to transplant them into the garden.
1. Choose the Right Time: Wait until all danger of frost has passed before transplanting your tomatoes.
2. Dig the Holes: Dig holes that are slightly larger than the root balls of your seedlings. Space the plants about 2-3 feet apart, depending on the variety.
3. Plant Deep: Tomatoes can be planted deeper than other plants. Remove the lower leaves from the stem and plant the seedling so that the lowest remaining leaves are just above the soil line. This encourages the plant to develop more roots along the buried stem.
4. Water Thoroughly: Water the seedlings well after transplanting.
5. Add Support: Black tomato plants can get quite large and heavy, so it’s important to provide them with support. You can use stakes, cages, or trellises. I prefer cages because they provide all-around support.
Caring for Your Black Tomato Plants
Now that your plants are in the ground, it’s time to give them the TLC they need to thrive.
1. Watering: Water deeply and regularly, especially during hot, dry weather. Avoid watering the foliage, as this can promote disease. Drip irrigation or soaker hoses are ideal.
2. Fertilizing: Fertilize your tomato plants every 2-3 weeks with a balanced fertilizer. Look for a fertilizer that’s specifically formulated for tomatoes. I also like to use compost tea as a foliar feed.
3. Pruning: Pruning can help improve air circulation and fruit production. Remove suckers (the small shoots that grow between the main stem and the branches) to encourage the plant to focus its energy on fruit production.
4. Mulching: Apply a layer of mulch around your tomato plants to help retain moisture, suppress weeds, and regulate soil temperature. Straw, hay, or wood chips are all good choices.
5. Pest and Disease Control: Keep an eye out for pests and diseases. Common tomato pests include aphids, tomato hornworms, and whiteflies. Common diseases include early blight, late blight, and blossom end rot. Treat any problems promptly with appropriate organic or chemical controls. I prefer to use organic methods whenever possible. Neem oil is a great all-purpose insecticide and fungicide.
Dealing with Common Tomato Problems
Even with the best care, you might encounter some problems along the way. Here are a few common issues and how to deal with them:
* Blossom End Rot: This is caused by a calcium deficiency. It’s characterized by a dark, leathery spot on the bottom of the tomato. To prevent blossom end rot, make sure your soil is well-drained and that you’re watering consistently. You can also add calcium to the soil by adding crushed eggshells or bone meal.
* Early Blight: This is a fungal disease that causes dark spots on the leaves. To prevent early blight, avoid watering the foliage and provide good air circulation. Remove any infected leaves promptly.
* Tomato Hornworms: These large green caterpillars can quickly defoliate your tomato plants. Handpick them off the plants and drop them into a bucket of soapy water.
* Aphids: These tiny insects suck the sap from plants. Spray them with a strong stream of water or treat them with insecticidal soap or neem oil.
Harvesting Your Black Tomatoes
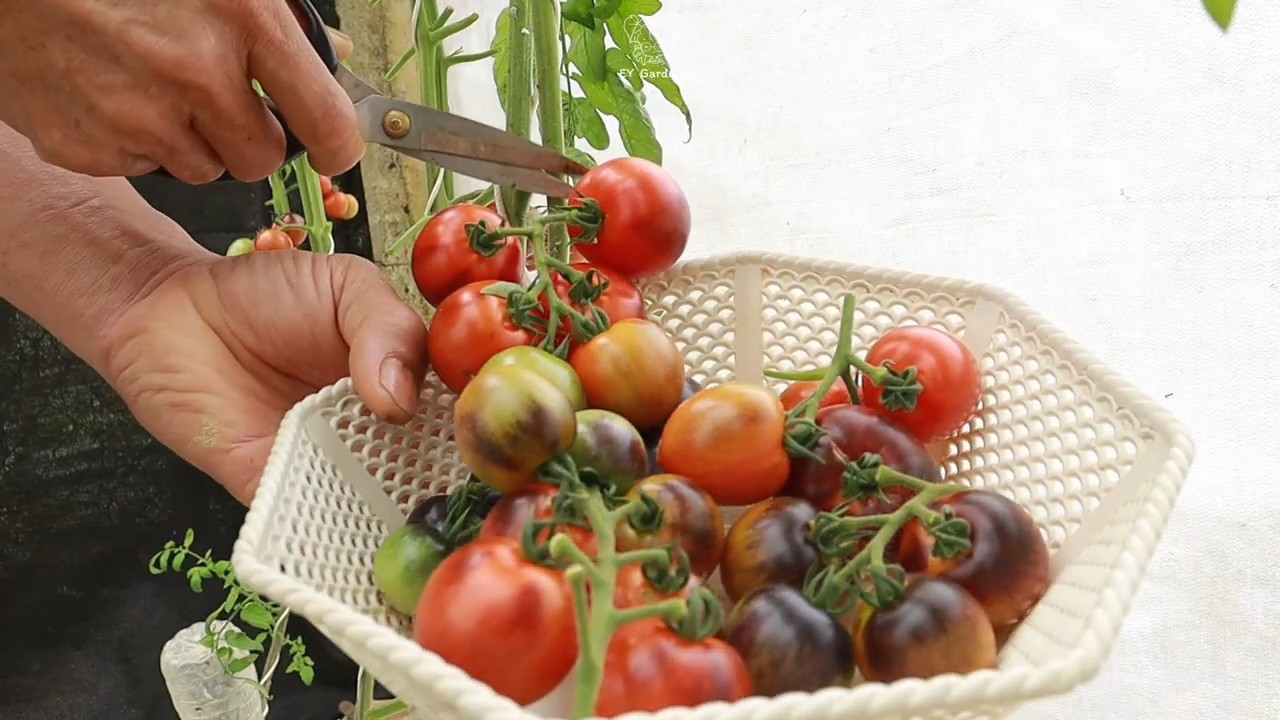
The moment you’ve been waiting for! Knowing when to harvest black tomatoes can be a little tricky, as they don’t turn bright red like other varieties.
1. Look for Color Change: The tomatoes will deepen in color, becoming a dusky rose-purple or almost black, depending on the variety.
2. Feel for Softness: Gently squeeze the tomato. It should be slightly soft to the touch but not mushy.
3. Check the Stem: The stem should easily detach from the plant when the tomato is ripe.
4. Taste Test: If you’re still unsure, pick one and give it a taste! Ripe black tomatoes should be rich, flavorful, and slightly sweet.
Once you
Conclusion
So, there you have it! Transforming your gardening game with this simple yet effective DIY trick for nurturing your black tomato plants is not just about saving money; it’s about empowering yourself to create a thriving, bountiful garden with your own two hands. We’ve explored how to provide the ideal environment for these unique and delicious fruits, ensuring they reach their full potential.
Why is this a must-try? Because store-bought solutions often fall short. They may contain unnecessary additives, lack the specific nutrients your black tomato plants crave, or simply be too expensive for regular use. This DIY approach allows you to tailor the solution to your plants’ exact needs, using ingredients you likely already have in your kitchen or garden. You’re not just feeding your plants; you’re giving them a personalized boost that will translate into richer color, deeper flavor, and a more abundant harvest.
Consider these variations to further customize your approach. For example, if your soil is particularly alkaline, adding a touch of vinegar to your DIY solution can help lower the pH, creating a more favorable environment for your black tomato plants. Alternatively, if you’re looking to boost potassium levels, banana peels are an excellent addition to your compost tea. Experiment with different combinations and observe how your plants respond. Remember, gardening is a journey of learning and discovery!
Don’t be intimidated by the “DIY” label. This trick is incredibly easy to implement, requiring minimal effort and time. The rewards, however, are significant. Imagine biting into a juicy, sun-ripened black tomato, knowing that you played a direct role in its creation. That’s the satisfaction of DIY gardening at its finest.
We wholeheartedly encourage you to give this DIY trick a try. Nurturing your black tomato plants with this method will not only improve their health and yield but also deepen your connection to the natural world. It’s a rewarding experience that will transform the way you approach gardening.
Once you’ve tried it, we’d love to hear about your experience! Share your results, tips, and variations in the comments below. Let’s create a community of black tomato enthusiasts who are passionate about growing the best possible fruit. Your insights could help other gardeners achieve success and inspire them to embrace the power of DIY gardening. Let’s cultivate a garden of knowledge together! Remember, the secret to truly exceptional black tomatoes often lies in the simple, homemade solutions.
Frequently Asked Questions (FAQ)
What exactly is a “black tomato,” and why does it need special care?
Black tomatoes aren’t truly black; they’re typically a deep reddish-purple or brownish-black color. This unique pigmentation comes from high levels of anthocyanins, the same antioxidants found in blueberries and other dark fruits. While they are still tomatoes, they often require slightly different care than standard red varieties. They can be more susceptible to blossom end rot due to calcium deficiencies and benefit from consistent watering and nutrient management to develop their rich color and flavor. This DIY trick helps address these specific needs.
What are the key ingredients in this DIY trick, and why are they beneficial for black tomato plants?
The specific ingredients will vary depending on the recipe, but common components include Epsom salts (magnesium sulfate), bone meal (phosphorus and calcium), and compost tea (a broad spectrum of nutrients and beneficial microbes). Epsom salts help prevent magnesium deficiencies, which can hinder nutrient uptake. Bone meal provides essential phosphorus for root development and calcium to prevent blossom end rot. Compost tea introduces beneficial microorganisms that improve soil health and nutrient availability. These ingredients work synergistically to create a thriving environment for black tomato plants.
How often should I apply this DIY solution to my black tomato plants?
The frequency of application depends on the specific recipe and the condition of your plants. As a general guideline, apply the solution every two to three weeks during the growing season. If your plants show signs of nutrient deficiencies (e.g., yellowing leaves, stunted growth), you may need to apply it more frequently. Always observe your plants closely and adjust the frequency accordingly. Avoid over-fertilizing, as this can be detrimental to plant health.
Can I use this DIY trick on other types of tomato plants, or is it specifically for black tomatoes?
While this DIY trick is particularly beneficial for black tomato plants due to their specific needs, it can also be used on other types of tomato plants. The nutrients provided by the solution are generally beneficial for all tomato varieties. However, you may need to adjust the recipe or frequency of application based on the specific needs of each variety. For example, determinate tomato varieties (those that grow to a certain size and then stop producing) may require less frequent fertilization than indeterminate varieties (those that continue to grow and produce throughout the season).
What are the signs of nutrient deficiencies in black tomato plants, and how can this DIY trick help address them?
Common signs of nutrient deficiencies in black tomato plants include yellowing leaves (chlorosis), stunted growth, blossom end rot (a dark, leathery spot on the bottom of the fruit), and poor fruit development. This DIY trick helps address these deficiencies by providing essential nutrients such as magnesium, phosphorus, calcium, and trace minerals. The compost tea also introduces beneficial microbes that improve nutrient availability in the soil. By regularly applying this solution, you can prevent and correct nutrient deficiencies, ensuring healthy growth and abundant fruit production.
Is there a risk of over-fertilizing my black tomato plants with this DIY trick?
Yes, there is a risk of over-fertilizing if you apply the solution too frequently or in excessive amounts. Over-fertilization can lead to salt buildup in the soil, which can damage plant roots and hinder nutrient uptake. Signs of over-fertilization include wilting leaves, brown leaf tips, and stunted growth. To avoid over-fertilizing, always follow the recommended application rates and observe your plants closely. If you notice any signs of over-fertilization, reduce the frequency of application or flush the soil with water to remove excess salts.
How do I know if my soil pH is suitable for black tomato plants, and how can I adjust it if necessary?
Black tomato plants prefer a slightly acidic soil pH of around 6.0 to 6.8. You can test your soil pH using a soil testing kit or by sending a sample to a soil testing laboratory. If your soil pH is too high (alkaline), you can lower it by adding sulfur or acidic organic matter such as peat moss or pine needles. If your soil pH is too low (acidic), you can raise it by adding lime. Always follow the instructions on the soil amendment products and retest your soil pH after making adjustments.
Can I use this DIY trick in conjunction with other gardening practices, such as companion planting or mulching?
Absolutely! This DIY trick is designed to complement other gardening practices. Companion planting (planting beneficial plants together) can help attract pollinators, repel pests, and improve soil health. Mulching (applying a layer of organic material to the soil surface) can help retain moisture, suppress weeds, and regulate soil temperature. Using this DIY trick in conjunction with these practices will create a more holistic and sustainable gardening system, leading to healthier and more productive black tomato plants.
What if I don’t have all the ingredients for this DIY trick? Can I substitute them with something else?
While the specific ingredients in the recipe are ideal, you can often substitute them with other readily available materials. For example, if you don’t have bone meal, you can use rock phosphate or eggshells as a source of phosphorus and calcium. If you don’t have Epsom salts, you can use magnesium sulfate fertilizer. If you don’t have compost tea, you can use diluted liquid seaweed fertilizer. The key is to understand the nutritional needs of your black tomato plants and find alternative sources of those nutrients.
How long will it take to see results after applying this DIY trick to my black tomato plants?
The time it takes to see results will vary depending on the condition of your plants and the severity of any nutrient deficiencies. In general, you should start to see improvements within a week or two of applying the solution. New growth will be healthier and more vigorous, leaves will be greener, and fruit development will be more robust. Be patient and consistent with your applications, and you will eventually see the positive effects of this DIY trick on your black tomato plants.

Leave a Comment