
Boost Melon Yields Easily with these simple, yet effective home gardening tricks! Have you ever dreamed of biting into a juicy, homegrown melon, bursting with flavor, only to be disappointed by a small, lackluster harvest? I know I have! It’s frustrating to put in the time and effort, only to feel like your melon patch isn’t living up to its full potential.
Melons have been cultivated for thousands of years, with evidence suggesting their origins trace back to Africa and Asia. Throughout history, they’ve been prized for their sweetness and refreshing qualities, often symbolizing abundance and prosperity. But even with centuries of cultivation, maximizing melon yields can still feel like a bit of a mystery.
That’s where these DIY tricks come in! In this article, I’m going to share some of my favorite, tried-and-true methods to help you boost melon yields easily. We’ll cover everything from soil preparation and pollination techniques to pruning strategies and pest control, all designed to help you achieve a bountiful harvest. Whether you’re a seasoned gardener or just starting out, these tips will empower you to grow bigger, sweeter, and more abundant melons than ever before. Get ready to transform your melon patch into a thriving oasis!

“`html
Boost Your Melon Yields: A Simple DIY Trick!
Okay, melon lovers, listen up! Are you tired of tiny, disappointing melons? Do you dream of juicy, sweet harvests bursting from your garden? Well, I’m here to tell you that you can significantly boost your melon yields with a simple, inexpensive DIY trick. It’s all about strategic pruning and support, and trust me, it’s easier than you think! This method works wonders for cantaloupes, watermelons, honeydews – you name it!
Understanding Melon Growth and Why Pruning Matters
Before we dive into the nitty-gritty, let’s quickly understand how melons grow. Melons are vining plants, meaning they spread out and produce long, trailing stems. These stems, or “vines,” produce both male and female flowers. The female flowers, once pollinated, develop into the delicious melons we crave.
The problem is, melon plants often put a lot of energy into producing *lots* of vines and leaves, rather than focusing on developing a few high-quality fruits. That’s where pruning comes in! By strategically removing some of the excess growth, we can redirect the plant’s energy towards producing larger, sweeter, and more abundant melons. Think of it like this: you’re telling the plant, “Hey, focus on these few melons and make them amazing!”
Materials You’ll Need
* Sharp pruning shears or scissors (make sure they’re clean to prevent disease!)
* Gardening gloves (optional, but recommended to protect your hands)
* Twine or plant ties
* Support structures (more on this later – think trellises, slings, or even old pantyhose!)
* A sunny day (for observing your plants)
The Pruning and Support Guide: Step-by-Step
Here’s the breakdown of how to prune and support your melon plants for maximum yield:
* **Phase 1: Early Vine Management (When vines are about 2-3 feet long)**
* **Goal:** Establish a strong main vine and encourage early fruit set.
* **Action:**
* Identify the main vine. This is usually the thickest and longest vine growing from the base of the plant.
* Remove any side shoots (also called “suckers”) that are growing from the base of the plant or along the first foot or so of the main vine. These suckers will only steal energy from the main vine and won’t produce much fruit.
* Pinch off the growing tip of the main vine *after* you see a few female flowers developing. This encourages the plant to focus on developing those existing flowers into fruits, rather than continuing to grow longer vines. You’ll recognize female flowers by the small, immature melon already present behind the flower petals. Male flowers just have a stem behind the flower.
* **Phase 2: Fruit Development and Vine Control (Once melons start to form)**
* **Goal:** Support developing melons and prevent overcrowding.
* **Action:**
* **Limit the number of melons per vine.** For smaller melons like cantaloupes, you can leave 3-4 melons per vine. For larger watermelons, I recommend limiting it to 1-2 melons per vine for the best size and sweetness.
* **Remove any new flowers that appear *after* your desired number of melons have set.** Again, this redirects energy to the existing fruits.
* **Prune back any excessive vine growth beyond the developing melons.** You don’t want the plant wasting energy on unnecessary foliage. Aim to keep the vines relatively tidy and manageable.
* **Provide support for the developing melons.** This is crucial, especially for larger varieties. As the melons grow, their weight can easily break the vines.
* **Phase 3: Ongoing Maintenance**
* **Goal:** Ensure proper airflow and sunlight penetration.
* **Action:**
* Continue to monitor your plants for any signs of disease or pests. Address any issues promptly.
* Remove any yellowing or dead leaves to improve airflow and prevent disease.
* Water regularly, especially during dry periods. Melons need consistent moisture to develop properly.
* Fertilize as needed. A balanced fertilizer or one specifically formulated for fruiting plants can help boost yields.
Detailed Step-by-Step Instructions
Now, let’s break down each step with even more detail:
1. **Gather Your Supplies:** Before you even head out to the garden, make sure you have everything you need. This includes your pruning shears (cleaned and sharpened!), gloves, twine, and your chosen support structures. Having everything ready will make the process much smoother.
2. **Observe Your Plants:** Take a good look at your melon plants. Identify the main vines, side shoots, male and female flowers, and any developing melons. This observation period is crucial for making informed pruning decisions. I like to do this in the morning when the sun is shining, so I can clearly see the plant’s structure.
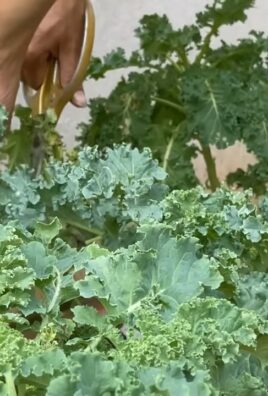
3. **Remove Side Shoots (Suckers):** Using your pruning shears, carefully cut off any side shoots that are growing from the base of the plant or along the first foot or so of the main vine. Cut as close to the main vine as possible without damaging it. These suckers are energy thieves!
4. **Pinch Off the Main Vine Tip:** Once you see a few female flowers developing on the main vine, pinch off the growing tip. This encourages the plant to focus on fruit development. To do this, simply use your fingers to pinch off the very end of the vine, just above a leaf node.
5. **Limit the Number of Melons:** This is a tough one, I know! But trust me, it’s worth it. For smaller melons like cantaloupes, aim for 3-4 melons per vine. For larger watermelons, stick to 1-2 melons per vine. Remove any new flowers that appear after your desired number of melons have set. It feels counterintuitive, but you’ll be rewarded with bigger, sweeter fruit.
6. **Prune Excessive Vine Growth:** As the melons grow, the vines will continue to grow as well. Prune back any excessive vine growth beyond the developing melons. This helps to improve airflow and sunlight penetration, and it also prevents the plant from wasting energy on unnecessary foliage.
7. **Provide Support:** This is where your creativity can shine! There are several ways to support developing melons:
* **Trellises:** Trellises are a great option for smaller melons like cantaloupes. Train the vines to grow up the trellis and use twine or plant ties to secure them.
* **Slings:** For larger melons, slings are a must! You can make slings out of old t-shirts, pantyhose, or even burlap. Simply create a pouch to support the melon and tie it to a sturdy support structure. Make sure the sling is strong enough to support the weight of the melon as it grows.
* **Ground Support:** If you don’t have a trellis or the space for slings, you can also support the melons by placing them on a bed of straw or cardboard. This will help to prevent them from rotting on the ground.
8. **Water and Fertilize Regularly:** Melons need consistent moisture and nutrients to develop properly. Water deeply and regularly, especially during dry periods. Fertilize as needed with a balanced fertilizer or one specifically formulated for fruiting plants. Follow the instructions on the fertilizer package.
9. **Monitor for Pests and Diseases:** Keep an eye out for any signs of pests or diseases. Common melon pests include aphids, squash bugs, and vine borers. Common diseases include powdery mildew and fusarium wilt. Address any issues promptly to prevent them from spreading.
10. **Harvest at the Right Time:** Knowing when to harvest your melons is crucial for getting the best flavor. Each type of melon has its own specific signs of ripeness. For example, cantaloupes are ripe when the stem slips easily from the vine. Watermelons are ripe when the underside turns yellow and the tendril closest to the melon dries up. Do some research on your specific melon variety to learn the best time to harvest.
Choosing the Right Support System
The type of support system you choose will depend on the size of your melons and the space you have available. Here’s a closer look at some options:
* **Trellises:** Trellises are ideal for smaller melons like cantaloupes and honeydews. They provide excellent vertical support and help to improve airflow around the plants. You can purchase pre-made trellises or build your own using wood or metal.
* **Slings:** Slings are essential for supporting larger melons like watermelons. They provide a comfortable and secure cradle for the developing fruit. You can make slings out of a variety of materials, including old t-shirts, pantyhose, burlap, or even netting. Just make sure the material is strong enough to support the weight of the melon.
* **Ground Support:** If you don’t have a trellis or the space for slings, you can also support the melons by placing them on a bed of straw or cardboard. This will

Conclusion
So, there you have it! This simple, yet incredibly effective DIY trick to boost melon yields easily is a game-changer for any gardener, whether you’re a seasoned pro or just starting out. We’ve walked you through the process, highlighting the benefits of increased fruit production, healthier plants, and ultimately, a more rewarding gardening experience.
Why is this a must-try? Because it addresses a common challenge faced by melon growers: maximizing fruit set and ensuring robust growth. Melons, particularly larger varieties, demand a lot of energy and resources. By providing targeted support and optimizing pollination, you’re essentially giving your plants the helping hand they need to thrive. Imagine harvesting basket after basket of juicy, flavorful melons, all thanks to this one simple technique!
But don’t just take our word for it. The real magic happens when you put this into practice in your own garden. And the beauty of this method is its adaptability. Feel free to experiment with variations to suit your specific needs and growing conditions.
Here are a few suggestions to get you started:
* Vertical Support Systems: If space is limited, consider training your melon vines to grow vertically using trellises or netting. This not only saves space but also improves air circulation, reducing the risk of fungal diseases. Ensure your support system is strong enough to handle the weight of mature melons.
* Companion Planting: Enhance your melon patch by incorporating companion plants like marigolds, basil, or nasturtiums. These plants can help deter pests and attract beneficial insects, further boosting your melon yields.
* Grafting: For even more advanced gardeners, consider grafting your melon plants onto more vigorous rootstocks. This can significantly improve disease resistance and overall plant health, leading to even higher yields.
* Watering Techniques: Consistent and proper watering is crucial for melon growth. Use drip irrigation or soaker hoses to deliver water directly to the roots, minimizing water loss and preventing foliar diseases.
* Soil Amendments: Before planting, amend your soil with plenty of organic matter, such as compost or well-rotted manure. This will improve soil drainage, fertility, and water retention, creating an ideal growing environment for your melons.
We are confident that this DIY trick will make a noticeable difference in your melon harvest. But the best part is sharing your success! We encourage you to try this technique in your garden and share your experiences with us. Post photos of your bountiful melon harvests on social media using the hashtag #BoostMelonYields. Let’s create a community of gardeners who are passionate about maximizing their yields and enjoying the fruits (or rather, melons) of their labor.
Don’t delay! Get started today and prepare to be amazed by the results. Happy gardening!
Frequently Asked Questions (FAQ)
What types of melons does this DIY trick work best for?
This technique is beneficial for most melon varieties, including watermelon, cantaloupe, honeydew, and muskmelon. However, it’s particularly effective for larger melon varieties that require more support and resources to reach their full potential. Smaller, bush-type melons may not require as much intervention, but they can still benefit from improved pollination and targeted feeding.
How often should I apply this technique to my melon plants?
The frequency depends on the specific technique you’re using. For hand-pollination, aim to pollinate female flowers early in the morning, ideally within a few hours of them opening. Repeat this process for several days to ensure successful fruit set. For supporting heavy melons, adjust the supports as the fruit grows to prevent breakage. For foliar feeding, follow the instructions on your chosen fertilizer, typically applying every 1-2 weeks during the active growing season.
What are the signs that my melon plants need this boost?
Several signs indicate that your melon plants could benefit from this DIY trick. These include:
* Poor fruit set: If your plants are producing flowers but not developing into fruit, it could be a sign of inadequate pollination.
* Small or misshapen fruit: This can indicate a lack of nutrients or insufficient support for the growing fruit.
* Yellowing leaves: This could be a sign of nutrient deficiencies, which can be addressed with foliar feeding.
* Weak or spindly vines: This suggests that your plants are not getting enough resources to support healthy growth.
* Fruit rot: This can be caused by the fruit sitting on the ground and can be prevented by using supports.
Can I use this technique in a container garden?
Absolutely! This DIY trick is adaptable to container gardening. Choose a large container with good drainage and use a well-draining potting mix. Provide adequate support for the vines and fruit, and be sure to water and fertilize regularly. Container-grown melons may require more frequent watering and feeding than those grown in the ground.
What if I don’t have time for hand-pollination?
While hand-pollination can significantly improve fruit set, it’s not always necessary. You can attract pollinators to your garden by planting flowers that attract bees and other beneficial insects. Avoid using pesticides that can harm pollinators. If you’re still experiencing poor fruit set, consider using a pollination aid spray, which can help improve pollination rates.
Are there any risks associated with this DIY trick?
When done correctly, this DIY trick is generally safe for your melon plants. However, there are a few potential risks to be aware of:
* Over-fertilization: Applying too much fertilizer can burn the roots and damage your plants. Always follow the instructions on your chosen fertilizer and avoid over-applying.
* Damage to vines: Be careful when handling the vines to avoid breaking or damaging them. Use gentle techniques when hand-pollinating or providing support.
* Introducing diseases: Use clean tools and materials to avoid introducing diseases to your plants.
* Fruit rot from improper support: Ensure the support is adequate and doesn’t cause the fruit to bruise or sit in a way that traps moisture.
How long does it take to see results from this DIY trick?
You should start to see results within a few weeks of implementing this technique. Improved fruit set should be noticeable within a week or two of hand-pollination. Healthier vines and larger fruit should become apparent within a few weeks of providing support and foliar feeding. Remember that results may vary depending on the specific growing conditions and the variety of melon you’re growing.
What are some organic alternatives to chemical fertilizers for foliar feeding?
There are several organic options for foliar feeding your melon plants. These include:
* Compost tea: A nutrient-rich liquid made by steeping compost in water.
* Seaweed extract: A natural source of micronutrients and growth hormones.
* Fish emulsion: A liquid fertilizer made from fish waste.
* Epsom salts: A source of magnesium, which can help improve plant growth and fruit production.
Always dilute organic fertilizers according to the instructions on the label to avoid burning the leaves.
How do I know when my melons are ripe and ready to harvest?
The signs of ripeness vary depending on the type of melon you’re growing. However, some general indicators include:
* A change in color: The rind of the melon may change color as it ripens.
* A dull sound when thumped: A ripe melon will typically sound dull or hollow when thumped.
* A sweet aroma: Ripe melons often have a sweet, fruity aroma.
* Easy separation from the vine: The stem of a ripe melon will often separate easily from the vine.
Consult specific resources for your melon variety to ensure you harvest at peak ripeness.


Leave a Comment