
Bottle Cabbage Garden DIY: Ever dreamed of harvesting fresh, crisp cabbage right outside your doorstep, even if you’re short on space or dealing with challenging soil? I know I have! Forget those sprawling garden beds and back-breaking labor. We’re diving into a clever, cost-effective, and surprisingly beautiful way to grow your own cabbage using recycled bottles.
The concept of container gardening, a close relative to our bottle cabbage garden DIY, has been around for centuries. From the hanging gardens of Babylon to the humble window boxes of Victorian England, people have always found creative ways to cultivate plants in limited spaces. But this specific DIY takes it a step further, embracing sustainability and resourcefulness.
Why is this bottle cabbage garden DIY so appealing? Well, let’s face it, not everyone has access to a large garden. Apartment dwellers, urban residents, and those with mobility issues often miss out on the joy of growing their own food. Plus, traditional gardening can be expensive and time-consuming. This method offers a fantastic solution, allowing you to control the soil quality, protect your plants from pests, and even create a visually stunning vertical garden. Imagine the satisfaction of snipping fresh cabbage leaves for your salads, knowing you grew them yourself, using recycled materials! Let’s get started and transform those empty bottles into a thriving cabbage patch!
Creating a Thriving Cabbage Garden from Recycled Bottles: A DIY Guide
Hey there, fellow gardening enthusiasts! I’m so excited to share this super fun and eco-friendly project with you: building a cabbage garden using recycled plastic bottles. Not only is this a fantastic way to reuse materials and reduce waste, but it’s also a surprisingly effective method for growing healthy, delicious cabbages. Plus, it’s a great conversation starter!
This project is perfect for beginners and experienced gardeners alike. It’s relatively inexpensive, easy to customize, and can be adapted to fit any space, from a small balcony to a larger backyard. So, grab your empty bottles, and let’s get started!
Materials You’ll Need
Before we dive into the step-by-step instructions, let’s gather all the necessary materials. Trust me, having everything organized beforehand will make the whole process much smoother.
* Plastic Bottles: This is the star of the show! You’ll need a good number of plastic bottles, ideally 2-liter soda bottles or similar sizes. The number of bottles depends on how big you want your cabbage garden to be. I recommend starting with at least 10-12 bottles for a decent-sized garden. Make sure they are clean and dry.
* Cabbage Seedlings: You can either start your cabbage seeds indoors or purchase seedlings from a local nursery. If you’re starting from seeds, allow about 6-8 weeks for them to grow into seedlings before transplanting them into the bottles.
* Potting Soil: Use a high-quality potting mix that’s well-draining and rich in nutrients. Cabbages are heavy feeders, so a good potting mix is essential for their growth.
* Scissors or Utility Knife: For cutting the plastic bottles. Be careful!
* Drill or Awl: To create drainage holes in the bottom of the bottles.
* Measuring Tape or Ruler: To ensure consistent spacing and cutting.
* Permanent Marker: For marking cutting lines on the bottles.
* Watering Can or Hose: For watering your cabbage plants.
* Optional:
* Gloves: To protect your hands.
* Sand or Gravel: For drainage at the bottom of the bottles.
* Fertilizer: To supplement the potting soil with extra nutrients.
* Labels: To identify different cabbage varieties.
Preparing the Bottles
This is where the magic begins! We’ll transform those ordinary plastic bottles into mini-planters ready to house our cabbage seedlings.
1. Clean the Bottles: Make sure all the bottles are thoroughly cleaned inside and out. Remove any labels and residue. You can use warm soapy water and a scrub brush to get them nice and clean. Rinse them well and let them dry completely.
2. Mark the Cutting Line: Decide how tall you want your bottle planters to be. I usually cut them about halfway down, but you can adjust the height depending on your preference. Use a permanent marker and a ruler or measuring tape to draw a straight line around each bottle at the desired height.
3. Cut the Bottles: Carefully use scissors or a utility knife to cut along the marked line. Be extra cautious when using a utility knife, as it can be very sharp. I find it helpful to start with a small puncture and then follow the line around the bottle. You’ll end up with two pieces: the bottom half, which will be our planter, and the top half, which we won’t be using for this particular project (but don’t throw it away! You can use it for other gardening projects or recycling).
4. Create Drainage Holes: Drainage is crucial for healthy cabbage growth. Use a drill or awl to create several drainage holes in the bottom of each bottle planter. I usually make about 4-5 holes, evenly spaced around the bottom.
5. Optional: Add Drainage Layer: To further improve drainage, you can add a layer of sand or gravel to the bottom of each bottle planter before adding the potting soil. This will help prevent the roots from sitting in water and rotting.
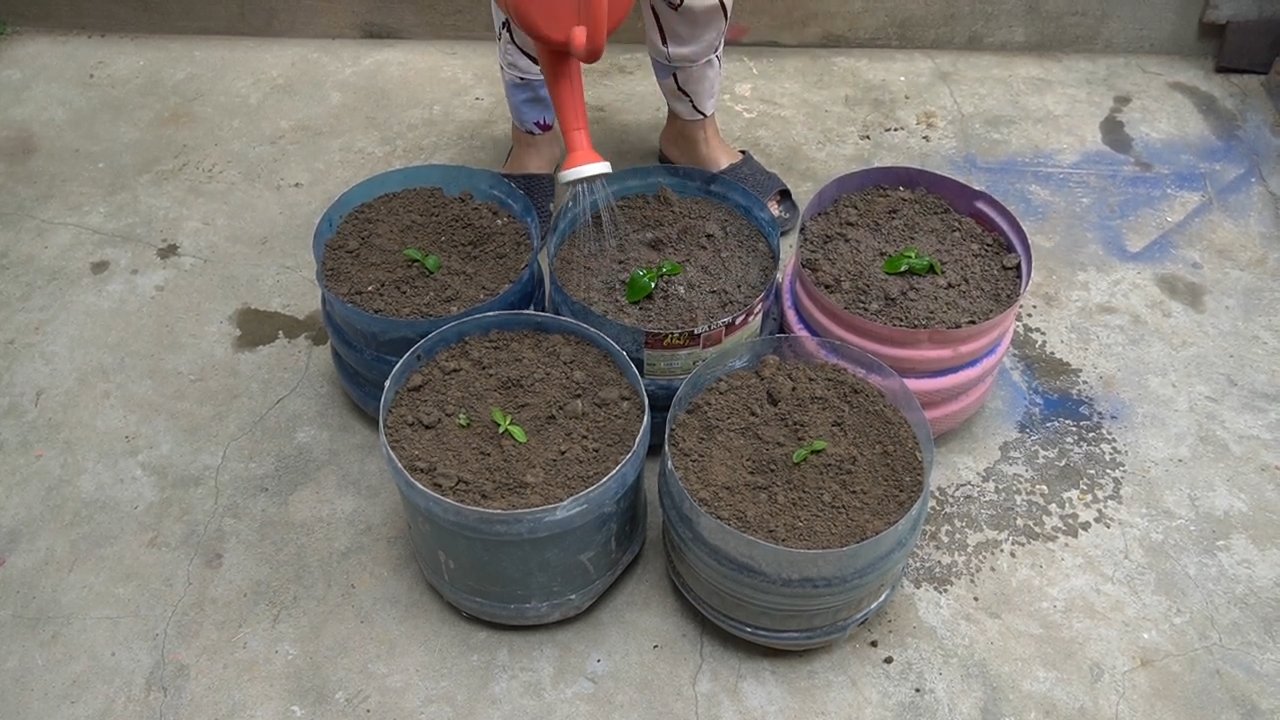
Planting the Cabbage Seedlings
Now comes the fun part: planting our cabbage seedlings into their new bottle homes!
1. Fill the Bottles with Potting Soil: Fill each bottle planter with high-quality potting soil, leaving about an inch of space at the top. Gently pat down the soil to remove any air pockets.
2. Prepare the Seedlings: Carefully remove the cabbage seedlings from their containers. If they are in individual cells, gently squeeze the bottom of the cell to loosen the roots. If they are in a larger pot, carefully separate the seedlings, trying to disturb the roots as little as possible.
3. Plant the Seedlings: Make a small hole in the center of the potting soil in each bottle planter. Gently place a cabbage seedling into the hole, making sure the top of the root ball is level with the surface of the soil.
4. Backfill with Soil: Fill in the hole around the seedling with more potting soil, gently firming it around the base of the plant.
5. Water Thoroughly: Water the newly planted seedlings thoroughly, until water drains out of the drainage holes at the bottom of the bottles. This will help settle the soil and ensure the roots are well-hydrated.
Caring for Your Bottle Cabbage Garden
Congratulations! You’ve successfully created a cabbage garden from recycled bottles. Now, it’s time to provide the necessary care to ensure your cabbages thrive.
* Sunlight: Cabbages need at least 6 hours of sunlight per day. Place your bottle garden in a sunny location where it will receive plenty of direct sunlight. If you don’t have a sunny spot, you can supplement with grow lights.
* Watering: Water your cabbage plants regularly, especially during hot and dry weather. Check the soil moisture by sticking your finger into the soil. If the top inch feels dry, it’s time to water. Avoid overwatering, as this can lead to root rot.
* Fertilizing: Cabbages are heavy feeders and benefit from regular fertilization. You can use a balanced liquid fertilizer or a slow-release granular fertilizer. Follow the instructions on the fertilizer package for application rates. I like to fertilize every 2-3 weeks.
* Pest Control: Keep an eye out for common cabbage pests, such as cabbage worms, aphids, and slugs. You can use organic pest control methods, such as hand-picking pests, using insecticidal soap, or applying diatomaceous earth.
* Weeding: Keep the bottle planters free of weeds. Weeds can compete with the cabbage plants for nutrients and water.
* Rotation: Rotate your cabbage plants every year to prevent soilborne diseases. Don’t plant cabbages in the same spot year after year.
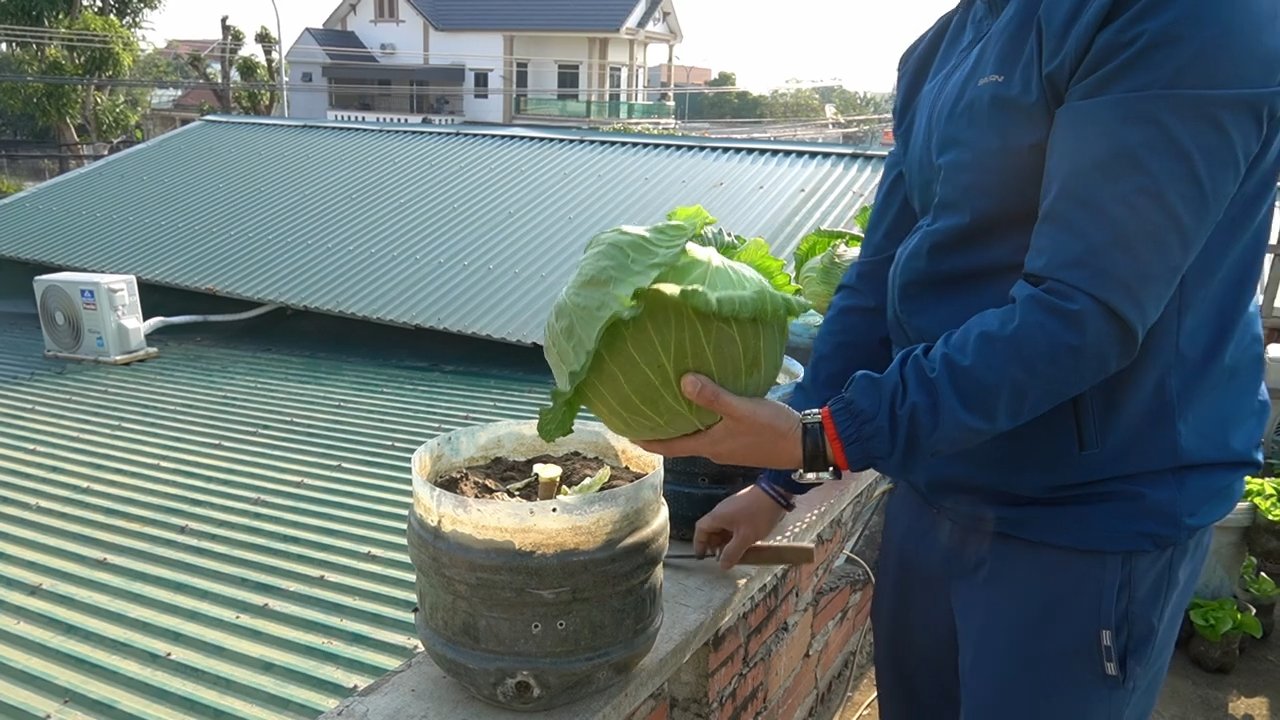
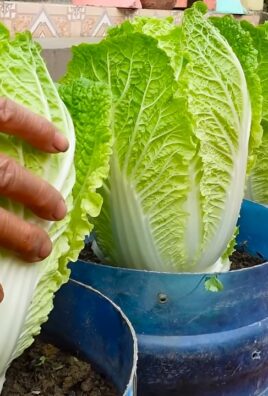
Harvesting Your Cabbages
After several weeks of care, your cabbages will be ready to harvest. The exact time to harvest depends on the variety of cabbage you’re growing, but generally, cabbages are ready to harvest when the heads are firm and tightly packed.
1. Check for Firmness: Gently squeeze the cabbage head. If it feels firm and solid, it’s likely ready to harvest.
2. Cut the Head: Use a sharp knife to cut the cabbage head from the stem, leaving a few outer leaves attached.
3. Enjoy Your Harvest: Bring your freshly harvested cabbage indoors and enjoy it in your favorite recipes! Cabbage is delicious in salads, soups, stews, and stir-fries.
Troubleshooting
Even with the best care, you might encounter some challenges along the way. Here are a few common problems and how to address them:
* Yellowing Leaves: This could be a sign of nutrient deficiency. Try fertilizing your plants with a balanced fertilizer.
* Stunted Growth: This could be due to insufficient sunlight, poor soil, or pests. Make sure your plants are getting enough sunlight, use a high-quality potting mix, and check for pests.
* Root Rot: This is caused by overwatering. Make sure your bottle planters have adequate drainage and avoid watering too frequently.
* Pest Infestations: Regularly inspect your plants for pests and take action promptly to prevent infestations from spreading.
Adapting the Project
The beauty of this DIY project is that it’s highly adaptable. Here are a few ideas for customizing your bottle cabbage garden:
* Vertical Garden: Create a vertical cabbage garden by hanging the bottle planters from a fence or wall.
* Tiered Garden: Build a tiered garden by stacking the bottle planters on top of each other.
* Different Bottle Sizes: Experiment with different bottle sizes to create a more visually interesting garden.
* Paint the Bottles: Add a splash of color to your garden by painting the bottles with weather-resistant paint.
* Grow Other Vegetables: While this guide focuses on cabbages, you can also use this method to grow other vegetables, such as lettuce, spinach
Conclusion
So, there you have it! Transforming discarded plastic bottles into a thriving cabbage garden is not just a quirky DIY project; it’s a sustainable, space-saving, and surprisingly rewarding way to grow your own food. We’ve walked you through the simple steps, highlighting the benefits of this innovative approach to gardening. From reducing plastic waste to enjoying fresh, homegrown cabbage, this method offers a multitude of advantages.
Why is this Bottle Cabbage Garden DIY a must-try? Because it empowers you to take control of your food source, even if you have limited space. Imagine stepping outside your door and harvesting crisp, delicious cabbage leaves for your salads, stir-fries, or slaws. The satisfaction of nurturing your own plants from seed to table is unparalleled. Plus, you’re contributing to a more sustainable lifestyle by repurposing materials that would otherwise end up in landfills.
But the beauty of this project lies in its adaptability. Feel free to experiment with different bottle sizes and shapes to create unique vertical gardens. You can also explore growing other leafy greens like lettuce, spinach, or kale alongside your cabbage. Consider adding companion plants like marigolds or basil to deter pests and enhance the flavor of your harvest.
Don’t be afraid to get creative with your bottle garden design. Paint the bottles with vibrant colors, add decorative labels, or arrange them in eye-catching patterns. This is your chance to express your personal style and create a truly unique and functional garden feature.
We understand that embarking on a new DIY project can sometimes feel daunting. But trust us, this Bottle Cabbage Garden DIY is incredibly easy to execute, even for beginners. The steps are straightforward, the materials are readily available, and the results are well worth the effort.
So, what are you waiting for? Gather your empty plastic bottles, grab some potting soil and cabbage seeds, and get ready to embark on a rewarding gardening adventure. We’re confident that you’ll be amazed by the abundance and flavor of your homegrown cabbage.
We’re eager to hear about your experiences with this Bottle Cabbage Garden DIY. Share your photos, tips, and variations in the comments below. Let’s create a community of bottle gardeners and inspire others to embrace sustainable living. Happy gardening!
Frequently Asked Questions (FAQ)
What type of plastic bottles are best for this project?
Ideally, you should use sturdy, food-grade plastic bottles. Bottles that previously contained water, juice, or soda are excellent choices. Avoid using bottles that have held harsh chemicals or cleaning products, as these may contaminate your soil and plants. The size of the bottle will depend on the variety of cabbage you’re growing. Smaller bottles are suitable for smaller cabbage varieties or for starting seedlings, while larger bottles are better for larger, head-forming cabbages. Ensure the bottles are clean and free of any residue before using them.
How do I ensure proper drainage in the bottle garden?
Proper drainage is crucial to prevent waterlogging and root rot. Before adding soil, create drainage holes in the bottom of each bottle. You can use a drill, a hot nail, or a sharp knife to make several holes. A layer of gravel or small stones at the bottom of the bottle can also improve drainage. When watering, be careful not to overwater. Allow the soil to dry slightly between waterings.
What type of soil should I use for my bottle cabbage garden?
Use a well-draining potting mix that is rich in organic matter. A mix of compost, peat moss, and perlite is ideal. Avoid using garden soil, as it can be too heavy and may not drain well in containers. You can also add slow-release fertilizer to the potting mix to provide your cabbage plants with essential nutrients.
How much sunlight does my bottle cabbage garden need?
Cabbage plants need at least 6 hours of direct sunlight per day to thrive. Choose a location for your bottle garden that receives plenty of sunlight. If you live in a hot climate, provide some afternoon shade to prevent the plants from overheating. You can also use grow lights to supplement sunlight if needed.
How often should I water my bottle cabbage garden?
Water your bottle cabbage garden regularly, especially during hot and dry weather. Check the soil moisture by sticking your finger into the soil. If the top inch of soil feels dry, it’s time to water. Water deeply, until water drains out of the drainage holes. Avoid watering the leaves, as this can promote fungal diseases.
How do I protect my bottle cabbage garden from pests?
Cabbage plants are susceptible to various pests, such as cabbage worms, aphids, and slugs. Inspect your plants regularly for signs of infestation. You can handpick pests off the plants or use organic pest control methods, such as insecticidal soap or neem oil. Companion planting with herbs like rosemary or thyme can also help deter pests. Consider using netting to protect your plants from cabbage white butterflies, which lay eggs that hatch into cabbage worms.
Can I grow cabbage in bottles indoors?
Yes, you can grow cabbage in bottles indoors, but you’ll need to provide adequate light and ventilation. Place your bottle garden near a sunny window or use grow lights to provide sufficient light. Ensure good air circulation to prevent fungal diseases. You may also need to hand-pollinate the flowers if you’re growing cabbage for seed production.
How long does it take for cabbage to grow in a bottle garden?
The time it takes for cabbage to grow in a bottle garden depends on the variety of cabbage and the growing conditions. Generally, it takes about 60-90 days from transplanting seedlings to harvest. Check the seed packet or plant label for specific information on the maturity time of your cabbage variety.
Can I reuse the plastic bottles for multiple growing seasons?
Yes, you can reuse the plastic bottles for multiple growing seasons, but it’s essential to clean them thoroughly between uses. Wash the bottles with soap and water to remove any soil or debris. Disinfect the bottles with a diluted bleach solution to kill any pathogens. Rinse the bottles thoroughly before using them again.
What are some variations I can try with this Bottle Cabbage Garden DIY?
There are many ways to customize your bottle cabbage garden. You can create a vertical garden by stacking the bottles on top of each other or hanging them from a wall or fence. You can also paint the bottles with different colors or add decorative labels. Consider growing different varieties of cabbage or other leafy greens in your bottle garden. Experiment with different soil mixes and fertilizers to find what works best for your plants. You can also add a self-watering system to your bottle garden to make watering easier. The possibilities are endless!
Leave a Comment