
Bottle gardening mustard greens: sounds a bit unconventional, right? But trust me, it’s a game-changer for anyone craving fresh, peppery greens without a sprawling garden! I’m so excited to share this incredibly simple and rewarding DIY project with you.
For centuries, humans have cultivated mustard greens, valuing them not only for their distinct flavor but also for their nutritional power. From ancient medicinal practices to culinary traditions across Asia and beyond, these leafy greens have held a special place. But what if I told you that you could bring this rich history and vibrant flavor right into your home, regardless of your space constraints?
That’s where bottle gardening mustard greens comes in! In today’s fast-paced world, access to fresh, healthy produce can be a challenge. Maybe you live in an apartment with limited outdoor space, or perhaps you’re simply looking for a fun and sustainable way to grow your own food. Whatever your reason, this DIY trick is the perfect solution. It’s budget-friendly, eco-conscious (hello, upcycling!), and incredibly easy to set up. Imagine snipping fresh mustard greens right from your windowsill to add a zesty kick to your salads, stir-fries, or sandwiches. I can’t wait to show you how!
Senfgrün im Flaschengarten: Dein DIY-Guide für frisches Grün aus der Flasche
Hey Gartenfreunde! Hast du Lust auf frisches, würziges Senfgrün, aber keinen Platz für ein großes Beet? Kein Problem! Ich zeige dir, wie du ganz einfach Senfgrün in einer Plastikflasche anbauen kannst. Das ist nicht nur platzsparend, sondern auch ein super cooles Upcycling-Projekt. Los geht’s!
Was du brauchst:
* Eine leere Plastikflasche (am besten eine 1,5- oder 2-Liter-Flasche)
* Ein scharfes Messer oder eine Schere
* Erde (am besten Anzuchterde oder Gemüseerde)
* Senfgrünsamen (gibt’s im Gartencenter oder online)
* Wasser
* Optional: Sprühflasche
* Optional: Kleine Steine oder Kies für die Drainage
Schritt-für-Schritt-Anleitung:
1. Flasche vorbereiten: Zuerst musst du die Plastikflasche vorbereiten. Spüle sie gründlich aus, damit keine Rückstände von vorherigen Getränken mehr vorhanden sind.
2. Flasche schneiden: Jetzt kommt der spannende Teil: das Schneiden der Flasche. Es gibt zwei Möglichkeiten, wie du das machen kannst:
* Variante 1: Horizontaler Schnitt: Schneide die Flasche horizontal in zwei Hälften. Die obere Hälfte wird später umgedreht und als Trichter verwendet. Achte darauf, dass der Schnitt sauber ist, damit die beiden Hälften gut ineinander passen.
* Variante 2: Fenster schneiden: Schneide ein großes rechteckiges “Fenster” in die Seite der Flasche. Lass dabei einen Rand von etwa 5-7 cm am Boden und an den Seiten stehen. Diese Variante ist besonders gut, wenn du mehrere Pflanzen nebeneinander anbauen möchtest.
3. Drainage anlegen (optional): Wenn du möchtest, kannst du eine Drainage am Boden der Flasche anlegen. Gib dazu eine Schicht kleine Steine oder Kies auf den Boden. Das verhindert Staunässe und sorgt dafür, dass die Wurzeln nicht faulen.
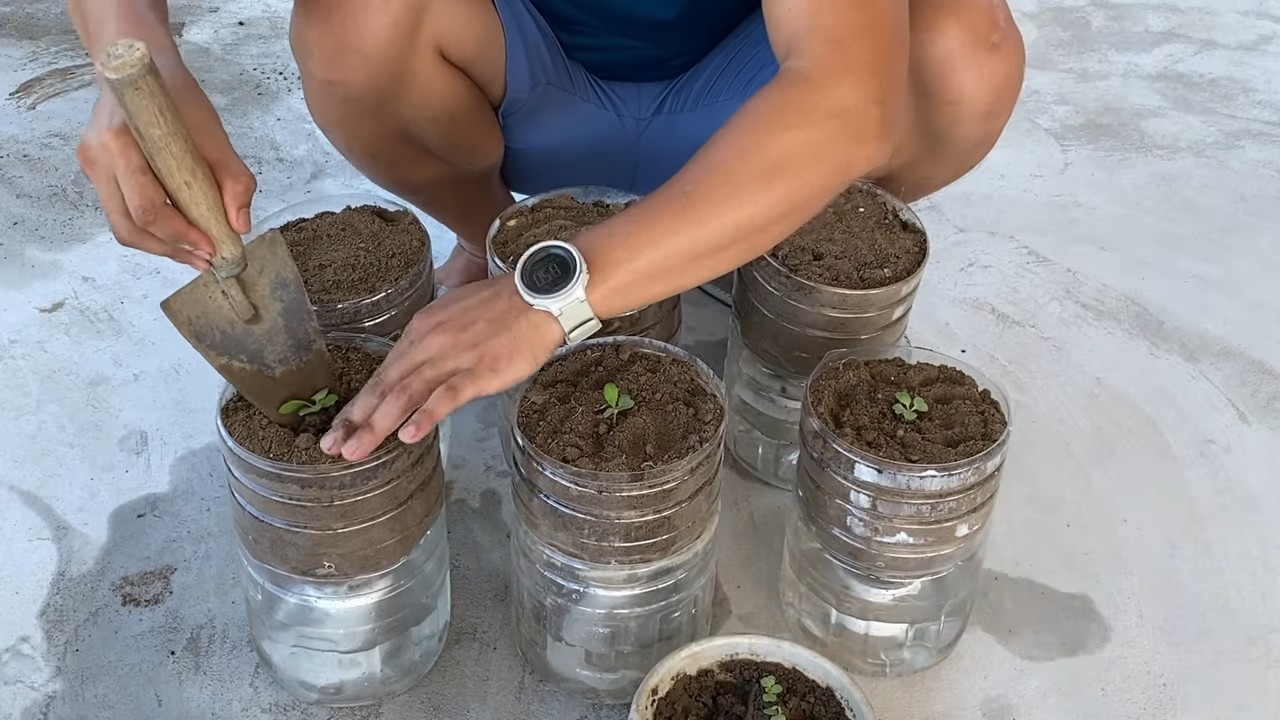
4. Erde einfüllen: Fülle die Flasche mit Erde. Achte darauf, dass die Erde locker und luftig ist. Drücke sie nicht zu fest an, damit die Wurzeln gut wachsen können. Lass etwa 2-3 cm Platz bis zum Rand.
5. Samen aussäen: Verteile die Senfgrünsamen gleichmäßig auf der Erde. Drücke sie leicht an, aber bedecke sie nicht komplett mit Erde. Senfgrün ist ein Lichtkeimer, das heißt, die Samen brauchen Licht zum Keimen.
6. Gießen: Gieße die Erde vorsichtig an. Am besten verwendest du dafür eine Sprühflasche, damit die Samen nicht weggespült werden. Die Erde sollte feucht, aber nicht nass sein.
7. Standort wählen: Stelle die Flasche an einen hellen Ort, aber nicht in die pralle Sonne. Ein Fensterbrett oder ein Balkon mit Halbschatten ist ideal.
8. Feuchtigkeit halten: Halte die Erde feucht, indem du sie regelmäßig gießt. Achte darauf, dass die Erde nicht austrocknet, aber auch nicht zu nass ist.
9. Geduld haben: Senfgrün keimt relativ schnell. Nach wenigen Tagen solltest du die ersten kleinen Pflänzchen sehen.
10. Ernten: Nach etwa 2-3 Wochen kannst du das Senfgrün ernten. Schneide die Blätter einfach mit einer Schere ab. Du kannst die Blätter mehrmals ernten, bevor die Pflanze verblüht.
Pflege-Tipps für dein Senfgrün im Flaschengarten
* Gießen: Wie bereits erwähnt, ist regelmäßiges Gießen wichtig. Überprüfe die Erde täglich und gieße, wenn sie sich trocken anfühlt. Vermeide Staunässe, da dies zu Wurzelfäule führen kann.
* Licht: Senfgrün braucht viel Licht, um gut zu wachsen. Wenn dein Standort nicht hell genug ist, kannst du eine Pflanzenlampe verwenden.
* Düngen (optional): Wenn du möchtest, kannst du dein Senfgrün düngen. Verwende dafür einen organischen Flüssigdünger und halte dich an die Dosierungsanleitung. Düngen ist aber nicht unbedingt notwendig, da Senfgrün relativ anspruchslos ist.
* Belüftung: Sorge für eine gute Belüftung, um Schimmelbildung zu vermeiden. Wenn du die Flasche mit einem “Fenster” geschnitten hast, ist die Belüftung in der Regel ausreichend. Wenn du die Flasche halbiert hast, kannst du die obere Hälfte ab und zu abnehmen, um die Luft zirkulieren zu lassen.
* Schädlinge: Senfgrün ist relativ resistent gegen Schädlinge. Wenn du dennoch Schädlinge entdeckst, kannst du sie mit einem natürlichen Schädlingsbekämpfungsmittel behandeln.
Variationen und Erweiterungen
* Verschiedene Sorten: Es gibt verschiedene Sorten von Senfgrün, die sich in Geschmack und Aussehen unterscheiden. Probiere verschiedene Sorten aus, um deinen Favoriten zu finden.
* Mischkulturen: Du kannst Senfgrün auch mit anderen Kräutern oder Gemüsesorten in der Flasche anbauen. Gute Partner sind zum Beispiel Radieschen, Kresse oder Salat.
* Vertikaler Garten: Wenn du mehrere Flaschen hast, kannst du einen vertikalen Garten anlegen. Befestige die Flaschen einfach an einer Wand oder einem Zaun.
* Upcycling: Verwende verschiedene Arten von Plastikflaschen, um deinen Flaschengarten noch interessanter zu gestalten. Du kannst zum Beispiel auch PET-Flaschen oder Saftflaschen verwenden.
Warum Senfgrün im Flaschengarten eine tolle Idee ist
* Platzsparend: Der Flaschengarten ist ideal für kleine Wohnungen oder Balkone.
* Upcycling: Du kannst leere Plastikflaschen wiederverwenden und so einen Beitrag zum Umweltschutz leisten.
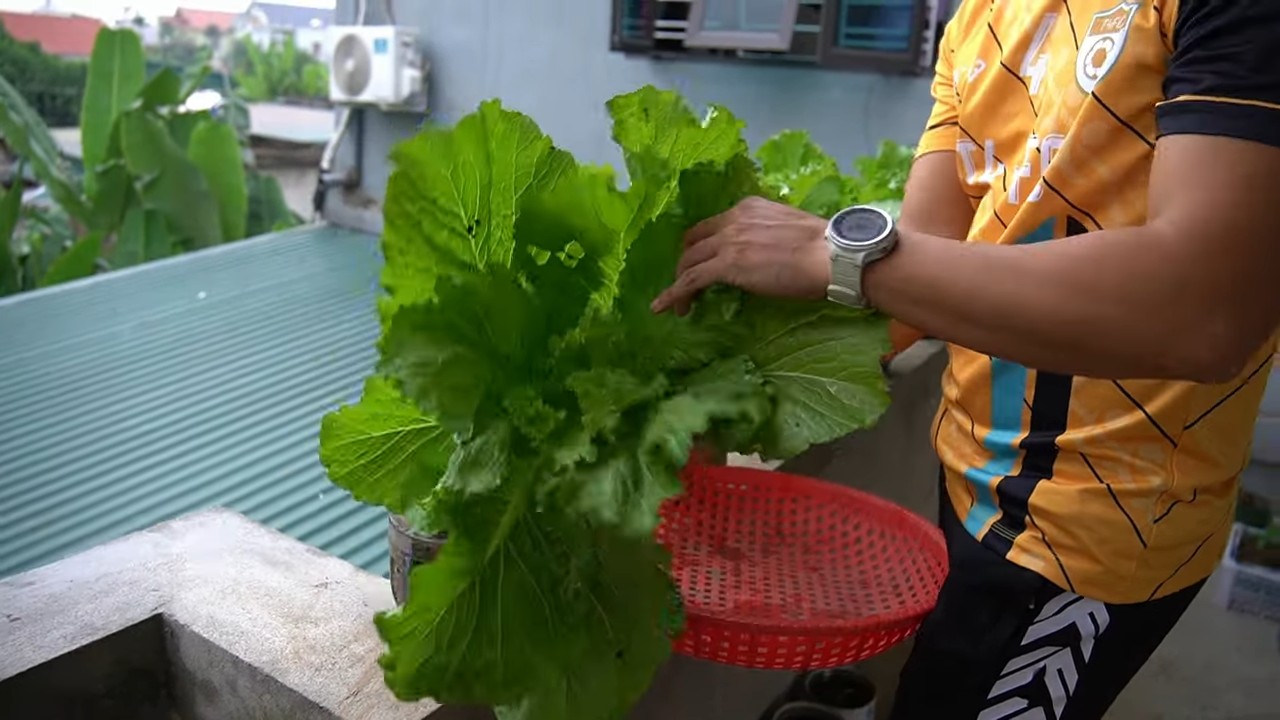
* Frisches Grün: Du hast immer frisches Senfgrün zur Hand, um deine Gerichte zu verfeinern.
* Einfach: Der Anbau von Senfgrün im Flaschengarten ist kinderleicht und auch für Anfänger geeignet.
* Dekorativ: Der Flaschengarten ist ein echter Hingucker und verschönert jeden Raum.
Senfgrün in der Küche
Senfgrün ist nicht nur lecker, sondern auch sehr gesund. Es ist reich an Vitaminen, Mineralstoffen und Antioxidantien. Du kannst Senfgrün roh in Salaten, Smoothies oder als Garnitur verwenden. Es schmeckt auch gut in Suppen, Eintöpfen oder als Beilage zu Fleisch oder Fisch. Der würzige, leicht scharfe Geschmack macht Senfgrün zu einer vielseitigen Zutat in der Küche.
Ich hoffe, diese Anleitung hat dir gefallen und du hast jetzt Lust bekommen, dein eigenes Senfgrün im Flaschengarten anzubauen. Es ist wirklich ein tolles Projekt, das Spaß macht und dir frisches Grün auf den Tisch bringt. Viel Erfolg!
Conclusion
So, there you have it! Transforming ordinary plastic bottles into thriving miniature gardens for mustard greens is not just a fun project; it’s a sustainable, space-saving, and incredibly rewarding way to enjoy fresh, peppery greens right at your fingertips. We’ve walked you through the simple steps, highlighting the ease and accessibility of this DIY trick. But why is this a must-try?
Firstly, it’s about reclaiming and repurposing. In a world grappling with plastic waste, finding creative ways to reuse these materials is crucial. Bottle gardening mustard greens offers a tangible solution, turning potential landfill fodder into a source of nourishment. You’re not just growing food; you’re contributing to a more eco-conscious lifestyle.
Secondly, it’s about accessibility. Whether you live in a sprawling suburban home or a compact city apartment, space is often a constraint. Bottle gardening eliminates this barrier, allowing you to cultivate a vibrant garden even in the smallest of spaces. A sunny windowsill, a balcony railing, or even a well-lit indoor area can become your personal mustard green haven.
Thirdly, it’s about the sheer joy of watching something grow. There’s an undeniable satisfaction in nurturing a seed and witnessing its transformation into a leafy green. This process is not only therapeutic but also educational, especially for children, teaching them about the life cycle of plants and the importance of sustainable food practices.
But the beauty of this DIY project lies in its adaptability. Feel free to experiment with different bottle sizes and shapes. Larger bottles can accommodate more plants, while smaller bottles can be grouped together to create a visually appealing display. Consider painting the bottles to add a splash of color or labeling them for easy identification.
For variations, you can explore different growing mediums. While we recommended a standard potting mix, you could also try using coco coir or a blend of compost and perlite. Each medium offers unique benefits in terms of water retention and nutrient content.
Another exciting variation is to explore different varieties of mustard greens. From the mild and tender Mizuna to the spicy and robust Red Giant, there’s a mustard green variety to suit every palate. Experiment with different types to discover your personal favorite.
Don’t be afraid to get creative with your watering techniques. While hand-watering is perfectly effective, you could also explore self-watering systems using wicks or reservoirs. This is particularly useful if you’re prone to forgetting to water your plants.
Ultimately, bottle gardening mustard greens is more than just a gardening project; it’s an invitation to connect with nature, embrace sustainability, and enjoy the simple pleasures of growing your own food. We wholeheartedly encourage you to give this DIY trick a try. We are confident that you will find it to be a rewarding and enriching experience.
Once you’ve embarked on your bottle gardening journey, we’d love to hear about your experiences. Share your photos, tips, and challenges with us. Let’s create a community of bottle gardeners, sharing our knowledge and inspiring others to embrace this sustainable and rewarding practice. So, grab those bottles, gather your seeds, and get ready to grow your own delicious mustard greens!
Frequently Asked Questions (FAQ)
What kind of bottles are best for bottle gardening mustard greens?
The best bottles for bottle gardening mustard greens are clear plastic bottles, such as those used for water, soda, or juice. The clarity allows sunlight to reach the plants, which is essential for photosynthesis. Avoid using bottles that have contained harmful chemicals or pesticides, as these could contaminate your plants. Thoroughly wash and rinse the bottles before using them. The size of the bottle will determine how many plants you can grow in each container. Smaller bottles are great for individual plants, while larger bottles can accommodate several.
How often should I water my bottle garden?
The frequency of watering depends on several factors, including the size of the bottle, the type of growing medium, the temperature, and the humidity. Generally, you should water your bottle garden when the top inch of soil feels dry to the touch. Avoid overwatering, as this can lead to root rot. Ensure that the bottle has adequate drainage to prevent water from accumulating at the bottom. During hot and dry weather, you may need to water more frequently. Conversely, during cooler and more humid weather, you may need to water less often. A good rule of thumb is to check the soil moisture daily and water as needed.
What kind of soil should I use for bottle gardening mustard greens?
A well-draining potting mix is ideal for bottle gardening mustard greens. Avoid using garden soil, as it can be too heavy and compact, hindering root growth. A good potting mix will provide adequate drainage and aeration, allowing the roots to breathe. You can also amend the potting mix with compost or other organic matter to improve its nutrient content. Alternatively, you can use a soilless growing medium, such as coco coir or perlite. These mediums are lightweight and provide excellent drainage. Experiment with different growing mediums to find what works best for you.
How much sunlight do mustard greens need in a bottle garden?
Mustard greens thrive in full sun, which means they need at least six hours of direct sunlight per day. If you’re growing your bottle garden indoors, place it near a sunny window or use grow lights to supplement the natural light. Insufficient sunlight can lead to leggy growth and reduced yields. Rotate the bottles regularly to ensure that all sides of the plants receive adequate sunlight. If you notice that the leaves are pale or yellowing, it could be a sign that they’re not getting enough light.
How do I harvest mustard greens from a bottle garden?
You can start harvesting mustard greens from your bottle garden when the leaves are about 4-6 inches long. Simply snip off the outer leaves with scissors, leaving the inner leaves to continue growing. This cut-and-come-again harvesting method allows you to enjoy a continuous supply of fresh greens. Avoid harvesting more than one-third of the plant at a time, as this can stress the plant and reduce its yield. Harvest in the morning, when the leaves are at their freshest.
Are there any pests or diseases that commonly affect bottle-grown mustard greens?
While bottle gardening can help reduce the risk of pests and diseases, mustard greens can still be susceptible to certain problems. Common pests include aphids, flea beetles, and cabbage worms. You can control these pests by handpicking them off the plants or using insecticidal soap or neem oil. Diseases such as downy mildew and white rust can also affect mustard greens. To prevent these diseases, ensure good air circulation and avoid overwatering. If you notice any signs of pests or diseases, take action promptly to prevent them from spreading.
Can I grow other vegetables in bottles besides mustard greens?
Absolutely! Bottle gardening is a versatile technique that can be used to grow a wide variety of vegetables, herbs, and flowers. Some other vegetables that thrive in bottle gardens include lettuce, spinach, kale, radishes, and herbs like basil, mint, and parsley. The key is to choose plants that are well-suited to the size of the bottle and the growing conditions. Smaller plants with shallow root systems are generally the best choice. Experiment with different plants to discover what grows best in your bottle garden.
How do I fertilize my bottle-grown mustard greens?
Mustard greens benefit from regular fertilization, especially when grown in containers. You can use a liquid fertilizer diluted to half strength or a slow-release granular fertilizer. Apply the fertilizer according to the package instructions. Avoid over-fertilizing, as this can burn the roots and damage the plants. Organic fertilizers, such as compost tea or fish emulsion, are also excellent choices. Fertilize every 2-3 weeks, or as needed, to keep your mustard greens healthy and productive.
How long will my bottle garden last?
The lifespan of your bottle garden depends on several factors, including the type of plants you’re growing, the growing conditions, and how well you care for the plants. Mustard greens are relatively fast-growing and can be harvested for several weeks. Eventually, the plants will bolt (go to seed), which will reduce their flavor and productivity. At this point, you can either let the plants go to seed and collect the seeds for future planting or start a new batch of plants. With proper care, your bottle garden can provide you with a continuous supply of fresh greens for several months.

Leave a Comment